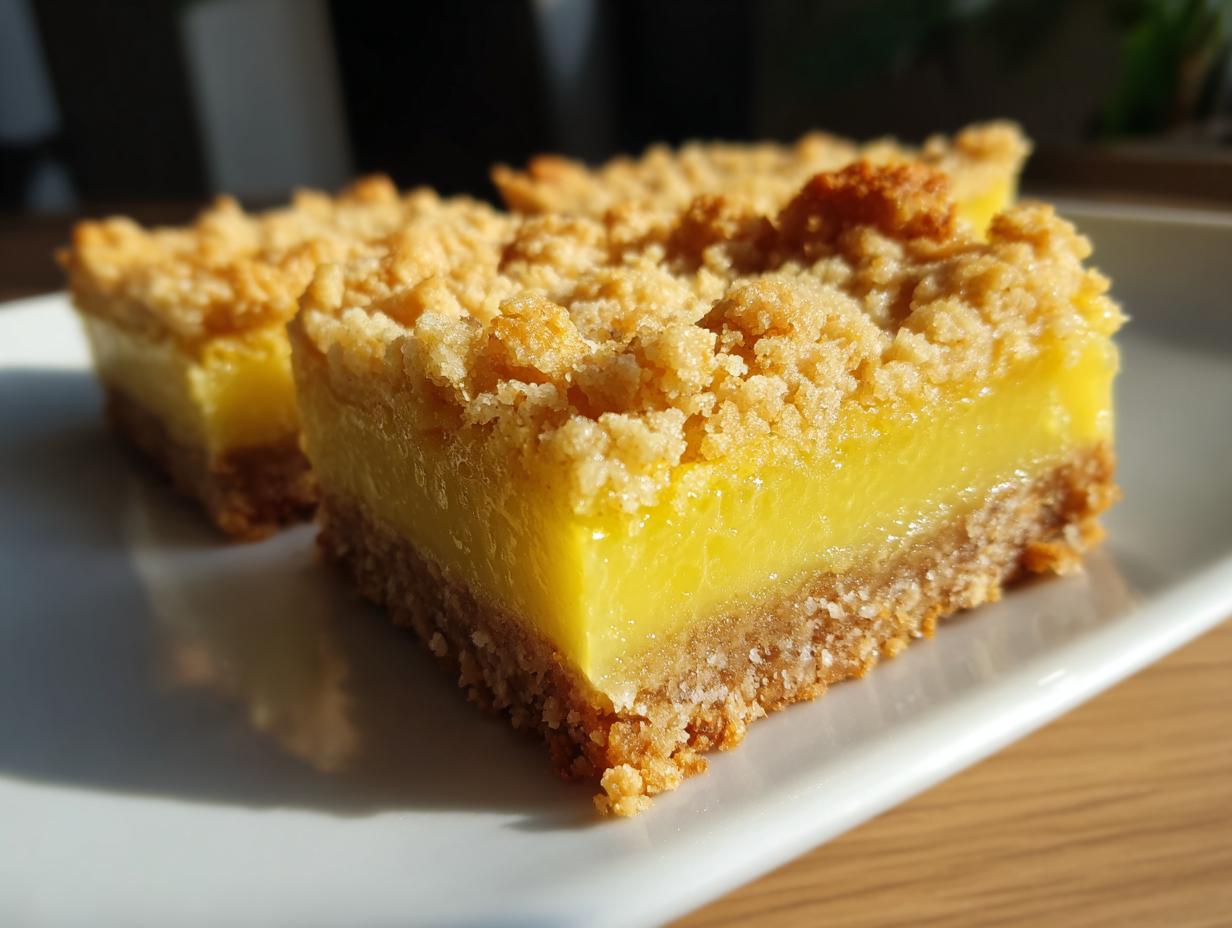
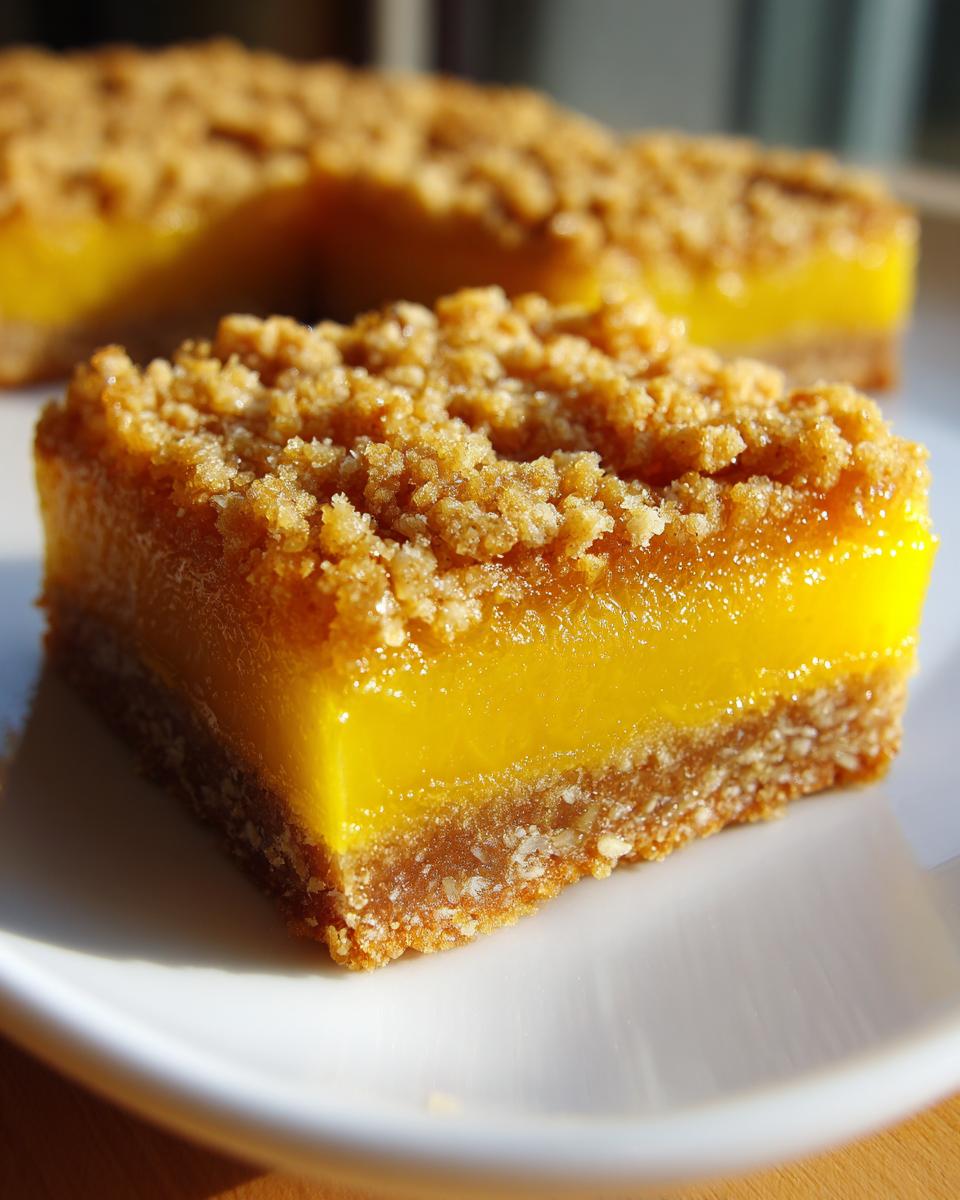
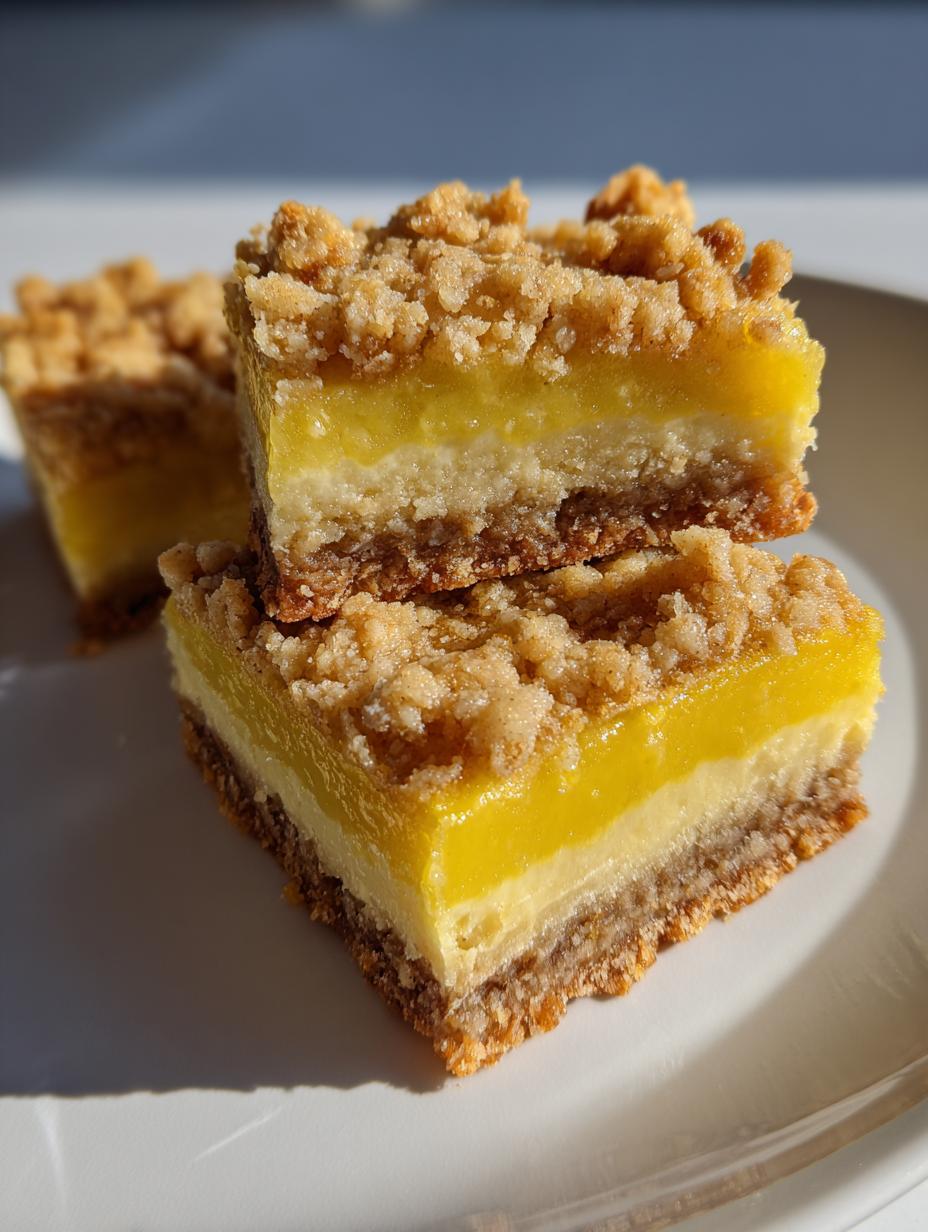
Forget those fussy, delicate lemon squares you see everywhere! If you’ve ever been scared off by temperamental fillings or crusts that crumble into dust, then I have found our new favorite obsession: these bright, buttery Lemon Crumb Bars. Seriously, these are a total game-changer. They combine the zesty punch of fresh lemon with the most satisfying, chewy oat crumble you can imagine.
The best part? They are ridiculously easy. If you can mix a handful of ingredients in a bowl, you can nail these bars on your very first try. They bake up golden, smell like sunshine, and are perfect for sharing—if you can manage not to eat all sixteen bars yourself!
My Journey Toward Perfect Lemon Crumb Bars
I used to avoid making traditional lemon bars like the plague. Every time I tried, the filling would either weep or the shortbread base would refuse to cooperate. I’d end up with a beautiful mess, but definitely not something I’d serve to company. I almost gave up on citrus desserts entirely!
Then, a friend shared this recipe that ditches the fussy shortbread for a hearty oat crust that doubles as the topping. It was pure genius! The oats absorb just enough of that tangy filling but stay wonderfully chewy. Trust me, these Lemon Crumb Bars are so forgiving. I made a batch last week while half-distracted watching a terrible daytime TV show, and they came out flawlessly. This recipe is the one that finally made me a lemon bar convert! You can see more of my baking adventures over on Facebook.
Gathering What You Need for Your Lemon Crumb Bars
Getting ready to bake these is half the fun, and honestly, it’s so fast! You don’t need any fancy mixers or specialized tools for these amazing Lemon Crumb Bars. Just a couple of bowls and your favorite cutting implement. We’re keeping this simple so you can get that buttery, zesty flavor into the oven faster!
Ingredients for the Crust and Crumble
For the base and the topping, you need to make sure you use old-fashioned rolled oats—the quick-cooking ones get too mushy. Make sure your light brown sugar is packed firmly into the measuring cup, and the butter? It absolutely must be melted and cooled just slightly before you mix it in. We need that mixture to be crumbly, not oily!
Ingredients for the Zesty Lemon Filling
The filling is where the magic happens, and freshness matters here! You’ll need two tablespoons of lemon zest, which means really getting into that bright yellow skin, and a half-cup of fresh lemon juice. If you absolutely have to use bottled juice, try to sneak in a little extra zest to keep that bright punch we’re looking for. If you are looking for other bright desserts, check out my recipe for easy white chocolate strawberries.
Essential Equipment for Making Lemon Crumb Bars
You’ll want an 8×8-inch baking pan. Line it with parchment paper that hangs over the sides—this is your handle for lifting the finished bars out later, trust me! Beyond that, you just need a couple of standard mixing bowls, a whisk for the filling, and a sturdy spatula for pressing that crust down. That’s it! You are ready to make incredible Lemon Crumb Bars.
Step-by-Step Instructions to Bake Lemon Crumb Bars
Okay, let’s get these amazing Lemon Crumb Bars into the oven! Preheat your oven right away to 350\u00b0F. I always grease my 8×8 pan first, and then I line it with parchment paper, letting the edges stick up over the sides. That parchment is your best friend when it comes time to lift these beauties out later—don’t skip that step!
First, we mix up all the dry stuff—flour, oats, sugars, salt, and baking soda. Then, pour in that melted butter and the vanilla. Stir it all together until it looks like wet sand. It should be crumbly, but if you squeeze a bit in your hand, it holds together, you know?
Preparing the Base and First Bake
Take about half of that crumb mixture and press it firmly into the bottom of your prepared pan. I use the bottom of a measuring cup to really pack it down tight; having a solid crust makes all the difference. Pop that base into the oven for exactly 15 minutes. You’re looking for it to be just lightly golden around the edges when you pull it out. Don’t let it brown too much!
Creating the Smooth Lemon Filling
While that crust is baking, get your filling going in a separate bowl. This is crucial: grab your whisk and combine the sweetened condensed milk, the lemon zest, the fresh lemon juice, and those two egg yolks. Whisk it like you mean it until it is completely smooth and uniform. If you see streaks of egg or unincorporated zest, keep going! A smooth filling means a creamy center for our bars. For more dessert inspiration, feel free to check out my Pinterest page.
Assembling and Baking the Lemon Crumb Bars
When the base comes out golden, pour that bright yellow filling right over the hot crust. Try to spread it evenly with a spatula. Next, take the remaining oat crumble mixture and sprinkle it over the top. Don’t press this top layer down; you want that lovely, rustic, uneven crumble texture. Back into the oven it goes for about 20 to 22 minutes. You know it’s done when the edges look golden brown and the center filling is just set—it might wiggle just a tiny bit in the very middle, but it shouldn’t look liquidy.
Cooling and Setting for Perfect Slices
This is the hardest part, I know! You have to let these bars cool down completely before you even think about slicing them. If you cut them warm, the filling will spill out everywhere, and you’ll end up with a puddle of deliciousness instead of neat squares. Seriously, slide them into the refrigerator for at least one full hour. Chilling them is what sets that creamy center perfectly so you get those clean, beautiful slices you see in pictures! If you are interested in other easy baked goods, take a look at my chocolate sea salt nut bars.
Tips for Success with Your Lemon Crumb Bars
Even though these are easy, a few little tricks will elevate your Lemon Crumb Bars from great to absolutely unforgettable. I’ve learned these little secrets over the years of testing, and they really make the difference between a good bar and the best bar on the block!
Flavor Adjustments and Brightness Tips
If you can’t get your hands on fresh lemons, don’t panic! Bottled lemon juice will work in a pinch for the liquid, but you absolutely must compensate for the lack of fresh oils. My rule is: if you use bottled juice, add an extra teaspoon of lemon zest. That zest is pure sunshine, and it’s what gives these bars their signature brightness. Don’t skip it, or your bars will taste a little flat! You can read more about my recipe secrets on Medium.
Achieving the Ideal Crumb Texture
When you are mixing the dry ingredients with the melted butter for the crust and topping, stop mixing the second it looks combined. I mean it! If you overmix the oats and flour, you develop too much gluten, and instead of getting that wonderful, tender crumble, you end up with a hard, dense layer. You want it to look shaggy and slightly uneven. That’s what creates those lovely pockets of creamy filling when you bite into the finished bar.
Storage and Enjoying Your Lemon Crumb Bars
Now that you’ve baked these perfect Lemon Crumb Bars, we need to talk about keeping them fresh! Since they have that creamy, citrusy center, they really are best enjoyed cool. Don’t leave them sitting out on the counter for days, or they might get a little gooey.
Storing Leftovers Safely
The best place for these is definitely the fridge. Keep them in an airtight container, and they will stay wonderfully fresh for up to five days. I’ve even tested freezing them! Wrap individual bars tightly in plastic wrap, then put them in a freezer-safe bag. They freeze beautifully for up to three months. Thaw them in the fridge before you plan to eat them.
Serving Suggestions for Lemon Crumb Bars
Honestly, these bars are fantastic plain, right out of the fridge. But if you want to dress them up just a little, try a tiny dusting of powdered sugar right before serving—it looks so pretty against the golden crumble. They also pair perfectly with a few fresh raspberries or a dollop of unsweetened whipped cream on the side. Enjoy every bite of your incredible Lemon Crumb Bars!
Frequently Asked Questions About These Lemon Crumb Bars
I always get questions after people try these for the first time, and that’s great! It just means everyone wants their Lemon Crumb Bars to turn out absolutely perfect. Here are a few things I hear most often when folks are baking along.
Can I make this recipe gluten-free?
Yes, you totally can adapt this! For the flour, you should substitute a good quality 1-to-1 gluten-free baking blend that already contains xanthan gum. For the oats, make sure you buy certified gluten-free rolled oats, since regular oats often get cross-contaminated. The texture might be slightly less chewy, but the flavor will still be fantastic!
What causes the center of my bars to be runny?
This usually comes down to one of two things, and it’s almost always impatience! First, make sure you’re baking long enough—the center should look just set, not liquid. More importantly, you must let them cool completely before slicing. If you cut them while they are still warm, the filling hasn’t finished setting up, and it will ooze out. Chilling them in the fridge for an hour truly locks everything in place.
Can I use a different size baking pan?
You can, but you’ll need to adjust your baking time! The recipe is perfectly balanced for an 8×8-inch pan. If you use a larger 9×13 pan, the layer of filling and crust will be much thinner, so you’ll need to reduce the baking time by about 5 to 8 minutes. If you use a smaller, deeper pan, you’ll need to add time, maybe 10 to 15 minutes, and check the center carefully before pulling them out.
Estimated Nutritional Information for Lemon Crumb Bars
Now, I’m not a nutritionist, so take this chart with a grain of salt—it’s just an estimate based on the main ingredients we used to make these incredible Lemon Crumb Bars. Since we are using oats and real butter, they are definitely a richer treat!
- Calories: 290 per bar
- Total Fat: 14g
- Carbohydrates: 36g
- Protein: 4g
This information is based on 16 bars being cut from the pan. Always remember that these figures are estimates, especially since we all measure ingredients slightly differently in our own kitchens!
Print
Amazing Lemon Crumb Bars: 16 Easy Bites
- Total Time: 1 hour 50 minutes
- Yield: 16 bars
- Diet: N/A
Description
Bright, buttery lemon crumb bars with a creamy citrus filling and golden oat crumble. They feature a chewy oat crust and a zesty, melt-in-your-mouth lemon center.
Ingredients
- 1 1/4 cups all-purpose flour
- 1 1/4 cups old-fashioned rolled oats
- 1/2 teaspoon salt
- 1/2 teaspoon baking soda
- 1/2 cup granulated sugar
- 1/2 cup packed light brown sugar
- 3/4 cup unsalted butter, melted
- 1 teaspoon vanilla extract
- 1 can (14 ounces) sweetened condensed milk
- 2 tablespoons finely grated lemon zest
- 1/2 cup fresh lemon juice
- 2 large egg yolks
Instructions
- Preheat your oven to 350°F. Grease an 8×8-inch baking pan and line it with parchment paper.
- In a large bowl, combine flour, oats, salt, and baking soda. Stir in granulated and brown sugar until blended.
- Pour melted butter and vanilla into the dry mixture. Stir until fully combined and crumbly.
- Press half the crumb mixture firmly into the bottom of the prepared pan to form the crust. Bake for 15 minutes until lightly golden.
- In a separate bowl, whisk together condensed milk, lemon zest, lemon juice, and egg yolks until smooth.
- Pour the lemon filling evenly over the baked crust.
- Crumble the remaining oat mixture on top, covering most of the surface.
- Bake for 20–22 minutes, or until the top is golden and the filling is just set.
- Allow bars to cool completely. Refrigerate for at least 1 hour before slicing for clean edges.
Notes
- If you use bottled lemon juice, add an extra teaspoon of zest for a brighter flavor.
- Store in an airtight container in the refrigerator for up to 5 days or freeze for up to 3 months.
- For an extra treat, dip the bottoms of chilled bars in melted white chocolate and refrigerate until set.
- Prep Time: 15 minutes
- Cook Time: 35 minutes
- Category: Dessert
- Method: Baking
- Cuisine: American