Blackberry Velvet Gothic Cake always looks like something that took a pastry chef three days to pull off, right? When I first started NoobRecipes, I thought anything that dramatic was completely off-limits for new bakers. I remember trying to make a fancy chocolate cake once, and it ended up looking more like a melted tire than a dessert. It was so discouraging!
But this cake changed everything for me. I spent months tweaking the cocoa and the buttermilk ratios until I figured out how to get that deep, dark, almost black color—the ‘Gothic’ part—using just standard pantry ingredients. Seriously, I must have baked five test runs just ensuring the layers stayed moist while I perfected the bright, tart blackberry filling.
The best part? The topping is just simple whipped cream, not fussy buttercream. This means you get that stunning, dramatic contrast with almost no stress. If I, Adam, the king of kitchen mishaps, can nail this showstopper, you absolutely can too. It’s proof that amazing results don’t require years of experience.

Essential Ingredients for Your Blackberry Velvet Gothic Cake
Okay, let’s talk about what makes this Blackberry Velvet Gothic Cake look so intense and taste so unbelievably balanced. You don’t need fancy extracts or weird color gels for this one; the drama comes straight from the quality of the cocoa and the brightness of that homemade filling. I’ve broken down the list so you can shop easily.
Remember that note about room temperature ingredients I mentioned earlier? It really helps when dealing with chocolate batters like this one. Having your eggs and buttermilk sitting out for just a bit helps everything emulsify nicely, giving you that smooth batter we talked about.
Dry Components for the Dark Cake Layers
- 2 cups all-purpose flour (240 grams)
- 1 1/2 cups granulated sugar (300 grams)
- 3/4 cup unsweetened cocoa powder (75 grams)
- 1 1/2 teaspoons baking powder
- 1 teaspoon baking soda
- 1/2 teaspoon salt
Wet Elements for Rich Batter Consistency
- 3 large eggs
- 3/4 cup vegetable oil (180 ml)
- 1 cup buttermilk (240 ml)
- 2 teaspoons vanilla extract
- 1/2 cup hot water (120 ml)
Crafting the Bright Blackberry Filling
This is where that beautiful tartness comes in to cut through the rich chocolate. Don’t skip the lemon juice; it really wakes up the fruit!
- 1 1/2 cups fresh or frozen blackberries (225 grams)
- 1/4 cup granulated sugar (50 grams)
- 2 tablespoons cornstarch mixed with 2 tablespoons water (This is your slurry!)
- 1 tablespoon lemon juice
Creating the Light Whipped Cream Topping
We keep this simple so it doesn’t compete with the filling or the cake flavor.
- 1 1/2 cups heavy whipping cream (360 ml)
- 1/4 cup powdered sugar (30 grams)
- 1 teaspoon vanilla extract
Step-by-Step Instructions for the Blackberry Velvet Gothic Cake
Time to bring this dark beauty to life! Making the Blackberry Velvet Gothic Cake is really just three separate, easy tasks that come together at the end. Don’t feel intimidated by the layers; we’re taking this nice and slow, just like I do in my own kitchen.
Preparing and Baking the Chocolate Cake Layers
First things first: get your oven warmed up to 350\u00b0F (175\u00b0C). Prep two 8-inch or 9-inch pans by greasing them well and lining the bottoms. A little trick I learned? If your eggs and buttermilk are at room temperature, your batter will be way smoother. Trust me on that one!
In one big bowl, whisk together all your dry stuff—flour, sugar, cocoa, leaveners, and salt. In a separate bowl, mix up the wet ingredients, skipping the hot water for now. Then, combine those two bowls. Mix just until it comes together; we don’t want to overwork that chocolate!
Finally, stir in that hot water last. Whoa, the batter will look thin, but that’s what makes it so moist! Divide it evenly between your pans and pop them in the oven for about 30 to 35 minutes. They are done when a toothpick comes out clean, or with just a few moist crumbs attached. Let them cool completely on a rack before moving on—patience is key here!
Cooking Down the Homemade Blackberry Filling
While the cakes are cooling, we tackle the filling. Toss your blackberries and sugar into a saucepan over medium heat. Let them bubble away until the berries start looking soft and releasing all their juice. It smells amazing already!
Now, take your cornstarch slurry (that mix of cornstarch and water) and pour it in along with the lemon juice. You must stir constantly here, or you’ll get lumps. Keep stirring until the whole mixture thickens up nicely, almost like a loose jam. Once it’s thick, take it off the heat and let it cool completely. Cold filling on warm cake equals a melted disaster!
Whipping the Sweet Cream Topping Perfectly
This part moves fast, so have everything ready! Put your heavy cream, powdered sugar, and vanilla into a clean, chilled bowl. Start whipping it up. You want to watch it closely. As soon as those peaks start holding their shape when you lift the whisk, STOP. If you keep going, you’ll end up with butter, and we need light, airy frosting for this look.
Assembling and Chilling Your Blackberry Velvet Gothic Cake
Time for the grand reveal! Place one cooled cake layer down. Spread that gorgeous, cooled blackberry filling evenly over the top—don’t go right to the edge, leave a little border. Place the second cake layer on top.
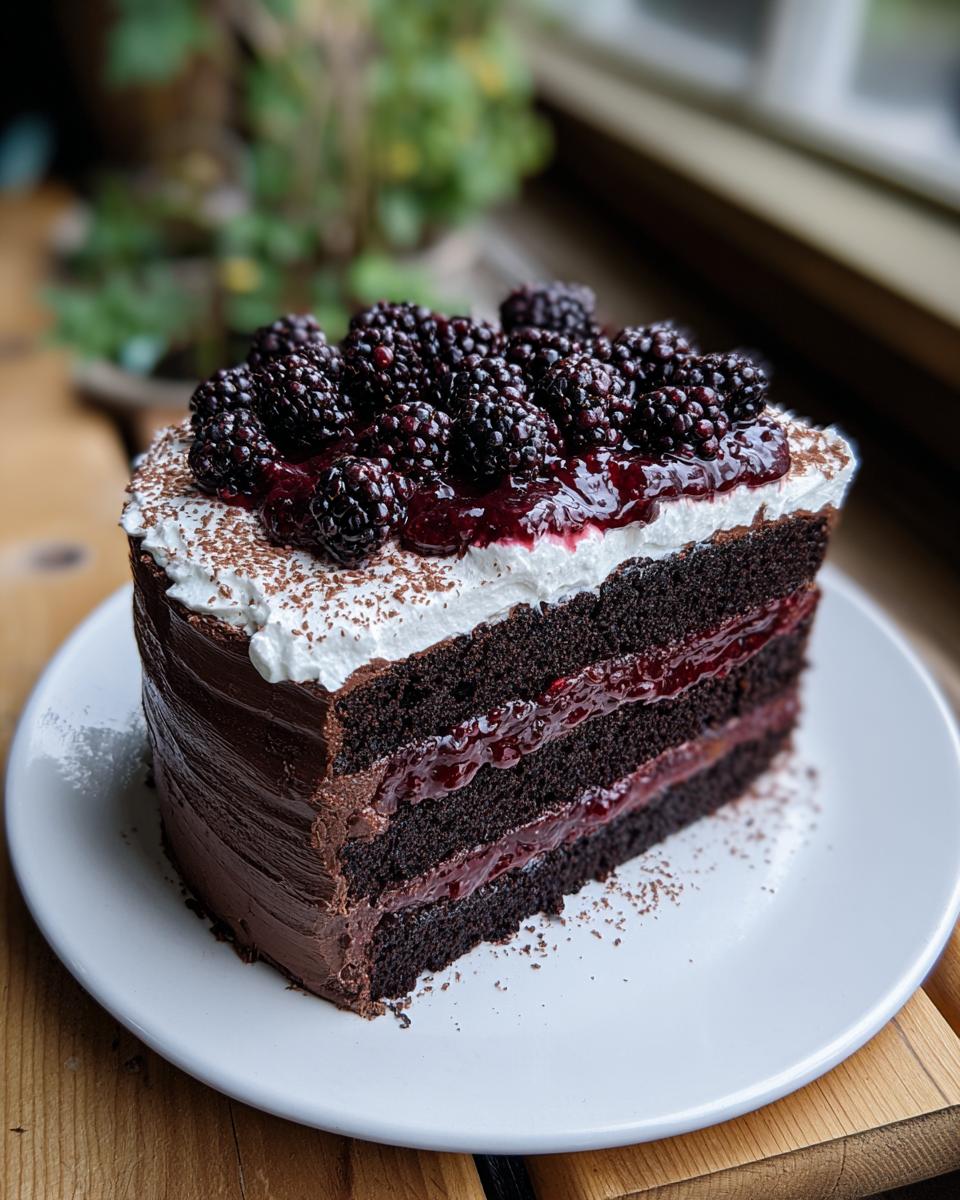
Now, gently cover the top and sides with that fluffy whipped cream. This is where the ‘Gothic’ look comes in—a slightly rustic, cloud-like topping against the dark cake peeking through. For the structure to set perfectly, you absolutely must chill the assembled Blackberry Velvet Gothic Cake in the fridge for at least one hour before you slice into it. Don’t skip the chill time!
Tips for Success with Your Blackberry Velvet Gothic Cake
Even with simple recipes, little things can trip up a new baker, so here are my must-know secrets for nailing this Blackberry Velvet Gothic Cake every single time. These aren’t complicated; they just save you from potential heartache!
First, let’s talk temperature again. I cannot stress enough how much easier it is to mix if your eggs and buttermilk are at room temperature. They blend into the oil and sugar so much better, resulting in a smooth, uniform batter.
Second, when you whip that cream topping, watch it like a hawk! It goes from perfect stiff peaks to grainy over-whipped cream in about three seconds flat. Stop the moment those peaks stand up straight.
Third, the cooling time for the cake layers and the filling is non-negotiable. If you try to assemble this while anything is even slightly warm, the whipped cream will slide right off, and you’ll have a sloppy mess instead of a gothic masterpiece.
Finally, for that clean slice, make sure you give the finished cake that full hour chill time in the fridge. It firms up the cream and sets the filling, making cutting much cleaner.
Serving Suggestions for This Rich Dessert
Since this cake is already so rich with dark chocolate and bright berries, you don’t need much fuss on the side. I usually keep things simple so the cake remains the star of the show. A light accompaniment is perfect.
My favorite pairing is a small scoop of good quality vanilla bean ice cream. The melting creaminess just melts perfectly against the chilled slice. If you want something a bit lighter, try serving it with a fresh mint sprig on the side for garnish and a little aromatic lift.
For an evening treat, a small glass of chilled, slightly sweet dessert wine works wonderfully to balance out the deep cocoa notes.
Storage and Reheating Instructions for Blackberry Velvet Gothic Cake
We want your gorgeous Blackberry Velvet Gothic Cake to stay perfect for as long as possible, but because we used light whipped cream—not heavy, shelf-stable frosting—we need to be smart about storage. You can’t really reheat this cake since the topping is dairy-based, so we focus on keeping it fresh in the cold!
If you have leftovers, cover the plate loosely with plastic wrap or use a cake dome, making sure the wrap doesn’t touch the whipped cream topping, or it will stick and tear off when you uncover it later. The moisture from the fridge can sometimes affect the whipped cream texture slightly over several days, but it should stay delicious for a good while.
For the absolute best texture, I always recommend eating this cake within two days. If you need to store it longer, the freezer is your friend, but you need to prep it first! Always make sure the cake is completely chilled before wrapping it tightly for freezing.
Storage Guidelines Table
| Storage Location | Timeframe | Method |
|---|---|---|
| Refrigerator | Up to 3 Days | Cover loosely to prevent drying out; keep chilled. |
| Freezer | Up to 1 Month | Wrap tightly in plastic wrap, then foil. Thaw in the fridge overnight. |
Frequently Asked Questions About Your Blackberry Velvet Gothic Cake
I get so many great questions about this recipe because it looks advanced but is secretly super simple. Here are the top things people ask me when they are getting ready to bake their first Blackberry Velvet Gothic Cake!
Can I use fresh blackberries instead of frozen for the filling?
Absolutely, yes! Fresh berries are wonderful if they are in season. The only thing you might need to watch out for is that fresh berries sometimes release a little less liquid than frozen ones. If your filling seems too thick after cooking, just add a tiny splash more lemon juice or water until it coats the back of a spoon nicely.
How do I achieve the deep ‘Gothic’ color without artificial dyes?
This is my favorite trick! You don’t need any food coloring here. The deep, dark look comes entirely from using a high-quality, unsweetened cocoa powder. I always recommend using Dutch-processed cocoa if you can find it. It has a lower acidity, which results in a much darker, almost black color when baked with baking soda and buttermilk. It’s all about the cocoa quality!
What if I do not have buttermilk available for the Blackberry Velvet Gothic Cake?
No buttermilk? Don’t panic! This is a classic beginner substitution that works perfectly every time. Just take your regular milk—whole milk is best—and measure out one cup. Then, stir in one tablespoon of white vinegar or lemon juice. Let it sit on the counter for about five to ten minutes until it looks slightly curdled. That’s your homemade buttermilk, ready for the batter!
Share Your Masterpiece!
I truly hope you loved baking this as much as I love sharing it with you. Once you’ve cooled and decorated your cake, please snap a photo and tag me on social media! I want to see your beautiful dark layers and creamy toppings. Don’t forget to leave a star rating below so other new bakers know this recipe is a winner!
You can also find more inspiration and share your creations with our community on Facebook or save this recipe on Pinterest!
Print
Blackberry Velvet Gothic Cake: 5 Amazing Steps
- Total Time: 4 hours 5 minutes (includes cooling and chilling)
- Yield: 10 servings
- Diet: N/A
Description
This Blackberry Velvet Gothic Cake features dark, rich chocolate layers filled with a bright, homemade blackberry preserve and topped with light, sweet whipped cream. It delivers a dramatic look with simple baking steps suitable for beginners.
Ingredients
- For the Cake:
- 2 cups all-purpose flour (240 grams)
- 1 1/2 cups granulated sugar (300 grams)
- 3/4 cup unsweetened cocoa powder (75 grams)
- 1 1/2 teaspoons baking powder
- 1 teaspoon baking soda
- 1/2 teaspoon salt
- 3 large eggs
- 3/4 cup vegetable oil (180 ml)
- 1 cup buttermilk (240 ml)
- 2 teaspoons vanilla extract
- 1/2 cup hot water (120 ml)
- For the Blackberry Filling:
- 1 1/2 cups fresh or frozen blackberries (225 grams)
- 1/4 cup granulated sugar (50 grams)
- 2 tablespoons cornstarch mixed with 2 tablespoons water
- 1 tablespoon lemon juice
- For the Cream Topping:
- 1 1/2 cups heavy whipping cream (360 ml)
- 1/4 cup powdered sugar (30 grams)
- 1 teaspoon vanilla extract
- Optional Garnishes:
- Fresh blackberries
- Edible flowers
- Dark chocolate shavings
- Cocoa powder dusting
Instructions
- Preheat your oven to 350°F (175°C). Grease and line two 8-inch or 9-inch cake pans.
- Mix the dry cake ingredients (flour, sugar, cocoa powder, baking powder, baking soda, salt) in one bowl. Mix the wet cake ingredients (eggs, oil, buttermilk, vanilla) in a separate bowl.
- Combine the wet and dry mixtures. Stir in the hot water until the batter is smooth.
- Divide the batter evenly between the prepared pans. Bake for 30–35 minutes. Cool the cakes completely on a rack.
- Make the filling: Combine blackberries and sugar in a saucepan. Cook until the berries release juice.
- Add the cornstarch and water mixture and the lemon juice to the saucepan. Stir constantly until the filling thickens. Cool the filling fully.
- Whip the heavy cream, powdered sugar, and vanilla extract until stiff peaks form.
- Assemble the cake: Place one cake layer on a serving plate. Spread the cooled blackberry filling evenly over the first layer. Top with the second cake layer.
- Frost the top and sides of the cake with the whipped cream.
- Decorate with fresh blackberries, chocolate shavings, or edible flowers, if desired. Dust lightly with cocoa powder.
- Chill the assembled cake for a minimum of 1 hour before slicing and serving.
Notes
- Use room temperature ingredients for a smoother cake batter.
- Allow cakes to cool completely before applying the cream topping to avoid melting.
- Whip the cream only until stiff peaks form; stop mixing immediately when peaks hold their shape.
- Prep Time: 30 minutes
- Cook Time: 35 minutes
- Category: Dessert
- Method: Baking and Whipping
- Cuisine: American