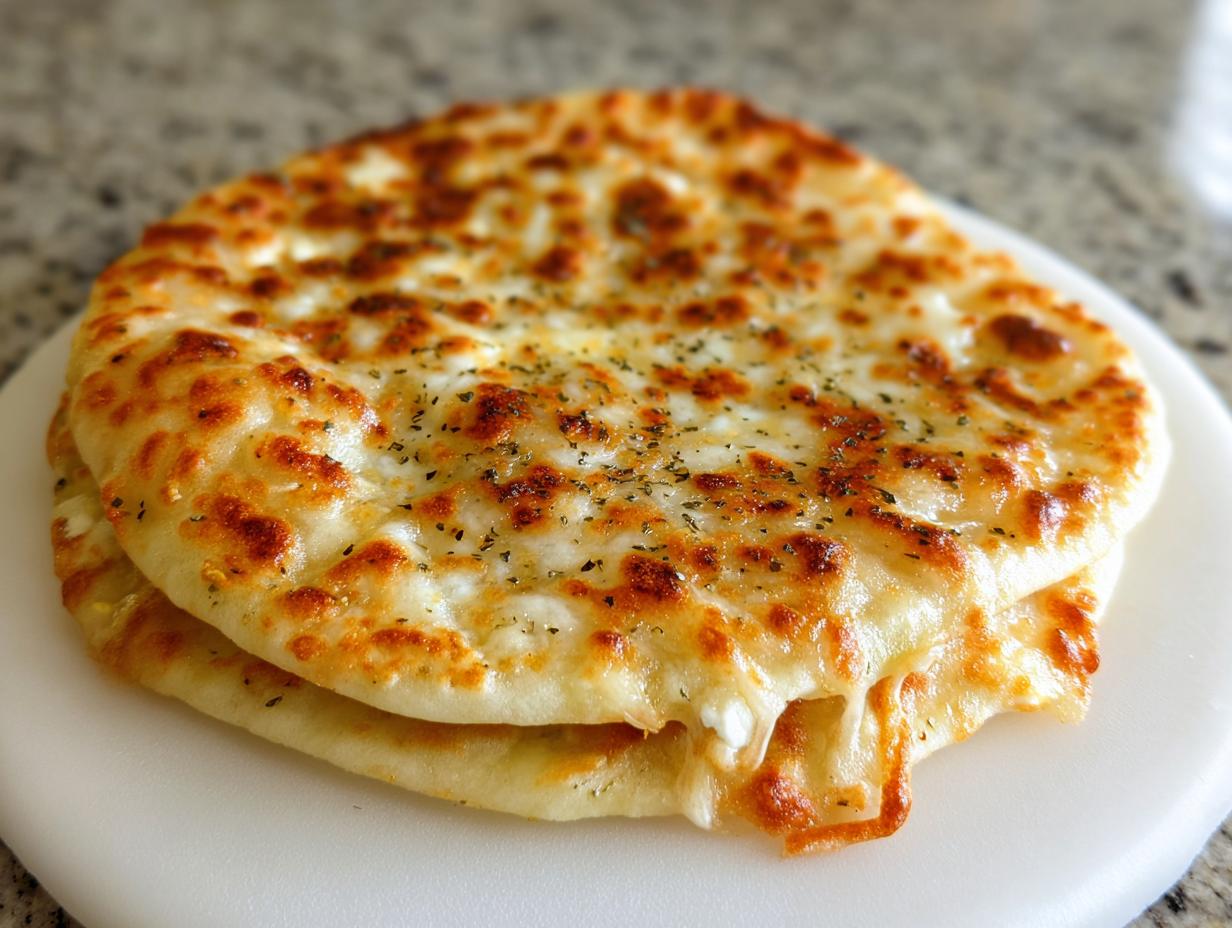
When I first started cooking for myself, I needed recipes that were fast, didn’t require a million pots, and actually kept me full. Seriously, I was tired of snacking on chips that left me hungry ten minutes later! That’s why this High Protein Air Fryer Tortilla Garlic Bread became my absolute savior. It hits every single mark: it’s crispy, it’s cheesy, it’s packed with protein, and it’s done before my coffee even cools down.
You don’t need to be a gourmet chef to nail this, trust me. I made this recipe the first time while juggling a textbook and trying to watch a lecture—it’s that straightforward! It’s the ultimate hack for when you want that warm, savory, garlicky bread feeling without the guilt or the wait time associated with actual bread dough.
The air fryer does all the heavy lifting, giving you that perfect crunch every time. Seriously, forget waiting for the oven to preheat. This little creation is proof that healthy, satisfying food can be ready in under fifteen minutes total. It’s my secret weapon for late-night study sessions or when I need a quick, protein-loaded side dish. You’re going to love how easy it is!

Gather What You Need for High Protein Air Fryer Tortilla Garlic Bread
Okay, now that you’re excited about how fast this is, let’s get organized. The beauty of this High Protein Air Fryer Tortilla Garlic Bread is that it uses things you probably already have in your fridge or pantry. We aren’t making a complicated sauce here; we’re just mixing a few things and layering them up. Having everything measured out beforehand is my number one tip for keeping things speedy.
Don’t panic if you don’t have exact measurements for everything—we can adjust later! But for the first time, stick close to the list so you can see how this amazing texture comes together. Grab your ingredients, and let’s move on to the specifics of what you need to make this cheesy masterpiece.
Essential Ingredients for High Protein Air Fryer Tortilla Garlic Bread
The secret sauce to making this a true High Protein Air Fryer Tortilla Garlic Bread isn’t just the mozzarella; it’s that secret weapon, the cottage cheese! Don’t skip it, because it blends down into the creamiest base imaginable. When you measure things out, try to be precise with the cheeses, as that’s where the protein punch comes from.
You need two high-protein flour tortillas—the regular ones just won’t give you the same boost, so check the label! For the cheese blend, make sure you have about half a cup of mozzarella, which should be part-skim. Then, get that low-fat cottage cheese ready. The olive oil is just a little bit to help the seasonings stick and get those edges golden brown.
Lastly, it’s all about the flavor: garlic powder and Italian seasoning. We don’t need fresh garlic here because it tends to burn too fast in the air fryer, and we want that lovely toasted flavor, not bitter char. Measure those spices out; they are small but mighty!
Equipment Needed for Preparation
You won’t need much for this speedy snack! First, you absolutely need your air fryer; that’s where the magic happens. A small mixing bowl and a little whisk or fork are necessary for blending the cheese spread. You’ll also need a butter knife or offset spatula for spreading the mixture evenly. That’s it—minimal cleanup, maximum flavor!
Step-by-Step Guide to Making High Protein Air Fryer Tortilla Garlic Bread
Now for the fun part! We are going from raw ingredients to crispy, cheesy perfection in about ten minutes flat. Seriously, you can make this High Protein Air Fryer Tortilla Garlic Bread while you’re waiting for a pot of water to boil for pasta or while the kids are finishing their homework. The key here is moving quickly once you start mixing, especially since we want that cheese warm and ready to melt!
Remember, preheating is crucial in the air fryer world. It helps everything crisp up evenly right from the start. While you are mixing your spread, go ahead and set your air fryer to 375°F. If you wait until the bread is assembled, you might rush the preheating, and we want that perfect environment ready for our little cheesy sandwich!
Creating the High-Protein Cheese Spread
This is where we build the flavor foundation. Grab that small bowl. You’re going to combine the low-fat cottage cheese, the olive oil, the garlic powder, and the Italian seasoning. Now, here’s the trick: you need to mix this until it’s as smooth as you can possibly get it with a fork or a tiny whisk. Don’t leave big lumps of cottage cheese hanging around! We want that cottage cheese to break down and almost mimic a thick ricotta or cream cheese texture.
If you have a mini-immersion blender, you could use that for about five seconds, but honestly, vigorous stirring works just fine. You’re aiming for a thick, creamy, garlicky paste. Taste it right here—if you want more garlic punch, add a tiny extra dash of powder now, before it hits the tortilla.
Assembling Your High Protein Air Fryer Tortilla Garlic Bread
Time to layer! Lay one of your high-protein tortillas flat on your cutting board or work surface. Take that beautiful, creamy spread and use a butter knife or a small offset spatula to coat the entire surface right up to the edges. Don’t be shy, but don’t make it so thick that it oozes out everywhere when you press it.
Next comes the mozzarella cheese. Sprinkle that shredded cheese evenly over the cottage cheese mixture. This is the gooey part! Once that’s done, gently place the second tortilla right on top. Press down very lightly all over the top tortilla. You just want to encourage the two tortillas to stick together securely so they don’t separate in the air fryer basket. That light press seals the deal!
Air Frying to Perfection
Carefully lift your assembled stack and place it into the preheated 375°F air fryer basket. Make sure it lays flat—if it curls up, the air won’t circulate properly, and you’ll end up with one crispy side and one floppy side. Nobody wants that!
Set your timer for 4 minutes to start. Then, check it. You are looking for two things: the edges of the tortilla should be golden brown and look visibly crisp, and the cheese inside should be completely melted and bubbly. If it’s not quite there after 4 minutes, pop it back in for another minute or two. Total time is usually 5 or 6 minutes. When it’s done, carefully remove it—it will be hot! Slice it into wedges right away, maybe four triangles, and dig in while it’s screaming hot and cheesy.

Tips for Perfect High Protein Air Fryer Tortilla Garlic Bread
I’ve made this High Protein Air Fryer Tortilla Garlic Bread dozens of times, and I’ve learned a few things that can save you from a floppy snack or burned garlic bits. The most important thing, which I mentioned before but bears repeating, is cooking it until it’s truly crispy. If you pull it out when the cheese is just melted but the tortilla is still soft, you’ve basically made a cheesy quesadilla, not garlic bread. You need that crunch!
If your edges are browning way too fast—like, getting dark brown after only 3 minutes—but the cheese inside is still cold, your temperature is too high, or your tortillas are too thin. Next time, drop the temperature down to 360°F. You’ll just need to cook it a minute or two longer, but you’ll save the edges from burning.
Another thing: don’t stack the cheese too high in the middle. If you pile all the mozzarella right in the center, it will melt and try to escape out the sides before the edges cook. Keep the cheese spread thin and even, just like the cottage cheese mixture underneath it. This ensures that every single bite, from the center to the crust, has that perfect melted, savory flavor.
Simple Variations for Your Cheesy Tortilla Snack
Once you master the basic High Protein Air Fryer Tortilla Garlic Bread, you can start playing around! Since the base is so simple, it’s easy to customize without messing up the structure. If you’re feeling a little more savory, swap out the Italian seasoning for some smoked paprika and a pinch of onion powder. That gives it a completely different, almost BBQ-adjacent vibe.
Cheese swaps are also fun. If you want a little tang, mix a tablespoon of shredded Parmesan in with your mozzarella. Parmesan browns up beautifully and adds a nice salty bite. If you need to use up some leftovers, a tiny sprinkle of feta mixed into the cottage cheese spread is amazing, but be careful: feta releases more moisture, so you might need that extra minute of air frying time to get everything crisp.
Storing and Reheating Your High Protein Air Fryer Tortilla Garlic Bread
Honestly, this snack is best eaten immediately. It’s just 10 minutes total, so making it fresh is always the way to go! But if you have leftovers, you can store them. Let the slices cool completely, then wrap them tightly in foil or plastic wrap and stick them in the fridge. It will keep for about two days, but it will definitely lose that fresh-from-the-air-fryer crispness!
Reheating is easy, but you must use the air fryer again to bring back the crunch. Do not microwave this, or you’ll end up with sad, chewy bread! Pop the slices back into the 375°F air fryer for just 2 to 3 minutes. Keep an eye on it, though, because since it’s already cooked, it heats up fast!
| Storage Method | Timeframe | Reheating Tip |
|---|---|---|
| Airtight Container (Fridge) | Up to 2 Days | Air Fryer at 375°F for 3 minutes |
| Freezer (Wrapped Tightly) | Up to 1 Month | Air Fryer at 375°F for 5-7 minutes |
Frequently Asked Questions About This High Protein Air Fryer Tortilla Garlic Bread
Q1. Can I use regular tortillas instead of high-protein ones?
You absolutely can! If you swap in standard flour tortillas, you’ll lose a lot of the protein, but the taste will still be great. Just know that this recipe is specifically designed to be a High Protein Air Fryer Tortilla Garlic Bread, so the nutrition will change quite a bit if you switch the base.
Q2. My cottage cheese mixture looks too watery. What did I do wrong?
That usually means your cottage cheese wasn’t drained well, or you added too much olive oil. If it happens, just stir in about a teaspoon of all-purpose flour or a tablespoon of mozzarella cheese right into the spread mixture. That should thicken it up enough so it doesn’t soak the tortilla.
Q3. Can I add actual garlic instead of powder?
You can, but be careful! If you use fresh minced garlic, it burns super fast in the air fryer. If you want that fresh flavor, mix the fresh garlic into the cottage cheese spread, but you need to lower your air fryer temperature to maybe 350°F and keep a very close eye on it—check it every 2 minutes.
Q4. My cheese didn’t melt all the way through. Why?
This is usually because the air fryer wasn’t fully preheated, or you didn’t press the top tortilla down enough to make contact with the cheese layer. Make sure you let the air fryer reach temperature before putting the bread in, and press firmly but gently when sealing the edges.
Understanding the Nutrition in Your High Protein Air Fryer Tortilla Garlic Bread
One of the best parts about this snack is knowing you’re getting a serious protein boost without a ton of sugar. Because we use part-skim mozzarella and low-fat cottage cheese, we keep the fat down while maximizing the muscle-building power. This is fantastic for a post-workout snack or just keeping you satisfied through the afternoon slump.
Keep in mind that these numbers are based on the exact ingredients listed, including the high-protein tortillas. If you substitute ingredients, especially the cheese or the tortilla, the final count will change, so always factor that in if you’re tracking closely!
| Nutrient | Amount (Per Serving) |
|---|---|
| Calories | 410 |
| Protein | 28 g |
| Fat | 18 g |
| Carbohydrates | 32 g |
Tips for Perfect High Protein Air Fryer Tortilla Garlic Bread
I’ve made this High Protein Air Fryer Tortilla Garlic Bread dozens of times, and I’ve learned a few things that can save you from a floppy snack or burned garlic bits. The most important thing, which I mentioned before but bears repeating, is cooking it until it’s truly crispy. If you pull it out when the cheese is just melted but the tortilla is still soft, you’ve basically made a cheesy quesadilla, not garlic bread. You need that crunch!
If your edges are browning way too fast—like, getting dark brown after only 3 minutes—but the cheese inside is still cold, your temperature is too high, or your tortillas are too thin. Next time, drop the temperature down to 360°F. You’ll just need to cook it a minute or two longer, but you’ll save the edges from burning.
Another thing: don’t stack the cheese too high in the middle. If you pile all the mozzarella right in the center, it will melt and try to escape out the sides before the edges cook. Keep the cheese spread thin and even, just like the cottage cheese mixture underneath it. This ensures that every single bite, from the center to the crust, has that perfect melted, savory flavor.
Simple Variations for Your Cheesy Tortilla Snack
Once you master the basic High Protein Air Fryer Tortilla Garlic Bread, you can start playing around! Since the base is so simple, it’s easy to customize without messing up the structure. If you’re feeling a little more savory, swap out the Italian seasoning for some smoked paprika and a pinch of onion powder. That gives it a completely different, almost BBQ-adjacent vibe.
Cheese swaps are also fun. If you want a little tang, mix a tablespoon of shredded Parmesan in with your mozzarella. Parmesan browns up beautifully and adds a nice salty bite. If you need to use up some leftovers, a tiny sprinkle of feta mixed into the cottage cheese spread is amazing, but be careful: feta releases more moisture, so you might need that extra minute of air frying time to get everything crisp.
Storing and Reheating Your High Protein Air Fryer Tortilla Garlic Bread
Honestly, this snack is best eaten immediately. It’s just 10 minutes total, so making it fresh is always the way to go! But if you have leftovers, you can store them. Let the slices cool completely, then wrap them tightly in foil or plastic wrap and stick them in the fridge. It will keep for about two days, but it will definitely lose that fresh-from-the-air-fryer crispness. I know, I know, nobody wants soggy garlic bread!
Reheating is easy, but you must use the air fryer again to bring back the crunch. Do not microwave this, or you’ll end up with sad, chewy bread! For the best results with your leftover High Protein Air Fryer Tortilla Garlic Bread, use the same temperature you cooked it at. It heats up fast, so keep an eye on it!
| Storage Method | Timeframe | Reheating Tip |
|---|---|---|
| Airtight Container (Fridge) | Up to 2 Days | Air Fryer at 375°F for 3 minutes |
| Freezer (Wrapped Tightly) | Up to 1 Month | Air Fryer at 375°F for 5-7 minutes |
Frequently Asked Questions About This High Protein Air Fryer Tortilla Garlic Bread
Q1. Can I use regular tortillas instead of high-protein ones?
You absolutely can! If you swap in standard flour tortillas, you’ll lose a lot of the protein, but the taste will still be great. Just know that this recipe is specifically designed to be a High Protein Air Fryer Tortilla Garlic Bread, so the nutrition will change quite a bit if you switch the base.
Q2. My cottage cheese mixture looks too watery. What did I do wrong?
That usually means your cottage cheese wasn’t drained well, or you added too much olive oil. If it happens, just stir in about a teaspoon of all-purpose flour or a tablespoon of mozzarella cheese right into the spread mixture. That should thicken it up enough so it doesn’t soak the tortilla, keeping your snack crispy!
Q3. Can I add actual garlic instead of powder?
You can, but be careful! If you use fresh minced garlic, it burns super fast in the air fryer. If you want that fresh flavor, mix the fresh garlic into the cottage cheese spread, but you need to lower your air fryer temperature to maybe 350°F and keep a very close eye on it—check it every 2 minutes. We don’t want bitter garlic!
Q4. My cheese didn’t melt all the way through. Why?
This is usually because the air fryer wasn’t fully preheated, or you didn’t press the top tortilla down enough to make contact with the cheese layer. Make sure you let the air fryer reach temperature before putting the bread in, and press firmly but gently when sealing the edges for that cheesy pull.
Q5. How long does it take to cook this cheesy tortilla snack?
It’s ridiculously fast! The total time, including a quick preheat, is usually around 10 minutes, with only 5 or 6 minutes actually spent air frying. It’s the perfect speedy fix when you need a high protein snack fast!
Understanding the Nutrition in Your High Protein Air Fryer Tortilla Garlic Bread
One of the best parts about this snack is knowing you’re getting a serious protein boost without a ton of sugar. Because we use part-skim mozzarella and low-fat cottage cheese, we keep the fat down while maximizing the muscle-building power. This is fantastic for a post-workout snack or just keeping you satisfied through the afternoon slump. Remember, the nutrition for this High Protein Air Fryer Tortilla Garlic Bread is an estimate, so if you switch out the tortillas, the numbers will shift!
| Nutrient | Amount (Per Serving) |
|---|---|
| Calories | 410 |
| Protein | 28 g |
| Fat | 18 g |
| Carbohydrates | 32 g |
If you want to see more quick, satisfying recipes like this, check out our Facebook page!
Print
Amazing 6-Minute High Protein Air Fryer Tortilla Garlic Bread
- Total Time: 10 minutes
- Yield: 1 serving
- Diet: Vegetarian
Description
This high protein tortilla garlic bread is crispy, cheesy, and made in the air fryer in minutes. It makes a quick snack or side dish with added protein.
Ingredients
- 2 high-protein flour tortillas
- ½ cup shredded part-skim mozzarella cheese
- ¼ cup low-fat cottage cheese
- 1 tablespoon olive oil
- ½ teaspoon garlic powder
- ½ teaspoon Italian seasoning
Instructions
- Stir together the cottage cheese, olive oil, garlic powder, and Italian seasoning in a small bowl until smooth.
- Lay one tortilla flat. Spread the cottage cheese mixture evenly to the edges.
- Sprinkle the mozzarella cheese evenly over the tortilla.
- Top with the second tortilla. Press gently to seal.
- Preheat the air fryer to 375°F.
- Place the tortilla stack into the air fryer basket in a single layer.
- Air fry for 4 to 6 minutes until golden brown, crispy, and the cheese is melted.
- Remove carefully, slice into wedges, and serve immediately.
Notes
- Cook until the tortilla is fully crisp and the cheese is completely melted for best texture.
- Prep Time: 5 minutes
- Cook Time: 5 minutes
- Category: Snack
- Method: Air Fryer
- Cuisine: American