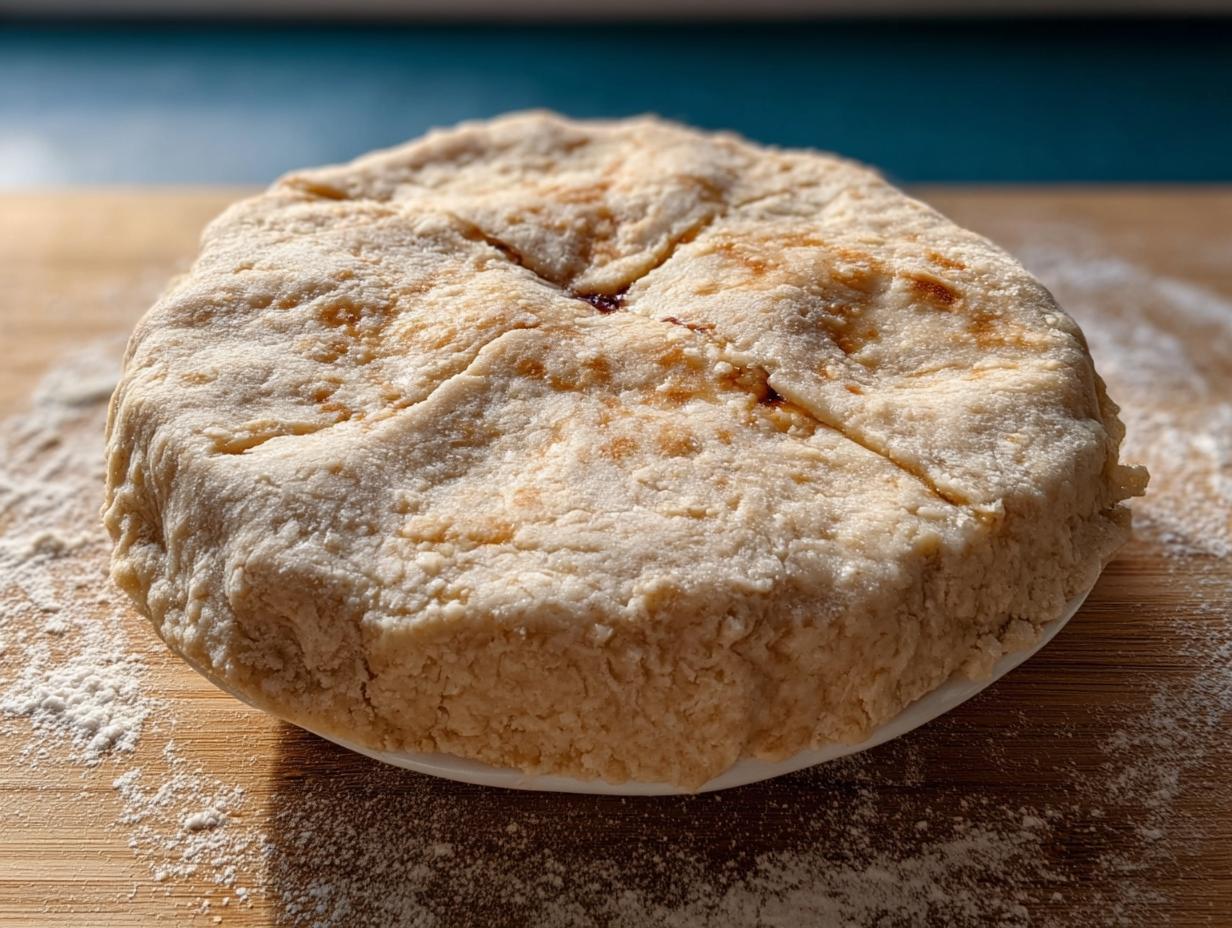
Forget those cardboard-tasting, store-bought rounds! If you want a crust that actually melts in your mouth and makes your pie filling sing, you need to learn my Grandma Style Homemade Pie Crust With Butter. This isn’t just any recipe; it’s the one that has graced every Thanksgiving and summer berry pie in our family for decades. It’s reliable, folks, and that’s what matters most!
What makes this pastry dough so incredible? It’s all about the cold and the technique. I’ve tested every trick out there, and nothing beats the classic method Grandma used to ensure a shatteringly flaky texture every single time. When you master this Grandma Style Homemade Pie Crust With Butter, you’ll never buy a frozen one again. Trust me, the results are consistently perfect, which is why I stand by it.
We are aiming for tender, flaky layers that support any filling you throw at them, sweet or savory. Let’s get those ingredients cold and get started!

Essential Components for Grandma Style Homemade Pie Crust With Butter
You cannot rush perfection, especially when it comes to pastry dough! The real secret to achieving that legendary flakiness in our Grandma Style Homemade Pie Crust With Butter lies entirely in what you put into the bowl and how cold those things are. Grandma always said, “If your fat isn’t freezing, your crust is freezing up!” It sounds silly, but she was right. Quality matters, but temperature matters more.
We use a specific combination of fats—butter for flavor and shortening for tenderness—and the magic only happens if everything stays properly chilled throughout the entire process. This section is where we build the foundation for that perfect, tender texture that defines a true homemade crust.
Selecting Your Fats for a Flaky Grandma Style Homemade Pie Crust With Butter
This is where we mix team players! We need both butter and vegetable shortening. The butter brings that gorgeous, rich flavor that nothing else can replicate. But the shortening? That’s our secret weapon for flakiness. Shortening has a higher melting point, so it stays colder longer during mixing and baking, creating those beautiful pockets of steam that separate the dough layers.
For this Grandma Style Homemade Pie Crust With Butter, you must cube your butter and make sure both fats are straight from the fridge. If the butter starts looking soft or greasy while you’re cutting it in, just pop the whole bowl into the freezer for five minutes. Don’t skip the chilling step for the fats!
Dry Ingredients and Liquid Preparation
For the dry side, we keep it simple: all-purpose flour and just a touch of kosher salt for flavor balance. Whisk them together well so the salt is evenly distributed. Now for the liquid, which is crucial! You need water that is truly ice cold—like, water with actual ice cubes floating in it.
The tablespoon of white vinegar might sound odd, but trust me on this one. It tenderizes the gluten just enough without adding any noticeable flavor. Stir the vinegar right into that ice water. This balanced liquid is what brings the whole dough together without activating too much flour.
Step-by-Step Guide to Grandma Style Homemade Pie Crust With Butter
Alright, now that we have our cold components ready, it’s time for the fun part—mixing! Remember, every move from here on out needs to be quick and gentle. We are building layers, not kneading bread. I always clear my counter space so I can move fast when making my Grandma Style Homemade Pie Crust With Butter.
Combining Dry Ingredients and Cutting in the Cold Fat for Grandma Style Homemade Pie Crust With Butter
First, get your flour and salt whisked together in that big bowl. We want them perfectly married before the fats come in. Now, toss in your cold, cubed butter and your cold shortening. You need a pastry cutter for this step, or you can use your fingertips if you’re fast, but a cutter works best to keep things cool.
Start cutting the fat into the flour. You’re looking for a texture that resembles coarse crumbs, maybe with some pea-sized chunks of butter still visible—those chunks are the key to flakiness! If you see any butter getting soft or oily, stop immediately and stick the bowl back in the freezer for five minutes. We are aiming for that perfect coarse crumb consistency for this Grandma Style Homemade Pie Crust With Butter.
Bringing the Dough Together Gently
Time for the ice water and vinegar mixture. Pour just a little bit in at a time—don’t dump it all in at once! Use a fork or a rubber spatula to gently stir and fold the liquid into the dry mix. You only want to stir until the dough *just* starts clinging together. Seriously, stop stirring as soon as you can gather the mixture into a shaggy mass.
If you look down and it still seems dry in spots, add another splash of that icy water. The goal is damp enough to hold together, but not wet enough to be sticky. Overmixing here is the quickest way to ruin the flakiness we worked so hard to create earlier!
Forming and Chilling the Dough Discs
Turn that shaggy pile out onto a lightly floured surface. Now, use your hands to gently press it together—don’t knead it! Just squeeze it until it forms a cohesive mass. Divide that dough right down the middle into two equal piles. Flatten each pile into a nice, neat disc shape.
Wrap those discs tightly in plastic wrap. If you have time, pop them into the fridge for at least 30 minutes. This chilling period is non-negotiable for a proper Grandma Style Homemade Pie Crust With Butter. It lets the flour relax and firms up the fat again, making rolling so much easier!
Rolling Out Your Finished Pie Crust
When you’re ready to roll, take one disc out of the fridge. Let it sit on the counter for just five minutes so it’s not rock hard. Lightly flour your surface and your rolling pin. Start rolling from the center out, turning the dough often to keep it from sticking and to maintain a nice round shape.
You need the circle to be about one inch larger than your 9-inch pie pan. Don’t worry if you get a little tear; just patch it up gently with a bit of excess dough. Carefully drape the rolled-out dough over your pan, ease it into the bottom without stretching it, and trim the edges. That’s your first perfect crust ready for filling!

Tips for Perfecting Your Homemade Pie Crust
Even with the best recipe, little things can go wrong. But honestly, most issues with pastry dough come down to two simple things: temperature and how much you handle it. If you keep these two elements in check, you’ll have a flawless Grandma Style Homemade Pie Crust With Butter every single time you bake. Don’t stress if your first one isn’t magazine-perfect; practice makes the baker!
These little troubleshooting tips are what separate a decent crust from one that makes people ask for the recipe immediately. We are aiming for light, airy flakes, not dense, tough pastry!
Temperature Control is Key
I can’t stress this enough: your butter and shortening need to be freezing cold. If you are baking on a hot day or in a warm kitchen, work fast! If the fat starts melting into the flour before it even hits the oven, you end up with a tough, uniform crust instead of flaky layers. If you feel the dough getting soft while you are cutting in the fat, stop! Put the bowl in the freezer for ten minutes. That cold shock is what sets up the steam pockets needed for lift.
Handling the Dough Minimally
This is the number one reason people end up with tough pastry. When you overwork the dough, you develop too much gluten, and gluten loves to be elastic and chewy—which is great for bread, terrible for pie crust! When you are mixing the water in, stir *just* until the dry flour disappears. When you press the discs together, use your hands like you’re handling delicate china.
When you roll it out, use a light touch. Stretching the dough as you place it in the pan is also a huge no-no. Keep everything calm, cool, and quick, and you’ll see those beautiful, tender layers form in your Grandma Style Homemade Pie Crust With Butter.
Storing and Using Your Grandma Style Homemade Pie Crust With Butter
Making a double batch is always my favorite move because then you have ready-made pastry dough for emergencies! Having this Grandma Style Homemade Pie Crust With Butter tucked away in the fridge or freezer saves so much time when pie cravings hit. The dough keeps its structure beautifully, provided you wrap it tight and don’t let it dry out.
The beautiful thing about this recipe is that the fat is locked in place, meaning it stores like a dream. Just follow these simple guidelines for keeping your pastry fresh until you need it for that perfect double-crust apple pie or a savory quiche!
Refrigeration and Freezing Guidelines
If you plan on using the dough within about five days, the refrigerator is perfect. Wrap those discs tightly in plastic wrap, making sure to press out any extra air. If you need to keep them longer, the freezer is your best friend! Wrap the discs first in plastic wrap, then foil, and they will stay perfect for up to three months. When freezing, make sure to label them with the date so you don’t forget what treasure you tucked away!
Preparing Chilled Dough for Baking
When you pull your dough out—whether from the fridge or freezer—you can’t just start rolling it! If it’s been refrigerated, let it sit on the counter for about 10 to 15 minutes until it’s pliable but still very cold. If you’re rolling frozen dough, you should let that thaw in the fridge overnight first.
The key is just letting the chill come off slightly so it doesn’t crack when you roll it. Remember, we want it cold, but not rock solid, for rolling out your Grandma Style Homemade Pie Crust With Butter.
Answering Common Questions About Your Pastry Dough
I get so many messages asking about little hiccups in the process, so let’s tackle the most common worries about this Grandma Style Homemade Pie Crust With Butter. Usually, if something goes wrong, it circles back to temperature or handling, but here are the quick fixes!
Q: My dough keeps tearing when I try to move it to the pan. What am I doing wrong?
That usually means the dough is too cold and hasn’t rested long enough after chilling. Let it sit out for an extra five minutes before you try to roll it. If a tear happens, just wet your finger slightly, press the edges together, and smooth it out. It’s just pastry dough; no one will notice the patch!
Q: How do I make sure I get that really flaky pie crust texture?
It all comes down to those cold chunks of butter and shortening! You need those pea-sized pieces to survive the mixing process because they create steam pockets when baking. If your fat melts before it hits the oven, you’ll get a tough crust instead of those beautiful flakes.
Q: Can I use all butter instead of mixing butter and shortening?
You absolutely can, but you’ll lose some of that extra tenderness that the shortening provides. If you must use all butter, make sure you freeze it first and cut it into even smaller pieces. The all-butter version is delicious, but our Grandma Style Homemade Pie Crust With Butter uses both for the best structure and flavor balance.
Q: Do I need the vinegar?
I know it seems odd, but yes, try to include it! It’s a tiny bit of acid that helps relax the gluten strands, ensuring your final flaky pie crust isn’t tough. You won’t taste it at all, I promise!
Understanding the Nutrition of Your Homemade Crust
Now, I know what some of you are thinking: “This is Grandma’s recipe, it’s probably packed with fat!” And well, yes, it has butter and shortening, because that’s what makes it taste so unbelievably good! But I always like to give you a clear picture of what you’re working with, especially since this recipe yields two full crusts. So, when we break down the estimated nutrition for just one crust, you can see that it’s actually quite reasonable given how rich it is!
This calculation is an estimate for one serving, assuming you divide the entire crust recipe into about 8 slices. It’s a good reminder that homemade is always worth the indulgence! You can find more baking tips on our Pinterest page.
Estimated Nutritional Breakdown Table
Here is the quick look at the estimated nutritional information for one serving (one slice) of this decadent, yet reliable, Grandma Style Homemade Pie Crust With Butter. Remember, these figures don’t account for whatever amazing filling—sweet or savory—you decide to put inside!
| Nutrient | Estimated Amount |
|---|---|
| Calories | 360 |
| Fat | 25 g |
| Carbohydrates | 32 g |
| Protein | 6 g |
What to Do After Making Your Grandma Style Homemade Pie Crust With Butter
Now you have two beautiful discs of pastry dough made with the best Grandma Style Homemade Pie Crust With Butter! Don’t just let them sit there—get baking! Once your pie is baked and cooling, I’d love to hear how it turned out. Seriously, head down to the comments below and give this recipe a star rating. You can also follow our journey on Facebook!
Tell me what filling you used! Did you go classic apple, or maybe a savory chicken pot pie? I live for seeing your success stories!