Black Velvet Cake is one of those desserts that just looks *so* dramatic, right? When I first saw a picture of it, I thought, “No way can a beginner like me ever make something that looks that intense and delicious.” But honestly, this recipe is totally doable, even for your first time tackling a truly show-stopping dessert! My goal here at NoobRecipes is to prove that *anyone* can make amazing food at home, and this Black Velvet Cake is the perfect example. It’s incredibly moist thanks to a few little tricks I’ll share, and the flavor from the black cocoa powder is just out of this world. Plus, who doesn’t love a cake that’s this beautifully dark and paired with a super creamy frosting? Trust me, you’re going to nail this one!

Why You’ll Love This Black Velvet Cake
Honestly, this Black Velvet Cake is a total winner for so many reasons. It looks incredibly fancy, but I promise it’s a breeze to whip up, even if you’re new to baking a layered cake. You’re going to get that amazing, deep dark color and a super moist cake that just melts in your mouth. Plus, the creamy frosting is the perfect partner. This is the kind of dessert recipe that makes you feel like a baking pro without all the stress!
- Stunning Appearance: That deep black color is seriously impressive!
- Incredibly Moist Cake: You won’t believe how tender and moist it is.
- Rich Flavor: The black cocoa powder gives it a unique, delicious taste.
- Beginner-Friendly: I’ve broken down every step to make it easy for you.
- Perfect Dessert Recipe: It’s guaranteed to wow any crowd!
Ingredients for Your Black Velvet Cake
Alright, let’s talk about what you’ll need to make this gorgeous Black Velvet Cake! I’ve tried to keep things super straightforward, but there are a couple of special ingredients that really make this cake sing. Don’t worry if you haven’t seen black cocoa powder before; it’s the secret weapon for that deep, dark color and a flavor that’s less bitter than regular cocoa. You’ll find it online or at specialty baking stores.
Here’s your shopping list:
- For the Cake:
- 1 ¾ cups cake flour
- 1 ¼ cups granulated sugar
- ⅔ cup black cocoa powder
- ¾ teaspoon baking soda
- ½ teaspoon salt
- ½ cup vegetable oil (or any neutral oil like canola)
- ½ cup sour cream (full fat is best for moisture!)
- ½ cup buttermilk (room temperature is ideal)
- 2 large eggs (also room temperature)
- 2 teaspoons vanilla extract
- ½ teaspoon white vinegar
- Black gel food coloring (this is key for that super dark color!)
- For the Cream Cheese Frosting:
- 12 tablespoons unsalted butter, softened
- 8 oz cream cheese, softened
- 5 cups powdered sugar, sifted
- ¼ cup black cocoa powder
- 2 teaspoons vanilla extract
- 1 tablespoon heavy cream (or milk, if needed for consistency)
- Black gel food coloring
Ingredient Notes and Substitutions
Okay, let’s chat about a couple of these ingredients because they really make a difference in our Black Velvet Cake! First up, that black cocoa powder. It’s different from regular cocoa powder because it’s been alkalized more intensely, giving it that super dark color and a milder, almost chocolatey-vanilla flavor. You really can’t substitute it if you want that signature black look, so try to find it! If you absolutely can’t, you’ll get a very dark brown cake with regular unsweetened cocoa, but it won’t be true Black Velvet.
Now, about the buttermilk. If you don’t have any on hand, no stress! Just measure out ½ cup of regular milk and stir in ½ tablespoon of white vinegar or lemon juice. Let it sit for about 5 minutes until it looks a little curdled – boom, DIY buttermilk! And for the black food coloring, gel coloring is best because it gives you intense color without adding too much liquid to the batter or frosting. A little goes a long way! For more information on the science behind baking, check out The Science of Cooking.
How to Prepare This Black Velvet Cake
Alright, let’s get down to business and make this amazing Black Velvet Cake! Honestly, the process is pretty straightforward, and I’ve broken it down into super easy steps. We’ll mix up the batter, bake those gorgeous dark layers, whip up a dreamy cream cheese frosting, and then put it all together. Don’t rush any of the cooling steps – that’s super important for a moist cake and frosting that spreads like a dream. Ready to bake up some magic?
Baking the Black Velvet Cake Layers
First things first, let’s get that oven preheated to 350°F (175°C). Grab three 6-inch cake pans, give them a good grease and flour – this really helps prevent sticking, which is key for a perfect layered cake. Now, in your stand mixer bowl, whisk together all your dry ingredients: the cake flour, sugar, that special black cocoa powder, baking soda, and salt. Give it a little whirl to make sure it’s all combined.
In a separate bowl, whisk together all the wet ingredients: the oil, sour cream, buttermilk, eggs, vanilla, white vinegar, and that black food coloring. You want it all mixed up well. Now, add the wet stuff to the dry stuff in the mixer and mix on low speed. Go slow here, just mix until everything is *just* combined. We don’t want to overmix! Divide the batter evenly between your three prepared pans. Pop them in the oven for about 25-28 minutes. You’ll know they’re ready when a toothpick comes out with just a few moist crumbs attached. Let them cool in the pans for about 10 minutes before flipping them onto a wire rack to cool completely. Patience here is a virtue, trust me!
Crafting the Perfect Cream Cheese Frosting
While those cake layers are cooling, let’s make the frosting! You’ll need softened butter and cream cheese for this. In your mixer bowl, beat them together until they’re super smooth and creamy. It’s important they’re soft but not melted! Gradually add in the sifted powdered sugar, mixing on low speed at first until it’s all incorporated. Then, crank it up a bit and whip it until it’s light and fluffy.
Now for the flavor and color! Mix in the black cocoa powder, vanilla extract, and that black gel food coloring. This is where the magic happens for that deep, dark look! Mix until it’s all smooth and beautifully colored. If it seems a little too thick, add in about a tablespoon of heavy cream (or milk) to get it perfectly spreadable. You want a frosting that’s rich, creamy, and oh-so-chocolatey!
Assembling Your Stunning Black Velvet Cake
Once your cake layers are totally cool (this is important, warm cake and frosting don’t mix well!), it’s time to assemble this beauty. Grab your cake stand or serving plate. Put one cake layer down and add a little dollop of frosting to stick it in place. Spread about a cup of that luscious cream cheese frosting evenly over the top. Then, place your second cake layer on top and repeat with another cup of frosting. Add the final layer.
Now for the pro touch: a crumb coat! Apply a thin, even layer of frosting all over the sides and top of the cake. This traps all those loose crumbs. Pop the cake in the fridge for about 10 minutes to let that layer set up. Then, you can apply your final, thick, beautiful layer of frosting, smoothing it out for that gorgeous finish. You’ve got this!
Tips for Black Velvet Cake Success
Making this Black Velvet Cake is super rewarding, and a few little tricks will make sure it turns out perfectly for you, even if it’s your first time trying a layered cake! First off, room temperature ingredients are your best friend here. Make sure your eggs, sour cream, and buttermilk aren’t straight from the fridge. This helps everything combine smoothly for a really moist cake. When you’re mixing the batter, remember not to go overboard! Just mix until everything is *just* combined. Overmixing can make the cake tough, and we want it tender.
Also, pay attention to your oven. Ovens can be a little quirky, so the toothpick test is your ultimate guide for knowing when the cake is done. Look for those moist crumbs, not wet batter! And please, let those layers cool *completely* before you even think about frosting. Warm cake can melt your beautiful cream cheese frosting, and nobody wants that! You’ve totally got this!
Frequently Asked Questions About Black Velvet Cake
Got questions about this stunning Black Velvet Cake? I’ve got answers! This recipe is designed to be super approachable, but I know sometimes you just want a quick clarification. Let’s dive in!
- Q: What makes this cake “black”?
A: The magic comes from special black cocoa powder! It’s processed differently than regular cocoa, giving it an incredibly deep, dark color and a milder chocolate flavor. We also boost the color with a bit of black gel food coloring, making sure it’s truly a Black Velvet! - Q: Can I use regular unsweetened cocoa powder instead of black cocoa powder?
A: You *can*, but it won’t be the same! Regular cocoa powder will give you a delicious chocolate cake, but it will be more of a dark brown, not that dramatic black. If you use regular cocoa, you’ll lose the signature look of Black Velvet. For the best results and that iconic color, try to find the black cocoa powder! - Q: My cake layers don’t seem super moist. What did I do wrong?
A: A few things can help ensure a super moist cake! Make sure your ingredients like eggs, sour cream, and buttermilk were at room temperature. Also, be careful not to overmix the batter once the wet and dry ingredients are combined – overmixing can make the cake tough and dry. And definitely don’t overbake it; the toothpick test with *moist crumbs* is your best friend! - Q: How should I store leftovers?
A: This cake is best stored covered in the refrigerator because of the cream cheese frosting. It should stay fresh for about 3-4 days. Just let a slice sit out for about 15-20 minutes before serving to take the chill off and enjoy that wonderful moist texture!
Nutritional Information for Black Velvet Cake
Please keep in mind that these nutritional values are estimates and can vary based on specific ingredients and portion sizes. This is a rich dessert, so enjoy a slice!
| Serving Size | 1 slice |
| Calories | Approximately 500-600 |
| Fat | Approximately 30-40g |
| Saturated Fat | Approximately 15-20g |
| Trans Fat | Less than 1g |
| Carbohydrates | Approximately 70-80g |
| Sugar | Approximately 60-70g |
| Fiber | Approximately 2-3g |
| Protein | Approximately 5-7g |
| Cholesterol | Approximately 100-150mg |
| Sodium | Approximately 200-300mg |
Storing and Reheating Your Black Velvet Cake
This decadent Black Velvet Cake is best enjoyed fresh, but lucky for us, it stores like a dream! Because of that luscious cream cheese frosting, you’ll want to keep any leftovers covered tightly in the refrigerator. This helps keep the frosting firm and the cake from drying out too quickly. It should stay wonderfully moist and delicious for about 3 to 4 days.
When you’re ready for another slice, just take it out of the fridge about 15-20 minutes before you plan to eat it. This little bit of time at room temperature lets the frosting soften up just enough and brings the cake back to that perfect, tender texture. Honestly, it tastes almost as good as the day you made it!
Share Your Black Velvet Cake Creation
I absolutely can’t wait to see your gorgeous Black Velvet Cakes! Seriously, if you make this recipe, please share a photo in the comments below or tag me on social media. I love seeing how your bakes turn out and hearing what you think. Your feedback helps me make all my recipes even better for fellow beginners! If you’re looking for other beginner-friendly baking ideas, check out our Dessert Cakes section.
Print
Black Velvet Cake: 1 Amazing Beginner Recipe
- Total Time: 58 minutes
- Yield: 12 servings
- Diet: Vegetarian
Description
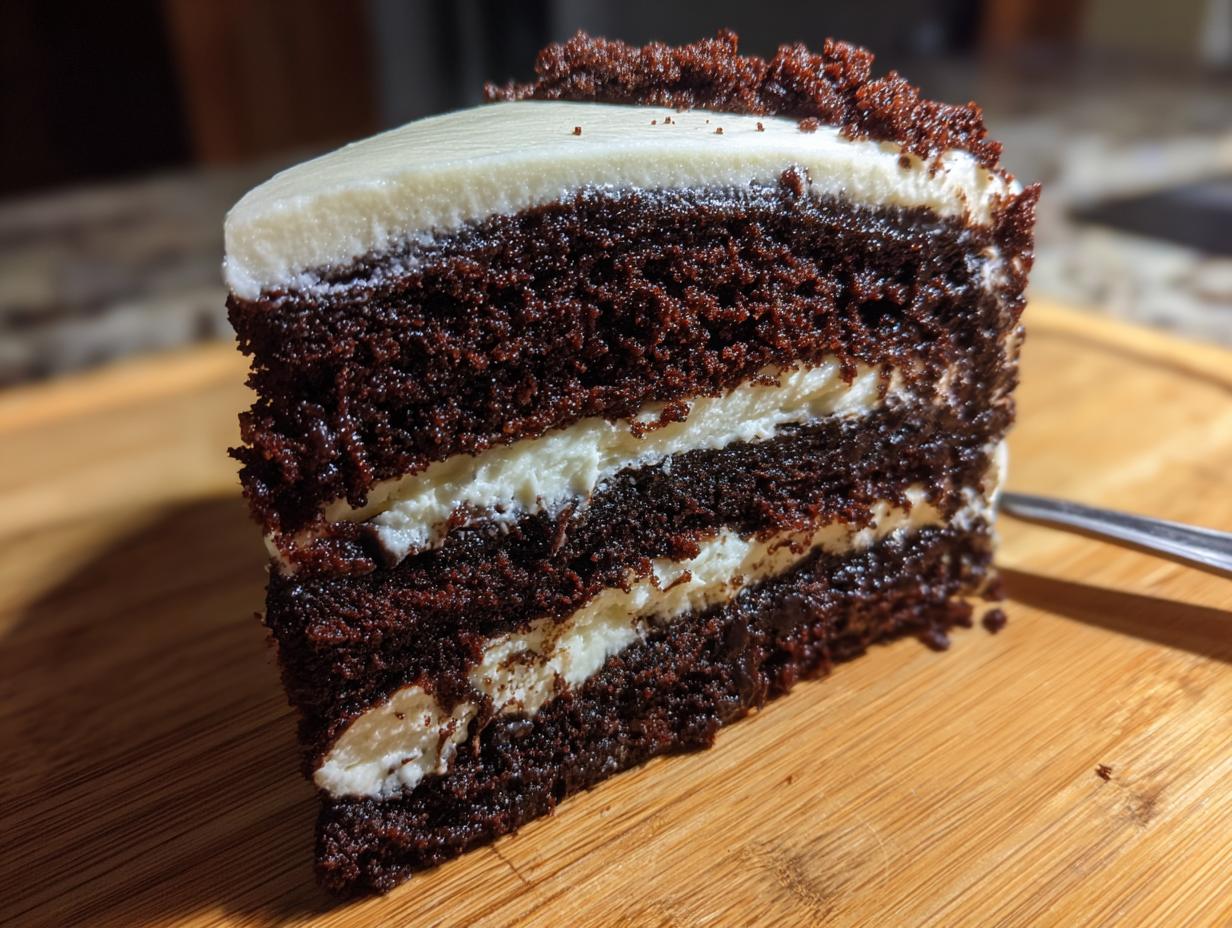
A strikingly dark and moist layered cake with a rich cream cheese frosting, perfect for any occasion.
Ingredients
- 1 3/4 cups cake flour
- 1 1/4 cup granulated sugar
- 2/3 cup black cocoa powder
- 3/4 teaspoon baking soda
- 1/2 teaspoon salt
- 1/2 cup vegetable oil
- 1/2 cup sour cream
- 1/2 cup buttermilk
- 2 large eggs
- 2 teaspoons vanilla extract
- 1/2 teaspoon white vinegar
- black food coloring
- 12 tablespoons unsalted butter
- 8 oz cream cheese
- 5 cups powdered sugar
- 1/4 cup black cocoa powder
- 2 teaspoons vanilla extract
- 1 tablespoon heavy cream
- black gel food color
Instructions
- Preheat oven to 350°F. Grease and flour three 6-inch cake pans.
- In a stand mixer, whisk together cake flour, sugar, black cocoa powder, baking soda, and salt.
- In a separate bowl, whisk together vegetable oil, sour cream, buttermilk, eggs, vanilla extract, white vinegar, and black food coloring.
- Add the wet ingredients to the dry ingredients and mix on low speed until just combined.
- Pour batter evenly into the prepared pans.
- Bake for 25-28 minutes, or until a toothpick inserted into the center comes out with moist crumbs.
- Cool cakes in pans for 10 minutes, then transfer to a wire rack to cool completely.
- Once cool, level the tops of the cakes if needed.
- For the frosting: Beat softened butter and cream cheese until smooth.
- Gradually add powdered sugar, mixing until incorporated.
- Mix in black cocoa powder, vanilla extract, and black gel food coloring. Whip until smooth. Add heavy cream if needed for consistency.
- To assemble: Place one cake layer on a stand with a dollop of frosting to secure.
- Spread about 1 cup of frosting over the layer.
- Add the next cake layer, spread another cup of frosting. Repeat with the final layer.
- Apply a thin crumb coat of frosting to the sides and top, then refrigerate for 10 minutes.
- Apply a final thick, even layer of frosting.
Notes
- Store cake covered in the refrigerator for 3-4 days.
- Cake layers can be baked ahead, cooled, wrapped, and refrigerated overnight.
- Prep Time: 30 minutes
- Cook Time: 28 minutes
- Category: Dessert
- Method: Baking
- Cuisine: American