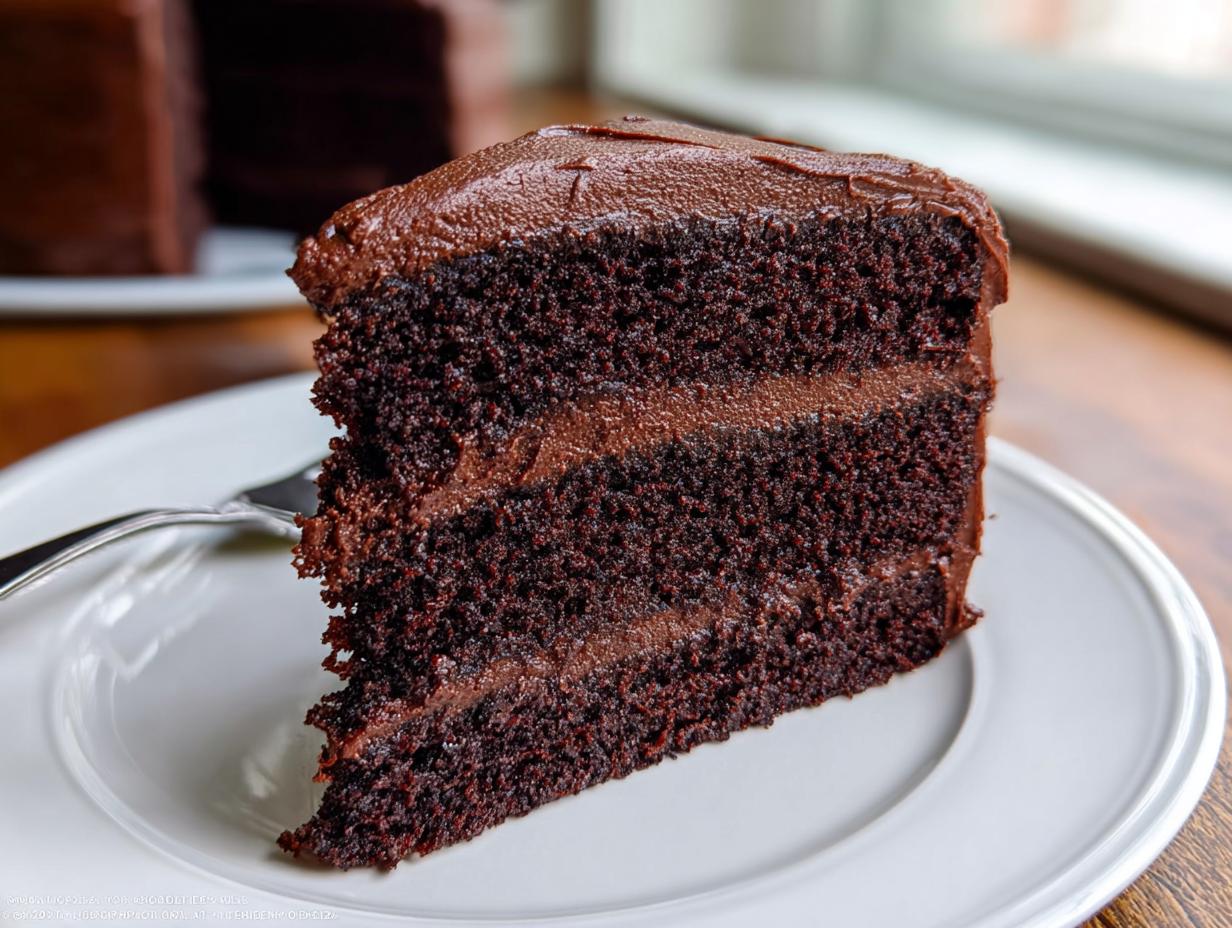
Homemade Chocolate Cake used to seem like something only professional bakers attempted. When I first started NoobRecipes, I distinctly remember trying three different boxed mixes before giving up and ordering a sad little grocery store sheet cake for my roommate’s birthday. I thought rich, moist chocolate cake with silky frosting was just beyond my skill level. That’s why this recipe is such a huge deal for me!
This version changed everything. It’s the recipe I wish I had back then—so straightforward, even if you’ve never successfully baked anything more complicated than toast. Seriously, mix the dry stuff, mix the wet stuff, add the hot water, and boom. You have the foundation for the best Homemade Chocolate Cake you’ll ever make. It comes out perfectly moist every single time, I promise. And the frosting? Forget those crumbly, greasy messes. This one beats any store-bought tub hands down. It’s proof that simple ingredients, handled correctly, always win.
We’re talking about a showstopper that comes together in under an hour total, which is perfect for those last-minute celebrations. Get ready to impress yourself!
Why You’ll Love This Homemade Chocolate Cake
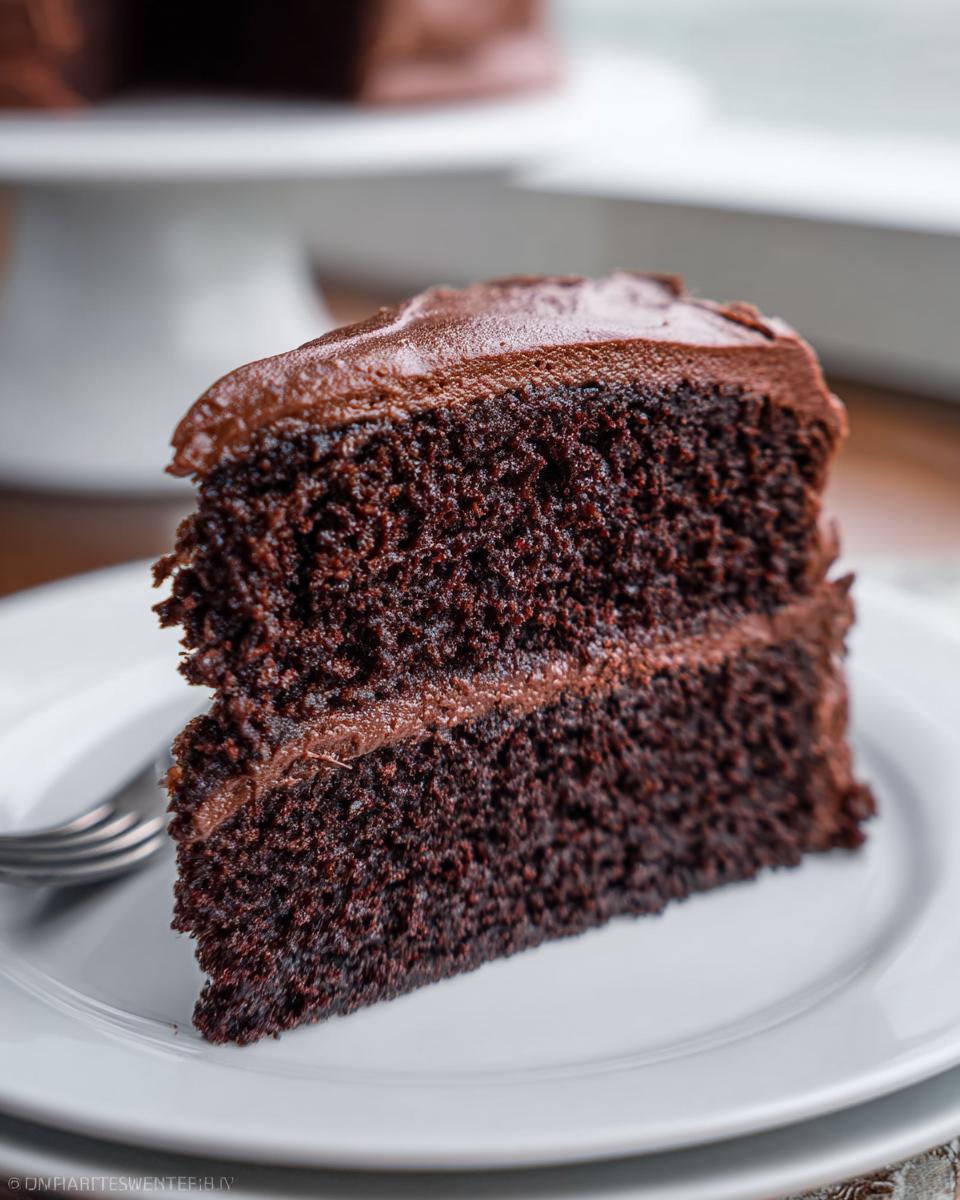
This isn’t just another chocolate cake recipe; it’s the one that proves you can bake something amazing without stress. If you’re new to the kitchen, this is your new best friend. Trust me, I designed this whole thing around making your first Homemade Chocolate Cake a total success.
- It’s lightning fast. Seriously, prep is done before you even finish your first cup of coffee.
- The texture is unbeatable—super moist, never dry, thanks to one key hot ingredient.
- The homemade chocolate frosting is rich, creamy, and unbelievably easy to whip up.
- It sets you up for success; beginner bakers will feel like pros after this one.
Quick Preparation Time
We’re talking about 15 minutes of active prep time here. That’s it! You’re just whisking things together in a bowl, which means less scrubbing later. You can have the batter mixed and ready for the oven before most people even finish deciding on a recipe.
Superior Texture and Flavor
This cake has that deep, dark chocolate flavor you crave. It stays tender for days, which is the hardest part about baking a Homemade Chocolate Cake from scratch. The secret is what we add right at the end—it locks in all that moisture and makes the crumb perfect, topped off with that ridiculously smooth, buttery frosting.
Equipment Needed for Your Homemade Chocolate Cake
Before we dive into the mixing madness, let’s make sure your kitchen arsenal is ready. You don’t need anything fancy, which is the beauty of this recipe! Having the right tools just makes the process smoother and stops things from getting messy. I’ve learned the hard way that trying to mix cake batter with a fork just doesn’t cut it!
Mixing and Baking Essentials
Grab these items before you start measuring anything out. It keeps everything organized, which is half the battle when you’re trying something new.
- Two sturdy, large mixing bowls—one for dry ingredients and one for the wet.
- A good wire whisk for incorporating air into the dry ingredients quickly.
- Measuring cups and spoons. Accuracy matters here, especially with the cocoa!
- A rubber spatula or wooden spoon for folding in the final ingredients.
- Two 9-inch round cake pans. These are essential for getting the layers just right.
- Parchment paper—I always cut circles ahead of time to save myself stress later.
- Non-stick cooking spray or butter/flour for coating those pans.
- A cooling rack large enough for two layers.
Gathering Ingredients for Homemade Chocolate Cake
Okay, let’s talk ingredients. The beauty of this Homemade Chocolate Cake is that it uses pantry staples, but we need to be specific about how we use them. Don’t try to substitute the boiling water for warm water, or you’ll miss out on that incredible texture boost. I spend just as much time organizing my ingredients as I do mixing them—it prevents that panicked “Where is the baking soda?!” moment halfway through.
For the frosting, remember that butter needs to be genuinely softened. If it’s too hard, it won’t cream properly, and if it’s melted, your frosting will be soup. It happens to the best of us, so just be mindful of that temperature!
Cake Batter Components
These are the building blocks for our wonderfully moist layers. Make sure your milk and eggs are at room temperature if possible; it helps everything blend better.
- Flour, sugar, cocoa powder, baking powder, baking soda, and salt (all whisked together first).
- Milk, vegetable oil, eggs, and vanilla extract (these get whisked in next).
- Crucially: One full cup of boiling water added right at the end. Don’t skip the boil!
Rich Chocolate Frosting Ingredients
This frosting is pure, classic buttercream goodness. It whips up beautifully and covers the cake like velvet.
- Softened butter is the base—it needs to be pliable.
- Unsweetened cocoa powder for that deep chocolate punch.
- Powdered sugar, vanilla, and a tiny pinch of salt to balance the sweetness.
- Milk: You’ll need between 6 and 8 tablespoons. Start low and add a tablespoon at a time until you reach that perfect, spreadable consistency.
Step-by-Step Instructions for the Homemade Chocolate Cake
Now for the fun part—making the actual cake! I’ve broken this down so you can follow along without getting overwhelmed. Remember, for a perfect Homemade Chocolate Cake, timing and order are your friends. Don’t rush the mixing, but don’t over-mix either. It’s a delicate balance we’ll master together.
Preparing the Pans and Oven
First things first: get that oven heating up to 350 degrees Fahrenheit. It needs time to get evenly hot, so start it now! Next, grab your two 9-inch round pans. You absolutely have to prep these well, or the layers will stick, and that’s a tragedy. Line the bottom of each pan with parchment paper—cut a circle to fit perfectly. Then, spray the sides and the parchment generously with non-stick cooking spray. This double protection means your layers will slide out like they’re on ice skates.
Mixing the Dry Ingredients
In your largest mixing bowl, it’s time to combine everything that isn’t wet. We’re talking about the flour, the sugar, the cocoa powder, the baking powder, the baking soda, and the salt. Don’t just dump them in! Use your wire whisk and mix everything really well for about a minute. This step is crucial because it distributes the leavening agents (baking powder and soda) evenly. If you skip this, you might get one side that rises and one side that sinks!
Combining Wet Ingredients and Achieving Smooth Batter for Homemade Chocolate Cake
Now, make a little well in the center of your dry ingredients. Pour in the milk, the oil, the two eggs, and the vanilla. Whisk this gently until it looks mostly smooth—don’t beat it hard yet. You’ll notice the batter is quite thick at this point. This is where the magic happens for our Homemade Chocolate Cake: carefully pour in the full cup of boiling water. Mix it slowly until everything is just combined and smooth. Yes, it will look very thin, almost soupy. That’s exactly what you want for that deep, moist crumb!
Baking and Cooling the Layers
Divide that thin batter evenly between your two prepared pans. Pop them into that 350-degree oven and set a timer for 30 minutes. Check them around 30 to 35 minutes—insert a toothpick into the very center. If it comes out clean or with just a few moist crumbs clinging to it, they are done! Let them rest in the pans on a cooling rack for exactly 10 minutes. After that brief rest, flip them out onto the rack to cool completely. Don’t even think about frosting until they are cold, or you’ll have a chocolate puddle!
Making the Smooth Chocolate Frosting
While the cake cools, make the frosting. Beat that softened butter until it’s nice and creamy. Then, mix in the cocoa powder. Start adding the powdered sugar slowly, alternating with the milk—maybe a cup of sugar, then a splash of milk. Keep going until it’s all incorporated. Taste it! If it’s too stiff, add milk one tablespoon at a time until it’s beautifully spreadable. Finally, mix in the vanilla and that tiny pinch of salt.
Assembling Your Two-Layer Homemade Chocolate Cake
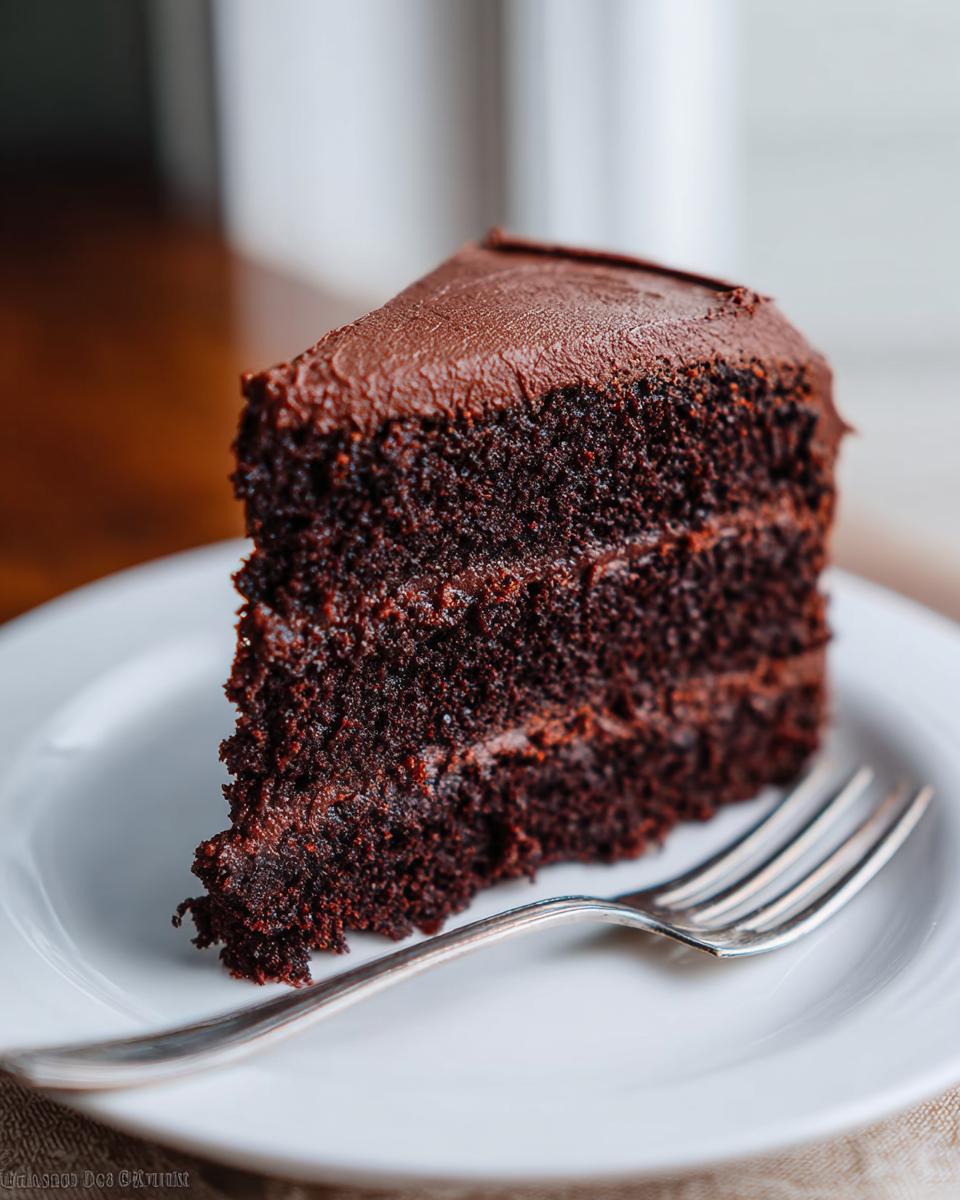
Once those layers are stone-cold, place your first layer on your serving plate. Take about a cup of that smooth frosting and spread it evenly over the top. Don’t worry about making it perfect; it’s just the filling! Carefully set the second layer on top. Now, take the rest of the frosting and cover the entire outside—sides and top. You can serve this right away, but honestly, if you cover it and let it sit overnight, the flavors really marry, and the frosting sets up beautifully.
Tips for Perfect Homemade Chocolate Cake Results
Baking is supposed to be fun, not frustrating! Whenever I get questions about why a cake didn’t turn out quite right, it usually comes down to one tiny step that got rushed. Here are a few things I learned the hard way that will help you nail this recipe every time.
Managing Batter Consistency
That final step where you stir in the boiling water? It’s non-negotiable, and it’s the secret to why this cake stays moist for days. Chocolate, especially when mixed with cocoa powder, tends to absorb moisture quickly. The boiling water “blooms” the cocoa powder, releasing its deepest flavor, but more importantly, it gelatinizes some of the starches, ensuring the crumb stays soft and tender rather than crumbly. Just trust the process—the batter *should* look thin before it goes into the oven!
Cooling is Non-Negotiable
I know you’re excited to frost that beautiful cake, but if you even attempt to spread frosting on a warm layer, you are inviting disaster. The heat transfers right into the butter in your frosting, making it melt, slide, and look streaky. If you’re short on time, wrap those cooled layers tightly in plastic wrap and pop them in the freezer for about 20 minutes. That’s my trick to get them chilled enough to hold their shape when you start stacking and frosting.
Storing and Reheating Your Homemade Chocolate Cake
I rarely have leftovers of this Homemade Chocolate Cake because everyone devours it, but when I do, storing it properly is key to keeping that amazing moist texture intact. Since this cake has that rich, buttery frosting, where you keep it depends on how quickly you plan to eat it.
Best Practices for Cake Storage
If you plan on eating the cake within a day or two, leaving it covered loosely at cool room temperature is totally fine. The sugar in the frosting acts as a preservative, and keeping it out of the fridge keeps the cake layers from firming up too much. If your kitchen is really warm, or if you think it will take longer than two days to finish, you definitely need to refrigerate it. Just make sure to cover it tightly with plastic wrap or place it under a cake dome so it doesn’t absorb any weird fridge smells.
If you need to keep it longer, freezing is your best bet! I always wrap the cooled, unfrosted layers individually in plastic wrap and then foil. If you frost it first, make sure the frosting is firm before wrapping it up tight.
Storage and Reheating Reference Table
Here’s a quick cheat sheet so you know exactly how to handle those delicious leftovers:
| Storage Method | Duration | Reheating Instructions |
|---|---|---|
| Room Temperature (Covered) | Up to 2 days | Serve as is! No reheating needed. |
| Refrigerator | Up to 5 days | Let slices sit out for 30 minutes before serving to soften the frosting and cake slightly. |
| Freezer (Unfrosted Layers) | Up to 3 months | Thaw overnight in the fridge, then let sit at room temp for 1 hour before frosting. |
| Freezer (Frosted Slices) | Up to 2 months | Microwave individual slices for 10-15 seconds for a warm, gooey treat. |
Frequently Asked Questions About This Easy Chocolate Cake
I get tons of messages asking about tweaks and troubleshooting, which is awesome! It just shows you’re getting excited about baking. Here are the most common things people ask me when they try this recipe for the first time. Don’t sweat the small stuff; we’ll figure it out!
Can I make this a single-layer Homemade Chocolate Cake?
You absolutely can, but you need to adjust your pan and time! If you want one big layer, use a 9×13 inch pan instead of the two 9-inch rounds. When you switch to a sheet cake pan, the batter is spread thinner, so it cooks faster. Start checking it around the 25-minute mark. You’re looking for that clean toothpick test, but it might finish closer to 30 minutes total. If you try to put all the batter into one deep round pan, it will take ages and probably sink in the middle, so the 9×13 is the way to go for a single layer!
What kind of milk works best for the frosting?
This is where you have some flexibility! I usually just grab whatever dairy milk I have on hand—whole milk works great because the fat content adds richness. But hey, if you’re dairy-free or just out of regular milk, you can absolutely substitute it with non-dairy options like almond milk or even a splash of heavy cream if you want it super decadent. The key isn’t the type of milk, but the *amount*. You only want to add enough until it’s spreadable, so always add it slowly, one tablespoon at a time, until it feels right under your spatula.
Why is my cake dense?
Density is usually caused by one of two things with this recipe, and both are easy to fix next time. First, did you overmix after adding the flour, or especially after adding the boiling water? Overmixing develops the gluten in the flour, which results in a tough, dense texture instead of a soft crumb. Second, check your leavening agents—baking powder and baking soda. If they are old and expired, they won’t create the necessary lift. Make sure yours are fresh, and be precise when measuring them!
Share Your Homemade Chocolate Cake Experience
I truly hope you loved making this cake as much as I love sharing it. When you pull those beautiful layers out of the oven and smell that rich chocolate aroma filling your kitchen, you’ll know you nailed it!
I want to see what you created! Did you stick to a simple dusting of powdered sugar, or did you go all-in with the smooth chocolate frosting? Drop a comment below and tell me how it went. Did you try any fun sprinkles or maybe add a little coffee to the batter for an extra kick? You can also share your amazing results on Pinterest!
Leave a star rating right here on the page if this recipe saved your next party or just satisfied a serious chocolate craving. Sharing your success helps other beginners feel brave enough to try baking from scratch next time! Feel free to follow along for more easy recipes on Facebook as well.
Print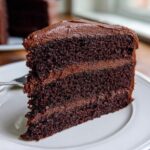
Homemade Chocolate Cake: 1 Amazing Moist Recipe
- Total Time: 50 minutes
- Yield: One 2-layer 9-inch cake
- Diet: Omnivore
Description
Homemade Chocolate Cake. This recipe yields a rich, moist chocolate cake with smooth homemade chocolate frosting. It is simple enough for beginners to master.
Ingredients
- Cake:
- 2 cups all purpose flour
- 2 cups sugar
- ¾ cup cocoa powder
- 2 tsp baking powder
- 1 ½ tsp baking soda
- 1 tsp salt
- 1 cup milk
- ½ cup oil
- 2 eggs
- 2 tsp vanilla
- 1 cup boiling water
- Chocolate Frosting:
- ½ cup butter softened
- ½ cup cocoa powder
- 4 cups powdered sugar
- 1 tsp vanilla
- 1 pinch salt
- 6-8 Tbsp milk
Instructions
- Line two 9″ round pans with parchment paper and spray with non-stick spray. Preheat oven to 350°.
- Whisk together the flour, sugar, cocoa, baking powder, baking soda, and salt in a large mixing bowl.
- Whisk in the milk, oil, eggs, and vanilla till smooth. Stir in the boiling water, mixing till smooth.
- Divide batter evenly between the two pans. Bake at 350° for 30-35 minutes or till toothpick inserted in the center comes out clean. Cool for 10 minutes in the pans, then invert onto cooling racks.
- Cool completely. Wrap each cake in plastic wrap and freeze if desired.
- Place one cake on a cake stand or serving tray. Spread about a cup of frosting on the top. Place the other cake on top.
- Frost sides and top of the cake. Serve immediately or cover and let sit overnight.
- For frosting, beat all ingredients in a bowl till smooth, adding enough milk to get a spreadable consistency.
Notes
- This chocolate cake is rich, moist, and perfect for any occasion.
- The frosting uses milk to achieve a spreadable consistency; adjust as needed.
- Prep Time: 15 minutes
- Cook Time: 35 minutes
- Category: Dessert
- Method: Baking
- Cuisine: American