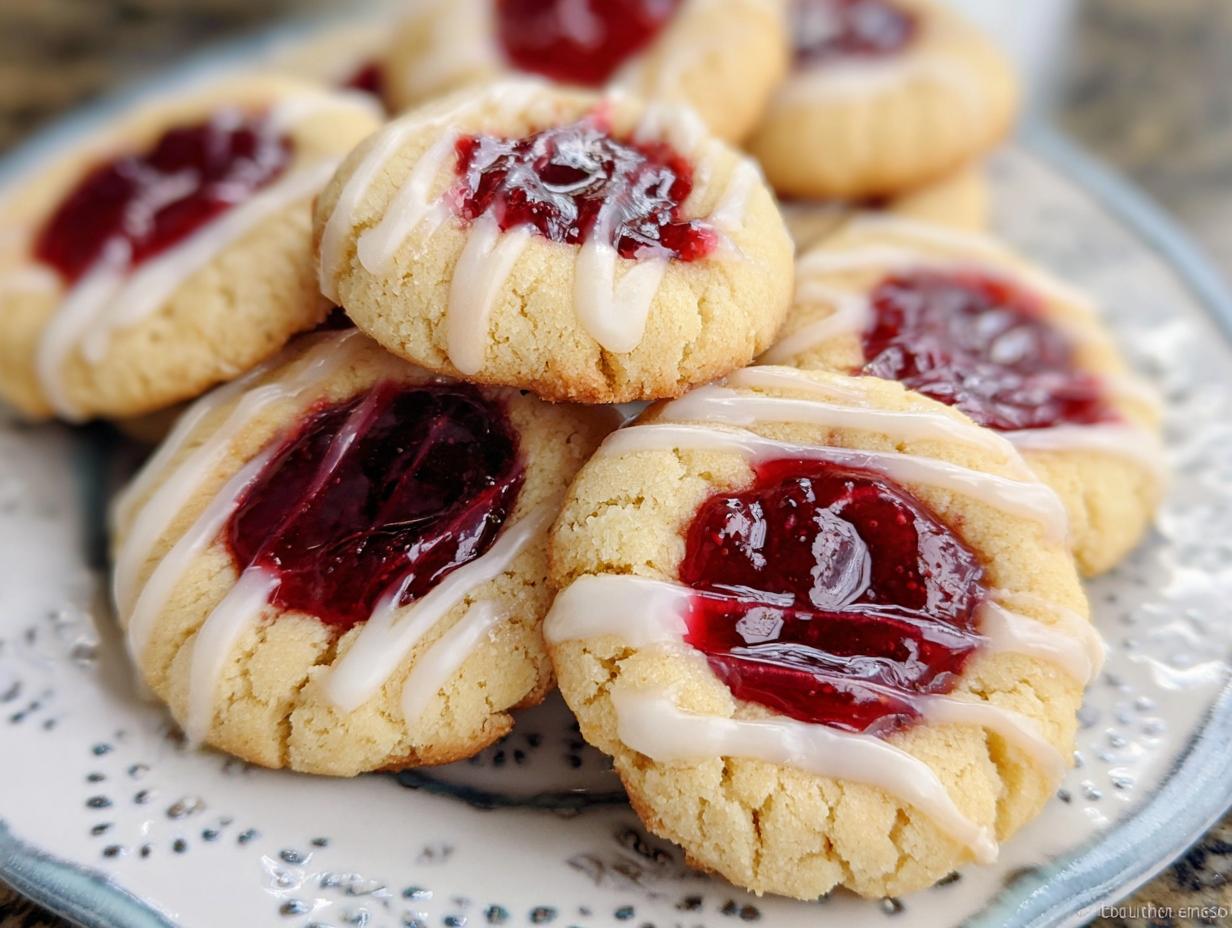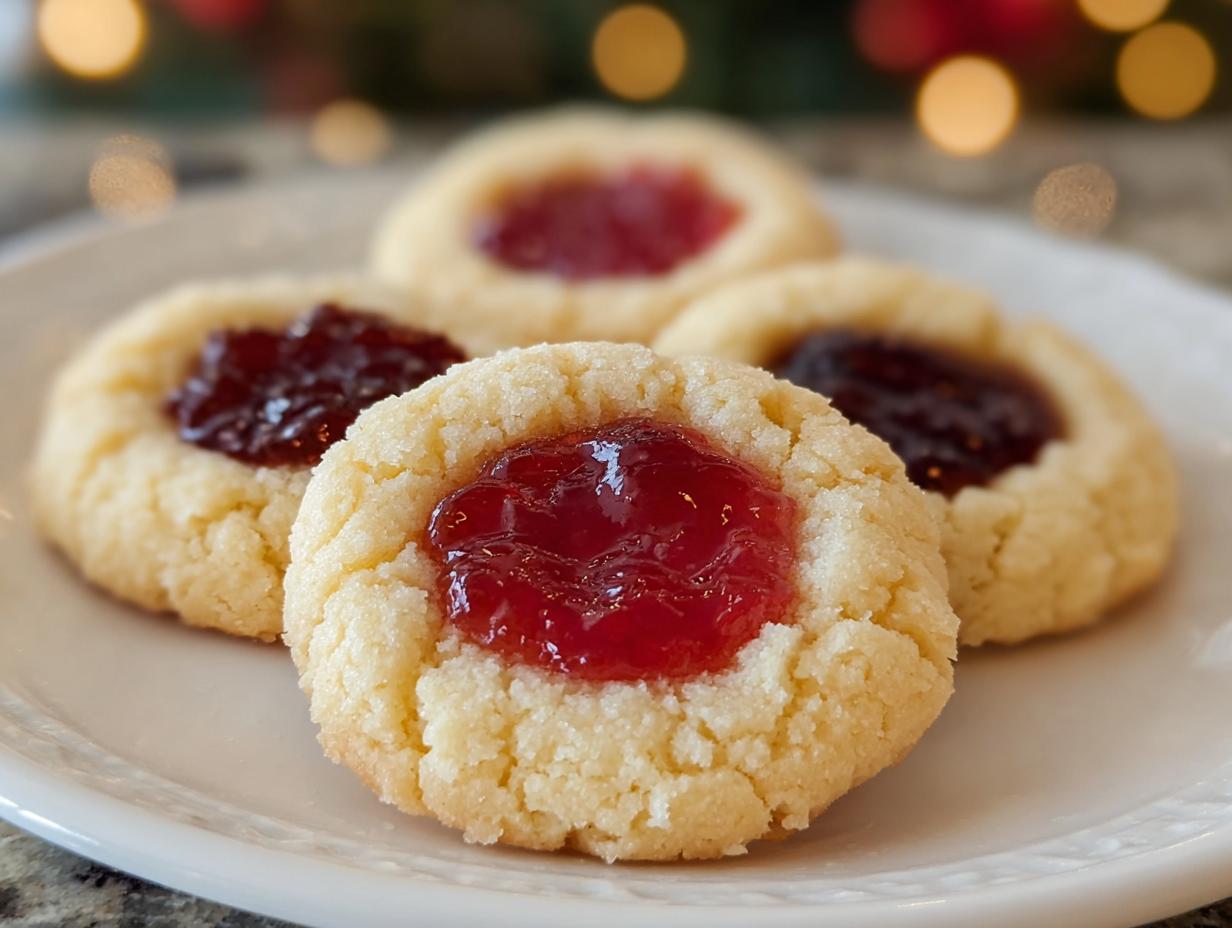
Thumbprint cookies 2025 are finally here, and I mean it when I say these are the easiest, prettiest cookies you will ever attempt—even if your kitchen usually looks like a flour bomb went off! When I first started NoobRecipes, I wanted to prove that baking didn’t need complicated techniques or fancy equipment. These buttery little gems are the perfect example of that philosophy. I remember trying to make a fancy shortbread cookie years ago for a holiday party, and it was a disaster; it crumbled into sand. That failure pushed me to find recipes that were structurally sound *and* delicious. These thumbprint cookies 2025 fit that bill perfectly. They are rich and tender because of the butter, but they hold their shape, and that little well of jam is pure genius. Seriously, if you can cream butter and press your thumb into some dough, you are ready to nail this recipe.

Essential Ingredients for Perfect Thumbprint Cookies 2025
Okay, let’s talk about what makes these Thumbprint cookies 2025 so wonderfully tender and rich. The secret isn’t some exotic spice; it’s making sure your basics are happy! You absolutely must use room temperature butter and egg. I know it’s tempting to just grab them straight from the fridge, but trust me, the butter needs to be soft enough to press a finger into easily so it creams up properly with the sugar. That creaming step is where all the air gets trapped, which gives us that beautiful, melt-in-your-mouth texture we are aiming for. Also, don’t skimp on the vanilla extract—a good splash makes a huge difference in grounding the sweetness!
Gathering Your Baking Supplies
You won’t need much fancy gear for this batch. Make sure you have a stand mixer or a sturdy hand mixer ready for creaming. You’ll also need a standard baking sheet. Parchment paper is great insurance, but not strictly necessary if you grease well. Grab a small spoon or your actual thumb for making the indentations, and a teaspoon for filling them with jam.
- 0.5 tsp baking powder
- 1 large egg (at room temperature)
- 2 tsp pure vanilla extract
- 1 cup white sugar
- 1 cup salted butter (softened)
- 2.5 cups all-purpose flour
- 1 cup jam (raspberry or apricot recommended)
Step-by-Step Instructions for Classic Thumbprint Cookies 2025
This is where the real magic happens, and trust me, it’s so much easier than you think! Before we even touch the mixer, get your oven ready. We want everything warm and waiting for these little beauties. Preheat your oven to 325\u00b0F (165\u00b0C). This slightly lower temperature helps keep the cookies tender instead of crisping them up too fast.
Mixing the Buttery Dough Base
Time to get that mixer going! In your bowl, start by creaming the softened butter, white sugar, and the baking powder together. You need to run the mixer on medium speed for a good 3 to 4 minutes. You’re looking for it to get noticeably lighter in color and fluffy—this is key for that perfect texture we talked about earlier in the ingredient section. Once it looks fluffy, scrape down the sides of that bowl, because we don’t want any unmixed bits hiding out!
Next, add your room temperature egg and beat it in until it’s fully incorporated. Then, drizzle in the vanilla extract and mix just a touch more. Now for the crucial part: the flour. With the mixer running on low speed, add the all-purpose flour gradually. And I mean gradually. This is where so many beginners go wrong! Stop mixing the absolute second you see no more dry streaks of flour. If you overmix the flour, you develop gluten, and suddenly your tender Thumbprint cookies 2025 turn into tough little hockey pucks. We want barely combined dough!

Shaping and Creating the Classic Thumbprint Cookies 2025 Indentation
Once the dough comes together, it’s time for the fun part—shaping! Scoop out the dough and roll it between your palms into nice, uniform 1-inch balls. Try to keep them all the same size so they bake evenly. Place them about an inch apart on your prepared baking sheet.
Now, you need to make that signature well. Take your thumb—make sure your hands are clean!—and gently but firmly press down into the center of each dough ball. You want a nice indentation, but don’t press all the way through to the bottom of the pan! You’re creating a tiny little nest for the jam. If you’re worried about making a mess, you can use the back of a small measuring spoon or even a greased wooden dowel instead of your thumb.
Finally, grab that jam. Raspberry or apricot are absolute winners here, but use what you love! Fill each little thumbprint with jam. Be brave and slightly overfill it. As the cookie bakes, the jam will melt and settle down, so if you fill it too sparsely now, you’ll end up with almost no center after baking. Pop those trays into the preheated oven and bake for about 20 minutes. Remember to rotate the tray halfway through so you get even browning all around. These Thumbprint cookies 2025 are done when the edges are just barely golden. Let them cool right on the hot pan for about five minutes before moving them gently to a wire rack to finish cooling completely. Patience here helps them set up perfectly!
Why You Will Love These Thumbprint Cookies 2025
Honestly, there’s no reason not to try these! I developed this recipe specifically for folks who think they can’t bake, and the results speak for themselves. These are the definition of high reward for low effort. If you are looking for a foolproof, buttery cookie that everyone asks you to bring to gatherings, look no further than these Thumbprint cookies 2025. They bake up beautifully every single time, provided you follow the mixing rules! If you enjoy easy baking, check out our recipe for easy jam cookies.
- Super Fast Prep: The total hands-on time is under 40 minutes, making them perfect for a weeknight baking session.
- Beginner Success Guaranteed: The dough is sturdy, forgiving, and doesn’t require rolling or cutting, which cuts down on beginner panic.
- Texture Perfection: They are incredibly tender and buttery, melting in your mouth right alongside that sweet, slightly tart jam center.
- Classic Holiday Flavor: Raspberry or apricot jam gives these the nostalgic taste everyone associates with holiday baking, even though they are great year-round!
Tips for Success with Your Thumbprint Cookies 2025
Even though these are beginner-friendly, there are a few little tricks that take your Thumbprint cookies 2025 from good to absolutely spectacular. I learned these the hard way, so you don’t have to! First, pay close attention to the indentations. If you press too lightly, the jam will bubble over the sides and burn slightly. If you press too hard, the cookie base might crack when you try to move it later. Aim for a deep, neat well.
Second, don’t skip rotating the pan halfway through baking! Seriously, ovens are funny about heat distribution. I once forgot to rotate a batch, and the cookies on the left were pale while the ones near the back element were nearly burnt. A quick 180-degree turn ensures they all get that beautiful, even golden edge.
Finally, if your dough feels a little too soft after mixing, that means your butter was probably too warm. Don’t freak out! Just pop the whole bowl into the fridge for about 15 minutes before rolling. Chilled dough is much easier to handle and rolls into those perfect little spheres.
Ingredient Notes and Simple Substitutions
Remember what I said about room temperature butter? It’s non-negotiable for the best texture. If your butter is too cold, it won’t cream properly. If it’s melted, the cookie will spread into a flat puddle instead of holding that nice round shape.
When it comes to the flour, mix it in gently and stop mixing immediately when the streaks disappear. If you keep the mixer going, you’re turning a simple butter cookie into something chewy, which is not what we want in a classic thumbprint. Also, while salted butter is specified here, you can use unsalted if you prefer, just add a tiny pinch of salt (about 1/4 teaspoon) to the dry mix.
Frequently Asked Questions About Thumbprint Cookies 2025
I know when you start a new recipe, especially one as classic as these, you end up with questions. That’s totally normal! I’ve gathered the most common things folks ask me about making these Thumbprint cookies 2025. Hopefully, this clears up any last doubts so you can get baking! If you want to see more of our baking adventures, follow us on Pinterest.
Q1. My jam bubbled over the sides and burned a little. What went wrong?
This is super common with jam cookies! It usually means you didn’t make the indentation deep enough, or you overfilled the little well. When you press your thumb in, aim for a nice, deep cup. You want the jam to sit nicely inside that cup, not piled high over the edges. Also, make sure you rotate the pan halfway through baking so the edges don’t brown too fast!
Q2. Can I use jelly instead of jam in my Thumbprint cookies 2025?
You certainly can, but jam is generally better for beginner baking projects like this one. Jam has pectin and fruit pieces, which help it stay put and give you that lovely texture. Jelly is much runnier, so it tends to melt and spread out more, potentially making your beautiful cookies look flatter.
Q3. My dough feels crumbly and hard to roll. Is it ruined?
Not at all! If your dough feels too stiff or crumbly, it means your butter was likely too cold when you started, or you added the flour a bit too aggressively. Take the dough, mash it back together gently, and let it sit on the counter for about 10 minutes to warm up slightly. If it’s still stiff, you can wet your hands slightly when rolling the balls; that little bit of moisture helps hold it together perfectly for the next step in making your Thumbprint cookies 2025.
Q4. Can I make these ahead of time for a party?
Yes! These are fantastic make-ahead holiday cookies. You can bake them completely and store them in an airtight container at room temperature for up to five days. They actually taste even better the next day once the jam has settled into the buttery cookie base!
Storing and Keeping Your Thumbprint Cookies Fresh
One of the best things about these classic Thumbprint cookies 2025 is that they are sturdy little guys! Unlike delicate shortbread, these jam cookies actually improve over a day or two once the flavors meld together. You do not need to keep them in the fridge at all, which is great for party planning when fridge space is tight. Just make sure they are completely cool—and I mean completely cool—before you seal them up.
If you try to store them while they are even slightly warm, condensation builds up inside the container, and suddenly your nice buttery cookie base gets soggy. Yuck! For best results, store them in a single layer if possible, or use parchment paper between layers to keep them from sticking together. They will stay fresh at room temperature for nearly a week! If you want to see more of our recipes, find us on Facebook.
| Storage Method | Duration | Notes |
|---|---|---|
| Airtight Container at Room Temp | Up to 7 Days | Ensure cookies are fully cooled first. |
| Freezer (Unfilled Dough Balls) | Up to 3 Months | Dough freezes well! Thaw slightly before pressing thumbprint and adding jam. |
Sharing Your Baking Achievements
I am so excited for you to try these Thumbprint cookies 2025! Seriously, if you nailed that buttery dough and have a tray full of colorful jam centers, I want to hear all about it. Head down to the comments below, tell me what jam you chose, and give this recipe a rating so other new bakers know it’s a winner. Happy baking!


Amazing Thumbprint cookies 2025 in 1 step
- Total Time: 40 minutes
- Yield: About 2 dozen cookies
- Diet: Vegetarian
Description
Bake classic thumbprint cookies with a sweet jam center. This simple recipe yields tender, buttery cookies perfect for beginners.
Ingredients
- 0.5 tsp baking powder
- 1 large egg (at room temperature)
- 2 tsp pure vanilla extract
- 1 cup white sugar
- 1 cup salted butter (softened)
- 2.5 cups all-purpose flour
- 1 cup jam (raspberry or apricot recommended)
Instructions
- Preheat your oven to 325°F (165°C).
- In a mixer, cream the softened butter, white sugar, and baking powder on medium speed for 3 to 4 minutes until light and fluffy.
- Scrape down the bowl sides. Add the egg and beat until incorporated. Add the vanilla extract and mix.
- With the mixer on low speed, gradually add the all-purpose flour. Mix only until the ingredients are barely combined.
- Roll the dough into 1-inch balls. Place them 1 inch apart on a baking sheet.
- Use your thumb or a rounded tool to make an indentation in the center of each dough ball.
- Fill each indentation with jam, slightly overfilling each one.
- Bake for about 20 minutes. Rotate the baking sheet halfway through baking for even results.
- Let the cookies cool on the pan for a few minutes before moving them to a wire rack to cool completely to room temperature.
Notes
- Use room temperature butter and egg for better dough consistency.
- Do not overmix the flour; mix only until just combined.
- Raspberry or apricot jam provides the best traditional flavor.
- Cooling on the rack allows the cookies to set properly.
- Prep Time: 20 minutes
- Cook Time: 20 minutes
- Category: Dessert
- Method: Baking
- Cuisine: American