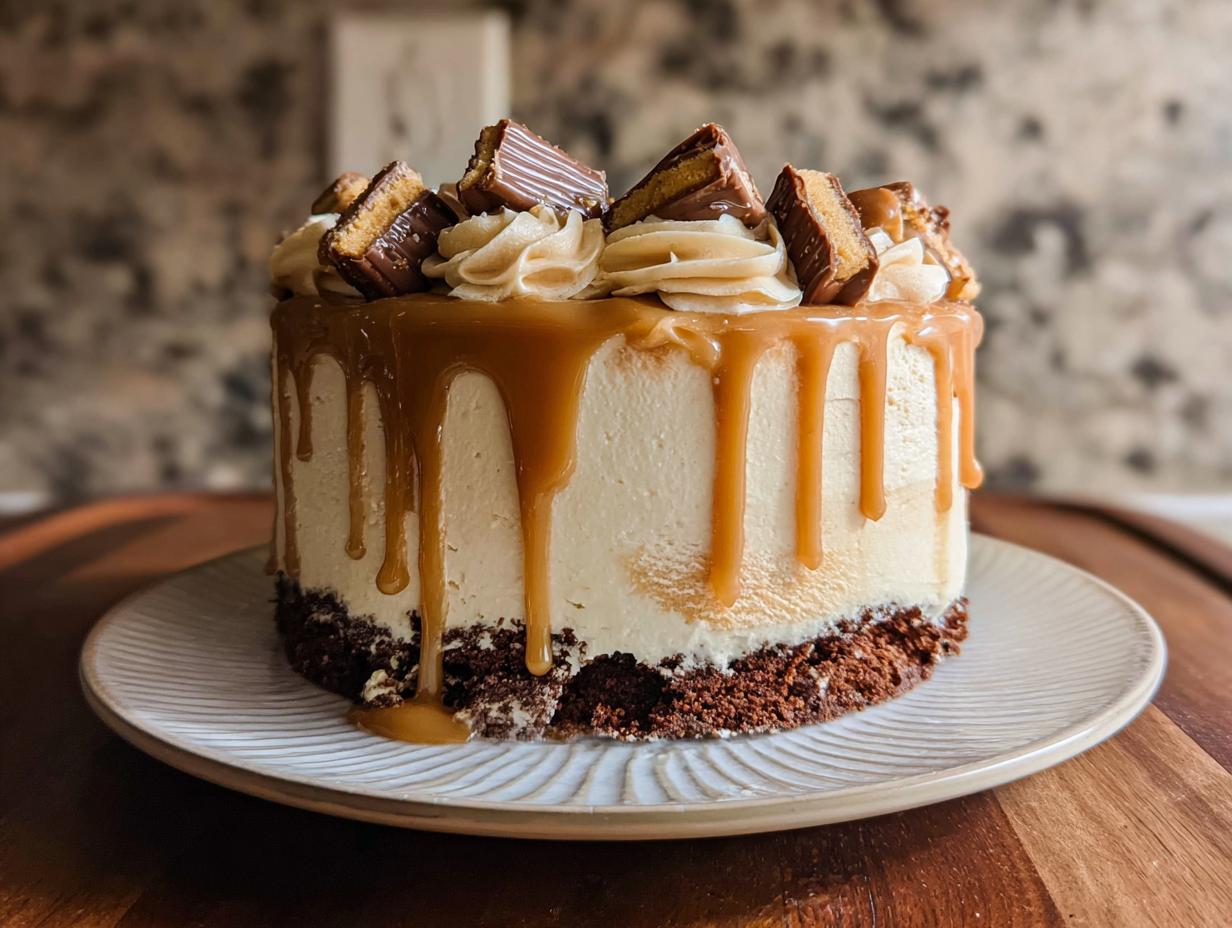
Twix Cake. Just saying it feels like a little bit of magic, right? When I first started NoobRecipes, I was terrified of anything that seemed too fancy. I remember looking at those elaborate layer cakes with all the swirls and drips and thinking, “No way, Adam, that’s way beyond you.” But then I realized something: most people, like me, just want to make something *delicious* that tastes amazing without needing a culinary degree. This Twix Cake is my answer to that. It’s got that incredible shortbread crust, layers of moist chocolate cake, and that dreamy caramel buttercream that just screams “Twix!” I’ve broken it down so you can totally nail it, even if your baking experience is, well, like mine used to be. Trust me, this is achievable, and it tastes out-of-this-world good.

Why You’ll Love This Twix Cake
Seriously, this Twix Cake is a game-changer for your baking repertoire. If you’ve ever looked at a gorgeous layer cake and thought, “Nope, not for me,” then this is the recipe you’ve been waiting for! It’s designed to make you feel like a total pro, even if you’re just starting out. Here’s why you’re going to be obsessed:
- Bakery-Quality Results at Home: You’ll get that showstopper look and incredible taste without needing a fancy bakery. This Twix Cake is proof that you can create magic in your own kitchen!
- Perfect for Any Occasion: Birthdays, holidays, or just because you deserve a treat – this cake fits the bill. It’s impressive enough for guests but totally doable for a weekend baking project.
- Impress Everyone: Get ready for the compliments! The layers of chocolate cake, that crunchy shortbread crust, and the smooth caramel buttercream are a flavor explosion your friends and family will rave about.
- A Truly Rewarding Project: We’ve broken down every step to make it super manageable. You’ll feel such a sense of accomplishment when you see this beauty come together.
- That Dreamy Twix Flavor: It’s all there – the buttery shortbread, the rich chocolate cake, and that gooey caramel. It’s basically your favorite candy bar turned into the ultimate dessert.
Ingredients for Your Twix Cake
Okay, let’s get down to business! Gathering your ingredients is half the fun, and having everything prepped makes the whole process so much smoother. Trust me on this one. We’ve got a few components, but they all come together beautifully. Here’s what you’ll need:
| Shortbread Crust: | |
| Unsalted butter, cold and cubed | 1 cup |
| Granulated sugar | 1/2 cup |
| All-purpose flour | 2 1/2 cups |
| Salt | 1/4 teaspoon |
| Chocolate Cake: | |
| All-purpose flour | 2 1/4 cups |
| Granulated sugar | 2 cups |
| Unsweetened cocoa powder | 3/4 cup |
| Baking soda | 2 teaspoons |
| Baking powder | 1/2 teaspoon |
| Salt | 1 teaspoon |
| Large eggs, room temperature | 3 |
| Buttermilk, room temperature | 1 cup |
| Vegetable oil | 1 cup |
| Vanilla extract | 2 teaspoons |
| Caramel extract (optional) | 2 teaspoons |
| Hot water | 1 cup |
| Caramel Shortbread (for shortbread portion of buttercream): | |
| Unsalted butter | 1/2 cup |
| Granulated sugar | 1/4 cup |
| All-purpose flour | 1 1/4 cup |
| Salt | 1/8 teaspoon |
| Caramel Shortbread Buttercream: | |
| Unsalted butter, slightly soft but still cold | 4 cups |
| Thick caramel (Sanders dessert topping recommended) | 3/4 cup |
| Shortbread crumbs | 2 cups |
| Powdered sugar, sifted | 10 cups |
| Heavy cream | 1/3-1/2 cup |
| Vanilla extract | 1 1/2 tablespoons |
| Caramel extract (optional) | 1 1/2 teaspoons |
| Salt | pinch |
Ingredient Notes and Substitutions
A couple of these ingredients might need a little explanation. First off, buttermilk is key for that tender chocolate cake. If you don’t have any, no worries! Just put a tablespoon of lemon juice or white vinegar in a measuring cup and fill it up to the 1-cup line with regular milk. Let it sit for 5 minutes – voilà, instant buttermilk! As for the caramel extract, it really boosts that Twix flavor, but if you can’t find it, you can just skip it or add an extra teaspoon of vanilla. The cake will still be amazing. And for the shortbread crumbs, make sure they’re ground up pretty fine, almost like sand, so they incorporate smoothly into the buttercream without any big chunks. This makes sure every bite is just perfect.
How to Prepare Your Twix Cake
Alright, aspiring cake wizards, this is where the magic really happens! We’re going to tackle each part of this Twix Cake step-by-step. Don’t feel overwhelmed; we’ll take it slow and steady. First up, that glorious shortbread crust!
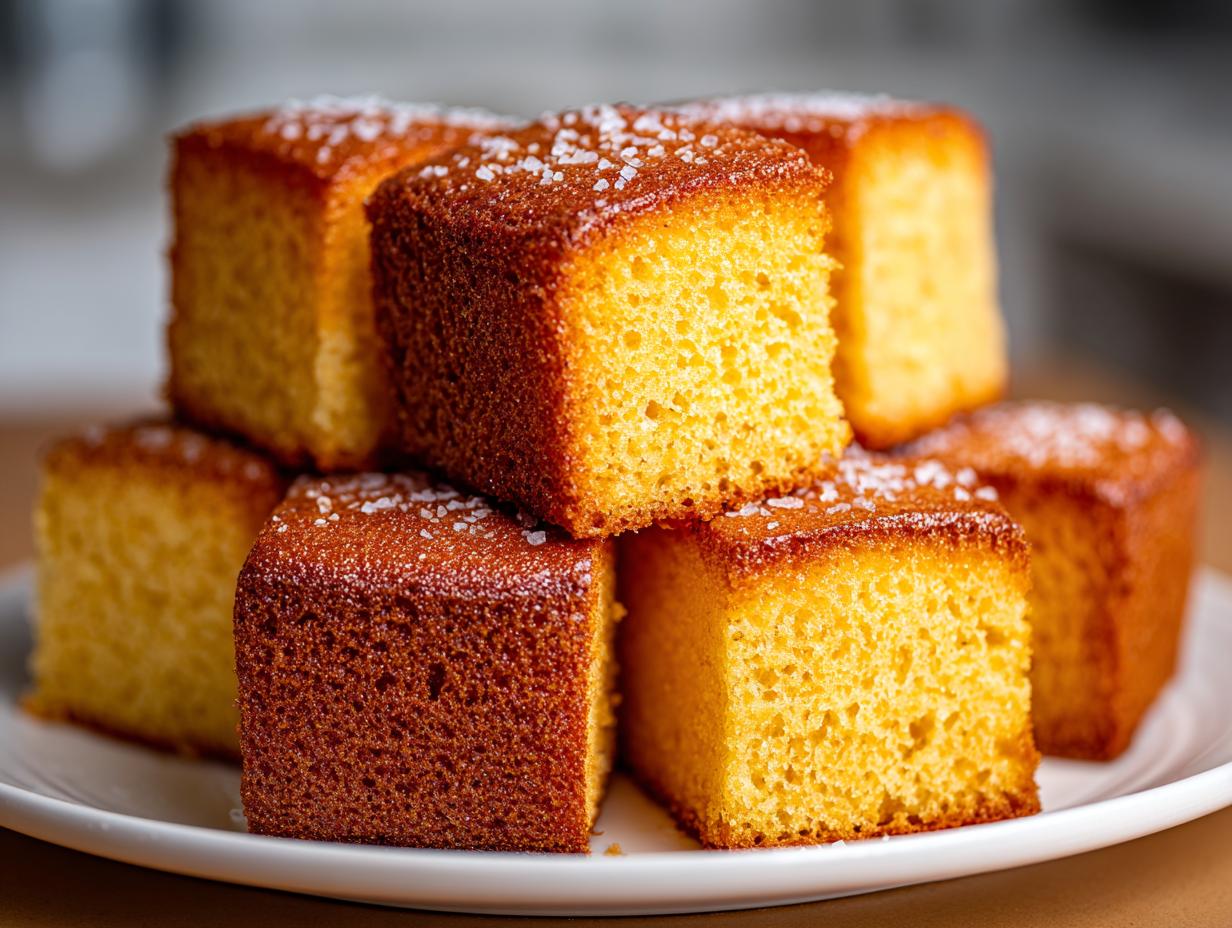
The Shortbread Crust
Preheat your oven to 325°F (that’s 160°C). Grab three 8-inch round cake pans. Give them a good spray with non-stick spray and then line the bottoms with parchment paper – this is your insurance policy against sticking, trust me!
In a medium bowl, mix your sugar, flour, and salt. Now, get your cold, cubed butter. You want to cut it into the dry ingredients using forks or a pastry blender. Keep going until the butter pieces are tiny, about the size of peas. It should look like coarse crumbs.
Divide this crumbly mixture evenly between your prepared pans. Press it down firmly and evenly. A flat-bottomed glass or your clean hands work perfectly for this. You want a nice, compact base.
Bake these for about 11 to 13 minutes. You’re looking for the edges to turn a lovely golden brown, and the centers should start showing just a hint of gold. Take them out to cool a bit in the pans, but leave the oven on – the cake layers are next!
The Chocolate Cake Layers
Now for the star of the show: the chocolate cake! In a medium bowl, whisk together the flour, sugar, cocoa powder, baking soda, baking powder, and salt. Make sure it’s all well combined so you don’t get pockets of unmixed ingredients later.
In your stand mixer (or a large bowl if you’re using a hand mixer), combine the eggs, buttermilk, vegetable oil, vanilla extract, and that optional caramel extract. Give it a quick mix until it’s all happily blended.
Now, add the dry ingredients to the wet. Mix until it’s just combined. Things might look a little thick, but don’t panic! Pour in the hot water and mix on medium speed until the batter is smooth and luscious. It’ll be quite thin, and that’s exactly what you want for a moist cake.
Divide this glorious chocolate batter evenly among your three cake pans, right on top of the baked shortbread. Bake for about 28 to 34 minutes. You’ll know they’re ready when a toothpick inserted into the center comes out with a few moist crumbs clinging to it – no wet batter, though!
Let the cakes cool in the pans for about 10 minutes before carefully inverting them onto a wire rack to cool completely. Patience here is key; you don’t want to frost a warm cake!
The Caramel Shortbread
While the cakes are cooling, let’s make the shortbread that’s going into our frosting and for our caramel layer. Preheat the oven again to 325°F (160°C) and line a baking sheet with parchment paper or a silicone mat.
Just like the crust, mix the sugar, flour, and salt in a medium bowl. Cut in the cold butter until you have those pea-sized pieces. Press this mixture evenly onto your prepared baking sheet, about ¼ inch thick. You can use a rolling pin if you have one.
Bake for 11 to 13 minutes, until the edges are golden. Let it cool completely on the baking sheet. Once it’s totally cool, break it up into pieces and pop it into a food processor. Pulse until it looks like fine sand. You can store this in an airtight container for a few days, or freeze it for longer storage.
The Caramel Shortbread Buttercream
This is the frosting dreams are made of! In your stand mixer bowl, beat the butter (make sure it’s slightly soft but still cold – this is important!) and salt until it’s super smooth and looks lighter in color. This might take a few minutes.
Add in the thick caramel and your processed shortbread crumbs. Beat it all together until it’s one glorious, homogenous mixture. Now, start adding the sifted powdered sugar, a couple of cups at a time, mixing well after each addition. As it starts to get really thick, drizzle in the heavy cream, vanilla extract, and optional caramel extract. Keep adding powdered sugar and cream until you reach your desired spreading consistency.
Once all the ingredients are in, beat the frosting on high speed for a good 2-3 minutes. This makes it super light and fluffy. You can make this a day or two ahead and keep it in the fridge. Just let it sit out for a couple of hours before assembling the cake, then give it a quick re-beat in the mixer until it’s smooth and spreadable again.
Assembling Your Twix Cake
It’s assembly time! Grab your cake board or stand and put a little dollop of buttercream on it – this stops the first layer from sliding around. Place your first cake layer, shortbread side down, on top of that dab of frosting.
Spread a nice, even, thin layer of buttercream over the top of the cake. Now, here’s a cool trick: pipe a rim of buttercream around the very top edge of that layer. This creates a little dam. Carefully spoon about 2/3 cup of that thick caramel inside the dam. Don’t overfill, or it’ll ooze out everywhere and make things messy!
Place your second cake layer on top, shortbread side down again. Repeat the process: a thin layer of buttercream, then pipe that dam, and fill it with caramel. Add your third and final cake layer.
Now, give the entire cake a thin, even coat of frosting. This is called a crumb coat, and it traps all those loose crumbs. Pop the cake in the fridge for about 10-15 minutes, or until the frosting is firm to the touch. This makes the final frosting layer so much cleaner!
Once it’s chilled, add your final, beautiful layer of frosting all over the cake. If you want to add those extra fancy caramel drips, just warm up a little extra caramel in the microwave for a few seconds until it’s pourable, put it in a piping bag, and drizzle it around the top edge. Fill the top with more caramel, and then use a Wilton 1M tip (or similar) to pipe those gorgeous swirls on top. You can even stick little pieces of Twix bars in there for extra flair!
Tips for Twix Cake Success
Alright, let’s make sure your Twix Cake turns out absolutely perfect! A few little tricks can make a world of difference, especially for us home bakers. First off, for the chocolate cake layers, make sure your ingredients like eggs and buttermilk are at room temperature. This helps everything mix together smoothly and creates a better texture. And please, please, please don’t overmix that cake batter once you add the flour – just mix until it’s combined. Overmixing makes for a tough cake, and we definitely don’t want that!
When you’re baking the shortbread crusts and layers, keep an eye on them. They bake pretty quickly, and you want that nice golden edge without burning. For the buttercream, remember that cold butter is key for that fluffy texture. If it gets too soft, just pop it back in the fridge for a few minutes before beating it again. And for the assembly, that crumb coat is your best friend. Chilling the cake after that first thin layer of frosting makes applying the final coat so much easier and cleaner!
Equipment You’ll Need for Your Twix Cake
To make this amazing Twix Cake, you’ll want to have a few key tools ready to go. Having everything laid out beforehand really makes the baking process so much smoother, especially for us beginners! You’ll definitely need a few mixing bowls of various sizes, along with your trusty measuring cups and spoons. A whisk and a spatula are essential for mixing and scraping down bowls. An electric mixer, either a stand mixer or a good hand mixer, will be a lifesaver for the cake batter and especially the buttercream. Make sure you have three 8-inch round cake pans and some parchment paper to line them. Cooling racks are crucial for letting those cake layers cool down properly. A food processor will make quick work of turning your baked shortbread into fine crumbs. And if you’re feeling fancy with the decorating, grab some piping bags and tips – a star tip like a Wilton 1M is perfect for those swirls! Lastly, a cake board or a sturdy serving plate will be your base for assembly.
Frequently Asked Questions About Twix Cake
Got questions about whipping up this incredible Twix Cake? I’ve got you covered! We’ve all been there, staring at a recipe and wondering about the little details, so let’s clear things up.
Q1. Can I make the Twix Cake ahead of time?
Absolutely! This is great news for busy bakers. You can make the individual components – the shortbread crusts, the chocolate cake layers, the caramel shortbread crumbs, and the caramel buttercream – a day or two in advance. Store the cooled cake layers at room temperature, well-wrapped, or freeze them for up to a month. The buttercream can be stored in the fridge and then re-beaten until smooth before assembly. Just assemble the cake the day you plan to serve it for the best texture, especially with the caramel filling.
Q2. What can I use if I don’t have caramel extract?
No caramel extract? No problem at all! The cake will still be wonderfully delicious. You can simply omit it, or if you want to boost that caramel flavor a bit more, add an extra teaspoon or two of vanilla extract to both the cake batter and the buttercream. The thick caramel sauce and the shortbread elements already give it a fantastic caramel-shortbread vibe, so you won’t miss the extract too much!
Q3. How do I store leftover Twix Cake?
Leftovers are the best, right? Store any leftover Twix Cake in an airtight container at room temperature for up to 2 days. If your kitchen is really warm, or if you’ve added a lot of caramel filling, it’s best to refrigerate it. When you’re ready to enjoy a slice, let it sit out for about 15-20 minutes to come back to room temperature so the buttercream is nice and soft.
Q4. Is this Twix Cake recipe suitable for a birthday party?
Oh, 100%! This Twix Cake is practically *made* for celebrations. It looks incredibly impressive with its layers and the optional caramel drips and swirls, and that combination of chocolate cake, shortbread, and caramel is a crowd-pleaser for sure. It’s a bit of a project, but totally manageable for a beginner, and the “wow” factor when you present it is huge. Your birthday person (or guests!) will be absolutely thrilled.
Estimated Nutritional Information for Twix Cake
Baking up this delicious Twix Cake is totally worth it, and knowing a little about what’s in each slice can be helpful! Keep in mind that these are just estimates, and the exact numbers can change a bit depending on the specific brands of ingredients you use. Here’s a general idea of what you can expect in one serving:
| Serving Size | 1 slice |
| Calories | Approx. 650 kcal |
| Fat (Total) | Approx. 38g |
| Saturated Fat | Approx. 22g |
| Unsaturated Fat | Approx. 16g |
| Trans Fat | Approx. 0.5g |
| Carbohydrates (Total) | Approx. 75g |
| Fiber | Approx. 3g |
| Sugar | Approx. 70g |
| Protein | Approx. 6g |
| Sodium | Approx. 300mg |
| Cholesterol | Approx. 120mg |
Storing and Reheating Your Twix Cake
Got leftover Twix Cake? Lucky you! To keep it tasting its absolute best, proper storage is key. For the shortcake layers and buttercream, you can store them separately in airtight containers. The cake layers will be happy at room temperature for about 2 days, or you can pop them in the fridge for up to 4 days. The buttercream is best kept in the fridge and will last for about a week.
Once the cake is fully assembled, it’s best to store it in an airtight container or cake dome. It’ll stay delicious at room temperature for up to 2 days. If your kitchen is on the warmer side, or if you’ve got a lot of that gooey caramel filling, pop it in the fridge. Just remember to let it sit out on the counter for about 20-30 minutes before you want to serve it again, so the buttercream softens up nicely. Reheating isn’t usually necessary, as room temp is ideal, but a few seconds in the microwave can soften a cold slice if needed.
Print
Amazing Twix Cake: 3 Layers of Joy
- Total Time: 1 hour 45 minutes
- Yield: 12 servings
- Diet: Vegetarian
Description
A decadent Twix-inspired cake featuring a shortbread crust, moist chocolate cake layers, and a rich caramel buttercream, designed for home bakers of all skill levels.
Ingredients
- Shortbread Crust:
- 1 cup unsalted butter, cold and cubed
- 1/2 cup granulated sugar
- 2 1/2 cups all-purpose flour
- 1/4 teaspoon salt
- Chocolate Cake:
- 2 1/4 cups all-purpose flour
- 2 cups granulated sugar
- 3/4 cup unsweetened cocoa powder
- 2 teaspoons baking soda
- 1/2 teaspoon baking powder
- 1 teaspoon salt
- 3 large eggs, room temperature
- 1 cup buttermilk, room temperature
- 1 cup vegetable oil
- 2 teaspoons vanilla extract
- 2 teaspoons caramel extract (optional)
- 1 cup hot water
- Caramel Shortbread (for shortbread portion of buttercream):
- 1/2 cup unsalted butter
- 1/4 cup granulated sugar
- 1 1/4 cup all-purpose flour
- 1/8 teaspoon salt
- Caramel Shortbread Buttercream:
- 4 cups unsalted butter, slightly soft but still cold
- 3/4 cup thick caramel (Sanders dessert topping recommended)
- 2 cups shortbread crumbs
- 10 cups powdered sugar, sifted
- 1/3-1/2 cup heavy cream
- 1 1/2 tablespoons vanilla extract
- 1 1/2 teaspoons caramel extract (optional)
- pinch salt
Instructions
- Shortbread Crust Instructions:
- Preheat oven to 325º F.
- Prepare three 8-inch round cake pans by spraying with nonstick spray and lining the bottom with parchment paper.
- In a medium-sized mixing bowl, combine sugar, flour, and salt. Using forks or a pastry cutter, cut in the cold, cubed butter until the pieces of butter are no larger than the size of a pea.
- Divide mixture evenly into the prepared cake pans. Press firmly and evenly into the pans using the bottom of a glass or clean hands.
- Bake for 11-13 minutes or until edges are golden brown and centers are just starting to get some golden color.
- Remove from oven to cool slightly, but leave the oven at 325º F to bake the cake layers.
- Chocolate Cake Instructions:
- In a medium bowl, whisk the flour, sugar, cocoa, baking soda, baking powder, and salt.
- In the bowl of a stand mixer fitted with a paddle attachment, mix the eggs, buttermilk, vegetable oil, vanilla, and caramel extract (if using) until combined.
- Add the dry ingredients to the stand mixer and mix until combined. Pour in the hot water and mix on medium speed until combined.
- Divide batter evenly between the cake pans and bake for 28-34 minutes or until a toothpick comes out with a few moist crumbs but no wet batter.
- Remove cakes from the oven and allow to cool for 10 minutes. Remove from the cake pans and allow cakes to cool on a cooling rack until completely cool.
- Caramel Shortbread (for the shortbread):
- Preheat the oven to 325° F and line a baking sheet with parchment paper or a silicone baking mat.
- In a medium-sized mixing bowl, combine sugar, flour, and salt. Using forks or a pastry cutter, cut in the cold, cubed butter until the pieces of butter are no larger than the size of a pea.
- Press the mixture firmly and evenly into the center of the baking sheet. Press or roll out with a rolling pin until it’s about ¼ inch thick.
- Bake for 11-13 minutes or until edges are golden brown and center is starting to get some golden color. Let cool completely.
- Once cool, break the shortbread into pieces and process in a food processor until it resembles fine sand. Store in an airtight container at room temperature for up to 4 days, or frozen for up to 4 weeks.
- Caramel Shortbread Buttercream:
- Beat butter and salt until smooth and light in texture and color. Add the caramel and shortbread crumbs and beat until the mixture is homogenous.
- Add the powdered sugar, a couple cups at a time, mixing between each addition. Add heavy cream, vanilla, and caramel extract (if using) as the mixture starts to get really thick.
- Once all of the ingredients have been added, beat on high for 2-3 minutes.
- This can be made a few days in advance and stored in the refrigerator. Set the buttercream out to come to room temperature a few hours before assembling the cake. Once the frosting has softened, beat in a stand mixer until smooth and spreadable.
- Assembly:
- Place a cake layer, crust side down, on a cake board or stand that has a small dollop of buttercream on it. This will help keep the cake from sliding around as you assemble it.
- Spread a thin layer of buttercream evenly over the top of the cake layer.
- Pipe a rim of buttercream around the top edge of the cake layer to create a dam, and add about 2/3 cup caramel inside the buttercream dam. Be sure to not overfill the cake as it will seep out when you add the next layer and make the cake unstable and difficult to finish icing.
- Repeat steps 2 and 3 with the second layer of cake, placing it on top of the first layer.
- Place the third cake layer on top and crumb coat the entire cake in a thin layer of buttercream. Refrigerate or freeze for a few minutes, until the buttercream is cold and no longer soft.
- Add the final layer of frosting around the entire cake.
- Optional decoration: Warm up extra caramel from the filling for a few seconds in the microwave, put it in a piping bag, and add a drip around the sides of the cake. Fill in the top with caramel as well. Use a Wilton 1M piping tip to create swirls topped with pieces of Twix candy bars.
Notes
- This is a big batch of buttercream. It will make enough for the swirls on top of the cake, plus a little extra.
- Make half batches of buttercream if your mixer bowl is small.
- A smaller buttercream batch (just enough to frost without decorations): 3 cups butter, ½ cup caramel, 1 ½ cups shortbread crumbs, 7 ½ cups powdered sugar, ¼-1/3 cup heavy cream, 1 tablespoon vanilla extract, 1 teaspoon caramel extract, Pinch of salt.
- Each element can be made ahead and stored in the fridge or freezer.
- Prep Time: 45 minutes
- Cook Time: 60 minutes
- Category: Dessert
- Method: Baking
- Cuisine: American