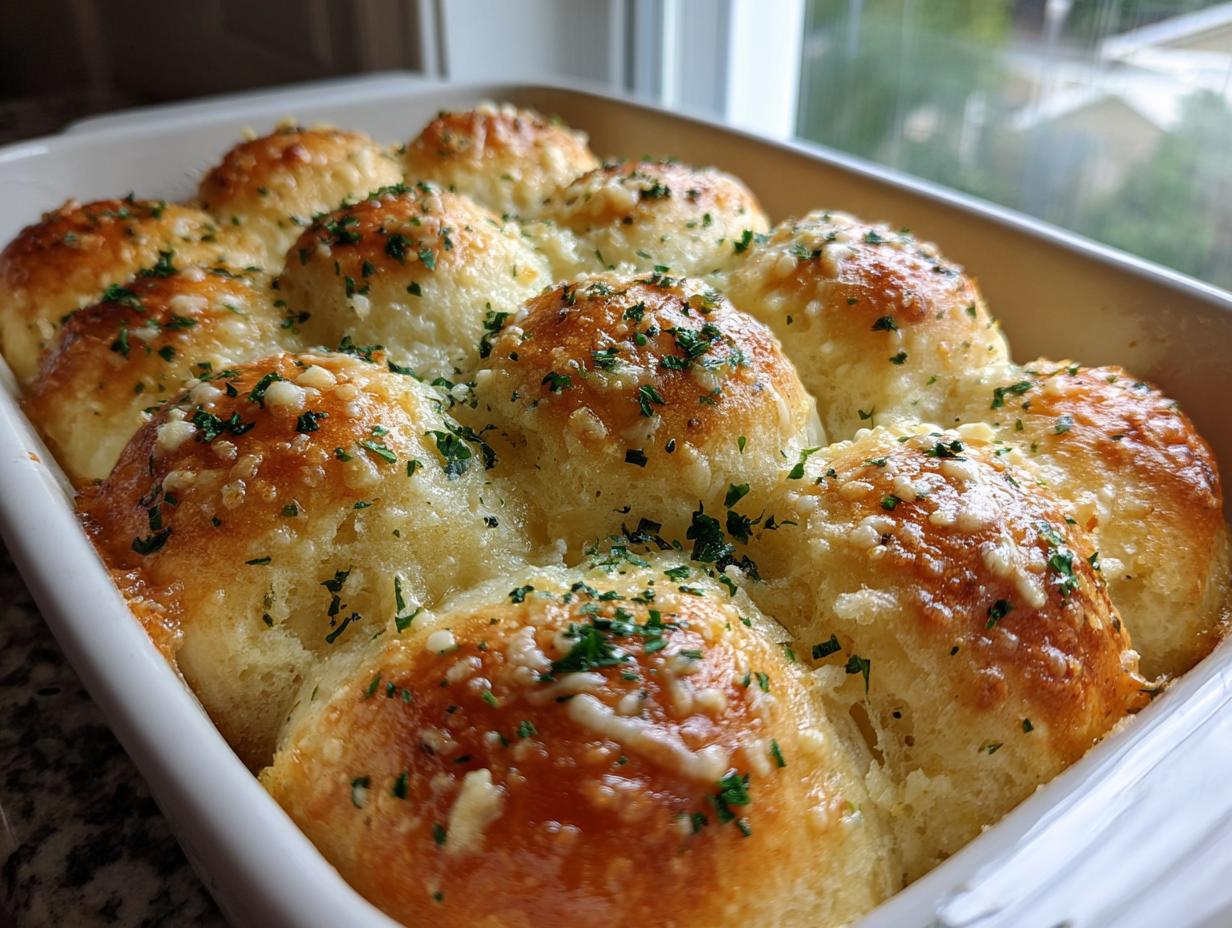
Best Ever Garlic Parmesan Dinner Rolls—that’s what I call them, and trust me, you’re going to feel like a baking wizard after making these! When I first started NoobRecipes, I was terrified of yeast. Seriously, I thought if the yeast didn’t foam up instantly, the whole batch was doomed. I remember trying to make a basic batch of rolls for a potluck and ending up with little dough hockey pucks. Total disaster!
But these Best Ever Garlic Parmesan Dinner Rolls changed everything for me. They are designed for people like us—the ones who want that incredible, pull-apart, buttery bread experience without the stress. The secret is really in the kneading time and the double rise, which builds that amazing fluffy texture. You get rolls that are so soft on the inside, and then you smother them in garlic butter and cheese. It’s heaven! If you’ve ever been scared of making bread from scratch, this recipe is your confidence booster. These Best Ever Garlic Parmesan Dinner Rolls prove you don’t need years of experience to make something truly spectacular.

Why You Will Make These Best Ever Garlic Parmesan Dinner Rolls
I get it; weeknights are busy, and sometimes you just want to grab a tube of dough from the fridge. But trust me, once you see how fast this dough comes together, you won’t go back to the store-bought stuff. These rolls are miles better than anything frozen or canned. They are soft, they smell divine while baking, and they disappear instantly at any dinner table setting.
Here’s why these are going to become your go-to recipe:
Quick Prep Time
The active time you spend on these is ridiculously low—less than 30 minutes of actual work! The rest of the time is just waiting for the yeast to do its magic. You mix it, forget it for an hour, shape it, and then bake. Perfect for when you want homemade bread but don’t want to spend the whole day baking.
Unbeatable Softness and Flavor
The texture is the real selling point here. You get this impossibly fluffy, pillowy interior thanks to the specific kneading time. Then, that outside crust gets crispy from the egg wash, but it’s immediately soaked in melted butter, fresh garlic, and salty Parmesan. That savory coating is what earns these the title of the Best Ever Garlic Parmesan Dinner Rolls.
Essential Equipment for Your Best Ever Garlic Parmesan Dinner Rolls
You don’t need a professional bakery setup for these rolls, which is great news for us beginners! Having the right tools just makes the process smoother and cleaner. I always make sure I have these items ready before I even touch the flour.
- A stand mixer with a dough hook attachment (though you can do it by hand, the mixer saves your arm!).
- Two 8-inch round baking pans or one 9×13 inch baking dish.
- A good quality box grater for that fresh garlic.
- A small saucepan for melting that glorious garlic butter topping.
- A silicone pastry brush for applying the egg wash and the final butter coat.
Gathering Your Ingredients for Best Ever Garlic Parmesan Dinner Rolls
Getting all your ingredients ready before you start mixing is what I call ‘mise en place,’ and it’s the secret weapon for any beginner baker. When you’re working with yeast, you don’t want to be scrambling for the salt while your water is cooling down! For these Best Ever Garlic Parmesan Dinner Rolls, we split the ingredients into two main groups: what makes the dough soft and what makes the topping famous. Quality matters here, especially with the cheese and the garlic!
Soft Dough Components
The magic starts with the yeast activator. You need warm water—and I mean *warm*, not hot! Think bathwater temperature, around 110 degrees F. If it’s too hot, you kill the yeast, and if it’s too cold, it sleeps forever. We mix that with sugar to wake it up, along with softened butter for richness. Then, the flour, salt, and that first quarter cup of Parmesan go right in. That bit of cheese inside the dough adds an amazing depth you just can’t get otherwise.
Savory Garlic Parmesan Topping
This is where the *wow* factor comes from. Don’t even think about using garlic powder here; it just won’t cut it! We melt six tablespoons of butter slowly and infuse it with three cloves of freshly minced garlic. You want that pungent, sharp flavor melting into the butter. The final dusting of finely grated Parmesan and fresh parsley brightens everything up. That fresh garlic is non-negotiable for these rolls!
Ingredient Preparation Table
Here is the full list. Double-check your measurements before you start mixing, especially the yeast and salt!
| Ingredient | Amount | Preparation Note |
|---|---|---|
| Warm Water | 1 1/2 cups | Must be 110°F (43°C) |
| Instant Yeast | 1 tablespoon | No proofing needed if instant |
| Granulated Sugar | 2 tablespoons | For activating yeast |
| Unsalted Butter (Dough) | 2 tablespoons | Softened to room temperature |
| All-Purpose Flour | 4 cups (about 500 g) | Measure accurately or weigh |
| Kosher Salt | 1 teaspoon | Do not substitute with table salt |
| Parmesan (in dough) | 1/4 cup | Finely grated |
| Egg | 1 large | For optional egg wash |
| Unsalted Butter (Topping) | 6 tablespoons | Melted |
| Garlic | 3 cloves | Grated or minced very fine |
| Parmesan (topping) | 1/4 cup | Finely grated |
| Parsley | 1 tablespoon | Freshly chopped |
Step-by-Step Instructions for Best Ever Garlic Parmesan Dinner Rolls
Now for the fun part! This is where we turn simple flour and water into something incredible. Don’t rush the rising stages; that’s where the flavor and air pockets develop. I’m walking you through exactly how I make these rolls so they come out perfect every single time.
Activating the Yeast and Mixing the Dough
First things first, let’s wake up that yeast! Grab your stand mixer bowl—or a big sturdy bowl if you’re mixing by hand. Pour in the 1 1/2 cups of warm water (remember, 110 degrees F is the sweet spot). Stir in the tablespoon of instant yeast and the sugar. Give it just five minutes. You should see a nice foamy layer forming on top. If you see foam, you’re good to go! If you see nothing, your water was probably too hot or too cold, and you’ll need to start that small step over.
Next, add the softened butter, the salt, the flour, and that first 1/4 cup of Parmesan cheese right into the foamy mixture. Attach the dough hook and turn the mixer to medium speed. You need to knead this dough for about five to seven minutes. We are looking for a dough that is smooth, elastic, and pulls away from the sides of the bowl cleanly. If your dough is just a sloppy mess that sticks everywhere, add flour one tablespoon at a time, but be careful! Too much flour and you lose that pillowy interior we are aiming for.
The First Rise: Creating Fluffy Best Ever Garlic Parmesan Dinner Rolls
Once the dough looks good—it should feel smooth, maybe slightly tacky but not sticky—turn off the mixer. Lightly grease a clean bowl with a little oil. Pop the dough ball in there, turn it over once to coat it lightly, and cover the bowl tightly with plastic wrap or a clean kitchen towel. Now, find the warmest, draft-free spot in your kitchen. An oven that’s off but has the light on works great, or just a sunny windowsill.
We need patience here. Let the dough sit until it has doubled in size. This usually takes between 45 and 60 minutes, depending on how warm your kitchen is. Don’t peek constantly; just let it do its thing. This first rise is essential for developing the structure of your Best Ever Garlic Parmesan Dinner Rolls.
Shaping and Second Proofing
Time to get those pans ready! Grease two 8-inch round pans or one 9×13 pan really well. When the dough has doubled, gently punch it down to release the air. Now, divide that dough into 16 perfectly equal pieces. I like to use a kitchen scale for this, but if you don’t have one, try to eyeball them as closely as you can. Roll each piece into a tight little ball between your palms.
Place the dough balls into your prepared pan(s), spacing them slightly apart. They need room to grow! Cover the pans again and let them rest for a second proof. This second rise is shorter, usually 25 to 40 minutes. You want them to look puffy and be almost touching each other before they go into the oven. While they are puffing up, get that topping ready!

Baking and Applying the Garlic Butter Topping
Preheat your oven to 375 degrees F (190 degrees C). If you want that beautiful, shiny, golden crust, brush the tops of the puffy rolls lightly with the optional egg wash. Bake them for 18 to 22 minutes. How do you know they are done? You can use a thermometer—aim for an internal temperature between 195 and 200 degrees F. If you don’t have one, look for a deep golden brown color.
Here’s the most important trick for making these the Best Ever Garlic Parmesan Dinner Rolls: the topping goes on IMMEDIATELY. As soon as they come out of the oven, melt your 6 tablespoons of butter with the minced garlic over low heat until fragrant. Brush this hot, garlicky butter generously all over the hot rolls. Then, quickly sprinkle on the rest of the Parmesan and the chopped parsley. Let them sit for 10 minutes to soak up all that flavor before you pull them apart. Enjoy!
Tips for Perfect Best Ever Garlic Parmesan Dinner Rolls
Even with an easy recipe like this, sometimes things don’t go exactly as planned, especially when you are working with yeast for the first time. Don’t sweat it! I’ve learned a few tricks over the years to save a batch or to make sure I get the softest possible results on a busy day.
Managing Dough Stickiness
If you followed the steps, your dough should be smooth, but sometimes the flour just absorbs liquid differently depending on humidity. If your dough is so sticky it’s practically glue, resist the urge to dump in a whole cup of extra flour! That’s the fastest way to end up with dry, tough rolls. Instead, sprinkle just one tablespoon of flour onto your work surface or mixer bowl at a time, kneading it in fully before adding more. We want soft, not stiff.
Achieving Maximum Softness
This is a pro tip I picked up from watching my mom bake: pull the rolls out just a minute or two *before* they look completely done, especially if you like them super pillowy. The temperature inside the oven might say 20 minutes, but the residual heat—what we call carryover heat—will keep cooking them for a few minutes after they come out. This keeps the internal texture unbelievably soft, guaranteeing you the fluffiest bites possible.
Make-Ahead Strategy
If you want these amazing rolls for a big holiday breakfast or party but don’t want to wake up at 4 AM, use the overnight method. After you shape the dough balls in the pan in Step 5, cover them tightly with plastic wrap and stick the whole pan right into the refrigerator. They will proof very slowly overnight. Just pull them out the next morning, let them sit on the counter until they are puffy (about an hour), and then bake them off. It’s a lifesaver!
Frequently Asked Questions About These Rolls
I know you might have questions, especially if this is your first time working with yeast dough. That’s totally fine! I struggled with the basics for ages, so please ask away. These rolls are forgiving, but getting the yeast right makes a huge difference in achieving those perfect soft dinner rolls.
Can I use a different type of cheese instead of Parmesan?
You absolutely can swap the cheese, but you need to stick to hard, salty cheeses. Parmesan is ideal because it melts nicely and adds that sharp, savory punch. If you don’t have it, Pecorino Romano works great, but it’s saltier, so maybe cut back on the kosher salt in the dough slightly. You could also try a good quality Asiago. Just avoid soft cheeses like mozzarella; they release too much water and make the dough gummy.
How do I ensure these soft dinner rolls stay fresh?
The best way to keep them fresh is to eat them the day you bake them, obviously! But if you have leftovers, store them in an airtight container at room temperature for up to three days. Don’t put them in the fridge unless you absolutely have to, because the cold air hardens the bread structure quickly. We have a great section coming up on reheating to bring them right back to that fresh-from-the-oven state.
My yeast did not foam. What went wrong?
This is the number one beginner hiccup! If you see zero foam after five minutes, it almost always means one of two things: your water was way too hot and killed the yeast, or your yeast was old and expired. Water temperature is crucial; always check it with a thermometer if you can—it needs to be around 110 degrees F. If you’re sure the temperature was right, try activating the yeast again with a fresh packet; sometimes you just get a dud batch!
Storing and Reheating Your Homemade Rolls
These rolls are so good, you’ll definitely have leftovers—or maybe you planned ahead using the overnight method! The key to keeping these savory rolls tasting fresh is how you store them and, more importantly, how you reheat them. You want to bring back that initial pillowy softness and re-melt that gorgeous garlic butter layer. Don’t just microwave them plain; they’ll turn tough fast!
Storage Guidelines Table
Keep this chart handy so you know exactly how long you can save those delicious leftovers. Always make sure the rolls are completely cooled before storing them, unless you are refrigerating for the overnight proof, of course!
| Storage Location | Duration | Reheating Tip |
|---|---|---|
| Countertop (Airtight Container) | Up to 3 Days | Wrap in foil; reheat at 350°F for 5-7 minutes. |
| Refrigerator | Up to 5 Days | Wrap tightly in foil; bake at 325°F for 10 minutes to thaw and warm. |
| Freezer (Airtight Bag) | Up to 3 Months | Thaw overnight on counter, then reheat wrapped in foil as above. |
Sharing Your Baking Success
I hope these rolls bring you as much joy as they bring my family. Seriously, when you pull that pan out of the oven, you’ll want to take a picture! Let me know how they turned out for you—did you use the egg wash? Did the kids devour them instantly? I love hearing about your successes on your baking journey. You can always share your results with us on Facebook or save this recipe on Pinterest!
Rate This Recipe
If you mastered these rolls and they earned the “Best Ever” title in your house, please take a minute and leave a star rating below. It really helps other beginner bakers trust the recipe!
Print
Amazing Best Ever Garlic Parmesan Dinner Rolls 16
- Total Time: 1 hour 50 minutes
- Yield: 16 rolls
- Diet: Vegetarian
Description
These Best Ever Garlic Parmesan Dinner Rolls are incredibly soft, fluffy, and packed with savory garlic butter and cheese flavor. This recipe makes perfect homemade bread for beginners.
Ingredients
- 1 1/2 cups warm water (110°F)
- 1 tablespoon instant yeast
- 2 tablespoons granulated sugar
- 2 tablespoons unsalted butter, softened
- 4 cups all-purpose flour (about 500 g)
- 1 teaspoon kosher salt
- 1/4 cup grated Parmesan, mixed in dough
- 1 large egg, for egg wash (optional)
- Garlic butter topping: 6 tablespoons unsalted butter
- 3 cloves garlic, grated or minced
- 1/4 cup finely grated Parmesan, for topping
- 1 tablespoon chopped parsley
Instructions
- Combine warm water, instant yeast, and sugar in a stand mixer bowl. Let it sit 5 minutes until foamy.
- Add softened butter, flour, salt, and 1/4 cup Parmesan to the yeast mixture. Knead on medium speed for 5–7 minutes until the dough is smooth and elastic. Add flour only if the dough is extremely sticky.
- Cover the dough and let it rise in a warm place until it doubles in size, about 45–60 minutes.
- Lightly grease two 8-inch pans or one 9×13 pan. Divide the dough into 16 equal pieces, shape them into tight balls, and place them spaced slightly apart in the prepared pan(s).
- Cover the shaped rolls and let them rise again until puffy and almost touching, 25–40 minutes. While rising, melt the 6 tablespoons of butter with the minced garlic over low heat for the topping.
- Brush the tops of the rolls with egg wash, if you are using it for shine. Bake at 375°F (190°C) for 18–22 minutes until the rolls are golden brown and reach an internal temperature of 195–200°F.
- Immediately brush the hot rolls with the melted garlic butter. Sprinkle the tops with the remaining Parmesan and chopped parsley. Let the rolls rest for 10 minutes before you serve them warm.
Notes
- For the softest possible rolls, remove them from the oven just before they reach full golden color; carryover heat will finish the cooking, keeping the inside pillowy.
- If you need a shortcut, you can use thawed frozen roll dough, bake it, and brush it with the garlic butter and Parmesan topping for a fast, fresh taste.
- You can prepare ahead by shaping the dough, covering it tightly, and refrigerating it overnight. Bring the dough to room temperature, let it proof until puffy, and then bake according to the recipe instructions.
- Prep Time: 20 minutes
- Cook Time: 25 minutes
- Category: Bread
- Method: Yeast Dough
- Cuisine: American