I’m going to let you in on one of my best-kept secrets for soft, comforting baked goods: the friendship bread starter. Seriously, if you thought making your own sourdough starter was complicated, forget that! This recipe is the absolute easiest way to get that wonderful, tangy, slightly sweet base for incredible breads, cinnamon rolls, and even muffins. It’s the perfect entry point into fermentation baking.
When I first started baking, I was terrified of yeast. I thought I’d kill it immediately! But this sweet starter doesn’t require any fancy temperature control or worrying about “feeding schedules” that are super strict. It just needs a little flour, milk, and time. It’s all about building trust with your ingredients. You’re going to see it bubble up, and that’s how you know you’ve got a thriving, shareable culture on your hands. This is baking magic made simple!
Why This friendship bread starter Recipe Works for Beginners
The beauty of this particular friendship bread starter is its forgiving nature. We use active dry yeast—the kind you probably have in your pantry for pizza dough—instead of wild yeast. This means you get predictable results fast, which builds your confidence up fast! Many starter recipes rely on intuition, but this one relies on proven ratios, ensuring that even if you’re new to this, your starter will be active and ready by day five.
We aren’t aiming for a super-sour flavor profile here; we want that soft, sweet base, which is why we use granulated sugar right from the start. It’s designed to be shared, too! Once it’s ready, you can pass some on to a neighbor, keeping the tradition going. Trust me, once you see that first batch foam up, you’ll be hooked on how simple it is to nurture something alive in your own kitchen.
Gathering What You Need for Your friendship bread starter
Before we start mixing, we need to get everything ready. This is the easiest part, honestly! Getting your space set up means the actual mixing goes super fast—we are talking 10 minutes max. When you’re making your very first friendship bread starter, having all your tools and ingredients lined up makes you feel like a real pro, even though this recipe is incredibly straightforward. I always lay everything out on the counter so I don’t have to hunt for the yeast mid-process!
Remember, this culture needs a nice, cozy home to grow in for the next five days, so make sure you have the right vessel ready to go.

Equipment Required for Your friendship bread starter
You don’t need anything fancy here, which is another reason I love this beginner-friendly recipe so much. Just grab:
- A large mixing bowl—glass is best so you can see the bubbles!
- A sturdy spoon or whisk.
- A clean kitchen towel for covering.
- A container big enough to hold about three cups of batter that can sit on your counter for a few days.
Exact Ingredient Measurements for friendship bread starter
Precision matters when you’re getting a yeast culture started, even an easy one like this friendship bread starter. You want to make sure you’re giving the yeast exactly what it needs to wake up and get happy. I always measure my flour and sugar using the “spoon and level” method—spoon the ingredient lightly into the measuring cup and then level off the top with a knife. Don’t scoop directly from the bag, or you’ll pack it too tightly and throw off the balance!
Here are the exact quantities you’ll need for this initial batch:
- 1 cup of whole milk
- 1 cup of granulated sugar
- 1 cup of all-purpose flour
- 1 packet of active dry yeast (that’s about 2 and 1/4 teaspoons, if you buy it in bulk).
Step-by-Step Instructions to Create the friendship bread starter
Okay, time to make some magic happen! These instructions are broken down into two main phases: waking up the yeast and then letting the mixture rest and develop flavor. If you follow these steps carefully, your initial friendship bread starter will be ready to bake with or share in just five days. This process isn’t fast, but it is mostly hands-off, so you can go about your day while the yeast does the heavy lifting!
Initial Mixing and Yeast Activation for your starter bread
First things first: we need warm milk. This is crucial! If the milk is too cold, the yeast won’t wake up, and if it’s too hot, you’ll kill it before it even gets started. You’re aiming for about 100 degrees Fahrenheit—it should feel comfortably warm to your finger, like bath water, but not hot. Warm up that 1 cup of milk gently on the stove or in the microwave.
In your large bowl, stir that warm milk together with your 1 cup of sugar until the sugar dissolves completely. This gives the yeast something to eat right away! Next, sprinkle that packet of active dry yeast right over the top. Don’t stir it in yet! Just let it sit there for about five minutes. You absolutely must wait for this foaming stage. If you see a nice layer of foam or froth develop on top, that’s your sign—your yeast is alive and ready to work on your starter bread!
Once it’s foamy, grab your whisk and stir in that 1 cup of flour until everything is smooth. Make sure there are no dry pockets of flour hiding at the bottom. Scrape down the sides of the bowl so everything is incorporated nicely.

Fermentation Timeline for the friendship bread starter
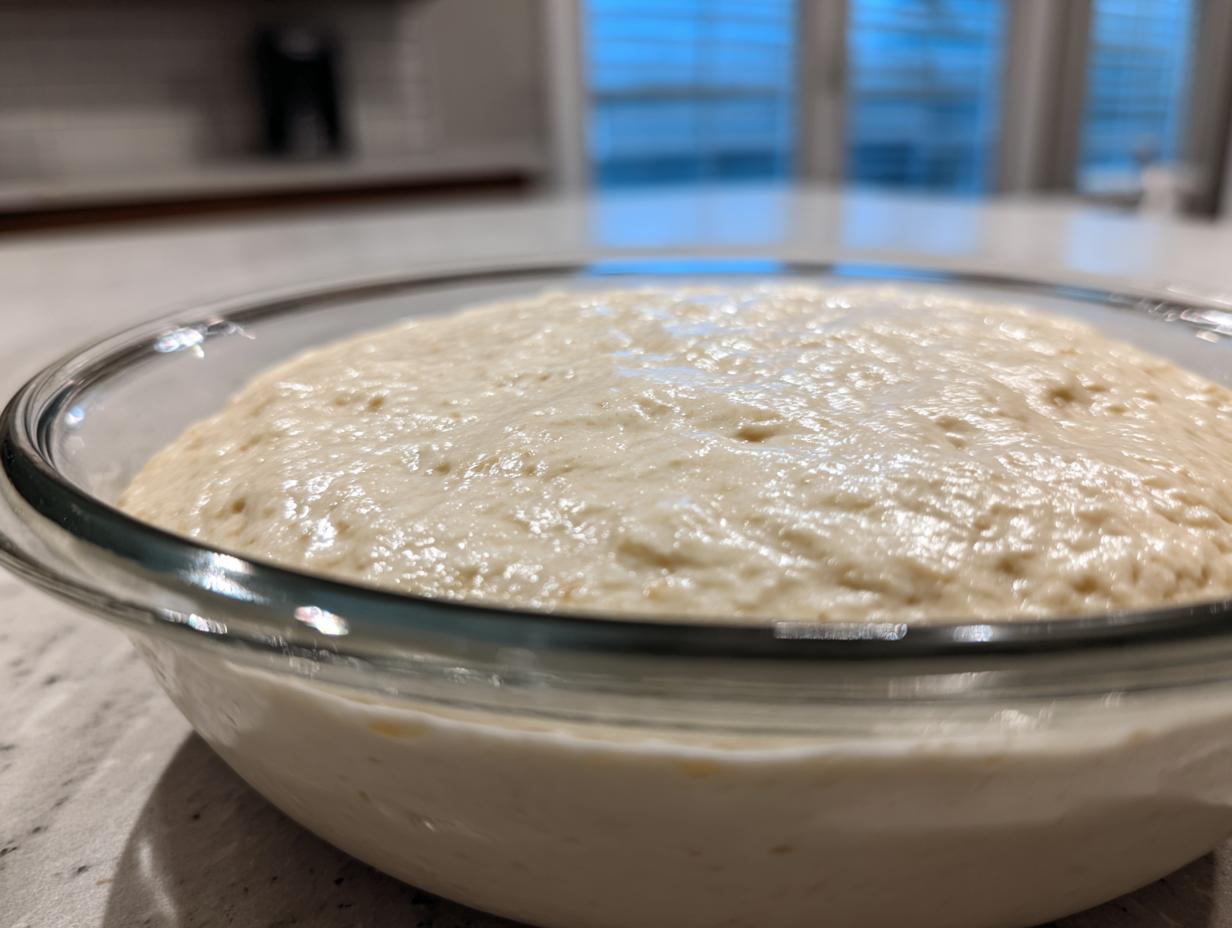
Now comes the waiting game, which is where the culture really develops. Cover your bowl loosely with a clean kitchen towel—you need air flow, so don’t seal it with plastic wrap! Place the bowl somewhere at room temperature, away from any direct drafts, and just let it sit undisturbed for a full 24 hours. It might look bubbly, or it might just look slightly thicker; either way, you’ve started the fermentation process for your friendship bread starter.
The real rhythm begins after that first day. For the next four consecutive days—Day 2, Day 3, Day 4, and Day 5—you only need to go to the bowl once a day to give it a good, thorough stir. That’s it! No adding ingredients, no fuss. Just stir it down well to redistribute the yeast and keep the activity going.
By the end of Day 5, you’ll notice the starter has a pleasant, yeasty, slightly sweet aroma, and it will look active and ready. At this point, you can either use your friendship bread starter in your first baking project or divide it up to keep some for yourself and share the rest!
Maintaining Your Active friendship bread starter
Congratulations! You’ve successfully nurtured your culture for five days, and now you have an active, sweet base ready for baking. But the fun doesn’t stop there—the real joy of this recipe is that you can keep this friendship bread starter going practically forever! It’s like having a pet that feeds you delicious baked goods. Once you start baking with it, you’ll want to keep it healthy for the next time inspiration strikes.
The key to keeping your starter happy is consistency, but luckily, the schedule is very relaxed. You don’t need to feed it every day, which is a huge relief compared to some traditional sourdoughs. Think of this as a low-maintenance friend! If you want to see other great baking ideas, check out our cinnamon swirl banana bread.
Feeding Schedule for Continuous Sweet Starter Activity
Once your starter is active, you need to feed it regularly to keep the yeast population healthy and fed. The rule of thumb here is to feed it every five days. If you bake with it, you’ll naturally feed it when you take out what you need, but if you leave it sitting in the fridge or on the counter, set a reminder!
When it’s feeding time for your friendship bread starter, you will add the exact same ingredients you used in the initial mix. You’ll stir in 1 cup of fresh milk, 1 cup of granulated sugar, and 1 cup of all-purpose flour. Make sure you mix it really well until it’s smooth again. This replenishes the food supply for the yeast and keeps things active. If you’re not planning to bake for a while, you can store the fed starter in the fridge to slow down its metabolism, and you’ll only need to feed it every week or so!
Frequently Asked Questions About Your friendship bread starter
I know when I first started, I had a million questions swirling around. It’s natural! You’re working with living ingredients, after all. Don’t worry if things don’t look exactly like someone else’s photo online right away. Here are the most common things folks ask me about their new friendship bread starter.
Q1. My starter didn’t foam up after 5 minutes! Did I kill the yeast?
Don’t panic! If you didn’t see much foam, it usually means your milk wasn’t quite warm enough, or maybe your yeast packet was old. If you waited the full 24 hours and it still looks flat, try warming up 1/2 cup of milk, dissolving a teaspoon of sugar in it, and sprinkling a fresh pinch of yeast on top. If that foams, your original batch just needed a little extra encouragement. If that fails, just start over with fresh yeast—it’s cheap insurance!
Q2. Can I use this starter bread culture to make sourdough bread?
That’s a great question about using your sweet starter for other things! Technically, no, you can’t swap this directly for a traditional sourdough starter. This recipe uses commercial yeast, so it won’t develop that deep, sour flavor profile you get from wild yeast. It’s designed specifically for sweet, soft breads, cakes, and rolls. Stick to recipes that call for a “sweet starter” or “yeast cake” for the best results!
Q3. What if I miss a day of stirring? Will my friendship bread starter go bad?
Missing one day of stirring during the initial five-day period is totally fine. Just go back the next day and give it a good stir down. The culture is pretty resilient! If you are storing it in the fridge after it’s mature and you miss a feeding by a few days, just pull it out, let it warm up a bit, and feed it. It might take an extra feeding cycle to get as active as usual, but it rarely dies completely.
Q4. What is the best way to share extra starter?
Sharing is the best part! Once your friendship bread starter is bubbly and active on Day 5, divide it up. Put one portion in a clean jar for your neighbor, and keep the rest for yourself. Make sure they know they need to feed it on the same schedule to keep it going! If you want to see more of our easy recipes, follow us on Facebook.
Storing and Using Your Finished friendship bread starter
Once your initial five days are up and you have a thriving friendship bread starter, you have a decision to make: bake it all now, or save some for later! I always divide mine immediately. I keep one jar for baking in the next week or so, and the rest goes straight into the fridge to slow down its activity. This way, I always have a ready-to-go base without having to wait five days!
When you’re ready to bake something later, remember to pull the refrigerated portion out the day before. Let it sit on the counter for a few hours, and then give it a good stir. If it looks a little sluggish, you might need to give it one small feeding (half a cup of milk, sugar, and flour) before using it in your recipe. This wakes it right back up!
If you plan to use this friendship bread starter for something other than the traditional sweet bread, just know it excels in anything that calls for a soft, slightly sweet yeast base. Think fluffy rolls or sweet coffee cakes. It adds a wonderful texture! For more simple baking inspiration, check out our guide on easy no-knead peasant bread.
| Storage Location | Feeding Frequency | Notes |
|---|---|---|
| Countertop (Room Temp) | Every 5 Days | For frequent bakers. |
| Refrigerator | Once per Week | Slows down activity; best for saving long-term. |
Understanding the Estimated Nutrition of this easy bread starter
Because this recipe is mostly flour, milk, and sugar, the nutrition profile reflects that! Keep in mind these numbers are an estimate based on the initial 3-cup batch before division, so if you divide it equally into 3 servings, the nutrition per serving will be higher. This easy bread starter is definitely built for flavor and tenderness, not low-calorie baking!
Here is a quick look at what you can expect from the raw culture:
| Nutrient | Amount (Per Estimated Serving) |
|---|---|
| Calories | 90 |
| Carbohydrates | 18 g |
| Protein | 3 g |
| Fat | 1 g |

Amazing friendship bread starter in 5 blissful days
- Total Time: 10 minutes
- Yield: About 3 cups starter
- Diet: Vegetarian
Description
This friendship bread starter is simple to make with flour, milk, and sugar. It creates a classic starter for soft, sweet breads you can share.
Ingredients
- 1 cup whole milk
- 1 cup granulated sugar
- 1 cup all-purpose flour
- 1 packet active dry yeast (2 1/4 teaspoons)
Instructions
- Warm the milk to about 100°F.
- In a large glass or plastic bowl, stir together the warm milk and sugar until the sugar dissolves.
- Sprinkle the yeast over the milk mixture and let it sit for 5 minutes until foamy.
- Stir in the flour until smooth and well combined.
- Cover the bowl loosely with a clean towel and let it sit at room temperature for 24 hours.
- After 24 hours, stir the starter well.
- Each day for the next 4 days, stir the starter once daily.
- On day 5, the starter is ready to use or divide and share.
Notes
- Feed the starter every 5 days with 1 cup milk, 1 cup sugar, and 1 cup flour to keep it active.
- Prep Time: 10 minutes
- Cook Time: 0 minutes
- Category: Baking
- Method: Mixing and fermentation
- Cuisine: American