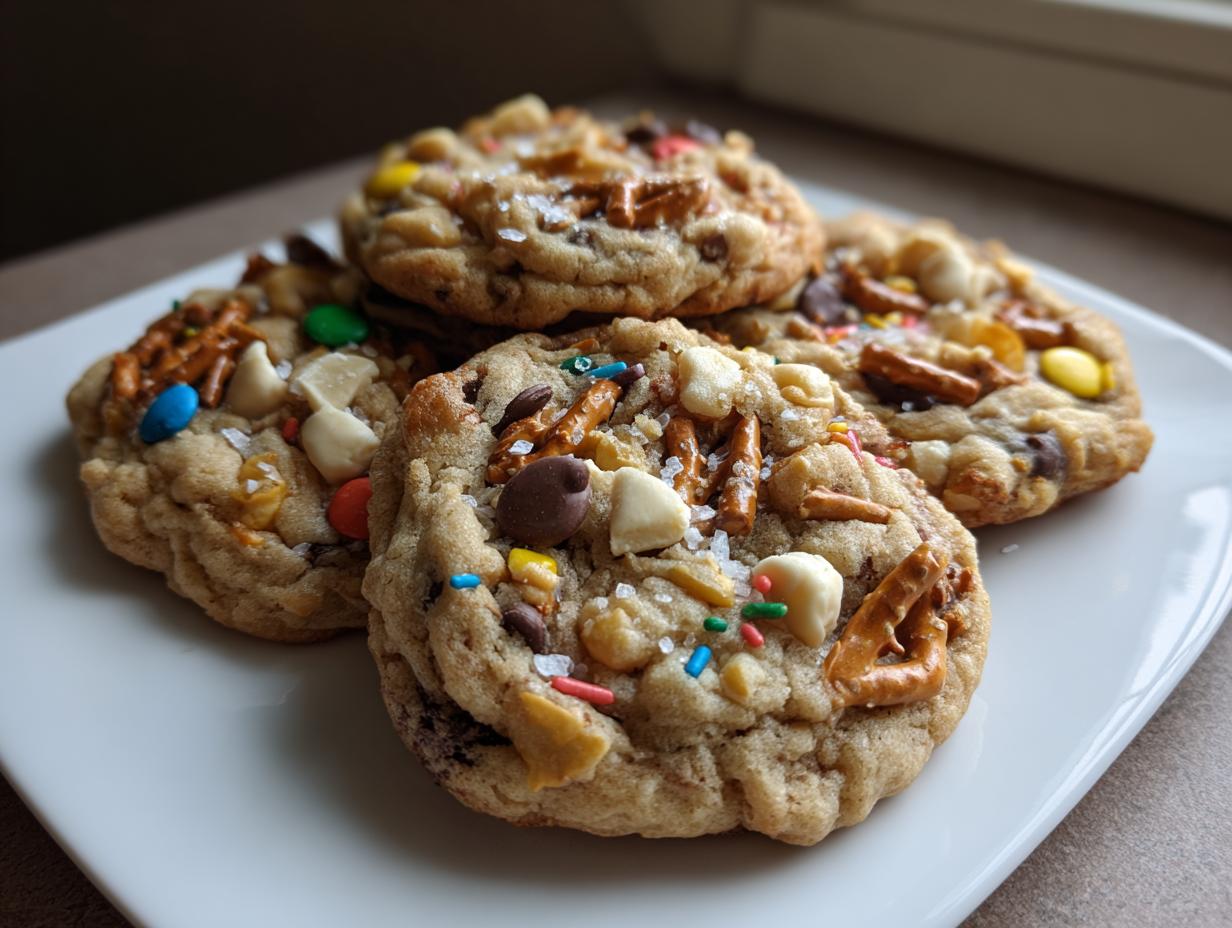
Okay, listen up, because I stumbled onto something truly genius for those days when you just need a cookie that has *everything*. We are talking about the ultimate Trash Cookies Recipe. Forget boring chocolate chip—this is where we throw in all the good stuff from the pantry! I promise you, the combination of salty crunch from pretzels and chips mixed with sweet chocolate is addictive. It hits every single note your mouth is looking for.

What makes these the best? It’s all about that texture contrast. I’ve baked a lot of cookies in my time, and I’ve learned that a recipe needs a solid foundation (which we cover later!) to hold up to all those mix-ins. This Trash Cookies Recipe is built strong. My goal here is to give you a recipe you can trust—one that yields perfect results even if you’re just grabbing random snacks from the back of the cupboard. Trust me, these are going to be your go-to when company shows up unexpectedly! You can find more fun baking ideas over on our Medium page.
Gathering Supplies for Your Trash Cookies Recipe
Before we dive into the glorious mess that is the mix-in phase, we need to make sure we have the right gear ready to go. When you’re making something as loaded as this Trash Cookies Recipe, having the proper tools makes everything smoother. You don’t want to be hunting for a spatula when your butter is perfectly creamed!
Get everything out now—your mixing bowls, measuring cups, and especially those cookie sheets. A little prep work on the front end saves so much headache later when you’re excited to get these salty, sweet monsters into the oven.
Essential Tools for the Best Trash Cookies Recipe
- A sturdy stand mixer or a good hand mixer for creaming the butter and sugars properly.
- Two large mixing bowls—one for the dry ingredients and one for the wet.
- A whisk for combining the flour mixture quickly.
- A flexible silicone spatula; this is key for gently folding in all those snacks without losing air.
- Two large baking sheets, because these cookies spread out a bit.
- Parchment paper or silicone baking mats to line those sheets—trust me on this one!
- A small cookie scoop or two spoons for uniform dough balls.
Ingredient Breakdown for the Ultimate Trash Cookies Recipe
This Trash Cookies Recipe is fantastic because it relies on a very standard cookie base, which means it can handle all the wild things we throw in later! Clarity on the measurements here is important, especially when dealing with all those salty snacks. We need the right ratio of flour to fat to make sure these don’t spread into thin, sad puddles when they bake. I always measure my flour using the spoon-and-level method, just to be safe!
Getting the ingredients right ensures that perfect sweet and salty balance we are after. Don’t skimp on the good quality butter, either; it really makes a difference in the final chewiness of these cookies. If you are looking for other easy baking projects, check out our cookie dough brownie bars recipe.
Dry Base Ingredients
This is the structure of our cookie, so we treat it gently. You’ll need:
- 2 and 1/4 cups of all-purpose flour.
- 1 teaspoon of baking soda—this gives us that little lift we want.
- 1/2 teaspoon of kosher salt. Since we are adding salty snacks, we keep the base salt a little lower than usual!
Wet Ingredients and Sweeteners
This is where the flavor really starts to build up. Make sure your butter is softened—not melted—otherwise, you won’t get the right fluff when you cream it.
- 1 cup of unsalted butter, softened.
- 3/4 cup of light brown sugar, and you must pack it down into the measuring cup!
- 1/2 cup of plain granulated sugar.
- 2 large eggs and 2 teaspoons of vanilla extract—that vanilla is crucial for rounding out the salty notes.
The “Trash” Mix Ins
Here’s the fun part! For the best texture in your Trash Cookies Recipe, you absolutely must crush these items up right before you add them. I mean it! We want texture, not big awkward chunks.
- 1/2 cup potato chips, crushed. Kettle-cooked chips hold their crunch the best, by the way.
- 1/2 cup pretzels, coarsely crushed.
- 1/2 cup semi-sweet chocolate chips.
- 1/4 cup toffee bits.
- 1/4 cup colorful sprinkles, just because everything is better with sprinkles!
Step-by-Step Guide for Making Your Trash Cookies Recipe
This is where the magic happens! Don’t rush these steps; they are what separate a good cookie from a truly phenomenal Trash Cookies Recipe. We want structure underneath all that salty goodness!
Preparing the Oven and Dry Mixture
First things first: get that oven warmed up! Preheat your oven to 350 degrees Fahrenheit, or 175 Celsius if you’re using Celsius. While it’s heating, grab a medium bowl and whisk together your flour, baking soda, and kosher salt. Whisking them well now means you won’t get a weird baking soda pocket later. Set that dry mixture aside for a moment.
Creaming Butter and Sugars
Now for the most important foundational step! In a large bowl—use your mixer for this part—beat the softened butter, brown sugar, and granulated sugar together. You need to let this go on medium-high speed for a solid three to four minutes. I know, it feels long, but you are looking for the mixture to get light and fluffy. It should look almost pale yellow and airy. This process whips air into the dough, which is crucial for the cookie’s final texture.
Incorporating Eggs and Folding in Snacks
Once you have that lovely fluffy base, reduce your mixer speed down to low. Beat in your two eggs one at a time, making sure the first one is fully incorporated before adding the second. Then, mix in the vanilla extract. Stop and scrape down the sides of the bowl—I always end up with dry bits clinging up there! Now, turn the mixer off completely. Slowly add your dry ingredients to the wet mixture, mixing only until you just see the last few streaks of flour disappear. Do not overmix here! Overmixing develops gluten and makes cookies tough.
Once the dry ingredients are mostly mixed, grab your spatula. Gently fold in all those amazing mix-ins: the crushed chips, the pretzels, the chocolate chips, the toffee bits, and those colorful sprinkles. You want to be gentle so you don’t knock all the air out you just worked so hard to beat in!
Scooping, Baking, and Finishing Touches
Line two large baking sheets with your parchment paper or silicone mats. Scoop your dough into 2-tablespoon-sized balls. They should be roughly the size of a golf ball. Place them about two inches apart on the sheets because they will spread a little bit in the oven. Bake these beauties for 9 to 11 minutes. You want the edges to look golden brown, but the very center should look slightly underdone—they will keep cooking once they come out.
If you are feeling fancy, immediately after they come out of the oven, sprinkle a few flakes of sea salt on top for an extra salty pop. Let them sit right there on the hot pan for five minutes so they can firm up, and then carefully move them to a wire rack to cool completely. That final cooling step is what sets the texture for this Trash Cookies Recipe!

Pro Tips for Perfecting Your Trash Cookies Recipe
Even though this Trash Cookies Recipe is super easy, a few little tricks can take them from great to absolutely unforgettable. I’ve learned these secrets over many batches when I was trying to get the texture just right—that perfect crunch factor!
First, crushing your mix-ins matters! Don’t just toss in whole pretzels. Crush those chips and pretzels down until they are about pea-sized pieces. This ensures you get a distribution of salty crunch in every single bite instead of just finding one big chip shard.
If you have the patience, definitely chill the dough for about 30 minutes before scooping. Chilled dough spreads less, meaning you get a thicker, chewier cookie, which I think is the best way to eat these. Also, if you want that super crisp edge, here’s a move I love: right when the cookies come out of the oven, give the pan a quick, firm bang on the counter. It sounds crazy, but it flattens the cookies slightly and creates those gorgeous little ripples around the edges! If you want to see more of our baking adventures, follow us on Pinterest.
Storage and Reheating Instructions
The best part about this Trash Cookies Recipe is that they are amazing fresh, but they are also great for making ahead! The mix-ins actually help them stay soft for days, which is a huge win when you’re craving that sweet and salty hit later in the week. You can store the baked cookies in an airtight container at room temperature for up to five days. Don’t worry about them getting stale too fast!
If you want to get ahead, you can absolutely freeze them, either baked or as raw dough balls—I usually freeze the dough balls because I like having fresh cookies ready on demand. If you find a baked cookie has gotten a little too soft for your liking, don’t throw it out! A quick trip back into a warm oven revives the crunch perfectly. Here’s a quick chart so you know exactly how long to keep things around:
| Storage Method | Duration | Reheating Temp/Time |
|---|---|---|
| Airtight Container (Baked) | Up to 5 days | N/A |
| Freezer (Baked or Dough) | Up to 3 months | 300°F (150°C) for 3–4 minutes (if baked) |
Frequently Asked Questions About This Trash Cookies Recipe
I get so many questions about this recipe, especially from people who are nervous about mixing so many things together! Don’t be nervous; this Trash Cookies Recipe is very forgiving. Here are a few things people always ask me when they try it for the first time.
Q1. Can I use different kinds of chips or snacks in my Trash Cookies Recipe?
Yes, absolutely! That’s the beauty of these Kitchen Sink Cookies. Feel free to swap out some of the toffee for peanut butter chips, or maybe use corn chips instead of potato chips for a different kind of salty crunch. Just try to keep the total volume of mix-ins similar to the original recipe so you don’t mess up the dough structure.
Q2. Why are my Sweet and Salty Cookies spreading too thin?
This usually happens if your butter was too soft or melted before you started creaming, or if you skipped chilling the dough. If they spread too much during baking, try chilling the dough for at least 30 minutes next time. Also, remembering to bang the pan right when they come out helps them set up thicker! If you need more baking tips, check out our Facebook page.
Q3. Do I really need to crush the pretzels and chips?
Oh, yes, you do! If you leave them whole, you end up with giant air pockets in your cookie or big chunks that fall out. Crushing them down to pea-sized pieces ensures that every bite of your Trash Cookies Recipe has that wonderful, satisfying sweet and salty texture contrast.
Q4. Can I skip the toffee bits?
You can, but I highly recommend keeping them! The toffee adds a wonderful buttery chewiness that melts slightly when baked. If you skip them, maybe add a few extra chocolate chips or some chopped nuts to make up for that lost texture.
Sharing Your Sweet and Salty Creations
Now that you have conquered the ultimate Trash Cookies Recipe, I really want to hear about it! Did you use potato chips or maybe even corn flakes? Rate this recipe below and tell me in the comments what wild mix-ins you decided to throw in. Don’t forget to snap a picture and share your sweet and salty creations with everyone!
Print
Amazing 1 Pouch Trash Cookies Recipe
- Total Time: 25 minutes
- Yield: 24 cookies
- Diet: N/A
Description
Bake perfect sweet and salty Trash Cookies packed with pretzels, chips, and chocolate. This easy recipe uses pantry snacks for a satisfying texture contrast.
Ingredients
- 2 1/4 cups all-purpose flour
- 1 teaspoon baking soda
- 1/2 teaspoon kosher salt
- 1 cup unsalted butter, softened
- 3/4 cup light brown sugar, packed
- 1/2 cup granulated sugar
- 2 large eggs
- 2 teaspoons vanilla extract
- 1/2 cup potato chips, crushed
- 1/2 cup pretzels, coarsely crushed
- 1/2 cup semi-sweet chocolate chips
- 1/4 cup toffee bits
- 1/4 cup colorful sprinkles
- 1 teaspoon sea salt flakes (optional topping)
Instructions
- Preheat your oven to 350°F (175°C). Line two large baking sheets with parchment paper or silicone mats.
- Whisk the flour, baking soda, and kosher salt in a medium bowl. Set this aside.
- Cream the softened butter, brown sugar, and granulated sugar in a large bowl on medium-high speed for 3–4 minutes until light and fluffy.
- Beat in the eggs one at a time, then add the vanilla extract. Scrape the bowl sides as needed.
- Reduce the mixer speed to low. Gradually add the dry ingredients, mixing only until the flour streaks disappear.
- Gently fold in the crushed potato chips, pretzels, chocolate chips, toffee bits, and sprinkles using a spatula.
- Scoop the dough into 2-tablespoon balls. Place them 2 inches apart on the prepared baking sheets.
- Bake for 9–11 minutes. The edges should be golden brown and the centers slightly underbaked.
- If using, immediately sprinkle sea salt flakes on top after removing from the oven.
- Let the cookies cool on the baking sheet for 5 minutes. Transfer them to a wire rack to cool completely.
Notes
- Crush chips and pretzels into pea-sized pieces for the best texture.
- Chill the dough for 30 minutes before baking for a thicker cookie.
- Kettle-cooked potato chips maintain crunch better during baking.
- Bang the pan on the counter once after removing from the oven to flatten cookies and create ripples.
- Store baked cookies in an airtight container for up to 5 days at room temperature.
- Freeze baked cookies or raw dough balls for up to 3 months.
- Reheat baked cookies at 300°F (150°C) for 3–4 minutes to restore crisp edges.
- Prep Time: 15 minutes
- Cook Time: 10 minutes
- Category: Dessert
- Method: Baking
- Cuisine: American