Oh my goodness, you absolutely MUST try this recipe! I’m so excited to share my method for the best salted caramel protein ice cream you will ever make in your Ninja Creami. Seriously, forget everything you think you know about protein desserts being icy or chalky. This batch comes out unbelievably creamy, rich, and yes, totally guilt-free!
I know, I know, protein ice cream can be tricky, especially if you’re new to the Creami world. But trust me when I say this recipe is foolproof. Even my husband, who usually just sticks to regular ice cream, asked for a second serving of this salted caramel protein ice cream. It’s that good. We swap out the regular sugar for low-calorie sweeteners, and the magic combination of protein and pudding mix creates that silky texture we all crave, making it the perfect high-protein dessert.
The secret? It’s all about balancing the liquids and powders before freezing. Follow my steps exactly, and you’ll be scooping rich, salty-sweet goodness in no time!

Essential Ingredients for Your Salted Caramel Protein Ice Cream
When you’re making a frozen treat that relies on protein powder, every single ingredient matters. If you just throw in standard milk and protein, you end up with a hard, icy brick. Not what we want! For this salted caramel protein ice cream to achieve that glorious, scoopable texture, we have to be strategic about our liquids and flavor boosters. Don’t worry, it’s not complicated, but these specific choices make all the difference in the final result.
I’ve tested this formula dozens of times, and the ratios of liquid to thickener are what keep this dessert tasting like true ice cream, not a protein shake that accidentally froze.
Selecting the Right Milk Base
This is non-negotiable, folks! You absolutely need a high-protein milk, and I swear by Fairlife skim milk. It packs way more protein than regular milk without adding much fat, which gives the ice cream structure. We only use one cup of it, but that protein is essential for that creamy mouthfeel. We stretch that richness by adding unsweetened almond milk. The almond milk keeps the overall fat content low, while the Fairlife does the heavy lifting for texture and protein count.
Flavor Components for Salted Caramel Protein Ice Cream
This is where the actual flavor magic happens for our salted caramel protein ice cream. Forget just dumping in protein powder; that’s how you get that grainy texture. We use a scoop of vanilla or salted caramel protein powder—vanilla is great if you want the caramel syrup to dominate. But the real secret weapon? Just a tablespoon of instant vanilla or butterscotch pudding mix! It dissolves completely and acts as a stabilizer, keeping the whole thing smooth.
Then, we layer the caramel flavor with the sugar-free syrup, a touch of maple syrup for depth, and a tiny pinch of sea salt to really make that caramel pop. It’s a symphony of salty-sweet!

Equipment Needed for This Salted Caramel Protein Ice Cream Recipe
You don’t need a huge stand mixer or an old-school ice cream maker for this recipe, which is the best part! Since we are making salted caramel protein ice cream in the modern way, you just need a few essentials. Make sure you have a container that fits your machine, or you’ll be sad when you go to process it!
Preparing the Ninja Creami Pint
The most important piece of gear here is the actual Ninja Creami pint container. You need to mix everything directly in this vessel. Grab a whisk—don’t just use a fork—and make sure you whisk everything until it’s totally smooth right inside the pint. We need to make sure the bottom doesn’t have any dry powder hiding out before we seal it up for the long freeze!
Step-by-Step Instructions for Salted Caramel Protein Ice Cream
Okay, let’s get into the action! This process is broken down into three main phases: mixing, freezing, and spinning. If you follow these steps for your salted caramel protein ice cream base, I promise you’ll get that perfect scoop every single time. It’s less about active cooking and more about proper prep work, which is great for busy days!
Mixing the Base Ingredients Thoroughly
Grab your Ninja Creami pint container, and let’s get whisking! You want to add all your liquids first—the Fairlife milk and the almond milk. Then, slowly start incorporating your powders and flavorings: the protein powder, the pudding mix, the sugar-free caramel syrup, the sweetener, and that tiny pinch of sea salt. Don’t just dump it all in and stir once. You have to work at it!
I use a small wire whisk and spend a good minute or two aggressively whisking everything together. The goal here is to completely dissolve that pudding mix and ensure there are absolutely no dry pockets of protein powder lurking at the bottom or clinging to the sides. If you see any clumps, keep whisking! Clumps turn into hard, chalky spots in your finished ice cream, and nobody wants that in their delicious salted caramel protein ice cream.
Once it looks totally smooth and uniform—like a slightly thin milkshake—fill it up to the max fill line if you need to, making sure you leave a little space for expansion. Pop the lid on tightly, and we move to the next crucial step.
The Critical 24-Hour Freeze
This is the hardest part, honestly: waiting! You need to freeze this base for a full 24 hours. I mean it—a full day. The Creami works by shaving off a rock-solid block of ice, so if it’s even slightly soft in the middle, the machine will struggle, and you’ll end up with a crumbly mess that needs re-spinning four times. Make sure you place the pint flat in the coldest part of your freezer. I usually put mine right toward the back where it stays consistently frozen solid. Resist the urge to touch it for 24 hours!
Processing in the Ninja Creami
When you are ready to eat, take the pint out of the freezer and let it sit on the counter for just one or two minutes. This tiny bit of softening on the edge helps the machine process it smoothly. Take the lid off, place the pint into the machine base, and secure the outer bowl lid. Now, select the **Lite Ice Cream** function. That setting is specifically calibrated for lower-fat, high-protein bases like ours.
Once it finishes its cycle, check the consistency. If it looks smooth and creamy, you’re golden! If it looks crumbly or powdery—which happens sometimes with protein bases—don’t panic. That’s what the Re-spin function is for. We’ll talk more about that in the next section, but for now, if it looks good, scoop out your incredible salted caramel protein ice cream!
Tips for Achieving Perfect Salted Caramel Protein Ice Cream Texture
Sometimes, even when you follow every step perfectly, your salted caramel protein ice cream base comes out a little powdery instead of perfectly creamy after the first spin. Don’t throw it out or add a ton of milk! That’s normal with high-protein recipes because they freeze differently than traditional ice cream bases. The machine just needs a little help breaking down those frozen protein structures.
If you check the pint after the first run and it looks dry, crumbly, or has a powdery layer on top, this next step is your magic wand. The Re-spin function is designed exactly for this situation. It re-processes the ice cream without adding a lot of extra liquid, which keeps the flavor strong and the texture thick.
Mastering the Re-spin Technique
If your first spin results in powder, grab your milk—I use the same high-protein milk we started with. Add just one tablespoon of milk over the top of the powdery ice cream block, put the lid back on, and run the **Re-spin** function. One tablespoon is usually enough to introduce just enough moisture to bind the ice crystals together.
If it’s still a little too crumbly after that first re-spin, you can add just one more tablespoon of milk and spin it again. I never recommend adding more than two tablespoons total, or you’ll end up with a thinner, milkshake-like consistency. Mastering this little trick ensures your salted caramel protein ice cream is always silky smooth, never icy!
Frequently Asked Questions About This Recipe
I get so many questions over on my Instagram about tweaking this recipe, and I love hearing how you all are customizing your salted caramel protein ice cream! Here are a few things people ask me all the time before they dive into making their own batch.
It’s important to remember that the protein powder is the backbone of the texture here, so substitutions can change things quite a bit. But don’t worry, we can troubleshoot!
Can I use a different protein powder for this salted caramel protein ice cream?
You certainly can! I use vanilla or salted caramel whey/casein blends because they tend to freeze the best. If you use a pure whey isolate, you might find it freezes a little harder, so be prepared to use that Re-spin function with an extra splash of milk. If you use plant-based protein, expect it to absorb more liquid, so you might need to add an extra tablespoon of milk right from the start during the mixing phase to compensate. The pudding mix helps stabilize most powders, though!
How do I make this recipe lower in sugar?
That’s the beauty of using a sugar-free caramel syrup! We’ve already cut a ton of sugar out. If you are trying to keep carbs extremely low, you can swap out the one teaspoon of maple syrup for a granulated monk fruit or stevia blend. Just start small with the granular sweetener because they are often much sweeter than maple syrup, and you don’t want to overpower the caramel flavor in your salted caramel protein ice cream.
Storing and Serving Your Salted Caramel Protein Ice Cream
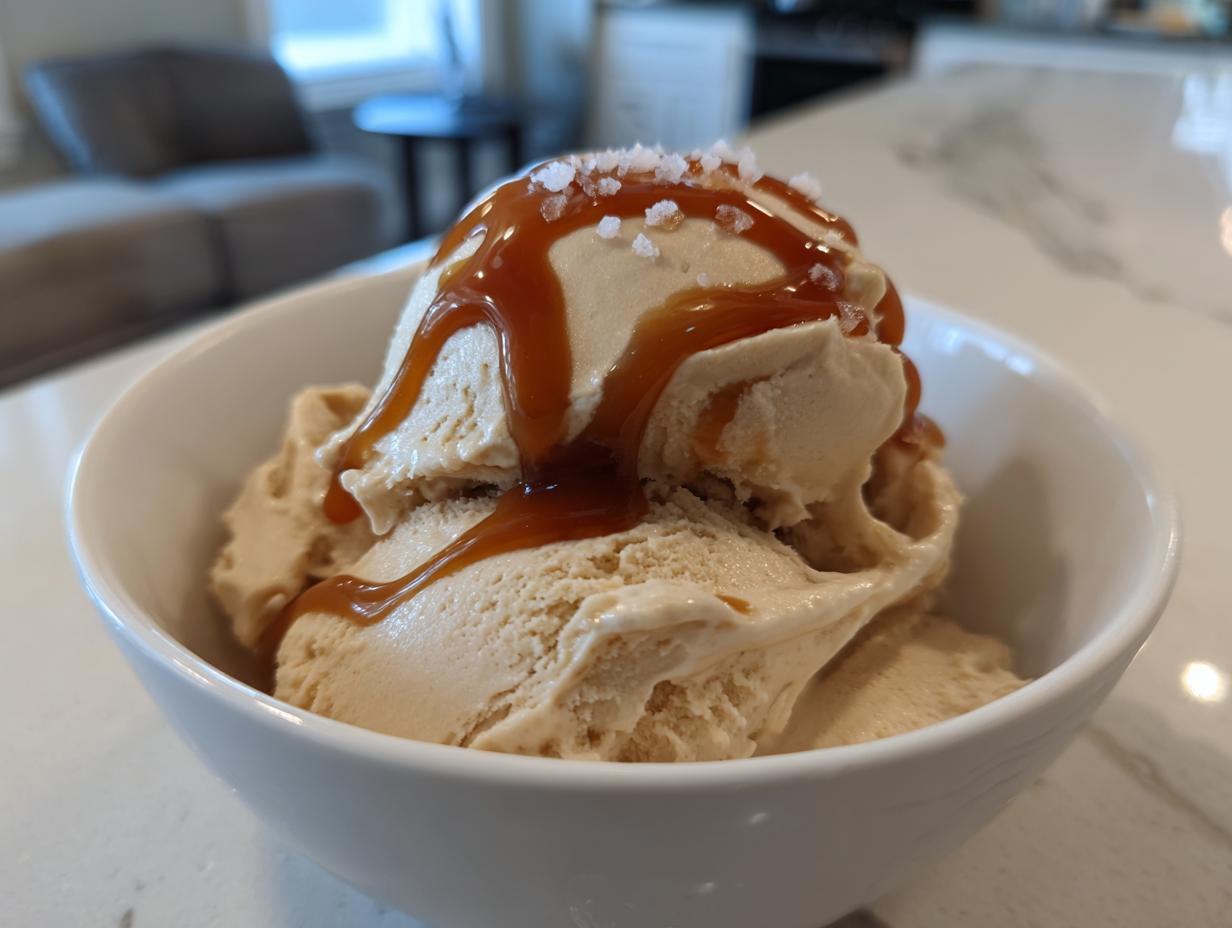
Once you’ve achieved that perfect, creamy texture, you have two main choices for eating your salted caramel protein ice cream. If you like it soft, scoop it right out of the Creami bowl immediately after the final spin. It’s heavenly—super soft, almost like soft-serve, and ready to eat instantly!
However, if you prefer that classic, firm scoop you get from a tub in the freezer, you’ll need to do a quick transfer. Scrape the ice cream back into the pint container, put the lid on tightly, and pop it back into the freezer for about 10 to 15 minutes. This short chill time firms it up just enough without making it rock hard.
If you have leftovers (which I rarely do!), just seal the pint tightly and put it back in the freezer. It keeps great for up to a week, though the texture might get a little harder the longer it sits, so remember to let it thaw on the counter for 5 minutes before you try to spin it again!
Optimal Serving Recommendations
For the absolute best experience with your salted caramel protein ice cream, I highly recommend the quick 10-to-15-minute freeze after processing if you want it firm. If you’re eating it right away, don’t forget those optional toppings! A drizzle of extra sugar-free caramel sauce and a sprinkle of flaky sea salt right before serving brings the whole salty-sweet experience together perfectly. It just elevates it from good to wow!
Here’s a quick guide for storage:
| Storage Method | Duration | Notes |
|---|---|---|
| Immediate Serving | 0 minutes thaw | Soft-serve consistency. |
| Post-Process Freeze | 10–15 minutes | Firm, classic scoopable texture. |
| In Freezer (Sealed) | Up to 1 week | May require a quick re-spin if very hard. |
Nutritional Estimates for Salted Caramel Protein Ice Cream
I know so many of us are tracking macros when we make these high-protein treats, and I totally get it! Knowing what’s in your salted caramel protein ice cream helps you fit it into your daily goals. Please remember that these numbers are just estimates based on the specific brand recommendations I used when developing the recipe.
Because protein powders, syrups, and even brands of high-protein milk differ so much in their makeup, your final counts might vary slightly. We are aiming for a high-protein, lower-fat dessert here, and these numbers reflect that goal! It’s amazing that we can get nearly 20 grams of protein in a single serving of ice cream!
Here is the breakdown based on my testing:
| Nutrient | Amount (Per Serving) |
|---|---|
| Calories | 170 |
| Protein | 19 g |
| Fat | 5 g |
| Carbohydrates | 12 g |
Disclaimer Regarding Nutritional Data
Just a quick note, because I want everyone to be informed! The nutritional data provided here is an estimate based on the specific ingredients listed in the main recipe, particularly using Fairlife skim milk and standard sugar-free caramel products. If you substitute your protein powder or use a different sweetener, these numbers will absolutely change. Always double-check the labels on your specific products if you are strictly counting calories or macros for your salted caramel protein ice cream!
Share Your Success with This Salted Caramel Protein Ice Cream
I put my heart into perfecting this recipe so you could have a truly delicious, guilt-free treat. Now that you’ve tried it, I would absolutely love to hear what you think! Did it come out perfectly creamy on the first spin? Let me know how much you loved this salted caramel protein ice cream.
Please take a moment to leave a rating below and drop a comment telling me if you added any fun toppings or if you used a different protein flavor. Happy scooping! Follow me on Pinterest for more great ideas!
Print
Awesome 170 Calorie Salted Caramel Protein Ice Cream
- Total Time: 24 hours 5 minutes
- Yield: 1 pint (2 servings)
- Diet: Low Fat
Description
This Ninja Creami salted caramel protein ice cream is rich, creamy, and guilt-free. It delivers sweet-salty flavor and silky texture using high-protein milk and caramel syrup.
Ingredients
- 1 cup Fairlife skim milk or other high-protein milk
- ¾ cup unsweetened almond milk
- 1 scoop vanilla or salted caramel protein powder
- 1 tablespoon instant vanilla or butterscotch pudding mix
- 1 tablespoon sugar-free salted caramel syrup
- 1 teaspoon maple syrup or monk fruit sweetener
- Pinch of sea salt
- Optional Topping: 1 teaspoon sugar-free caramel sauce
- Optional Topping: Pinch of flaky sea salt
Instructions
- In a Ninja Creami pint container, whisk together Fairlife milk, almond milk, protein powder, pudding mix, caramel syrup, maple syrup, and salt until smooth.
- Fill the container to the max line if needed, then cover and freeze flat for 24 hours until completely solid.
- When ready to make, remove the pint from the freezer and let sit at room temperature for 1–2 minutes.
- Install the pint into the Ninja Creami and select the Lite Ice Cream function.
- Check consistency. If powdery, add 1–2 tablespoons milk and use the Re-spin function until creamy and smooth.
- Scoop into a bowl and drizzle with caramel sauce or sprinkle flaky sea salt if desired.
- Serve immediately or freeze for 10–15 minutes for a firmer texture.
Notes
- Use high-protein milk like Fairlife for best results.
- The Re-spin function helps achieve a smooth texture if the initial blend is powdery.
- Prep Time: 5 minutes
- Cook Time: 0 minutes
- Category: Dessert
- Method: Ninja Creami
- Cuisine: American