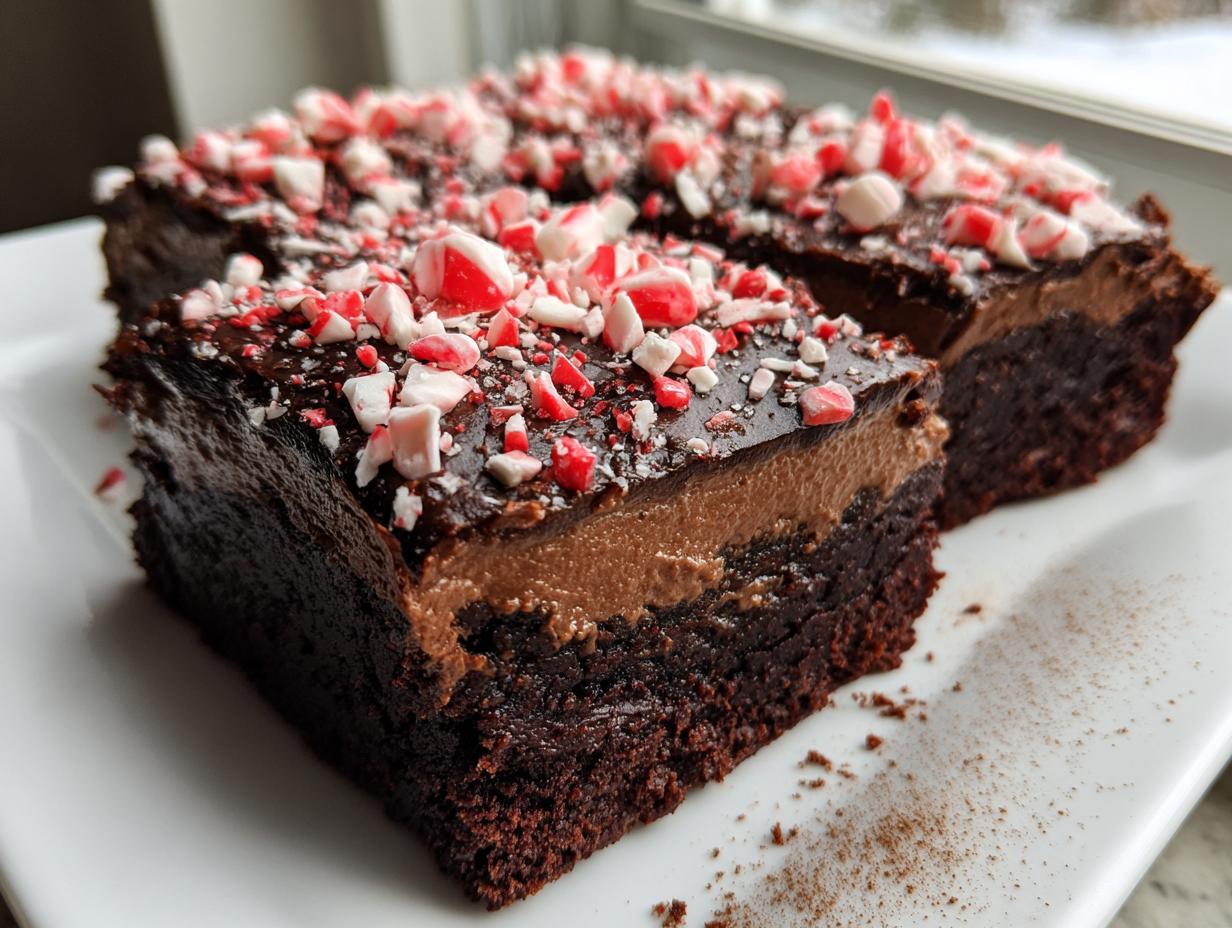
Forget those dry, cakey brownies you think you have to order from a fancy coffee shop! I’m here to tell you that making truly decadent, fudgy Peppermint Mocha Brownies is shockingly easy, even if you’ve never baked anything more complicated than toast. These aren’t just brownies; they’re a holiday hug in square form. We’ve got that deep, dark cocoa flavor, a hint of rich espresso to boost the chocolate, and that gorgeous, cool mint finish.
I spent years trying to replicate the mocha brownies I used to grab downtown during the holidays. I tried recipes that called for melted chocolate bars, recipes that used oil, and honestly, they just never had that crackly top and dense, gooey center I craved. It took me nearly a dozen batches to figure out the trick was in the sugar ratio and *not* overmixing. Trust me, once you see that glossy top form, you’ll know you’ve hit the jackpot.

My Journey to the Perfect Fudgy Peppermint Mocha Brownies
I originally developed this base recipe for my niece’s first baking attempt last Christmas. She was intimidated, bless her heart! I wanted something that looked incredibly professional—like it cost twelve dollars at a specialty bakery—but was truly foolproof. So, I kept the technique super simple: melt the butter, whisk the sugars until they look thick, and fold gently. That’s it! The espresso powder is my special touch; it doesn’t make them taste like coffee, it just makes the chocolate taste like the *best* chocolate you’ve ever had. When we finally poured that cool, minty ganache over the set base, she gasped. If my niece can nail these, anyone can!
Why This Peppermint Mocha Brownies Recipe Works for Everyone
This recipe is built for success. We skip the complicated double-boiler methods and focus on creating structure with the right amount of sugar and butter so you get that signature fudgy chew every time. The espresso brings out the deep chocolate notes, and the cool peppermint cuts through the richness perfectly. It’s the ultimate winter indulgence, made simple.
Gathering Your Essentials for Peppermint Mocha Brownies
Okay, before we dive into the fun part—the mixing and the smelling—let’s make sure you have everything lined up. There’s nothing worse than realizing halfway through you’re missing the heavy cream! Having all your ingredients measured out first makes the process so smooth. We’re aiming for a stress-free baking session that results in amazing Peppermint Mocha Brownies.
Ingredient List for Fudgy Peppermint Mocha Brownies
I’ve listed out exactly what you need below. Pay special attention to the temperature of the eggs; that really makes a difference in how well they incorporate into the melted butter base. Everything else is pretty standard pantry fare, except maybe that glorious espresso powder!
- 1 cup unsalted butter, melted and slightly cooled
- 1 cup granulated sugar
- 1 cup packed light brown sugar
- 3 large eggs, at room temperature
- 2 teaspoons vanilla extract
- 2 teaspoons instant espresso powder
- 1 cup all-purpose flour, spooned and leveled
- 1 cup unsweetened cocoa powder
- 1 teaspoon fine sea salt
- 1 teaspoon baking powder
- 1 1/2 cups semisweet chocolate chips
- 1/2 cup milk chocolate chips
- 3/4 cup heavy whipping cream
- 2 tablespoons unsalted butter, at room temperature
- 1 teaspoon peppermint extract
- 1/2 cup finely crushed candy canes or peppermint candies (plus extra for garnish!)
- Whipped cream for serving (optional, but highly encouraged!)
Necessary Equipment for Success
You don’t need a stand mixer for this recipe—a sturdy bowl and a good whisk will do the trick! Just make sure you have these basics ready to go:
- 9 x 13 inch baking pan
- Parchment paper (this is non-negotiable for easy removal!)
- Large mixing bowl and one medium bowl
- Whisk and a flexible silicone spatula
- Small saucepan for heating the cream
- Wire cooling rack
Step-by-Step Mastery: Making Peppermint Mocha Brownies
Alright, grab your apron! This is where the magic happens, and I promise, it moves quickly once you get going. We’re building layers of incredible flavor here, starting with that deeply fudgy base that makes these Peppermint Mocha Brownies legendary.
Preparing the Pan and Mixing the Brownie Batter
First things first: get that oven warmed up to 350°F. You need to prepare your 9×13 pan. I always grease it well with neutral oil or softened butter, and then line it with parchment paper, making sure I leave a little overhang on two sides. That overhang is your handle later, so don’t skip it!
In a big bowl, whisk your melted butter with both sugars until it looks thick and shiny—you’re looking for a glossy sheen. Now, whisk in the eggs one at a time, followed by the vanilla and that crucial espresso powder. Keep whisking until it’s totally smooth!
In a separate bowl, you’ll want to sift together your dry stuff: the flour, cocoa powder, salt, and baking powder. Sifting is important here to avoid clumps of cocoa! Now, gently fold the dry ingredients into the wet mixture using a spatula. This is the most important part! You only fold until you can just barely see the last streaks of flour disappear. Stop mixing right there! Over-mixing develops gluten, and we want fudgy, not cakey. Finally, fold in those chocolate chips.
Baking and Cooling the Fudgy Base
Spread that gorgeous batter evenly into your prepared pan. Pop it into the preheated oven and set your timer for 22 minutes. You want the top to look set, but when you test it with a toothpick, you must see moist crumbs clinging to it—not wet batter, but definitely not dry ones either. If you bake it until the toothpick comes out clean, you’ve gone too far! Pull them out and let the pan sit on a wire rack to cool completely. Seriously, they need to be room temperature before we move on to the topping, or the ganache will melt right off.

Crafting the Silky Peppermint Chocolate Ganache
While the base cools, we make the topping! This is what turns them into true Peppermint Mocha Brownies. In a tiny saucepan, heat your heavy cream until it just starts to steam around the edges—don’t let it boil! Place all your chocolate chips (semisweet and milk chocolate) into a heat-safe bowl. Pour that hot cream right over the chocolate and just let it sit there, untouched, for about three full minutes. Resist the urge to stir!
After resting, add the two tablespoons of room-temperature butter and the peppermint extract. Now, whisk slowly, starting right in the center and working your way out in little circles until everything emulsifies into a glossy, smooth river of minty chocolate goodness. Let it sit for about five to ten minutes so it thickens up just a touch.
Assembling and Setting Your Peppermint Mocha Brownies
Once the brownie base is cool, pour that luxurious peppermint ganache right over the top. Use your spatula to gently spread it evenly across the entire surface. Time is of the essence here! Immediately sprinkle those finely crushed candy canes all over the top, followed by the coarser pieces for texture. The ganache is still soft, so the candy canes will stick perfectly. Now, you must refrigerate the whole slab for at least one to two hours until that ganache is firm. This chilling step is crucial for clean cutting!
Tips for Perfect Peppermint Mocha Brownies Every Time
I’ve learned a few hard-won lessons over the years trying to get these right, especially when I’m rushing before a holiday party. Getting that perfect fudgy center in your Peppermint Mocha Brownies is all about temperature control and knowing when to step away from the bowl!
Achieving the Ideal Fudgy Texture
If you want that dense, melt-in-your-mouth texture, two things are non-negotiable for me. First, make sure those eggs are truly at room temperature. Cold eggs shock the melted butter mixture, which can prevent everything from combining smoothly. Second, and this is huge: do not overbake! Seriously, pull them out when the toothpick still has moist crumbs. They will continue to set up as they cool on the rack, and pulling them early guarantees that gooey center we are chasing.
Clean Slicing Techniques
Cutting these brownies after the ganache has set can be a messy job if you try using a dull knife. You want sharp, clean edges so they look bakery-worthy. Here’s my trick: use a large, sharp chef’s knife. After every single cut, wipe the blade clean with a damp paper towel. This removes any melted chocolate or stray candy cane bits that would otherwise drag across your next slice. If you want perfect squares of Peppermint Mocha Brownies, wiping the knife between cuts is the secret weapon!
Storing and Reheating Your Peppermint Mocha Brownies
These brownies are so rich, you probably won’t eat them all in one sitting—though I’ve certainly tried! The good news is that they keep wonderfully, especially because the peppermint ganache acts like a little protective seal. Proper storage keeps the fudgy base soft and the topping firm for days.
Best Practices for Storage and Freshness
Because of that lovely ganache layer, I strongly recommend keeping your Peppermint Mocha Brownies in the refrigerator. Just make sure they are cut into squares first, and then place them in an airtight container. I usually place a layer of parchment paper between the layers of brownies to stop the peppermint topping from sticking to the next layer. They stay perfectly fresh and dense like this for up to four days. Honestly, I think they taste even better on day two when the mint mingles with the espresso! If you want to see more holiday baking ideas, check out my Black Forest Trifle for Holidays.
Freezing Instructions for Longer Keeping
If you need to make these way ahead of time, freezing is your best friend! Don’t freeze the whole slab; it’s much easier if you slice them up first. Wrap each individual square tightly in plastic wrap—I mean really wrap it—and then place those individually wrapped squares into a heavy-duty freezer bag. They freeze beautifully for up to two months. When you want one, just pull it out of the freezer and let it thaw on the counter for about 30 minutes. They’ll be perfect!
Storage and Reheating Guide for Peppermint Mocha Brownies
| Storage Location | Duration | Serving Suggestion |
|---|---|---|
| Countertop (Airtight) | Up to 1 day | Serve at room temperature for the softest texture. |
| Refrigerator (Airtight) | Up to 4 days | Serve chilled or let sit out for 15 minutes before eating. |
| Freezer (Wrapped Individually) | Up to 2 months | Thaw for 30 minutes on the counter. No reheating needed! |
Frequently Asked Questions About Peppermint Mocha Brownies
Can I make these brownies without espresso powder?
You absolutely can, but you’ll miss that deep multiplier effect on the chocolate! If you can’t use espresso powder or just don’t have it, you can substitute it with an equal amount of strong brewed coffee—about two teaspoons of very strong, cooled coffee—mixed in with your wet ingredients. If you skip it entirely, the brownies will still be fantastic, but they will taste purely chocolatey instead of that rich, coffeehouse mocha flavor we love in these Peppermint Mocha Brownies.
What is the best way to crush the candy canes?
This is a great question because you want two different textures: fine dust and bigger chunks! For the fine crush, I put the candy canes in a heavy-duty zip-top bag and gently tap them with the bottom of a heavy pan—be gentle so you don’t punch a hole in the bag! For the coarser pieces, I use a rolling pin and give the bag a few firm, targeted whacks. Remember to crush them right before you use them, or they can start to get sticky! You can find more baking inspiration on my Pinterest page.
Understanding the Nutrition in Peppermint Mocha Brownies
Now, let’s talk about the fuel behind these amazing treats! I have to be upfront: these are rich, decadent brownies, so they aren’t exactly “light.” When I make these Peppermint Mocha Brownies for the holidays, I know I’m indulging, and that’s okay! The numbers below are estimates based on the ingredients listed, so please treat them as a general guideline rather than a strict medical analysis.
We’ve got plenty of energy from the fats and sugars, but you still get a nice little boost of protein from the eggs and chocolate, too. Don’t worry too much about the exact numbers; just focus on the sheer joy of that minty, fudgy bite!
Estimated Nutritional Information
Here is the breakdown based on 20 servings. Remember, this is just an estimate so you can plan accordingly for your holiday feasting! For more sweet treats, check out my recipe for Fudgy Homemade Brownies.
| Metric | Estimated Value |
|---|---|
| Calories | 390 |
| Total Fat | 22 g |
| Total Carbohydrates | 46 g |
| Protein | 5 g |
Share Your Homemade Peppermint Mocha Brownies Experience
I’ve shared all my secrets, from the espresso powder to the double-crush candy cane topping, and now it’s your turn! I absolutely love seeing your baking triumphs in my kitchen, even if it’s just on a screen. Did you manage to get that perfect glossy ganache? Did your family devour these Peppermint Mocha Brownies in under an hour? If you want to share your results, feel free to connect with me on Facebook.
Please leave a rating for the recipe down below—it helps other bakers know what you thought! And if you made these, snap a picture and tag me on social media. I want to see your beautiful, minty, fudgy creations! Happy baking, and enjoy every single bite of that coffeehouse magic! You can also read more about my recipes on Medium.
Print
Decadent 20 Peppermint Mocha Brownies Magic Revealed
- Total Time: 2 hours 30 minutes
- Yield: 24 small squares or 16 medium brownies
- Diet: Omnivore
Description
Peppermint Mocha Brownies feature fudgy cocoa and espresso in the base, topped with a silky peppermint chocolate ganache and crunchy crushed candy canes for a coffeehouse-style winter dessert.
Ingredients
- 1 cup unsalted butter, melted and slightly cooled
- 1 cup granulated sugar
- 1 cup packed light brown sugar
- 3 large eggs, at room temperature
- 2 teaspoons vanilla extract
- 2 teaspoons instant espresso powder
- 1 cup all-purpose flour, spooned and leveled
- 1 cup unsweetened cocoa powder
- 1 teaspoon fine sea salt
- 1 teaspoon baking powder
- 1 1/2 cups semisweet chocolate chips
- 1/2 cup milk chocolate chips
- 3/4 cup heavy whipping cream
- 2 tablespoons unsalted butter, at room temperature
- 1 teaspoon peppermint extract
- 1/2 cup finely crushed candy canes or peppermint candies
- 1/4 cup coarsely crushed candy canes for garnish
- Whipped cream for serving
- Unsweetened cocoa powder for dusting on top
- Neutral oil or softened butter for greasing pan
- Parchment paper for lining a 9 x 13 inch pan
Instructions
- Preheat your oven to 350°F. Grease a 9 x 13 inch baking pan, then line it with parchment paper, leaving an overhang on two sides.
- In a large bowl, whisk together the melted butter, granulated sugar, and brown sugar until thick and glossy.
- Add the eggs, vanilla, and instant espresso powder to the sugar mixture and whisk until smooth.
- In a separate bowl, sift together the flour, cocoa powder, salt, and baking powder.
- Add the dry ingredients to the wet mixture and gently fold with a spatula just until no flour streaks remain.
- Spread the batter evenly into the prepared pan.
- Bake for 22 to 28 minutes until the top sets and a toothpick shows moist crumbs.
- Place the pan on a wire rack and let the brownies cool completely in the pan.
- Prepare the ganache: place the chocolate chips in a heat-safe bowl.
- Heat the heavy cream in a small saucepan until it steams, then remove from heat.
- Pour the hot cream over the chocolate chips; let sit undisturbed for 2 to 3 minutes.
- Add the butter and peppermint extract, then whisk slowly from the center outward until smooth and glossy.
- Let the ganache stand 5 to 10 minutes to thicken slightly.
- Pour the ganache over the cooled brownies and spread evenly.
- Immediately sprinkle the finely crushed candy canes over the ganache, then add the coarsely crushed pieces for garnish.
- Refrigerate the pan for 1 to 2 hours until the ganache is set.
- Lift the brownie slab using the parchment overhang and cut into squares or wedges with a sharp knife.
- Serve topped with whipped cream, a dusting of cocoa powder, and extra crushed candy canes if desired.
Notes
- Do not overbake the brownies; aim for a dense and fudgy texture.
- Ensure brownies are completely cool before adding the ganache layer.
- Crush candy canes just before sprinkling for the best color and crispness.
- Wipe your knife between cuts for cleaner slices.
- Store leftovers tightly covered in the refrigerator for up to 4 days.
- For longer storage, freeze individual squares for up to 2 months.
- Prep Time: 25 minutes
- Cook Time: 25 minutes
- Category: Dessert
- Method: Baking
- Cuisine: American