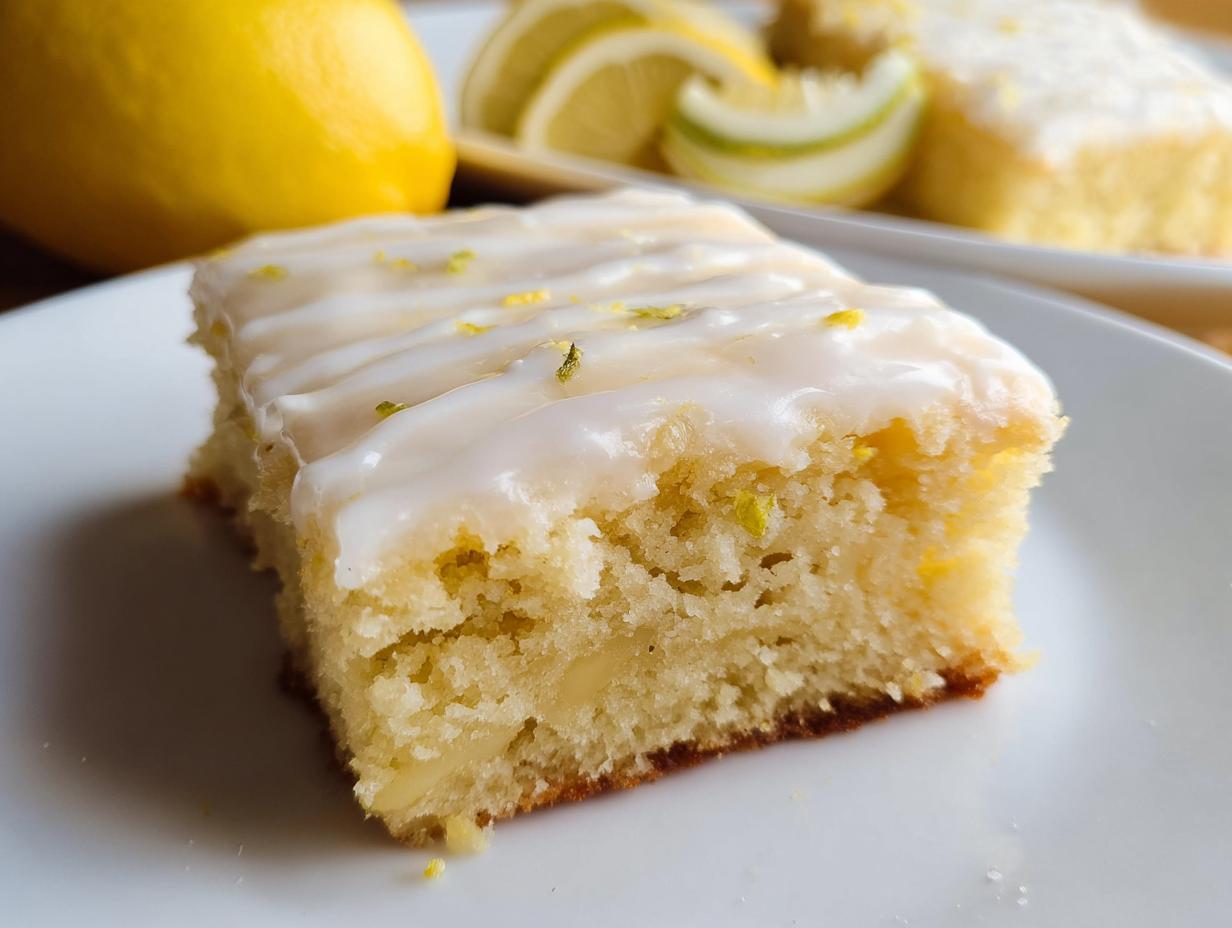
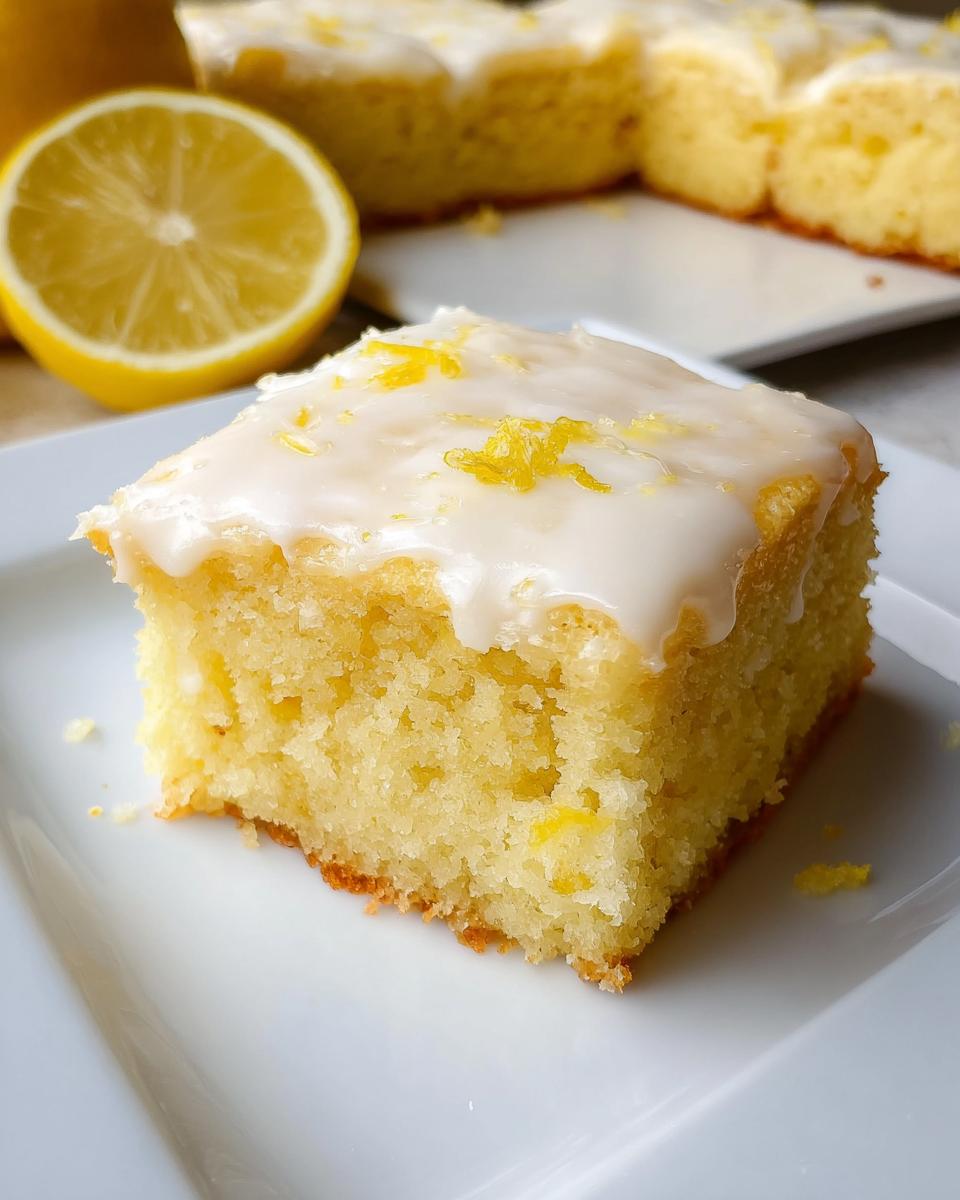
When I first started baking, anything that required three separate bowls felt like too much pressure! That’s why I absolutely adore these lemon brownies. They are sunshine in bar form—buttery, rich, and bursting with that perfect bright citrus zip. Seriously, these are the easiest, most rewarding bars you will ever make.
My favorite part is that everything happens in one bowl, which means cleanup is a breeze. I remember trying to make fancy layered desserts when I was younger and just getting frustrated. These bars taught me that sometimes, the simplest recipes are the ones you keep coming back to. They are truly the perfect recipe for anyone who wants that intense, zesty flavor without any fuss.
Gathering Your Ingredients for Perfect lemon brownies
Trust me, gathering your ingredients is half the battle won, especially when you’re making something as delicate in flavor as these lemon brownies. Because this recipe is so straightforward, the quality of what you put in really shines through. We aren’t using a ton of complicated stuff, just the basics done right! It’s important to make sure your eggs are at room temperature; it helps them blend beautifully with the sugar and butter later on.
Essential Components for lemon brownies
You’ll need your basic baking staples—flour, sugar, salt, and baking powder. The stars of the show, though, are the fat and the flavor! We use good unsalted butter and chopped white chocolate, which melts right into the batter for an amazing fudgy texture. Don’t forget those gorgeous, fragrant lemons for zest and juice!
Crafting the Zesty Lemon Glaze
The glaze is super simple, which is great because we don’t want to overwhelm that beautiful brownie flavor we just built. All you need for that perfect, thick, tangy topping is powdered sugar and a little extra fresh lemon juice. Whisk it until it’s smooth as silk, and you’re ready to go!
Equipment Needed to Make Your lemon brownies
Honestly, you don’t need a fancy mixer for these lemon brownies! Since it’s a one-bowl recipe, grab a sturdy, large mixing bowl and a reliable whisk—that’s your powerhouse. You’ll also need a microwave-safe bowl for melting the chocolate chips and, of course, your 8×8-inch baking pan. Light-colored pans work best for even baking, so keep that in mind! If you are looking for more easy baking ideas, check out our apple cider whoopie pies recipe.
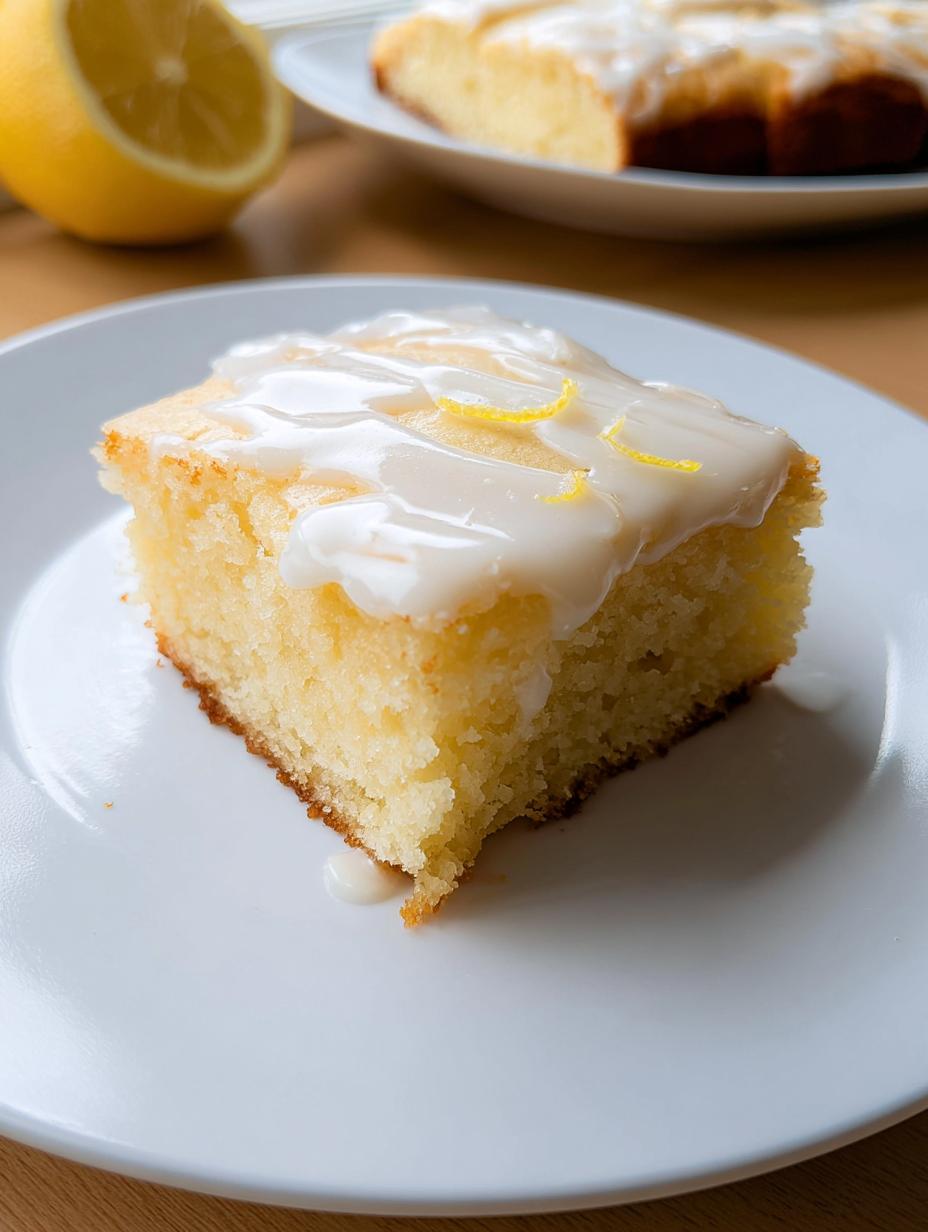
Step-by-Step Instructions for Rich lemon brownies
Okay, this is where the magic happens! Since we are keeping things super simple, we’ll build the flavor right in the bowl. Just follow these steps closely, and you’ll have the best, brightest lemon brownies ever. Remember, the key here is not to rush the cooling or overmix the flour—those are the two biggest rookie mistakes!
Preparing the Pan and Melting the Chocolate
First things first, get your oven cranked up to 350 degrees Fahrenheit. I always line my 8×8-inch pan with parchment paper, letting the edges hang over like little handles. This is my non-negotiable tip for easy removal later—no sticky corners for us! Now, for the white chocolate: combine your melted butter and the chopped white chocolate in a microwave-safe bowl. Microwave it in short 20-second bursts, stirring well in between each one. You want it totally smooth, like silk, not grainy or burnt. Once it’s combined, just set that bowl aside to cool down a bit while we work on the rest.
Building the Batter Base for Your lemon brownies
Here is my favorite trick for maximum lemon flavor! Take your granulated sugar and all that lovely lemon zest, and rub them together with your fingertips. You are literally squeezing the oils out of the zest right into the sugar. It smells incredible! Now, whisk in your room-temperature eggs, that extra yolk for richness, the lemon extract, and the vanilla until the mixture looks pale and happy. Once smooth, gently stir in that slightly cooled melted butter and chocolate mixture. Don’t worry if it looks a little messy right now; it comes together! For more simple baking inspiration, see our guide on easy white chocolate strawberries.
Final Mixing and Baking the Bars
It’s time for the dry stuff—the flour, salt, and baking powder. Add those in and fold them gently. I mean it—fold, don’t beat! As soon as you see the flour streaks almost disappear, toss in your fresh lemon juice and fold just a couple more times until everything is barely incorporated. Overmixing makes these bars tough, and we want soft lemon brownies! Pour that batter into your prepared pan and smooth the top. Bake for about 25 to 28 minutes. You are looking for golden edges and a toothpick that comes out with just a few moist crumbs clinging to it. If it’s totally dry, you’ve gone too far!
Applying the Bright Lemon Glaze
You absolutely must let these cool completely in the pan on a wire rack before you even think about glazing them. If you try to put glaze on warm bars, it just melts right off into a sad, transparent puddle. Once they are totally cool, whisk together the powdered sugar and the remaining lemon juice until you get a nice, pourable consistency. Spread it evenly over the top. Let that beautiful glaze set up for about 20 minutes before slicing. That waiting period is the hardest part, but trust me, it’s worth it!
Tips for Success with Citrus Bars
These bars are so forgiving, but there are two little things that can really make or break your texture. First, remember that flour mixing step? Go easy! If you mix the flour in too vigorously, you develop gluten, and suddenly your soft, rich bar turns into something closer to tough bread. Fold gently until you *just* see the last few streaks of flour disappear, then stop mixing immediately.
Second, and this is huge for clean slicing, you have to be patient with the cooling process. Trying to cut these warm is a disaster; the bars crumble, and the glaze slides around. Let them cool completely in the pan—I usually wait a couple of hours, or even chill them slightly before slicing. Once they are cool and firm, you get those beautiful, neat squares that look as good as they taste! If you want to see another great bar recipe, check out our chocolate sea salt nut bars recipe.
Frequently Asked Questions About lemon brownies
I get so many questions about these bars because everyone loves how easy they are! Here are the things folks ask me most often about making these incredible lemon brownies.
Q1. Can I skip the white chocolate?
You certainly can try, but you’ll lose that signature rich, buttery texture that makes these bars feel like a cross between a brownie and a blondie. The white chocolate melts right into the batter, adding fat and density. If you must skip it, try adding an extra tablespoon of melted butter, but the texture won’t be quite the same!
Q2. Why did my glaze turn out too thin?
This usually happens if you add too much lemon juice at once. The glaze is very forgiving, though! Just whisk in a little more powdered sugar, one teaspoon at a time, until it thickens up to a nice, spreadable consistency. You want it thick enough to coat the back of a spoon.
Q3. Can I use lime juice instead of lemon?
Absolutely! If you swap out the lemon zest and juice for lime zest and juice, you get fantastic key lime bars instead. The ratios are almost identical, and they bake up exactly the same way. It’s a fun way to change things up! For more citrus inspiration, see our raspberry lemon spritzer recipe.
Q4. My bars seem too crumbly when I slice them. What did I do wrong?
Nine times out of ten, this means you rushed the cooling process. You must let these bars cool completely—and I mean *completely*—before attempting to lift them out or slice them. Chilling them for 30 minutes after they reach room temperature helps immensely for clean cuts.
Storing and Keeping Your lemon brownies Fresh
These bars are best enjoyed the day they are made, but honestly, they hold up beautifully! Because of that amazing glaze, you need to treat them right so the frosting stays perfect. I always rely on keeping them airtight to lock in that fresh, bright lemon flavor. You can find more of our baking tips on our Medium page.
Storage and Reheating Guidelines
You can keep these on the counter at room temperature for about three days, provided they are in an airtight container. If you need them to last a little longer—maybe you’re saving some for a mid-week treat—they do great in the fridge for up to a week. Since they are so rich, I find they taste best when you let them warm up on the counter for about 15 minutes after they come out of the fridge.
| Location | Maximum Time |
|---|---|
| Room Temperature (Airtight) | 3 Days |
| Refrigerator (Airtight) | 1 Week |
Understanding the Nutritional Estimate for lemon brownies
I always feel a little guilty looking at the nutrition facts after making something this delicious, but knowledge is power, right? These lemon brownies are rich because we use real butter and white chocolate for that perfect dense texture, so they pack a little punch! I’m not a nutritionist, of course, but based on the recipe measurements, here’s what you can generally expect per bar. Remember, since this is homemade, the exact numbers can shift depending on how thick you spread that gorgeous glaze! If you want to follow us for more recipes, check out our Pinterest page.
We are aiming for a satisfying, dense square here, so the protein is small, but the carbs and fats are what give you that wonderful, melt-in-your-mouth feeling. It’s dessert, after all—enjoy it! I always tell people to have one with a cup of coffee; it’s the perfect afternoon treat. If you want to see our Facebook page, visit us here.
Here is a quick breakdown of the main estimates based on 9 servings:
| Nutrient | Amount |
|---|---|
| Calories | 210 |
| Fat | 11g |
| Carbohydrates | 25g |
| Protein | 3g |

1 Bowl lemon brownies for 9 sweet treats
- Total Time: 38 minutes
- Yield: 9 brownies
- Diet: Vegetarian
Description
Soft, rich, and buttery lemon brownies topped with a zesty lemon glaze. These one-bowl bars offer a bright, sunny dessert flavor.
Ingredients
- 1/2 cup unsalted butter, melted
- 4 oz white chocolate, chopped
- 3/4 cup granulated sugar
- 2 tablespoons lemon zest (from 2 large lemons)
- 2 large eggs, room temperature
- 1 large egg yolk
- 1 teaspoon lemon extract
- 1 teaspoon vanilla extract
- 1 cup plus 2 tablespoons all-purpose flour, spooned and leveled
- 1/2 teaspoon salt
- 1/8 teaspoon baking powder
- 2 tablespoons fresh lemon juice
- 1 cup powdered sugar (for glaze)
- 2 tablespoons fresh lemon juice (for glaze)
Instructions
- Preheat your oven to 350°F. Line an 8×8-inch light-colored metal pan with parchment paper.
- Combine butter and white chocolate in a microwave-safe bowl. Microwave in 20-second intervals, stirring between each, until melted and smooth. Let this mixture cool slightly.
- In a large bowl, rub the sugar and lemon zest together with your fingertips to release the oils.
- Whisk in eggs, egg yolk, lemon extract, and vanilla extract until the mixture is smooth and pale.
- Stir in the melted butter mixture until you combine everything.
- Fold in flour, salt, and baking powder until almost mixed. Add the lemon juice and fold gently just until incorporated. Do not overmix the batter.
- Pour the batter into the prepared pan and smooth the top surface.
- Bake for 25–28 minutes. The edges should be lightly golden, and a toothpick inserted in the center should come out with a few moist crumbs.
- Cool the brownies completely in the pan on a wire rack.
- For the glaze, whisk powdered sugar and lemon juice until smooth and pourable. Spread the glaze over the cooled brownies. Let the glaze set for 20 minutes before you slice them.
Notes
- Store these brownies in an airtight container at room temperature for up to 3 days.
- You can refrigerate them for up to 1 week.
- These taste best when chilled.
- Prep Time: 10 minutes
- Cook Time: 28 minutes
- Category: Dessert
- Method: Baking
- Cuisine: American