If you’re anything like me, sometimes you need a healthy win, but you just don’t have the time during the week. That’s where these Frozen Greek Yogurt Cups save the day! Seriously, these are the most beginner-friendly, make-ahead breakfast treats you’ll ever whip up. They come together faster than pouring a bowl of cereal, and I promise, even if you’ve never frozen anything before, you’ll nail these.

Why Frozen Greek Yogurt Cups Are Your New Favorite Snack
I swear by these things. When my mornings get completely chaotic—you know those mornings where you forget to pack lunch or you just hit snooze one too many times—having a couple of these yogurt cups waiting in the freezer is a lifesaver. They are perfectly portioned, packed with protein from the Greek yogurt, and you feel great grabbing one. It’s the ultimate healthy snack that requires zero willpower because it’s already done!
The assembly is so simple; my nephew made a batch last summer, and they were perfect. That’s how easy this recipe is for anyone starting out. You just layer, stir, freeze, and you’ve got a week’s worth of healthy fuel ready to go. Trust me, once you try these Frozen Greek Yogurt Cups, they become part of your weekly routine. You can see more quick snack ideas on our snacks page.
Essential Equipment for Perfect Frozen Greek Yogurt Cups
You don’t need any fancy gadgets for this one, which is another reason I love them so much! Keep your arsenal simple. First up, you absolutely need a standard 12-cup muffin tin. I prefer the ones with the little indentations, but any standard size works. You’ll also need paper liners, or if you’re going the reusable route, silicone molds are fantastic for easy popping later on.
For mixing, grab a large bowl for the yogurt filling—you want room to whisk without splashing everything everywhere. A medium bowl is perfect for mixing up that crunchy base layer. Then, you’ll need a whisk or a sturdy fork for the yogurt, and a spoon or small spatula for pressing the granola down firmly into the cups. That’s it! Simple tools for a super satisfying result.
Gathering Ingredients for Frozen Greek Yogurt Cups
Okay, let’s talk ingredients! This is where the magic starts, but honestly, it’s just grabbing stuff from your pantry and fridge. We are making 12 beautiful Frozen Greek Yogurt Cups, so make sure you have everything measured out before you start assembling. The beauty of this recipe is that you don’t need to cook anything, which is a huge win on a hot day.
You’ll need two main components: the granola base and the creamy filling. Everything needs to be ready to go because once the base is set, we want to move quickly to the next step. Don’t stress if you’re missing one thing; we’ll talk substitutions later, but for the first batch, stick close to the list!
Choosing the Best Yogurt and Fruit Components
For the yogurt, you absolutely must use plain Greek yogurt. I use the full-fat version because it freezes creamier, but 2% works if you’re watching calories. Make sure it’s plain, not vanilla already, because we are adding our own sweetness and flavor! We need two cups total. Sweetening the yogurt is simple: just whisk in two tablespoons of honey and a teaspoon of vanilla extract. A little splash of fresh lemon juice cuts through the richness and brightens everything up—don’t skip that little bit of acid!
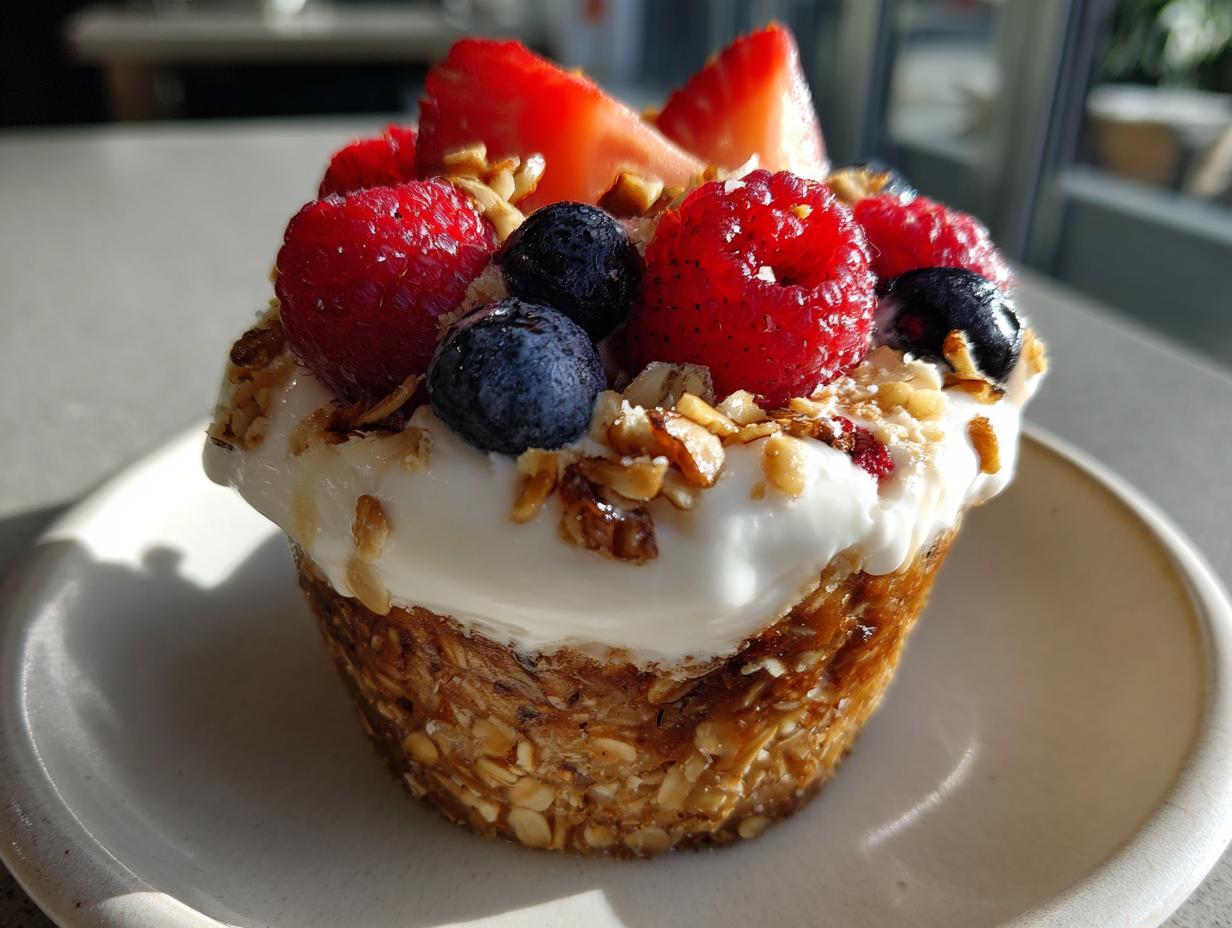
For the fruit, mixed berries are the way to go for those gorgeous pops of color in your Frozen Greek Yogurt Cups. Blueberries, raspberries, sliced strawberries—whatever looks good in the freezer aisle works. If you want a marbled effect, you can gently mash about half of your berries before you layer them in. That looks so fancy!
Creating the Perfect Granola Base
This base is crucial because it stops your Frozen Greek Yogurt Cups from crumbling into a million pieces when you pull them out of the tin. We’re using one cup of your favorite crunchy granola. Now, here’s the trick to binding it: natural peanut butter or almond butter, about two tablespoons worth, and one tablespoon of honey. If you need a great homemade granola recipe to start with, check out our homemade granola recipe.
You need to mix this together really well until all the granola feels damp and sticky, almost like wet sand. If it seems too dry, add just a tiny drizzle more honey. The nut butter and honey act like glue, holding those crunchy bits together so you get a solid foundation for your yogurt layer. Press that mixture down firmly in the bottom of your liners!
Step-by-Step Instructions for Frozen Greek Yogurt Cups
Now that we have all our components ready, let’s get these Frozen Greek Yogurt Cups assembled! This process moves fast, so have your muffin tin ready to go right next to where you’re mixing. Remember, we aren’t cooking anything, just assembling and freezing, which is the best part!
Preparing and Setting the Base Layer
First things first, get those paper liners into your muffin tin cups, or make sure your silicone molds are greased up well. In your medium bowl, combine that one cup of granola, the nut butter, and the tablespoon of honey. Use your hands or a sturdy spoon to really work it together until every piece of granola is coated and sticky. You want it cohesive!
Take about a tablespoon of this mixture and press it *firmly* into the bottom of each cup. I mean firm! If you just sprinkle it in, it will crumble later when you try to eat it. Use the back of a spoon or your fingers to really compact that base layer down. Once all 12 cups have their solid foundation, pop the whole tin into the freezer for exactly 10 minutes. This little chill time ensures that base sets up hard so the yogurt doesn’t sink right into it.
Mixing the Yogurt Filling and Layering
While the bases are chilling, grab your large bowl. Whisk together the two cups of Greek yogurt, the two tablespoons of honey, the vanilla extract, and that crucial tablespoon of lemon juice. Whisk until it looks completely smooth and uniform—no streaks of honey left! This is your creamy filling.
Take the tin out of the freezer after those 10 minutes are up. Now we layer! Spoon about two tablespoons of that lovely yogurt mixture over each set granola base. Spread it out gently so you don’t disturb the bottom layer. Next, top each one with your mixed berries. Press them lightly into the yogurt so they stick. If you are using those optional chopped nuts or extra granola, sprinkle a tiny bit on top now so they freeze right on the surface. This layering sequence is what makes our Frozen Greek Yogurt Cups look so professional!
Freezing and Finalizing Your Frozen Greek Yogurt Cups
This is the hardest part: waiting! Place the muffin tin back in the freezer, but here’s a pro tip: leave it uncovered for the first hour or two. This helps the cups freeze quickly and evenly without developing a weird icy crust on top. You need to freeze these for a solid 4 to 5 hours, but honestly, overnight is always best for guaranteed firmness.
Once they are rock solid, you can cover the tin with plastic wrap or transfer them to an airtight container for longer storage. These Frozen Greek Yogurt Cups are ready when they are completely solid all the way through. They are perfect for grabbing straight from the freezer! If you want to share your success, feel free to tag us on Facebook.

Tips for Success with Frozen Greek Yogurt Cups
Even though these are super easy, there are a couple of little things you can do to make sure your Frozen Greek Yogurt Cups come out looking like they came from a fancy shop, not stuck halfway in the paper liner. I learned these tricks the hard way after wrestling with a few sticky bottoms!
Preventing Sticking and Ensuring Easy Release
The biggest issue people run into is trying to peel the paper liner off a rock-solid, frozen yogurt cup. It rips, it tears, and suddenly your beautiful snack looks like abstract art. If you are using standard paper liners, make sure you really press that granola base down firmly, like I mentioned before. A solid base means less chance of the yogurt sticking to the paper.
However, my absolute favorite hack—and this is the expert tip—is using silicone muffin molds. They are flexible, so when the yogurt is totally frozen, you just gently peel the silicone away from the sides. It pops right out, no fuss, no fighting! If you don’t have silicone, you can line your regular tin with parchment paper strips that stick up over the sides like little handles. That way, you just lift the whole frozen cup out.
When you store them later, never stack them directly on top of each other unless you want them to fuse into one giant yogurt block! Always lay down a sheet of parchment paper between layers in your airtight container. This simple step keeps every single one of your perfect Frozen Greek Yogurt Cups separate and ready to grab. You can find more baking tips on our Medium profile.
Storing and Serving Your Frozen Greek Yogurt Cups
Once you’ve mastered making these amazing Frozen Greek Yogurt Cups, the next big question is how to keep them perfect until you want to eat them. Storing them correctly is key to maintaining that creamy texture and preventing freezer burn. You want them to last, right?
I always make a huge batch on Sunday so I have grab-and-go snacks for the whole week. The trick is making sure they don’t stick together in one giant frozen mass!
Proper Storage Duration and Layering Techniques
These freeze beautifully, and honestly, the flavor seems to get better as they sit for a day or two! You should aim to eat them within two weeks for the best texture, though they are safe much longer. When you put them away, make sure they are in a truly airtight container. If you stack them, you *must* use parchment paper between each layer. Even a thin sheet of wax paper works in a pinch! If you are looking for other make-ahead breakfast ideas, check out our frozen yogurt granola cups.
| Storage Method | Recommended Duration |
|---|---|
| Airtight Container (Layered with Parchment) | Up to 2 Weeks |
| Individual Freezer Bags (Wrapped Tightly) | Up to 10 Days |
The Ideal Thawing Time Before Serving
You can’t bite into these straight out of the deep freeze; they are too hard! That’s why you need a little patience before enjoying your Frozen Greek Yogurt Cups. Pull them out of the freezer and let them sit on the counter for about 3 to 5 minutes. This short time softens the yogurt just enough so it’s creamy and easy to bite into without being melted or messy. If you used silicone molds, you might only need 3 minutes, but paper liners usually need that full 5 minutes.
Frequently Asked Questions About Frozen Greek Yogurt Cups
I get so many questions about these little gems because everyone wants to make them their own way! They really are the perfect make-ahead snack, but sometimes you need to swap an ingredient or two. Here are the top things people ask me about perfecting their Frozen Greek Yogurt Cups.
Can I substitute the honey in the yogurt mixture?
Yes, you absolutely can! Honey is great because it adds a lovely flavor complexity, but if you don’t have it or you’re avoiding it, maple syrup is a fantastic swap, especially in the yogurt filling. Maple syrup has a slightly different texture when frozen, but it works beautifully with the lemon juice. If you use maple syrup, you might want to use just a tiny bit less, as it can sometimes be sweeter than honey. For the granola base, stick to honey or maple syrup—you need that stickiness to hold the base together!
How long can I keep these Frozen Greek Yogurt Cups in the freezer?
These hold up really well, which is why they are such a great meal prep item! For the absolute best texture—the creamiest yogurt and the crunchiest granola—I recommend eating them within two weeks. After that, they are still perfectly safe to eat, but sometimes the yogurt can get a little more icy, especially if your freezer temperature fluctuates. Make sure they are in a good, sealed, airtight container, and they should last a solid month if you forget about them for a bit!
Understanding the Nutrition in Your Frozen Greek Yogurt Cups
One of the main reasons I rely on these Frozen Greek Yogurt Cups is because I know exactly what’s going into them. When you make things yourself, you skip all that weird processed sugar and stabilizers that the store-bought stuff sneaks in. We are using plain yogurt, real fruit, and a little bit of natural sweetener, so you get a great hit of protein without feeling guilty.
This recipe is easily adaptable, too! If you swap out the full-fat yogurt for non-fat, your fat content drops significantly. If you use lower-sugar granola, the carbs will shift. But based on the standard recipe—using 2% Greek yogurt, natural peanut butter, and the specified honey amounts—you get a fantastic, balanced snack.
Nutrition Snapshot for Frozen Greek Yogurt Cups
I calculated the rough numbers based on 12 even servings, and the results are pretty solid for a quick breakfast or afternoon pick-me-up. It’s a great way to get essential protein into your diet!
| Nutrient (Per Cup) | Estimated Value |
|---|---|
| Calories | 110 |
| Protein | 6g |
| Fat | 3g |
| Carbohydrates | 15g |
See? A good balance! You get enough carbs for energy from the fruit and granola, and that 6 grams of protein really helps keep you full until your next meal. That’s why these Frozen Greek Yogurt Cups are my go-to when I need something satisfying! For more healthy recipes, check out our Pinterest page.
Print
Make 12 Frozen Greek Yogurt Cups amazingly fast
- Total Time: 4 hours 10 minutes
- Yield: 12 cups
- Diet: Vegetarian
Description
Creamy frozen Greek yogurt cups layered with crunchy granola and sweet mixed berries. A healthy make-ahead breakfast or snack.
Ingredients
- 1 cup granola
- 2 tablespoons natural peanut butter or almond butter
- 1 tablespoon honey
- 2 cups plain Greek yogurt
- 2 tablespoons honey
- 1 teaspoon vanilla extract
- 1 tablespoon fresh lemon juice
- 1 cup mixed berries (blueberries, raspberries, strawberries, sliced)
- 2 tablespoons granola for topping
- Optional: chopped walnuts or sliced almonds
Instructions
- Line a 12-cup muffin tin with paper liners or lightly grease with cooking spray.
- Mix together granola, nut butter, and honey in a medium bowl until the granola is evenly coated and slightly sticky.
- Press approximately 1 tablespoon of the granola mixture firmly into the bottom of each muffin cup to create a solid base layer.
- Place the muffin tin in the freezer for 10 minutes to set the granola base.
- Whisk together Greek yogurt, honey, vanilla extract, and lemon juice in a large bowl until smooth.
- Remove the muffin tin from the freezer and spoon approximately 2 tablespoons of the yogurt mixture over each granola base, spreading it evenly.
- Top each cup with mixed berries, pressing them gently into the yogurt, then sprinkle with additional granola or chopped nuts if desired.
- Freeze uncovered for 4 to 5 hours or overnight until completely frozen through.
- Store frozen yogurt cups in an airtight container in the freezer and consume within 2 weeks.
- Remove cups from the muffin tin and let sit at room temperature for 3 to 5 minutes before enjoying.
Notes
- Press the granola base firmly to prevent crumbling.
- Mash half the berries before mixing them with yogurt for a marbled effect.
- Let cups stand 3 to 5 minutes before eating to soften slightly.
- Use silicone muffin molds for easier removal.
- Layer cups between parchment paper when storing to prevent sticking.
- Prep Time: 10 minutes
- Cook Time: 0 minutes
- Category: Breakfast/Snack
- Method: Freezing
- Cuisine: American