Frozen Yogurt Granola Cups are the absolute perfect recipe for anyone who thinks they can’t cook, or maybe just someone who hates turning on the oven in July. I remember when I first started NoobRecipes, I tried making one of those fancy layered parfaits, and it looked like a messy yogurt explosion by the time I got to work. I needed something sturdy, something that traveled well, and something that tasted like a real treat without requiring actual baking skills. These cups were my breakthrough! They use simple pantry staples—oats, a little nut butter, and yogurt—and they come together faster than ordering takeout. Seriously, if you can stir things in a bowl, you can master these. They have the crunch, the creaminess, and they’re just so satisfying when you pull that cold, sweet cup out of the freezer. Welcome to your new favorite easy dessert!

Why You’ll Love These Frozen Yogurt Granola Cups
I designed this recipe specifically for the kitchen novice, and honestly, even I make these weekly now because they are just so convenient. They tick every box when you need something quick and good for you. They are the ultimate make-ahead treat!
- Quick Preparation Time: You are looking at just 15 minutes of active work before they head to the freezer. No oven required, ever!
- Perfect Healthy Snack: We use real whole oats for that satisfying crunch and high-protein Greek yogurt to keep you full longer. They feel indulgent but are actually good fuel.
Quick Preparation Time
Seriously, 15 minutes is all it takes. You mix, press, fill, and freeze. That no-bake magic means less mess and zero worries about burning anything.
Perfect Healthy Snack
The protein in the Greek yogurt really sets these apart from sugary frozen desserts. Plus, those oats? They are hearty and give you the energy you need without the sugar crash later on. A genuine healthy snack!
Essential Equipment for Frozen Yogurt Granola Cups
You don’t need a fancy setup for this recipe, thank goodness! Since we aren’t baking, our needs are simple. Grab your standard baking tools, and you are ready to go. Make sure you have a standard 12-cup muffin tin ready to line up.
- One standard 12-cup muffin pan
- Paper or silicone muffin liners
- Mixing bowl and spoon
- Measuring cups and spoons
Gathering Your Frozen Yogurt Granola Cups Ingredients
When you are new to the kitchen, precision matters, especially with no-bake recipes where there’s no heat to fix mistakes later! I’ve listed everything below. Pay close attention to the almond butter—it’s what holds this base together, so make sure it’s creamy and not too stiff.
Here is exactly what you need to gather for about 6 to 8 perfect cups. Don’t try to eyeball these measurements; it really throws off the texture!
| Component | Amount | Notes for Success |
|---|---|---|
| Oats (Rolled or Quick) | 3/4 cup | Make sure they are standard rolled oats, not steel-cut, or the base won’t stick! |
| Cinnamon | 1/2 teaspoon | Just a hint to warm up that oat flavor. |
| Almond Butter | 1/4 cup | Creamy is best here. If yours is super stiff, warm it slightly first. |
| Honey (or Maple Syrup) | 3 to 4 tablespoons | This is your glue! Use 4 tablespoons if your almond butter is stiff. |
| Vanilla Extract | 1 teaspoon | Adds that lovely background bakery smell. |
Granola Base Components
This is the crunchy part that keeps the whole thing from falling apart when you pull it out of the freezer. Remember, the almond butter and honey are key here. If it seems too crumbly when you pinch it, add a tiny bit more honey, just a teaspoon at a time, until it holds its shape easily.
Yogurt and Topping Selection
For the yogurt, you absolutely must use Greek yogurt. Regular yogurt is too watery and will just turn into a frozen ice block that cracks. We need that thickness! For the berries, whatever looks best at the market that day—strawberries, blueberries, raspberries—they all work great on top.
Step-by-Step Instructions for Frozen Yogurt Granola Cups
Okay, this is where the magic happens, and trust me, it’s ridiculously simple. We are building this treat in two main stages: the crunchy bottom and the creamy top. Don’t rush the mixing, because a good base is everything here!
Creating the Sturdy Granola Base
First up, grab your mixing bowl. Toss in your oats, cinnamon, almond butter, honey, and vanilla extract. Now, start stirring! You want to mix this until it looks like wet, sticky sand—the kind you can actually pack together. If you notice it’s still too crumbly and won’t hold a shape when you squeeze a handful, don’t panic! Just add another teaspoon of honey or a tiny drizzle of almond butter until it starts clumping nicely. Once it’s cohesive, line your muffin tin with liners. This step is non-negotiable; it saves you so much heartache later!
Take about a tablespoon of that sticky granola mixture and drop it into the bottom of each lined cup. Now, use your fingers or the bottom of a small glass to press that base down really firmly. You need to pack it tight so it doesn’t fall apart when you try to eat it later. Give it a good solid press down!
Assembling and Freezing Your Cups
Next, the yogurt layer. Spoon your thick Greek yogurt right over that packed base in each cup. Try to keep the sides clean so they look nice when they come out. If you reserved any of that granola mixture, sprinkle a little bit on top of the yogurt for extra texture. Then, top generously with your fresh berries. A few blueberries or a slice of strawberry looks fantastic!

The final, and hardest, part: waiting! Place the entire muffin pan straight into the freezer. These need at least 4 hours to set up completely. If you try to pull them out sooner, you’ll just have a yogurt puddle. I usually make these the night before. When you are ready to serve, just let them sit on the counter for about 5 to 10 minutes—this little thaw time makes them perfect for biting into.
Tips for Perfect Frozen Yogurt Granola Cups
Even though these are beginner-friendly, sometimes things go a little sideways when you’re dealing with frozen treats. Don’t sweat it! Most issues just come down to sticky ingredients or timing. I’ve learned a few tricks over the years to make sure your cups come out looking exactly like the picture.
Adjusting Sweetness and Texture
If you taste-tested your granola base mixture before pressing it in and found it needed more sweetness, go ahead and drizzle in a little extra honey. Remember, once it’s frozen, tastes get slightly muted, so it’s better to have it slightly sweeter when it’s room temperature. If your almond butter was really stiff or natural (the kind that separates), you might have needed more honey to make it stick. If your base feels too loose even after adding the full amount of honey, don’t add more liquid! Instead, add another tablespoon of oats to soak up the excess moisture. That’s the secret to a firm base.
Preventing Sticking Issues
I know I stressed using liners, but honestly, sometimes even the liners try to fight you! If you are worried about the granola base sticking to the paper liner itself, try this little trick: Before you put the granola dough in, spray the inside of the paper liner with a tiny bit of non-stick cooking spray. It sounds excessive, but it guarantees the base peels away cleanly from the paper liner when you go to eat it. Also, when pulling them out of the freezer to serve, use a butter knife to gently run around the very edge of the paper liner before peeling it off. That little break in the seal makes all the difference!
Storing and Serving Your Frozen Yogurt Granola Cups
The beauty of these cups is that they are designed for storage! They are the ultimate make-ahead snack for busy weeks. However, because they contain fresh yogurt and fruit, we need to be smart about how we freeze them so they don’t get freezer burn or stick together.
The most important thing is keeping them airtight. If you leave them exposed in the freezer, the yogurt top will start to look dry and icy after about a week. Don’t let that happen! If you want to see more of our easy dessert recipes, check out our dessert section.
Best Practices for Freezer Storage
When you pull that muffin pan out after 4 hours, you need to transfer them immediately. Do not try to store the whole pan—they take up too much room and are hard to manage. Carefully peel the paper liner just enough to get a good grip, and transfer each cup into a heavy-duty freezer bag or an airtight container. If you are layering them in a container, put a small square of parchment paper between each cup so they don’t freeze together into one giant yogurt brick.
If you follow these steps, your perfect little snack will last well for about three weeks. Any longer than that, and the texture of the fresh fruit might start to degrade a little. When serving, remember they are rock hard right out of the freezer. Give them 5 to 10 minutes on the counter—I sometimes put them on a small plate while I make coffee—to soften just enough so you get that perfect, creamy bite!
| Storage Method | Duration | Key Tip |
|---|---|---|
| Airtight Container/Freezer Bag | Up to 3 Weeks | Use parchment squares between layers to stop sticking. |
| Refrigerator (Thawed) | Up to 12 Hours | They will soften quickly, so only thaw what you plan to eat immediately. |
Frequently Asked Questions About Frozen Yogurt Granola Cups
I get tons of questions about these cups because everyone wants to customize them, which is great! But remember, these are a beginner recipe, so sometimes changing one thing throws off the whole structure. Here are the most common things people ask me about when they are making their first batch of these easy dessert cups.
Can I substitute the Greek Yogurt?
This is the number one question! You really need Greek yogurt because of its thickness. If you use standard yogurt, it’s just too watery, and you’ll end up with a frozen block that cracks when you bite it. You can use a thick coconut yogurt if you need dairy-free, but you might need to drain it in cheesecloth overnight first to get rid of excess liquid. Just know that any substitution will likely change the final texture of your healthy snack.
How do I make these vegan?
Making these vegan is super easy! For the base, swap the honey for pure maple syrup—use the same amount. Maple syrup acts just like honey in this no-bake treat. Then, for the yogurt, use a high-quality, thick, plain plant-based yogurt. That’s it! You’ve got yourself a vegan version of these yummy cups.
Can I prepare these ahead of time?
Absolutely, yes! That’s one of the best features of these frozen yogurt granola cups. They are designed to be prepared ahead of time. I usually make a double batch on Sunday night, and they last us perfectly through the week. Just make sure they are in an airtight container in the freezer, and you’re set for quick, easy dessert all week long! For more quick ideas, follow us on Pinterest.
Understanding the Nutritional Profile of Frozen Yogurt Granola Cups
I always get asked if these delicious treats are actually good for you, and the answer is a resounding yes, especially compared to store-bought frozen snacks! Since we are using whole ingredients like oats and Greek yogurt, you get a nice balance of protein, fiber, and healthy fats. Remember, these are estimates based on the recipe as written, using plain yogurt and standard almond butter. Your exact numbers might shift slightly based on the brand of honey or the type of berries you use.
It’s amazing what you can pack into one little, easy dessert cup when you skip out on all those weird additives they put in the frozen aisle!
| Nutrient | Approximate Value |
|---|---|
| Serving Size | 1 cup |
| Calories | Approx. 180 |
| Protein | Approx. 7g |
| Fat | Approx. 8g |
| Carbohydrates | Approx. 22g |
| Fiber | Approx. 2g |
| Sugar | Approx. 15g |
Disclaimer: Nutritional information is calculated based on standard ingredient averages and is intended as a general guide only.
Print
Frozen Yogurt Granola Cups: 15 Minute Wonder Fuel
- Total Time: 4 hours 15 minutes
- Yield: Makes 6-8 cups
- Diet: Vegetarian
Description
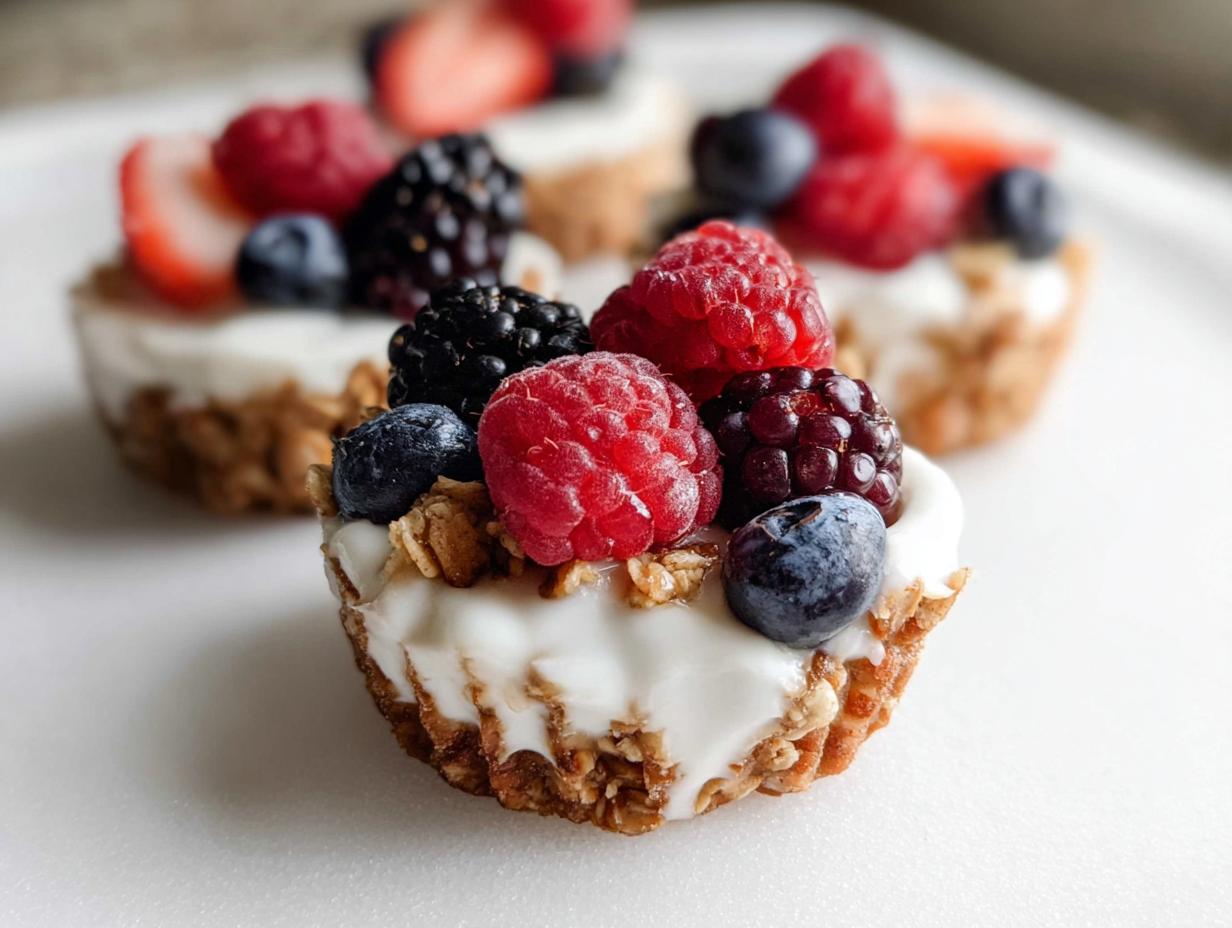
Frozen Yogurt Granola Cups offer a simple, healthy, and satisfying treat. These no-bake cups feature a crunchy oat base, creamy Greek yogurt, and fresh berries, perfect for a quick snack or light dessert. You can easily customize them to fit your taste.
Ingredients
- 3/4 cup oats
- 1/2 tsp cinnamon
- 1/4 cup almond butter
- 3–4 tbsp honey (depending on desired sweetness)
- 1 tsp vanilla extract
- 1 1/2 cups Greek yogurt*
- Berries of choice to top
Instructions
- Mix the oats, cinnamon, almond butter, honey, and vanilla extract together in a bowl until you form a sticky dough. If the dough seems very dry, add more almond butter and honey.
- Line a muffin pan with muffin liners. Add a spoonful of the granola dough into the bottom of each muffin cup. Press the dough firmly with your fingers to create a sturdy base.
- Add a spoonful of yogurt to each cup. Top with berries and any leftover granola mixture.
- Place the pan in the freezer to set for a minimum of 4 hours. Allow the cups to thaw slightly before you serve them.
Notes
- Use plain or flavored Greek yogurt. If you choose plain yogurt, add 1/2 tsp of vanilla extract and honey or maple syrup to sweeten it to your preference.
- Store these cups in the freezer.
- Prep Time: 15 minutes
- Cook Time: 0 minutes
- Category: Dessert
- Method: No-Bake/Freezer
- Cuisine: American