I swear, if you think baking bread is hard, you haven’t tried my recipe for cheese filled bread yet! Seriously, this is the recipe that made me realize kneading isn’t a chore; it’s therapeutic. I remember the first time I tried making these – I was convinced I’d end up with hard, dense rocks instead of soft buns. Oops!
But this recipe? It’s foolproof. It uses the simplest steps to create the fluffiest, softest dough you’ve ever worked with, and the center is just pure, gooey, melty goodness. It’s my go-to comfort food. Whether you need a warm breakfast or a ridiculously satisfying snack, these buns are the answer. Trust me, you’re about to bake the best cheese filled bread of your life, and you won’t even need a fancy stand mixer for it!

Gathering Your Ingredients for cheese filled bread
Before we get our hands messy, we need to make sure we have everything ready to go. This recipe is so simple, but the success really hinges on using the right ingredients, especially when it comes to getting that perfect soft texture. Don’t rush this part! Lay everything out so you can move quickly once the mixing starts.
The dough components are basic pantry staples, but we need to pay attention to the milk temperature—that’s where people usually mess up the yeast. For the filling, we’re going for a dynamic duo of cheese that melts like a dream but still has a little bit of bite to it.
Dough Components for cheese filled bread
You’ll need 3 cups of all-purpose flour, 2.25 teaspoons of instant yeast, 1 tablespoon of sugar, and 1 teaspoon of kosher salt. For the wet stuff, grab 1 cup of milk—and this is important—it needs to be warm, not hot. If it’s too hot, it kills the yeast, and your bread won’t rise. We want it around 105 to 115 degrees Fahrenheit; just warm enough that it feels cozy, not scalding, when you test it on your wrist. Then, 3 tablespoons of melted unsalted butter brings in that essential richness.
Crafting the Melty cheese filled bread Filling
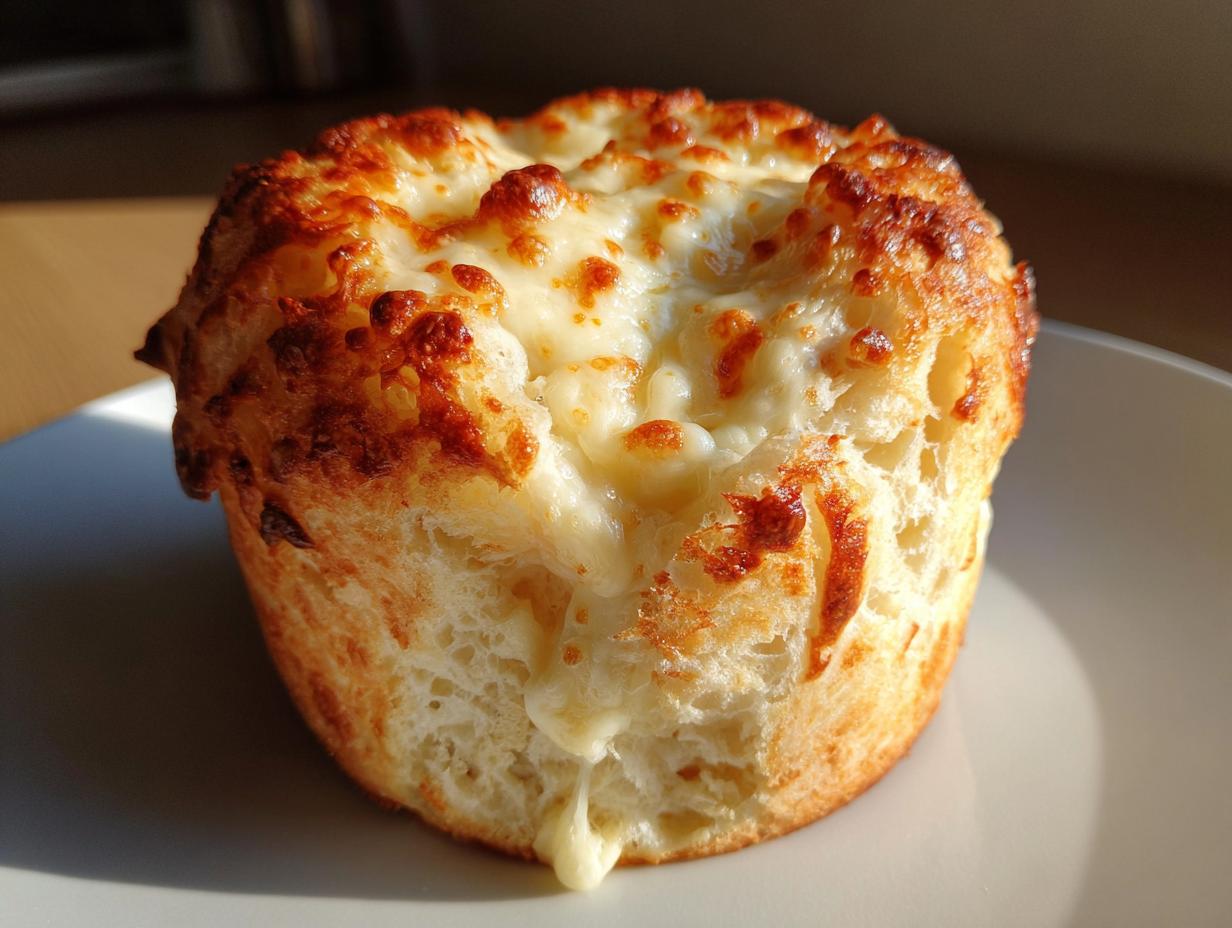
This is where the magic happens! For the best melt and flavor combination, we are using 1.5 cups of shredded mozzarella and 0.5 cup of shredded cheddar. Mozzarella gives you that glorious, stringy pull, and the cheddar adds a nice little tang. Make sure your cheese is shredded before you start mixing the dough—trying to shred cheese mid-knead is a recipe for disaster!
Ingredient Table
Here is everything you need listed out so you can check off your list:
| Ingredient | Amount |
|---|---|
| All-purpose flour | 3 cups |
| Instant yeast | 2.25 teaspoons |
| Sugar | 1 tablespoon |
| Kosher salt | 1 teaspoon |
| Warm milk | 1 cup |
| Unsalted butter, melted | 3 tablespoons |
| Shredded mozzarella cheese | 1.5 cups |
| Shredded cheddar cheese | 0.5 cup |
Step-by-Step Guide to Making Perfect cheese filled bread
Okay, now we roll up our sleeves! Making this soft bread isn’t rocket science, but paying attention to a few key moments will ensure you get that beautiful, fluffy texture we talked about. We’re going to treat this dough gently until it’s ready to be shaped.
Mixing and Kneading Your Dough
First things first: grab a big bowl. Mix your dry stuff—flour, yeast, sugar, and salt—just until they look friendly together. Then, pour in that warm milk and the melted butter. Stir it all up until it just comes together into a shaggy, soft mass. Don’t try to make it perfect yet! Now, turn it out onto a lightly floured surface. This is where the work starts. You need to knead this dough for a solid 6 to 8 minutes. You’re looking for smooth and elastic—it shouldn’t stick aggressively to your hands anymore. If you poke it, it should slowly spring back. That elasticity is what holds all that lovely cheese in later!
The First Rise and Dividing the Dough
Once it feels right, put the dough back into a lightly oiled bowl, give it a gentle turn so it’s coated, and cover it tight with plastic wrap or a damp towel. Find the warmest, draft-free spot in your kitchen—maybe the top of the fridge? Let it hang out for a full 60 minutes. You must wait until it has visibly doubled in size. Don’t cheat this step! When it’s ready, gently punch it down—yes, it’s satisfying—and then divide the dough into 8 equal pieces. I usually eyeball it until they look roughly the same size, but weighing them is for the serious bakers among us!
Filling and Shaping the cheese filled bread Buns
This is the most important part for containing that gooey center! Take one piece of dough and flatten it out—not too thin, just enough to make a small disc. Now, measure out about a quarter cup of your cheese mixture and place it right in the center. You have to seal these tightly! Bring all the edges up over the cheese and pinch them together really well at the top. Roll it gently between your palms to create a smooth ball, making sure the seam side ends up on the bottom. If you don’t pinch it shut, that cheese will stage a breakout in the oven, trust me.
Final Proof and Baking
Place your beautifully sealed balls seam-side down onto a baking sheet lined with parchment paper—this helps keep them from sticking. Cover them again and let them rest for just 20 minutes. While they are doing their final puff, crank your oven up to 375 degrees Fahrenheit. When the 20 minutes are up, pop them in the oven. Bake them for 18 to 22 minutes. You want them to be lightly golden on top and feel soft when you tap them. As soon as they look done, pull them out! They continue to bake slightly even after they leave the heat.

Tips for Achieving Expert-Level cheese filled bread Results
Even with a simple recipe like this, there are little tricks that separate a good batch from a truly amazing batch. I’ve learned these the hard way, usually by ending up with flat, sad buns or cheese explosions! Don’t worry, I’m sharing my hard-earned wisdom so your cheese filled bread turns out perfect the first time.
Managing Dough Temperature and Texture
Let’s talk about that milk temperature again—it’s non-negotiable! If your milk is too hot, you’ve just made warm milk, not active yeast. If it’s too cold, the yeast just sleeps. Aim for that cozy bathwater feel. Also, when you’re kneading, stop when the dough is smooth, even if it feels like you could knead it for five more minutes. Over-kneading develops too much gluten, making the final bun chewy instead of soft. And please don’t rush the first rise; that hour is when the dough builds the structure that keeps our buns light.
Ensuring a Truly Melty cheese filled bread Center
The cheese blend is key here. Mozzarella is your stretch, but cheddar is your flavor. If you try to use only a hard cheese like Parmesan, it won’t melt right; it’ll just get oily. When you’re filling them, be generous, but don’t overstuff! I learned that if you put more than that quarter cup in, the dough strains too thin when you pinch it closed. That thin spot is where the cheese escapes during the bake. Make sure you really seal those edges tight—a little extra dough pinched together is better than a cheese leak!
Frequently Asked Questions About cheese filled bread
I know you might have a few lingering questions before you dive into your baking adventure. That’s totally normal! Baking bread from scratch can feel intimidating, but these little buns are so forgiving. Here are the things I get asked most often about making this perfect soft bread.
Can I make this soft bread dough ahead of time?
Yes, you absolutely can! This dough is fantastic for making ahead. After you finish kneading (Step 3), instead of letting it rise on the counter, you can put the whole ball of dough into a lightly oiled bowl, cover it tightly, and stick it right in the refrigerator for up to 24 hours. Cold fermentation actually develops more flavor! Just remember, if you do this, you’ll need to let the dough sit on the counter for about an hour to take the chill off before you divide and fill it. It needs to be pliable before you start shaping the cheese buns.
What if I don’t have both mozzarella and cheddar?
That’s fine! The goal is meltiness and flavor. If you only have one, use a total of 2 cups of whatever you have. If you only have mozzarella, you’ll get a milder flavor but a fantastic stretch. If you only have cheddar, it’ll be tangier. Some folks have even used Gruyère or Monterey Jack in a pinch. Just avoid anything too dry or crumbly, like Feta, because it won’t give you that gooey center we’re aiming for in our breakfast bread.
How do I know when my cheese filled bread is done baking?
Don’t rely only on the timer! Visually, you are looking for a light, appealing golden-brown color on the top of the buns. The best test, though, is how they feel. Gently tap the top of one of the buns. If it feels springy and firm, not squishy, they are done. If you gently poke one and the indentation springs back slowly, that means the structure is set. If they look pale, give them two more minutes, but don’t let them get dark brown or they’ll dry out!
Storing and Reheating Your Homemade cheese filled bread
These buns are absolutely heavenly fresh from the oven, but let’s be real, sometimes we have leftovers! The good news is that because they’re so soft, they reheat beautifully. The key is keeping the moisture locked in. If you plan to eat them the same day, just leave them on the counter in an airtight container. Don’t try to store them in the fridge right away, though; that’s the fastest way to make any bread taste stale!
If you need to keep them longer, you definitely need the fridge, but reheating is essential before serving. A quick zap in the microwave or a few minutes in a warm oven brings that cheese right back to life. They are so worth the extra step! If you want more bread ideas, check out our stuffed bread recipes.
Storage Table for cheese filled bread
Here’s my quick guide for keeping your wonderful cheese filled bread fresh:
| Storage Method | Duration | Reheating Tip |
|---|---|---|
| Airtight Container (Room Temp) | Up to 2 days | Microwave for 10 seconds |
| Airtight Container (Refrigerator) | Up to 5 days | Wrap in foil, bake at 325°F for 8 min |
Understanding the Nutritional Profile of cheese filled bread
I always tell people that while these are comforting, they are definitely a treat! Since we are using real butter and a good amount of cheese, they have some satisfying substance to them. I don’t usually count calories when I’m baking something this good, but if you’re curious about what goes into one of these gorgeous, soft buns, I put together a quick estimate based on the ingredients used. Remember, this is just an approximation, but it gives you a good idea of the payoff!
Estimated Nutritional Breakdown
Here is what you can generally expect per serving (one cheese filled bread bun). It’s a decent protein punch thanks to all that dairy!
| Nutrient | Estimate Per Serving |
|---|---|
| Calories | 310 |
| Fat | 13 g |
| Carbohydrates | 38 g |
| Protein | 11 g |
Share Your Homemade cheese filled bread Success
That’s it! You’ve made the most wonderfully soft and cheesy bread imaginable. I truly hope these buns bring as much comfort to your table as they do to mine. Please leave a rating if you loved the recipe! I’m always so excited to hear how your batch turned out. Tag me on social media when you share photos of your delicious homemade cheese filled bread; I love seeing your baking successes!
If you want to see more of our recipes or share your creations, follow us on Pinterest!
Print
Foolproof 8-min cheese filled bread Bliss
- Total Time: 107 minutes
- Yield: 8 servings
- Diet: Vegetarian
Description
Soft, fluffy bread with a warm, melty cheese filling. This recipe is simple for home baking and yields comforting results perfect for any time of day.
Ingredients
- 3 cups all-purpose flour
- 2.25 teaspoons instant yeast
- 1 tablespoon sugar
- 1 teaspoon kosher salt
- 1 cup warm milk
- 3 tablespoons unsalted butter melted
- 1.5 cups shredded mozzarella cheese
- 0.5 cup shredded cheddar cheese
Instructions
- In a large bowl, mix flour, yeast, sugar, and salt.
- Add warm milk and melted butter and stir until a soft dough forms.
- Knead the dough for 6 to 8 minutes until smooth and elastic.
- Cover and let rise in a warm place for 60 minutes until doubled.
- Punch down the dough and divide into 8 equal pieces.
- Flatten each piece and place about 0.25 cup cheese filling in the center.
- Pinch edges closed and shape into smooth balls.
- Place seam side down on a lined baking sheet.
- Cover and let rise 20 minutes while heating oven to 375°F.
- Bake for 18 to 22 minutes until lightly golden and soft.
- Cool slightly before serving warm.
Notes
- Use a combination of mozzarella and cheddar for the best melt and flavor.
- Ensure the milk is warm, not hot, to activate the yeast correctly.
- Do not overbake; the bread should remain soft.
- Prep Time: 25 minutes
- Cook Time: 22 minutes
- Category: Bread
- Method: Baking
- Cuisine: American