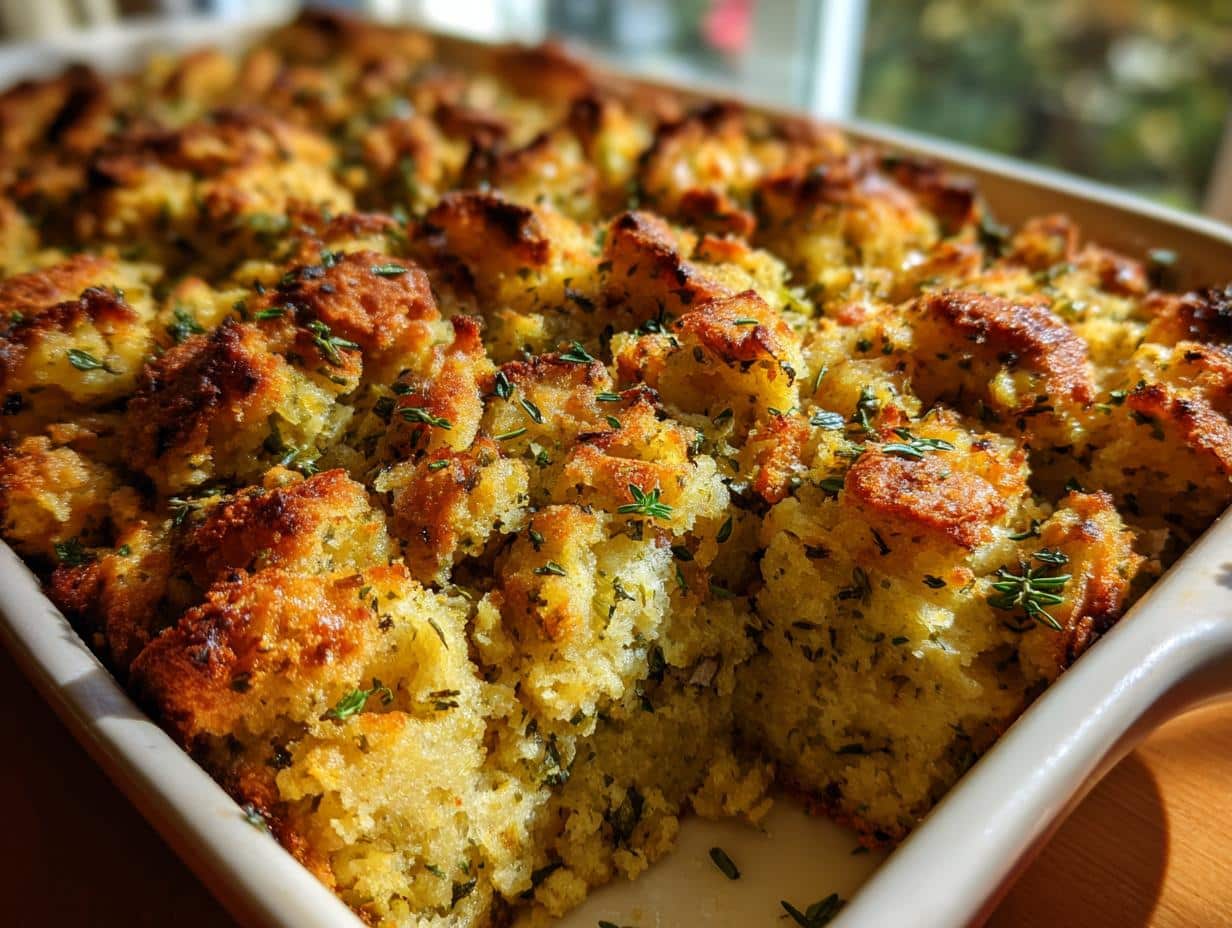
Grandma’s Thanksgiving Stuffing. For me, this dish is pure nostalgia, conjuring up images of my own grandma bustling around the kitchen, the air thick with the smell of roasting turkey and something warm and savory. When I first started NoobRecipes, I was terrified of holiday cooking. Everything seemed so complicated! But this stuffing recipe? It was my gateway. My grandma walked me through it step-by-step, and it was so forgiving, so delicious, and honestly, so *easy*. It proved to me that even us beginners could nail those classic holiday dishes. Trust me, if I can make this, you absolutely can too!
Why You’ll Love This Grandma’s Thanksgiving Stuffing
Seriously, why wouldn’t you love this stuffing? It’s the ultimate side dish for your Thanksgiving dinner, and it’s practically foolproof. Even if you’ve never made stuffing before, this recipe is designed to make you feel like a pro. It’s packed with fantastic flavor and smells absolutely amazing while it’s baking.
- Super Easy for Beginners: No fancy techniques here! We use simple bread cubes, readily available seasonal vegetables, and aromatic herbs. If I can make it, you totally can too!
- Packed with Flavor: The combination of savory broth, butter, onions, celery, and a generous helping of fresh herbs like sage, thyme, and rosemary creates a truly delicious stuffing. It’s the perfect savory dish to complement your roasted turkey.
- Perfect for the Holidays: This stuffing recipe is a classic for a reason. It’s a crowd-pleaser that brings that comforting, traditional holiday cooking vibe to any table.
- Customizable: Don’t be afraid to tweak it! Add in some extra seasonal vegetables or even some sausage if you’re feeling adventurous.
Gathering Your Grandma’s Thanksgiving Stuffing Ingredients
Alright, let’s get down to business! To make this amazing Grandma’s Thanksgiving Stuffing, you’ll need a few key players. Don’t worry, they’re all super easy to find and work with, perfect for us beginners. The star of the show is definitely the bread cubes – I like to use sourdough or a good French bread because they have a nice chew and hold up well. Make sure you get about 10 cups worth. Then we’ve got our aromatics: one big onion, diced up nice and fine, and about two cups of celery, also chopped up small. These guys are going to give our stuffing that incredible savory base. And herbs! Oh, the herbs! You’ll want fresh sage, thyme, and rosemary. Using fresh makes ALL the difference, trust me. We’re talking about 2 tablespoons each of sage and thyme, and 1 tablespoon of rosemary, all chopped up finely.
For the liquid magic, we need 4 cups of low-sodium broth – chicken or veggie works great depending on what you like. And of course, half a cup of unsalted butter, melted, to bring it all together. We’ll also need some salt and pepper, but we’ll season as we go. Having all these ready makes the actual cooking process so smooth. It’s like setting yourself up for success before you even turn on the stove!
| Ingredient | Quantity | Preparation |
| Bread cubes | 10 cups | Sourdough or French bread, dried or lightly toasted |
| Onion | 1 large | Finely diced |
| Celery | 2 cups | Finely chopped |
| Fresh Sage | 2 tbsp | Finely chopped |
| Fresh Thyme | 2 tbsp | Finely chopped |
| Fresh Rosemary | 1 tbsp | Finely chopped |
| Low-sodium broth | 4 cups | Chicken or vegetable |
| Unsalted butter | ½ cup | Melted |
| Salt and pepper | To taste |
Ingredient Substitutions and Notes
So, about that bread! If you can’t find sourdough or French bread, don’t sweat it. A good sturdy white bread or even some cornbread works too – just make sure it’s a day or two old so it’s nice and dry. If your bread is too fresh, you can always pop it in the oven for a bit on a low temp to dry it out, like we talked about. For the broth, feel free to use whatever you have on hand, just keep it low-sodium so you can control the saltiness yourself. And if you’re not a huge fan of one of the herbs, no biggie! You can adjust the amounts or even swap one out for something like parsley if you prefer. The goal is deliciousness, and this recipe is super forgiving!
Step-by-Step Guide to Making Grandma’s Thanksgiving Stuffing
Alright, let’s get this stuffing party started! This is where the magic happens and trust me, it’s way easier than you think. First things first, let’s get that oven ready. Preheat your oven to 350°F (175°C). While that’s heating up, let’s prep our bread. If you haven’t already, go ahead and cube up your bread. Remember, slightly stale bread works best – it gives you that perfect texture. If your bread is super fresh, no worries! You can just toast those cubes lightly in the oven for about 10-15 minutes at a lower temp (around 300°F/150°C) until they’re just a little dry. Now, let’s get chopping! Finely dice that big onion and chop up your celery. Mince up those gorgeous fresh herbs – sage, thyme, and rosemary. Having everything prepped and ready makes this go so smoothly, it’s like a well-oiled machine!
 4")
Next up, we’re going to build some flavor. Grab a large skillet and melt your butter over medium heat. Toss in that diced onion and chopped celery. We want to cook these until they’re nice and tender, which usually takes about 5-7 minutes. Don’t rush this part – letting them soften up really brings out their sweetness. Season them with a pinch of salt and pepper while they’re cooking. Once they’re tender, pour them right into a big mixing bowl with your dried bread cubes. Add in all those beautifully chopped aromatic herbs. Now, season everything again with salt and pepper. Remember, we’re building layers of flavor here!
Here comes the part that makes it all come together: the broth! Pour in about 4 cups of your warm low-sodium broth. You want to stir everything gently until the bread cubes are nicely moistened. Don’t go crazy stirring, or you’ll end up with mushy bread. Just enough to get everything coated. If it seems a little dry, you can always add a splash more broth, but remember, we don’t want it swimming! This is where you can really adjust it to your liking. Once it’s all mixed, transfer this glorious mixture into a greased baking dish. Pop it into your preheated oven, and cover it tightly with foil. Let it bake for about 30 minutes. This steams it perfectly and lets all those flavors meld together. Finally, take off that foil and bake for another 15 minutes. You want to see that top get beautifully golden brown and a little crispy. That’s the sign of perfect stuffing!
 5")
Tips for Perfect Grandma’s Thanksgiving Stuffing
Okay, so you’ve made the stuffing, and it smells amazing! But how do we make it *extra* special? My favorite trick for that perfect stuffing texture is all about the bread. If you want a really crispy top, leave the foil off for the last 20-25 minutes of baking. Seriously, that golden-brown, crunchy bit? Chef’s kiss! On the flip side, if you prefer your stuffing a little more moist and tender, just add a splash more broth before you bake it, or keep that foil on for a bit longer. Don’t be afraid to really taste the mixture before it goes in the oven – a little more salt or pepper can make a world of difference. And remember, letting it rest for just 5-10 minutes after it comes out of the oven before you serve it lets those flavors really settle in. It’s these little things that take it from good to absolutely unforgettable holiday cooking!
Serving Suggestions for Your Savory Dish
This Grandma’s Thanksgiving Stuffing is the ultimate savory dish and practically begs to be served alongside all your Thanksgiving dinner favorites! Of course, it’s a no-brainer with roasted turkey – that classic pairing is unbeatable. But don’t stop there! It’s also incredible with glazed ham, a hearty pot roast, or even alongside some baked chicken. For a vegetarian Thanksgiving, this stuffing is so flavorful and satisfying, it stands up beautifully on its own or with a side of roasted seasonal vegetables like Brussels sprouts or sweet potatoes. Honestly, it’s so good, you might find yourself sneaking bites straight from the serving dish!
Storage and Reheating Grandma’s Thanksgiving Stuffing
Don’t you hate when leftovers get all sad and soggy? Me too! But with this stuffing, you can keep that deliciousness going. Once it’s cooled down a bit (but not for more than two hours, safety first!), pop any extra stuffing into an airtight container. It’ll stay good in the fridge for about 3-4 days. When you’re ready to reheat, I find the best way to get that nice texture back is to pop it in a baking dish, maybe add a tiny splash of broth if it looks dry, cover it with foil, and warm it up in the oven at around 350°F (175°C) until it’s heated all the way through. You can always take the foil off for the last few minutes if you want to crisp up the top again!
| Storage Method | Location | Duration |
| Airtight container | Refrigerator | 3-4 days |
| Airtight container | Freezer (for longer storage) | Up to 2 months |
Frequently Asked Questions About Grandma’s Thanksgiving Stuffing
Got questions about making this classic stuffing recipe? I’ve got answers! As Adam from NoobRecipes, I know how important it is to get those holiday dishes just right, even if you’re new to cooking. Here are a few things people often ask about Grandma’s Thanksgiving Stuffing:
Q1. Can I make this stuffing recipe ahead of time?
Absolutely! This stuffing recipe is fantastic for making ahead. You can prepare the entire mixture (bread cubes, veggies, herbs, broth) the day before and store it in the baking dish, covered tightly, in the refrigerator. Just add the butter and bake as directed, you might need an extra 5-10 minutes if baking from cold. It’s a lifesaver for busy Thanksgiving dinner prep!
Q2. My bread cubes seem too soft. What can I do?
No worries if your bread cubes are a bit soft! The key is to dry them out properly. You can leave them out on the counter overnight, or if you’re short on time, spread them on a baking sheet and toast them in a 300°F (150°C) oven for about 10-15 minutes until they feel firm to the touch. This helps them hold their shape and gives you that perfect stuffing texture.
Q3. Can I add meat or other vegetables to this stuffing?
Yes, totally! This is a great base recipe for adding your own spin. For a meatier stuffing, you can cook up some sausage or bacon and add it in with the sautéed onions and celery. For extra seasonal vegetables, diced carrots, mushrooms, or even some chopped bell peppers would be delicious additions. Just sauté them along with the onions and celery!
Q4. How do I get a really crispy top on my stuffing?
To get that coveted crispy top, the trick is all in the final baking stage. After the initial 30 minutes covered with foil, remove the foil and bake for an additional 15-20 minutes, or even a bit longer, until the top is beautifully golden brown and wonderfully crunchy. Keep an eye on it so it doesn’t burn, but that extra time uncovered makes all the difference!
Nutritional Information
Here’s a general idea of what you’re looking at for a serving of this delicious stuffing. Remember, these numbers are estimates and can change a bit depending on the exact ingredients you use, especially the type of bread and amount of butter!
| Metric | Amount |
| Serving Size | 1 cup |
| Calories | 350 |
| Fat | 18g |
| Saturated Fat | 9g |
| Trans Fat | 0g |
| Cholesterol | 40mg |
| Sodium | 450mg |
| Carbohydrates | 35g |
| Fiber | 3g |
| Sugar | 4g |
| Protein | 8g |
 6")
Amazing Grandma’s Thanksgiving Stuffing (1pan)
- Total Time: 1 hour 5 minutes
- Yield: 8-10 servings
- Diet: Vegetarian
Description
Grandma’s Thanksgiving Stuffing is a classic, savory bread-based side dish perfect for your holiday meal. This recipe is easy for beginners and delivers delicious, aromatic results.
Ingredients
- 10 cups cubed bread (sourdough or French)
- 1 large onion, finely diced
- 2 cups celery, finely chopped
- 2 tbsp fresh sage, finely chopped
- 2 tbsp fresh thyme, finely chopped
- 1 tbsp fresh rosemary, finely chopped
- 4 cups low-sodium broth (chicken or vegetable)
- ½ cup unsalted butter, melted
- Salt and pepper to taste
Instructions
- Preheat oven to 350°F (175°C). Cube the bread and let it dry overnight or toast lightly. Chop the onion, celery, and herbs.
- Melt butter in a large skillet over medium heat. Add onion and celery. Cook until tender, 5-7 minutes. Season with salt and pepper.
- Put bread cubes in a large bowl. Add the sautéed vegetables and herbs. Season with more salt and pepper. Stir in warm broth until the mixture is moistened.
- Transfer stuffing to a greased baking dish. Cover with foil and bake for 30 minutes. Remove foil and bake for another 15 minutes, until golden brown and crisp.
- Let stuffing cool slightly before serving with turkey or other holiday dishes.
Notes
- For drier bread cubes, you can toast them in the oven at 300°F (150°C) for about 10-15 minutes.
- Adjust the amount of broth to your preference; add more for a moister stuffing, less for a drier one.
- Feel free to add other vegetables like diced carrots or mushrooms for extra flavor and texture.
- Prep Time: 20 minutes
- Cook Time: 45 minutes
- Category: Side Dish
- Method: Baking
- Cuisine: American