Oh my goodness, stop what you are doing right now! If you’ve ever dreamed of a dessert that tastes like a slice of velvety cake but has the dense, chewy center of a perfect brownie, then you have found your new obsession. We are talking about the absolute best red velvet brownies you will ever make, trust me on this one.
I spent ages perfecting this recipe because I needed that classic tangy red velvet flavor combined with a truly fudgy texture—not cakey, never dry! This recipe has been tested, tweaked, and approved by everyone who tries it. My goal here is always transparency and sharing the tried-and-true methods that actually work when you’re standing in your own kitchen.
These aren’t your average baked squares. They are rich, intensely chocolatey thanks to the cocoa, and they bake up beautifully fudgy every single time. If you follow my steps exactly, you won’t be disappointed. They are seriously addictive!

Essential Ingredients for Your Red Velvet Brownies
Okay, let’s talk about what goes into these glorious red velvet brownies. Whenever I get questions about why a batch didn’t turn out right, nine times out of ten, it comes down to the quality or measurement of the ingredients. We are aiming for fudgy, so we need to treat our ingredients right!
Don’t just eyeball things here; precision matters, especially when it comes to balancing the fudgy texture against the cakey lift. I always lay everything out on the counter before I even turn the oven on. It just makes the whole process smoother! If you are looking for other great baking ideas, check out my hot chocolate cookies recipe.
Dry Components and Flavor Builders
For the dry stuff, it’s pretty straightforward, but measurements are key. We use all-purpose flour, of course, but don’t forget the salt—it really wakes up the chocolate notes. The unsweetened cocoa powder is what gives us that signature, subtle chocolate background that makes red velvet what it is. Make sure you whisk these together well in a separate bowl before adding them to the wet mixture!
Wet Ingredients for Fudgy Red Velvet Brownies
This is where the magic for our red velvet brownies really happens! You absolutely must use unsalted butter, and it needs to be melted along with the chopped semi-sweet chocolate. That combination of melted fat and chocolate creates the dense structure we want. Next, we use granulated sugar, two large eggs, pure vanilla extract, and here’s a secret: white vinegar.
The vinegar might sound weird, but trust me, it reacts with the cocoa and the coloring to deepen that classic red velvet flavor. And speaking of color, skip the liquid food coloring! You need the red *gel* food coloring. It gives you that vibrant color without adding extra liquid that can mess up your fudgy texture. Use a good amount for that deep, striking look.
Equipment Needed for Perfect Red Velvet Brownies
You don’t need a ton of fancy gadgets for these incredible red velvet brownies, but having the right tools really helps! Grab a couple of mixing bowls—one big, one medium—a whisk, and a rubber spatula. And you absolutely need an 8×8-inch baking pan. That size is crucial for getting the right thickness!

Preparing Your Pan
This is my number one tip to avoid any baking sadness: parchment paper! Line that 8×8 pan with parchment paper, but here’s the trick—let it hang over the edges on two sides. Those overhangs become little handles later. When the brownies are totally cool, you just grab those edges and lift the entire slab right out. It makes slicing so clean!
Step-by-Step Instructions for Making Red Velvet Brownies
Alright, time to put it all together! Making these red velvet brownies is fast—way faster than making a full cake, which is why I love them for a weeknight treat. Just remember that the total time is mostly cooling time because you cannot rush that part, or they fall apart!
Melting Chocolate and Mixing Wet Ingredients
First things first, preheat your oven to 350 degrees F. Now, grab your microwave-safe bowl. Melt the butter and the chopped chocolate together. I zap mine in 30-second bursts, stirring hard in between each time. Don’t walk away, or you’ll scorch that chocolate! Once it’s smooth as silk, whisk in the sugar until they look happy together.
Now for the eggs—add them one at a time, whisking really well after each one goes in so they emulsify properly. This builds structure! Next, stir in your vanilla extract, the white vinegar we talked about, and that vibrant red gel coloring. Keep stirring until the whole mixture is one uniform, gorgeous shade of red. It should look almost shocking!
Combining Dry and Wet Mixtures Correctly
While you were doing the wet stuff, you should have whisked your flour, salt, and cocoa powder together in that separate bowl. Now, gently fold the dry mixture into the wet. I mean *gently*. You are only mixing until you can’t see any more streaks of dry flour. Stop right there! Seriously, if you overmix brownies, they get tough and cakey. We want fudgy, remember? If you are adding those optional white chocolate chips, fold them in right at the very end.
Baking and Cooling Your Red Velvet Brownies
Scrape that beautiful red batter into your prepared 8×8 pan and spread it out evenly. Pop it into your preheated oven for about 30 to 35 minutes. When checking for doneness on these red velvet brownies, forget the clean toothpick test; that means they’re overdone! Stick the toothpick near the center, and you want it to come out with a few moist crumbs clinging to it. That’s the perfect fudgy indicator!
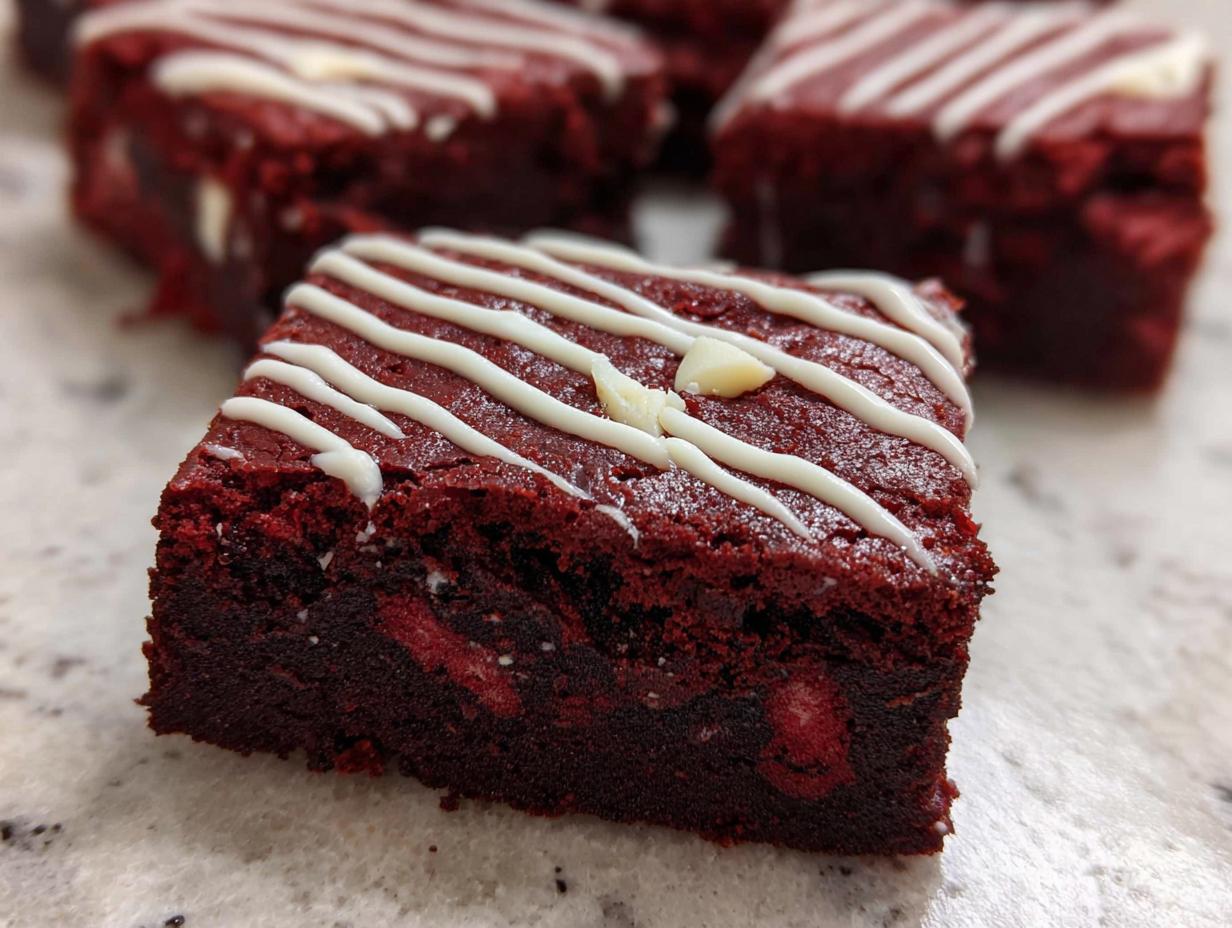
This next part is the hardest but most crucial: let them cool completely in the pan. I know it’s torture, but slicing them warm guarantees a gooey mess that won’t look pretty. Once they are totally cool, use those parchment handles to lift them out, slice them into 16 squares, and then—if you’re feeling fancy—drizzle with melted white chocolate! For more dessert inspiration, check out my edible cookie dough bites.
Tips for Success with Your Fudgy Red Velvet Brownies
I want every batch of your red velvet brownies to be absolutely perfect. Since this recipe leans toward fudgy, a couple of little details make a huge difference. First, let’s talk color again. If you use liquid food coloring, you’ll end up with a weak pinkish color and a slightly cakey texture. Stick to the gel coloring for that deep, unmistakable red velvet hue!
Second, and this is critical, do not overbake them! That 30 to 35-minute window is your friend. If that toothpick comes out totally clean, you’ve baked past fudgy and into cake territory. You are looking for moist crumbs, not wet batter, but definitely not dry. Patience during the cooling stage also guarantees those beautiful, clean slices! If you want to see how I handle other baked goods, take a look at my walnut banana muffins recipe.
Storing and Reheating Your Red Velvet Brownies
These red velvet brownies are so rich that sometimes you just can’t eat them all in one sitting—though I certainly try! Luckily, they store beautifully, and we can keep that fudgy texture locked in for days. The key is making sure they are completely cool before you try to put them away.
Storage Guidelines
You need an airtight container for these beauties. They do great sitting right on the counter for a few days because the high sugar content helps keep them fresh. If you’re making a huge batch for a party or just want them to last longer, the fridge is your friend, but I always let them warm up slightly before eating.
Here is a quick guide so you don’t forget:
- At Room Temperature (Airtight Container): 3 to 4 days
- In the Refrigerator (Airtight Container): Up to 1 week
Reheating for Freshness
If you chill your red velvet brownies, you might notice they firm up a bit more than you like. That’s normal! We don’t want to microwave these for too long, or you lose that fudgy center and end up with a tough square. You want to gently warm them up just enough to soften the chocolate chips inside.
I usually zap mine for about 10 to 15 seconds on medium power. If you want to get fancy, serving them slightly warm with a small scoop of vanilla bean ice cream is heavenly. The gentle heat brings out all that lovely cocoa flavor again! If you enjoy following along with my recipes, please consider following me on Pinterest.
Frequently Asked Questions About Red Velvet Brownies
I get so many messages about these red velvet brownies, and that’s wonderful! It means you all are baking them, which makes me so happy. Here are the questions I hear most often about getting that perfect texture and color. Don’t worry if you mess up the first time; baking is all about learning!
If you have a question that isn’t covered here, please drop it in the comments below. I love chatting about baking fails and successes! You can also find more updates on my Medium page.
Does the Vinegar Affect the Taste of the Red Velvet Brownies?
This is a common concern, but no, the vinegar does not make your brownies taste sour or vinegary! I promise. The white vinegar is actually a crucial chemical helper here. It reacts with the cocoa powder and the baking soda (even though we don’t use much, the cocoa has acidity) to help activate the color and give that classic, slight tang that defines red velvet. It deepens the flavor profile, it doesn’t overpower it!
How Can I Get a Deeper Red Color?
If your red velvet brownies are coming out looking pale pink, it’s almost always the food coloring you’re using. Please, please use the gel food coloring, not the liquid kind from the little plastic bottles. Gel coloring is concentrated, so you use less of it, meaning you don’t add extra moisture to your batter. A small amount of gel gives you that deep, dramatic red that screams red velvet! For more community interaction, feel free to visit my Facebook page.
Sharing Your Red Velvet Brownies Experience
Now that you’ve made these incredible fudgy red velvet brownies, I want to hear all about it! Did you drizzle them with white chocolate? Did they disappear in five minutes flat? Please come back and leave a rating for the recipe so other bakers know it’s a winner!
Drop a comment below and tell me how they turned out for you. Happy baking, everyone!
Print
Stunning 16-piece Red Velvet Brownies treat
- Total Time: 45 minutes
- Yield: 16 brownies
- Diet: N/A
Description
These fudgy red velvet brownies are soft, rich, and chocolatey with a hint of cocoa and optional white chocolate drizzle. They offer the dense, chewy texture of brownies with the classic red velvet flavor.
Ingredients
- 3/4 cup unsalted butter, melted
- 2 ounces semi-sweet chocolate, chopped
- 1 1/4 cups granulated sugar
- 2 large eggs
- 2 teaspoons pure vanilla extract
- 1 teaspoon white vinegar
- 1/2 tablespoon red gel food coloring
- 2 tablespoons unsweetened cocoa powder
- 1 1/4 cups all-purpose flour
- 1/4 teaspoon salt
- 1/2 cup white chocolate chips, optional for mixing or drizzling
Instructions
- Preheat your oven to 350°F. Line an 8×8-inch baking pan with parchment paper, leaving some overhang for easy lifting.
- In a large microwave-safe bowl, melt the butter and chopped chocolate in 30-second bursts, stirring between each burst until smooth.
- Whisk in the sugar until blended. Add the eggs one at a time, whisking well after each addition.
- Stir in vanilla extract, white vinegar, and red gel food coloring until the mixture is evenly tinted.
- In a separate bowl, whisk together the cocoa powder, flour, and salt.
- Fold the dry ingredients into the wet ingredients until just combined. Do not overmix.
- If you are using white chocolate chips, fold them in now.
- Spread the batter evenly in the prepared pan.
- Bake for 30 to 35 minutes. Check for doneness when a toothpick inserted near the center comes out with a few moist crumbs.
- Let the brownies cool completely in the pan. If desired, drizzle cooled brownies with melted white chocolate before slicing.
Notes
- For best results, use red gel food coloring for a deep color.
- Do not overbake; slightly underbaking yields fudgier results.
- The white chocolate chips are optional, used for either mixing into the batter or drizzling on top.
- Prep Time: 15 minutes
- Cook Time: 30 minutes
- Category: Dessert
- Method: Baking
- Cuisine: American