If you are anything like me, sometimes you just need food that tastes like a hug, but you only have about ten minutes to make it happen. Forget complicated recipes! I’ve found the absolute fastest route to cheesy, comforting perfection, and it involves milk and bread. Yes, milk!
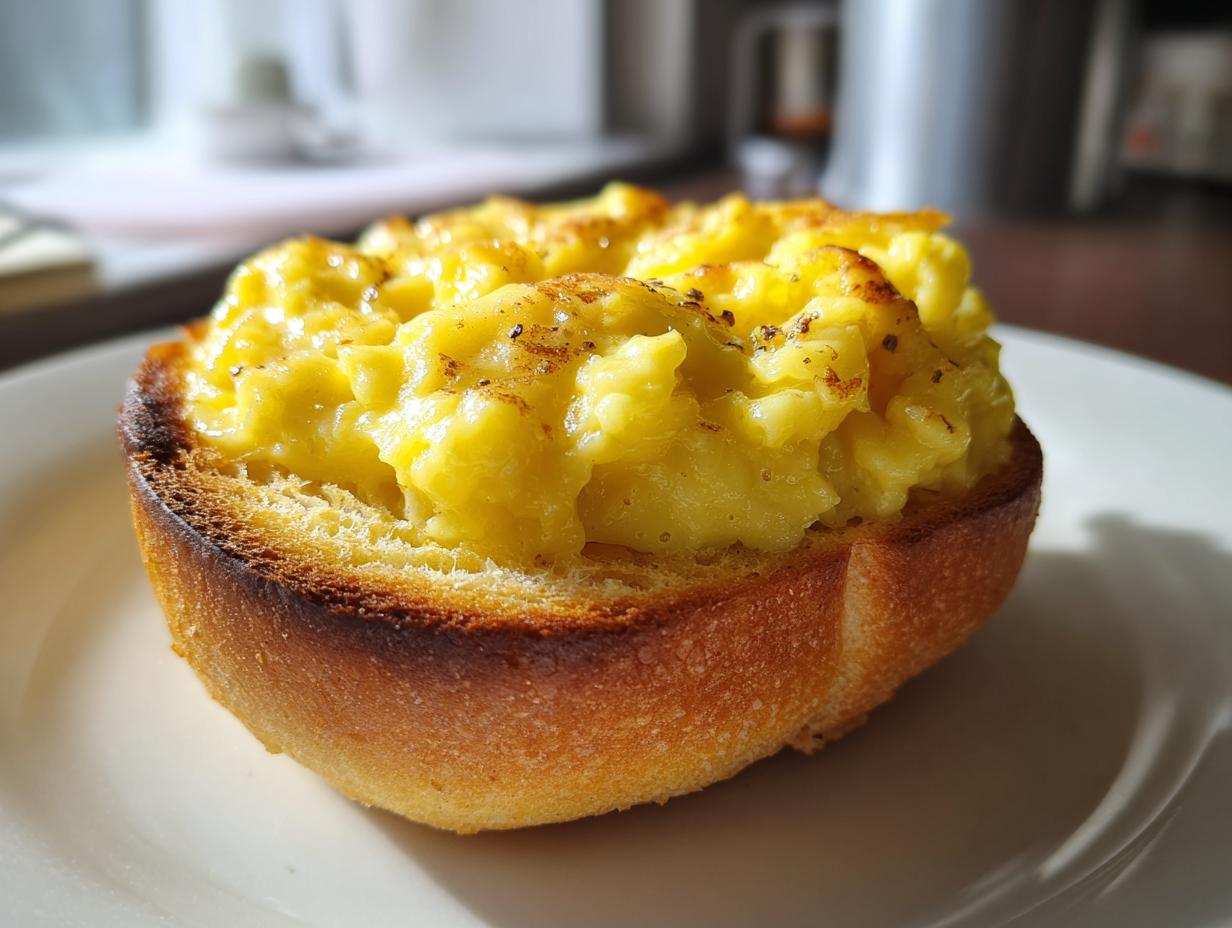
I’m talking about the crispy cheese milk toast. This isn’t your average grilled cheese, folks. We’re taking simple sandwich bread, giving it a quick soak, loading it up with mozzarella, and frying it until it achieves this incredible golden crust while the inside stays pillowy soft. It’s pure magic, truly.

I developed this method because I needed something reliable for those late-night snack cravings or when I’m too tired for real cooking. You don’t need fancy techniques or a culinary degree to nail this. Seriously, if you can melt butter in a pan, you can make this. It’s my go-to recipe for beginners who want a massive flavor payoff for almost zero effort. It’s the simplest comfort food you’ll ever meet, and trust me, you’ll be making it weekly. You can find more quick ideas on Pinterest.
Why This Crispy Cheese Milk Toast Recipe Works For You
I know you want recipes that deliver big flavor without demanding your entire afternoon. This particular method for crispy cheese milk toast is my secret weapon for weeknight wins or weekend breakfast emergencies. It’s built on three core ideas that make it foolproof for everyone, even if you just pulled your mixing bowls out of the cupboard for the first time.
- It’s incredibly fast—we’re talking done before you can even decide what to watch on TV next.
- It uses ingredients you almost certainly already have hiding in your fridge or pantry right now.
- The flavor profile is simple but satisfying: savory, cheesy, slightly tangy, and perfectly balanced.
Quick Prep and Cook Times
When I say fast, I mean it. The prep time is barely five minutes because there’s no slicing or dicing involved, just mixing. The cooking is just over six minutes total. You get a full, hot, satisfying snack or breakfast in under 15 minutes from start to finish. That 11-minute total time is not a typo; it’s a promise!
Simple Ingredient Accessibility
You won’t need to run to a specialty market for this one. We are using basic sandwich bread, milk, butter, salt, and mozzarella. If you have mayonnaise on hand, fantastic—that’s the secret binder! These are the reliable staples that mean you can decide you want this cheesy bread five minutes before you eat it, and you won’t be disappointed. If you love grilled cheese, you might enjoy this variation.
Essential Ingredients for Perfect Crispy Cheese Milk Toast
Okay, let’s talk about what makes this crispy cheese milk toast so unbelievably good, despite its simplicity. Because the cook time is so short, the quality and type of each ingredient really shine through. We aren’t masking flavors here; we are celebrating them! I’ve listed out exactly what you need below. Don’t eyeball these measurements, especially the cheese—that’s where the magic happens.
The main job of the milk is to keep the inside tender while the outside crisps up, so whole milk is my recommendation. And please, for the love of good toast, use good melting cheese!
Ingredient Breakdown and Clarity
Precision matters here because we are cooking so quickly. You need four slices of sandwich bread that are nice and sturdy—about half an inch thick is perfect. If your bread is too thin, it gets soggy too fast. For the cheese, you absolutely must use shredded mozzarella; it melts beautifully and gives you those amazing cheese pulls. I mix that with a tablespoon of mayonnaise, which sounds weird, I know, but it acts like a binder and adds a little necessary tanginess to cut the richness!
- 4 slices sandwich bread (about 1/2 inch thick)
- 3 tablespoons whole milk
- 1 1/2 cups shredded mozzarella cheese
- 2 tablespoons unsalted butter
- 1 tablespoon mayonnaise
- 1/8 teaspoon salt
Substitution Notes for Crispy Cheese Milk Toast
If you don’t have mozzarella, don’t panic. You can absolutely swap it out for a mix of Monterey Jack and a little sharp cheddar for more bite. Just make sure whatever cheese you use is shredded finely so it melts evenly during that short cooking window. For the bread, a sturdy white bread works best, but if you only have thick-cut sourdough, try to slice it a little thinner than usual. And if you run out of mayo? A tiny splash of heavy cream or even an extra teaspoon of softened butter mixed into the cheese can work in a pinch, though the mayo is really the secret weapon for that creamy texture.
Equipment Needed for Your Crispy Cheese Milk Toast
You won’t need a lot of fancy gear for this quick snack, which is part of why I love it so much! Just pull these basics out of your drawers. You want to make sure your skillet is large enough so the four slices don’t overlap—crowding the pan is the enemy of crispiness!
- A large nonstick skillet or frying pan.
- A small bowl for mixing the cheese filling.
- A pastry brush or a regular fork for applying the milk.
- A spatula for careful flipping.
Step-by-Step Cooking Instructions for Crispy Cheese Milk Toast
Alright, let’s get cooking! This process moves really quickly once you start, so have everything measured out and ready to go before you even think about turning on the stove. We want speed, but we don’t want rushed results, you know? Getting the bread ready while the pan heats up is the key to perfect crispy cheese milk toast.
Preparing the Bread and Cheese Filling
First things first, lay your four slices of bread out on a clean plate or cutting board. Now, take your three tablespoons of whole milk—don’t use skim, trust me—and brush it lightly over both sides of every slice. You’re not soaking them until they fall apart; you’re just giving them a quick drink. Let them sit for just 30 seconds so the milk soaks in and starts softening the crumb. While that’s happening, get your filling ready.
Grab that small bowl and dump in your shredded mozzarella, the tablespoon of mayonnaise, and that tiny pinch of salt. Mix this until it’s evenly combined—it should look like a slightly sticky, cheesy paste. Now, take that mixture and spread it evenly over one side of each milk-soaked bread slice. Make sure you get right to the edges, but don’t pile it so high that it will ooze out everywhere when it melts.
Achieving the Perfect Golden Crust on Your Crispy Cheese Milk Toast
This is where the heat management comes in, so pay attention! Place your large nonstick skillet over medium-low heat. I mean it—medium-low! If it’s too hot, the bread will burn before that cheese even thinks about melting, and we absolutely do not want that. Once the pan is warm, melt your two tablespoons of butter and swirl it around until the entire bottom is coated. It should sizzle gently, not smoke!
Carefully place your bread slices into the pan, making sure they are all cheese-side up. Now, here is my favorite trick for guaranteed meltiness: cover the skillet immediately. This traps the heat and creates a little oven inside the pan. Let it cook covered for about three to four minutes. You’re looking for the bottom crust to be beautifully golden brown when you peek underneath. Once the bottoms look perfect, uncover it, flip those babies carefully with your spatula, and let the cheese side cook for just one to two more minutes until it’s bubbly and just starting to get those lovely crispy golden spots. Take them out immediately and serve them hot!

Tips to Master Crispy Cheese Milk Toast Every Time
Even though this recipe is incredibly simple, there are two little secrets my notes always stress. If you follow these tips, your crispy cheese milk toast will go from good to absolutely legendary every single time. Don’t skip these details; they separate the perfectly golden from the slightly scorched!
Heat Control is Key
I cannot stress this enough: medium-low heat is your best friend here. Think of it like a slow, gentle persuasion rather than a high-pressure negotiation! If you crank the heat up to medium or medium-high, the bread exterior will brown way too fast, leaving you with a burnt base and cold, unmelted cheese on top. We need that gentle heat to work two jobs simultaneously: slowly toasting the bottom crust to a perfect golden crisp while trapping enough ambient heat under the lid to fully melt and warm up that thick layer of mozzarella.
The Role of the Milk Soak
When you see that instruction to brush milk on both sides, you might be tempted to skip it because you’re in a hurry. Please don’t! That quick 30-second soak is crucial for the texture profile we’re aiming for. Since this is essentially a grilled cheese cooked on the stovetop, the milk works to slightly steam and tenderize the inside of the bread. This means when you bite into it, you get that satisfying crunch on the outside, but the interior stays soft, pillowy, and tender, not dry or cracker-like. Read more about cooking techniques on Medium.
Serving Suggestions for Crispy Cheese Milk Toast
Because this crispy cheese milk toast is so rich and savory, you don’t need much to go along with it, but a little something on the side can make it feel like a real meal. If you’re serving this for breakfast, I love pairing it with something bright and fresh to cut through the richness of the cheese and butter.
A small bowl of fresh sliced tomatoes or even a simple side of quick-pickled red onions adds a fantastic zing! For a snack, a light drizzle of hot sauce over the top is always welcome in my house—sriracha works wonders here. If you’re feeling really cozy, a mug of warm tomato soup is the classic partner for any cheesy bread, and this toast is no exception. Just keep the sides simple so the star of the show—that gooey, crispy cheese—really shines through. A warm chowder pairs nicely with cheesy bread.
Storing and Reheating Leftover Crispy Cheese Milk Toast
Now, I’ll be honest, this crispy cheese milk toast is truly best eaten the second it comes out of the skillet—that golden crust is fleeting! But sometimes life happens, and you end up with leftovers. Don’t throw them out! You just need to handle the reheating process carefully to wake up that cheese without turning the whole thing into a soggy mess.
For storage, let the toast cool completely before sealing it in an airtight container. It should be fine in the fridge for about two days. When you’re ready to eat it again, the microwave is going to ruin that beautiful crispness, so we have to use dry heat. Here’s my little cheat sheet for bringing it back to life:
| Method | Time | Result |
|---|---|---|
| Toaster Oven/Air Fryer | 3-4 minutes at 350°F | Best crispness restored |
| Skillet (Dry) | 2 minutes per side on medium-low | Good result, watch carefully |
If you must use a regular oven, pop it on a baking sheet at 375°F for about five minutes. That dry heat helps suck the moisture out of the bread exterior and re-crisps it perfectly. Enjoy! If you need another quick sandwich idea, try this melt.
Frequently Asked Questions About Crispy Cheese Milk Toast
I get so many messages asking for clarification, which tells me this recipe is hitting the spot for people who need fast comfort food! I’ve gathered the most common questions I receive about making perfect crispy cheese milk toast right here. Hopefully, this clears everything up so you can get back to cooking!
Can I use different types of cheese in this Crispy Cheese Milk Toast?
You absolutely can experiment! Mozzarella is my top pick because it melts into that gorgeous, stretchy layer that makes this toast famous. However, if you want a sharper flavor, try mixing half mozzarella with half sharp cheddar or Monterey Jack. Just avoid very crumbly cheeses like feta or goat cheese, as they won’t bind together well with the mayonnaise and won’t give you that classic, gooey cheese pull we’re after.
What is the best bread thickness for this recipe?
This is a detail I feel strongly about! You really want sandwich bread that is about 1/2 inch thick. If you use standard, super-thin sliced bread, it tends to absorb the milk too quickly and turns mushy rather than tender when you cook it. If your only option is thick-cut bread, try slicing it slightly thinner yourself, or extend the initial cooking time under the lid just a bit longer to ensure the center heats through without the outside burning.
Why do I need to use mayonnaise in the cheese mixture?
It’s my little secret for making the cheese spreadable and adding a tiny bit of necessary acid! The mayonnaise helps bind the shredded cheese together so it doesn’t just fall out of the bread when you flip it. It also adds a subtle tanginess that perfectly balances the richness of the butter and the milk used on the outside of the bread. Don’t skip it if you can help it! You can also follow us on Facebook for daily updates.
Can this be made in an air fryer instead of a skillet?
You can! If you’re looking for that crispy texture without the stovetop, the air fryer is a great tool. You’ll want to place the cheese-side up slice in the basket first, then flip it halfway through cooking. Cook at about 350°F for 5 to 7 minutes total. Just watch carefully, as air fryers can brown things very quickly!
Understanding the Nutrition in Your Crispy Cheese Milk Toast
Since this crispy cheese milk toast is made with simple ingredients like milk, cheese, and butter, it’s definitely more of an indulgence than an everyday salad, but you still deserve to know what you’re eating! Please remember that these numbers are just estimates based on the ingredients listed. Nutrition facts can change wildly based on the exact brand of bread or the fat content of the cheese you use, so treat this as a general guide.
For a single serving, you’re looking at a decent amount of protein to keep you full, alongside satisfying fats. Here’s a quick snapshot of what you can expect from one slice of this delicious, cheesy goodness:
| Nutrient | Estimate Per Serving |
|---|---|
| Calories | 310 |
| Fat | 18 g |
| Carbohydrates | 26 g |
| Protein | 12 g |

Amazing 11-Min Crispy Cheese Milk Toast
- Total Time: 11 minutes
- Yield: 2 servings
- Diet: Vegetarian
Description
Crispy cheese milk toast features a golden crust and soft center. This recipe uses a stovetop method with milk, butter, and melted cheese for quick comfort food.
Ingredients
- 4 slices sandwich bread (about 1/2 inch thick)
- 3 tablespoons whole milk
- 1 1/2 cups shredded mozzarella cheese
- 2 tablespoons unsalted butter
- 1 tablespoon mayonnaise
- 1/8 teaspoon salt
Instructions
- Lay the bread slices on a plate in a single layer.
- Brush the milk lightly over both sides of each slice and let absorb for 30 seconds.
- In a small bowl mix the cheese, mayonnaise, and salt until combined.
- Spread the cheese mixture evenly over one side of each slice.
- Heat a large nonstick skillet over medium low heat.
- Melt the butter and swirl to coat the skillet.
- Place the bread slices cheese side up in the skillet.
- Cover and cook for 3 to 4 minutes until the bottoms are golden.
- Uncover, flip carefully, and cook for 1 to 2 minutes until the cheese side is crisp and lightly golden.
- Remove from the skillet and serve hot.
Notes
- Use sandwich bread about 1/2 inch thick for best results.
- Do not skip the milk soak; it keeps the inside tender.
- Cook over medium low heat to prevent burning the bread before the cheese melts.
- Prep Time: 5 minutes
- Cook Time: 6 minutes
- Category: Breakfast/Snack
- Method: Skillet
- Cuisine: American