Oh my gosh, you guys, get ready for a dessert that looks like it took you three days to make but actually comes together faster than you can clean up the mixing bowls! I’m talking about my absolute favorite version of the classic, the raspberry tiramisu. Forget the fussy eggs and the standing over a hot stove; this is the ultimate no-bake triumph.
When I first started baking for real—you know, before I knew what ‘tempering’ meant—I always looked for desserts that felt elegant but were secretly simple. This fruity twist on tiramisu was my breakthrough recipe! It uses bright, tart raspberries instead of coffee, making it lighter and perfect for summer gatherings when you don’t want to turn on the oven. Trust me, this recipe is built on solid culinary experience, making it totally foolproof for beginners.
The secret to its success isn’t just that it’s easy; it’s that every component works together perfectly to deliver that signature creamy, fruity, melt-in-your-mouth texture. I’ve spent years perfecting the jam-to-syrup ratio, and I can confidently say this recipe delivers on flavor and structure every single time.

Essential Components for Your raspberry tiramisu
This dessert might look complicated, but it really boils down to three main players that we have to prep before assembly. Think of it as building blocks: we need the homemade raspberry jam for that deep fruity flavor, the soaking syrup for the ladyfingers, and the decadent mascarpone cream to tie it all together.
Don’t sweat the sourcing here! Frozen fruit works beautifully for both the jam and the syrup, saving you money and hassle. The key is making sure the mascarpone and heavy cream are nice and cold when we get to the whipping stage.
Gathering Ingredients for the Raspberry Jam
For the jam, we just need three things: a big batch of frozen raspberries, regular sugar, and a splash of lemon juice. That lemon juice is important; it helps the jam set up nicely and keeps the color bright. This jam is what makes our raspberry tiramisu taste so vibrant!
Ingredients for the Raspberry Syrup and Soaking
The soaking liquid is separate from the jam, which is a genius move! We use simple syrup—equal parts water and sugar—but we toss in a few berries for color and flavor, then we strain out all the seeds. You need that smooth liquid for dipping the ladyfingers quickly, just a second or two per side so they don’t get mushy.
Creating the Rich Mascarpone Cream Base
This is the creamy heart of the dessert. You’re going to use the whole container of cold mascarpone cheese, powdered sugar for sweetness, a little vanilla, and some lemon juice for a tiny bit of tang. But the real volume comes from whipping in two cups of heavy cream until it holds its shape. Remember, everything in this part needs to be cold!
Step-by-Step Guide to the Perfect raspberry tiramisu
Okay, now that we have our components ready, we move onto the fun part: building this masterpiece! Since we’re making everything from scratch, we need to follow the order of operations carefully so things have time to cool down before we start layering. Patience here pays off big time later! If you want to see more of my favorite no-bake desserts, check out my no-bake avalanche cookies recipe.
Preparing the Homemade Raspberry Jam
First up is the jam. Toss your three cups of frozen raspberries, the sugar for the jam, and that lemon juice into a saucepan. Turn the heat to medium. You want it to come up to a nice bubble, but keep an eye on it so it doesn’t boil over—I’ve definitely learned that lesson the hard way! Once it’s bubbling, knock the heat down low and let it simmer for about 20 to 25 minutes. It needs to reduce and thicken up so it’s spreadable, not runny. When it looks glossy and coats the back of a spoon, pull it off the heat. You absolutely must let this cool completely before assembly. I usually make this the day before!
Crafting the Flavorful Raspberry Syrup
Next, the syrup for dipping. Grab a smaller saucepan for this one. Combine the sugar for the syrup, the water, and that small portion of frozen raspberries. Bring this to a boil, then reduce it and let it simmer for just three minutes. You want the sugar dissolved and the berries to break down a little bit. Here’s the crucial part: you must strain this liquid through a fine-mesh sieve into a shallow dish. You want zero seeds in your dipping liquid! If you leave the seeds in, they get stuck in the ladyfingers and it just ruins the smooth texture we’re aiming for. Let this cool completely, too.
Mixing the Light Mascarpone Cream
Time for the cream! Make sure your mascarpone and heavy cream have been chilling in the fridge for hours. In your mixer bowl, beat the mascarpone, powdered sugar, lemon juice, and vanilla until it’s completely smooth—no lumps allowed. Then, slowly stream in the cold heavy cream. You need to whip this until you get what I call ‘medium-stiff peaks.’ That means when you lift the whisk, the peaks hold their shape but the tips just gently flop over. Stop mixing right there! If you overmix mascarpone cream, it can turn grainy or seize up on you, and that’s a tragedy.
Assembling Layers of Your raspberry tiramisu
Now for the layering! Start by spreading a thin, even layer of the mascarpone cream on the bottom of your dish. This acts like glue for the next layer. Take your ladyfingers and dip them SUPER fast—I mean one or two seconds per side, max—into that cool raspberry syrup. They should absorb the moisture but not turn to mush. Lay them snugly side-by-side over the cream. Next, spread half of your remaining mascarpone cream over the cookies. Then dollop half of that gorgeous, cooled raspberry jam right on top of the cream layer. Repeat that entire sequence: dipped ladyfingers, the rest of the cream, and the rest of the jam. Cover it up tightly and get it into the fridge! You can find more great dessert ideas on my Medium page.

Tips for Success Making raspberry tiramisu
Look, this dessert is incredibly easy, but the success of your final raspberry tiramisu hinges on two non-negotiable steps. I learned this the hard way when I tried to rush one for a potluck—it ended up looking more like soup than a structured layer cake!
Following these simple rules is what separates a good attempt from a truly impressive, restaurant-quality dessert. It shows that you know what you’re doing, even if the recipe itself is no-bake! For more easy dessert inspiration, check out my recipe for chocolate sea salt nut bars.
The Importance of Chilling Time
You absolutely cannot skip the minimum eight hours of chilling time. Seriously, don’t even try it for six hours! This isn’t just about letting the flavors meld together—which they do beautifully, by the way—it’s about structure. The ladyfingers need that time to fully absorb the syrup and soften up properly against the cream. If you cut into it too soon, the whole thing collapses when you try to serve, and that’s a presentation disaster. Overnight is always best for the ultimate set.
Ingredient Temperature Matters
When you’re making the mascarpone cream, temperature is your biggest friend or worst enemy, depending on how you handle it. Your heavy cream and your mascarpone cheese *must* be cold. If the heavy cream is even slightly warm when you start whipping, you’ll struggle to get those necessary stiff peaks, and you’ll end up with a runny mess that won’t hold up in the layers of your raspberry tiramisu. Keep everything chilled until the absolute second you put it in the mixer bowl.
Equipment Needed for This No-Bake Dessert
Since this is a no-bake recipe, we don’t need the oven, but we do need a few tools to keep things moving efficiently. You’ll definitely want two saucepans—one small for the syrup and one slightly larger for simmering down that gorgeous jam.
A sturdy hand mixer or stand mixer is essential for getting that mascarpone cream light and fluffy. Make sure you have your whisk attachment ready! Also, you’ll need a fine-mesh sieve for straining the syrup seeds out. Finally, grab an 8×10 inch or a 9×9 inch baking dish for assembly. Anything that holds about 10 cups of volume works perfectly!
Storing and Serving Your Masterpiece raspberry tiramisu
The best part about this dessert, besides how it tastes, is that it actually gets better overnight! Since it’s so rich, you might have leftovers, which is great because it tastes just as amazing the next day. Handling and displaying your finished raspberry tiramisu is the final flourish that makes it look professional. If you want to share your culinary creations, feel free to follow along on Facebook.
I always aim for perfection on the serving platter, but I also need to know it will last until the next day without tasting stale.
Storage Guidelines for Leftovers
Once you’ve served the first slices, you need to protect the rest. Cover your dish tightly with plastic wrap—make sure the wrap doesn’t touch the top jam layer if you can help it, or it might smear. It needs to stay refrigerated, and honestly, it’s fantastic for up to three days. The ladyfingers stay soft and moist, absorbing all those lovely raspberry flavors. Don’t even think about freezing this one; the texture of the cream just doesn’t handle the thaw well.
Presentation Ideas
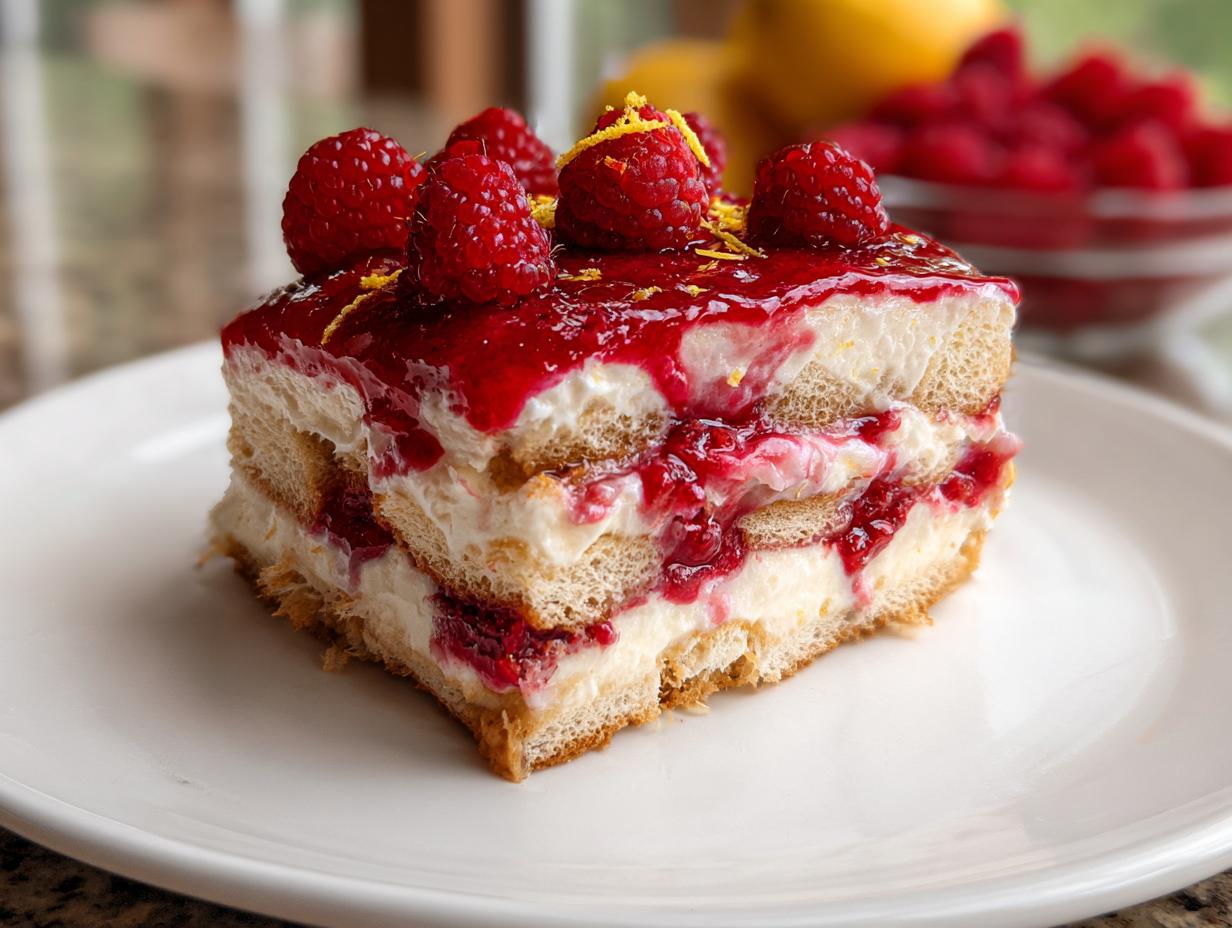
When you bring this beautiful raspberry tiramisu out for serving, you want that top layer of jam to look perfect. Before you slice it, take your fresh raspberries and cluster them nicely in the center or around the edges. Then, grab your microplane and grate some bright yellow lemon zest right over the top for an incredible burst of color and scent. If you prefer a cleaner look, thin lemon slices placed artfully around the edge look really elegant, too. It’s these small details that make everyone think you bought it from a fancy bakery! For more dessert inspiration, check out my sweet potato pie cookies.
Frequently Asked Questions About raspberry tiramisu
I get so many questions about this recipe, especially since it deviates a little from the traditional coffee-soaked version. People always want to know if they can cheat the system, and while I encourage creativity, some steps are just sacred for the best results! For more tips and tricks, follow my Pinterest board.
Here are the top things I always get asked about when making this beautiful raspberry tiramisu.
Q1. Can I use store-bought jam instead of making my own?
You certainly can, and it saves a ton of time! However, my homemade jam is cooked down longer, making it much thicker, which helps with structure. If you use store-bought, look for a very thick preserve, or gently simmer your store-bought jam for 5–10 minutes to reduce the liquid content. Otherwise, your layers might get too wet.
Q2. Can I substitute the ladyfingers for something else?
Ladyfingers are ideal because they soak up liquid quickly without completely dissolving. If you absolutely can’t find them, angel food cake cut into strips works okay, but it won’t have the same texture. If you use sponge cake, dip it even faster than you dip the ladyfingers! If you are looking for other easy recipes, try my easy heart cookies recipe.
Q3. How far ahead of time can I assemble this no-bake dessert?
I aim for overnight, which is at least 8 hours. That’s my sweet spot for flavor melding and structure setting. You can technically assemble it up to 36 hours ahead, but I find the very best texture comes when you assemble it the day before you plan to serve it.
Q4. Do I have to use lemon juice in the cream?
I highly recommend it! The mascarpone cheese is very rich, and without that little bit of acid from the lemon juice, the cream can taste a bit flat or too heavy. It just brightens up the whole flavor profile of the raspberry tiramisu.
Share Your Delicious raspberry tiramisu Experience
I absolutely love hearing from you all when you try one of my family recipes! Making this raspberry tiramisu should be a fun, rewarding experience, and I want to know how it turned out in your kitchen.
Did you keep it simple with just powdered sugar on top? Or did you go all out with the lemon zest? Drop a comment below and let me know how many stars you’re giving this no-bake beauty!