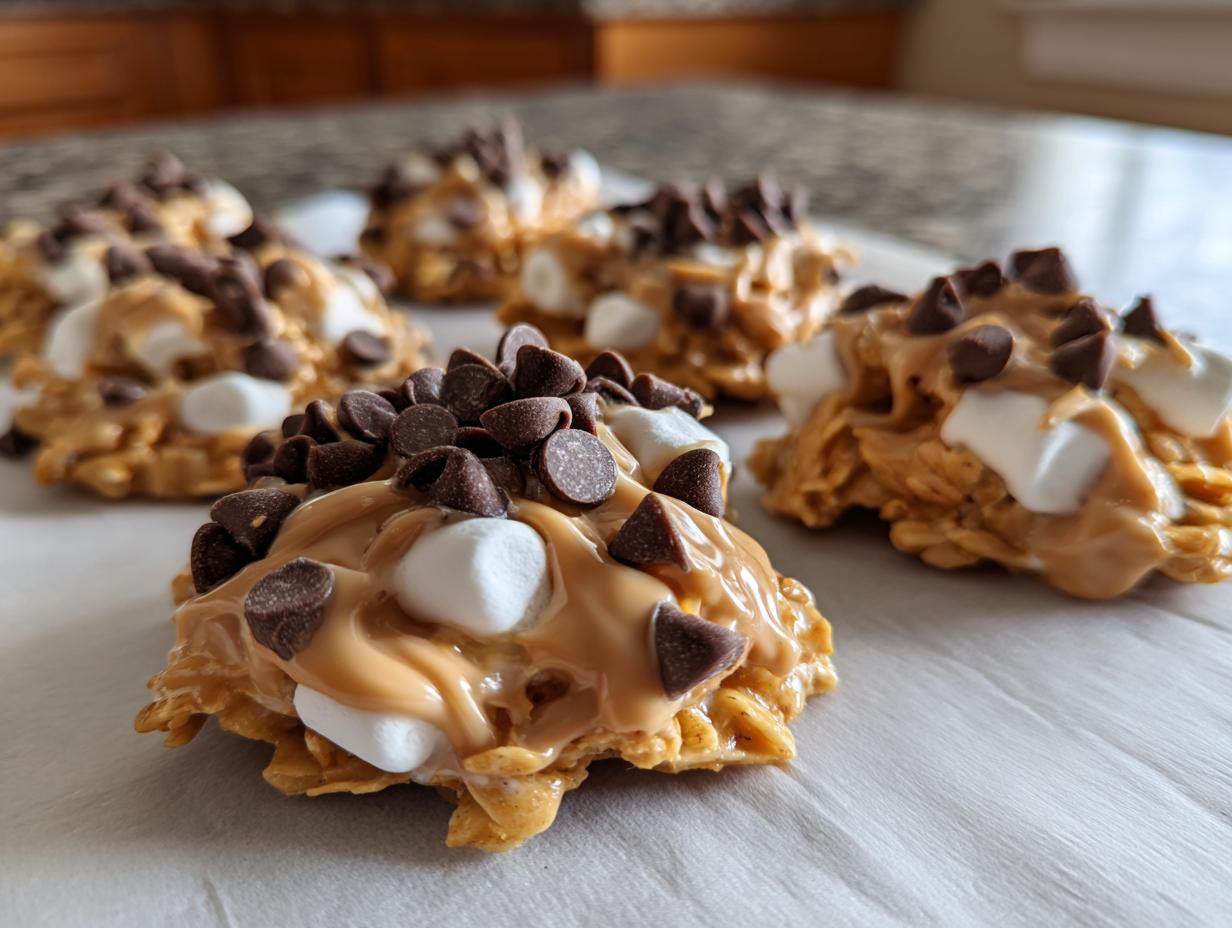
Honestly, sometimes you just need something sweet and crunchy right now, don’t you? Forget the oven, forget the waiting—I’m talking about the kind of dessert magic that happens faster than you can decide what to watch on TV. That’s why I’m obsessed with these No-Bake Avalanche Cookies. They are the ultimate lazy baker’s dream, coming together with just five simple ingredients and ready to eat in about fifteen minutes total.
I first whipped these up because my nephew wanted a “white chocolate snow treat” for a school project, and I had zero time to bake anything traditional. I was panicking until I remembered this trick! They look fancy, packed with peanut butter, marshmallows, and that creamy white coating, but they are ridiculously easy. If you’ve never made a no-bake cookie before, trust me, this is your gateway recipe. Seriously, these No-Bake Avalanche Cookies prove you don’t need hours or complicated steps to get that incredible, satisfying crunch.
Gathering Your Supplies for No-Bake Avalanche Cookies
Before you even think about melting that chocolate, setting up your station is half the battle won. Since there’s no baking involved in these No-Bake Avalanche Cookies, speed is everything once the peanut butter and white chocolate are melted. You want everything ready to go so nothing burns while you’re scrambling for a spoon!
It’s all about making sure your assembly line is smooth. We aren’t dealing with hot ovens, but we are dealing with sticky, fast-setting coatings, so preparation here prevents major messes later on. Grab your tools, line those pans, and get ready for the fastest cookie batch ever.
Essential Equipment for Perfect No-Bake Avalanche Cookies
You don’t need much fancy gear for these, which is why they’re perfect for beginners. But having the right basics makes the process so much cleaner.
- Microwave-Safe Bowl: You need a sturdy bowl, preferably glass or ceramic, for melting the chocolate and peanut butter together quickly.
- Sturdy Spatula or Wooden Spoon: You’ll be stirring thick ingredients, so make sure your stirring tool is up to the job.
- Large Baking Sheets: You need two of these ready to go, lined with parchment paper. This is non-negotiable for easy cleanup and removal of your No-Bake Avalanche Cookies.
- Cookie Scoop or Two Spoons: Using a standard cookie scoop (about 2 tablespoons size) is my top tip for uniform cookies, but two spoons work just fine if you don’t mind slightly rugged shapes!

The Simple Ingredients for No-Bake Avalanche Cookies
The best part about these No-Bake Avalanche Cookies is that they rely on just five core things. Five! But don’t let the simplicity fool you; the quality of those five things really makes a huge difference in the final texture and flavor. We aren’t baking, so there’s no rising or complex chemical reactions happening—it’s all about the right ratios of creamy, crunchy, and sweet.
You absolutely must pay attention to the preparation notes, especially around the chocolate chips and the melting wafers. If you use regular chocolate chips instead of melting wafers, they might seize up or burn easily in the microwave, and that makes a huge mess. Also, we need to divide the mini chocolate chips—that’s a critical step for getting that beautiful speckled look on top!
Ingredient Clarity and Preparation Details
Keep this list handy while you shop. I promise, gathering these specific items ensures your No-Bake Avalanche Cookies set up perfectly crunchy and creamy.
| Ingredient | Measurement | Preparation Needed |
|---|---|---|
| White Chocolate Melting Wafers (or Almond Bark) | 16 oz | Chopped (if using bark) |
| Creamy Peanut Butter | ¾ cup | None |
| Rice Krispies Cereal | 3 cups | None |
| Mini Marshmallows | 1½ cups | None |
| Mini Semi-Sweet Chocolate Chips | ½ cup | Divided: ¼ cup for mixing, ¼ cup for topping |
Step-by-Step Instructions for No-Bake Avalanche Cookies
Okay, this is where the fun starts, and honestly, this is the fastest 15 minutes you’ll spend in the kitchen all year. Since we aren’t using the oven, we have to be quick once the chocolate base is melted, but there’s a tiny pause built in that is super important. Read these steps through once before you start melting anything, just so you know what’s coming next!
Your goal is smooth, glossy coating and then fast assembly. If you rush the cooling step, you’ll end up with melted marshmallows instead of those delightful little white pockets in your No-Bake Avalanche Cookies.
Melting the Base for Your No-Bake Avalanche Cookies
Grab your microwave-safe bowl and toss in your white chocolate wafers and the peanut butter. Now, don’t just blast this on high for two minutes straight! That’s how you burn white chocolate, and trust me, burnt chocolate smells awful and ruins the whole batch. We work in short bursts.
Microwave for 30 seconds. Pull it out, stir it really well, even if it doesn’t look melted yet—the residual heat does a lot of work. Put it back in for another 30 seconds. You might need one or two more bursts, stirring thoroughly each time, until it’s completely smooth and glossy. It should flow like thick, luxurious gravy. This smooth base is what holds all the crunch together in our No-Bake Avalanche Cookies.
Mixing the Crunch and Marshmallows
This cooling pause is crucial! Once it’s smooth, let that bowl sit on the counter for a good 2 to 3 minutes. This slight temperature drop prevents the marshmallows from dissolving instantly when you add them. If you skip this, bye-bye fluffy texture!
After the brief rest, gently stir in your Rice Krispies cereal first until every piece is coated in that peanut butter goodness. Then, it’s time for the soft stuff. Gently fold in the mini marshmallows and the first quarter cup of those mini chocolate chips. Use a folding motion—don’t beat it up! We just want them incorporated without squishing the marshmallows.

Scooping and Setting Your No-Bake Avalanche Cookies
Now, move fast! Grab your cookie scoop or two spoons. Drop generous mounds—I aim for about two tablespoons worth—onto your prepared, lined baking sheets. This is where you grab that reserved quarter cup of chocolate chips. Immediately, sprinkle a few on top of each wet cookie mound. If you wait even five minutes, those chips won’t stick!
For the impatient among us (like me!), you can pop the trays into the fridge for about 15 minutes. If you can wait, leaving them on the counter at room temperature for 45 minutes to an hour works just fine too. Either way, check them after 15 minutes—they should be firm to the touch and ready to eat!
Tips for Achieving Expert No-Bake Avalanche Cookies Results
These cookies are nearly foolproof, but there are a few little secrets I’ve learned over the years that elevate them from “good” to “OMG, what is this magic?” Most issues come down to temperature or ingredient choice. Don’t worry if your first batch isn’t perfect; baking is about learning, even no-baking!
My biggest advice for anyone making these No-Bake Avalanche Cookies is to respect the chocolate melting process. White chocolate is notoriously fussy, so paying attention to those small details means you avoid a sticky, grainy mess. If you want to see more of my kitchen tips, check out my latest articles!
Ingredient Swaps and Texture Management
First, let’s talk about the coating. While you *can* use high-quality white chocolate chips, they often contain stabilizers that make them seize up or get grainy when melted with peanut butter. I highly recommend sticking to vanilla almond bark or actual melting wafers. They are designed to melt smoothly and set up firm, which is exactly what we need for these cookies.
Remember that 2-to-3-minute cooling break after melting the chocolate base? That’s crucial for texture management, especially with the marshmallows. If the base is too hot when you fold in the marshmallows, they just melt into sugary goo instead of staying puffy and distinct. We want those pillowy white pockets throughout our No-Bake Avalanche Cookies, not a flat, chewy surface. A little patience during that short waiting period pays off huge later!
Frequently Asked Questions About No-Bake Avalanche Cookies
I get so many questions about these beauties! They are so simple, but sometimes people worry about substitutions or storage. Here are some of the most common things I hear about making the best No-Bake Avalanche Cookies.
Q1. Can I use crunchy peanut butter instead of creamy?
You certainly can, but it changes the texture! Creamy peanut butter mixes in smoother and gives you that signature creamy coating. Crunchy will add extra texture, but it might make the overall cookie structure a little looser. It’s a matter of preference for your No-Bake Avalanche Cookies!
Q2. Why are my cookies soft and won’t set up?
Usually, this happens for two reasons. Either your kitchen is too warm, or you didn’t use melting wafers/almond bark. If you used regular white chocolate chips, they might not set hard enough. If it’s warm in your house, just pop them in the fridge for 20 minutes—that usually firms them right up!
Q3. Are these a good quick dessert option for a party?
Absolutely! They are the definition of a quick dessert. You can literally make a huge batch of these No-Bake Avalanche Cookies in under 20 minutes of active time, and they look fantastic on a platter. They are always the first thing people grab! If you want to save this recipe for later, be sure to pin it on Pinterest.
Q4. Can I use different kinds of cereal?
While Rice Krispies are traditional for the right crunch, you could try Cheerios or even crushed pretzels if you want a salty twist. Just remember that the volume of cereal needs to stay consistent with the recipe to balance the melted white chocolate mixture correctly.
Storing Your Homemade No-Bake Avalanche Cookies
Because these No-Bake Avalanche Cookies don’t spend any time in the oven, their biggest enemy is heat. If your kitchen is warm, or if you live somewhere humid, they can get soft and sticky surprisingly fast. You want them firm, right? So, knowing how to store them correctly is key to keeping that perfect crunch.
For short-term freshness, room temperature is fine, but for longer keeping, the fridge is your best friend. You don’t need to reheat these at all—they are best served cool—so the storage focus is purely on texture preservation.
| Storage Location | Maximum Duration | Notes |
|---|---|---|
| Airtight Container (Room Temp) | 3 Days | Best if your kitchen is cool (under 70°F). |
| Airtight Container (Refrigerator) | 10 Days | Keeps them firmest. Let sit 5 minutes before eating if too cold. |
Always use an airtight container, no matter where you put them! Air is the enemy of no-bake treats, drying them out or making them tacky. These No-Bake Avalanche Cookies hold up wonderfully, but keeping the air out makes a huge difference. For more quick treats, check out my Snacks category!
Share Your Perfect No-Bake Avalanche Cookies Experience
Well, that’s it! You’ve made the fastest, crunchiest, most satisfying treat around. I really hope you loved whipping up these No-Bake Avalanche Cookies as much as I love eating them. Let me know how they turned out for you! You can always connect with us on Facebook too!
Did you stick to the classic five ingredients, or did you sneak in some fun variations? Drop your rating below, tell me if you added pecans or used different chips, and share your biggest no-bake success story!
Print
5 Amazing No-Bake Avalanche Cookies Magic
- Total Time: 45 minutes
- Yield: 24 cookies
- Diet: Omnivore
Description
These 5-ingredient No-Bake Avalanche Cookies mimic the famous Rocky Mountain Chocolate Factory treat. A creamy white chocolate and peanut butter crunch ready in 15 minutes.
Ingredients
- 16 oz white chocolate melting wafers or vanilla almond bark (chopped)
- ¾ cup creamy peanut butter
- 3 cups Rice Krispies cereal (crisp rice cereal)
- 1½ cups mini marshmallows
- ½ cup mini semi-sweet chocolate chips (divided: ¼ cup for mixing, ¼ cup for topping)
Instructions
- Line two large baking sheets with parchment paper or wax paper and set them aside.
- Microwave the white chocolate melting wafers and creamy peanut butter in 30-second intervals, stirring well after each burst, until completely smooth and melted.
- Let the melted mixture cool for 2–3 minutes.
- Gently stir in the Rice Krispies cereal until fully coated in the peanut butter mixture.
- Fold in the mini marshmallows and ¼ cup of the chilled mini chocolate chips just until combined.
- Use a large cookie scoop or two spoons to drop generous mounds (about 2 tablespoons each) onto the prepared baking sheets.
- Immediately sprinkle the remaining ¼ cup of mini chocolate chips on top of the wet cookies before they set.
- Let the cookies stand at room temperature for 30–60 minutes until firm, or place them in the refrigerator for 15 minutes to set faster.
Notes
- Use melting wafers or almond bark instead of premium white chocolate chips for smoother melting.
- Chilling the mini chocolate chips before mixing helps maintain the speckled look.
- Do not skip the brief cooling step before adding marshmallows; this prevents them from melting completely.
- If your kitchen is warm, store cookies in the refrigerator to maintain firmness.
- Prep Time: 15 minutes
- Cook Time: 0 minutes
- Category: Dessert
- Method: No-Bake
- Cuisine: American