No Bake Cookies are the first thing I ever successfully made in a kitchen that didn’t involve a microwave popcorn button. Seriously! Back when I was trying to learn to cook for my dorm room—and failing spectacularly at boiling water—I almost gave up. Everything felt too technical, too scary, like I needed a chemistry degree just to make toast. Then I found a version of this recipe, and wow, it changed everything for me.
It proved that you don’t need fancy equipment or hours of time to create something genuinely delicious and satisfying. These cookies require zero oven time, which is a huge win for anyone who’s nervous about temperature control or just hates turning on the stove for too long. If you’re new here at NoobRecipes, know this: I built this whole site because of treats like this. If you can stir, you can master these no bake cookies, and that success is going to boost your confidence for every recipe you try next!

Why You Need This Easy No Bake Cookies Recipe
If you’re looking for a dessert that screams classic comfort without demanding any real baking skill, stop scrolling right now. This recipe for no bake cookies is your new best friend for those sudden chocolate and peanut butter cravings. We’re talking about a full batch ready to eat in about 20 minutes total—and most of that time is just waiting for them to set up! That’s faster than preheating your oven, honestly.
These treats deliver that perfect, nostalgic combination of rich cocoa, salty peanut butter, and chewy oatmeal. It’s the ultimate simple dessert, and you don’t have to worry about burning anything. It’s pure, foolproof stovetop magic, which is exactly what we aim for here at NoobRecipes!
Speed and Simplicity Define These No Bake Cookies
I can’t stress this enough: these no bake cookies are designed for success. The entire hands-on process takes less than ten minutes. You melt, you boil for exactly one minute, you stir in the final ingredients, and you drop them onto parchment. That’s it! There is no tricky folding or delicate batter handling required.
This recipe is an absolute lifesaver for busy weeknights or when you need to bring a quick treat to a last-minute gathering. Mastering these simple no bake cookies proves you’re already a capable cook. Seriously, if you can follow three simple stovetop steps, you’ve already mastered the hard part of making these delicious chocolate oatmeal cookies. If you want to see more of my easy dessert recipes, check out my page on dessert cakes!
Gathering Your Ingredients for No Bake Cookies
Okay, gathering the ingredients for these no bake cookies is the easiest part, but I need you to pay close attention to the measurements here. Since we aren’t baking, the ratios of the sugar, milk, and cocoa are critical for the cookies to set up correctly. Trust me, a slightly off measurement here means you end up with chocolate peanut butter soup instead of firm cookies. Don’t panic, though! Just measure carefully, and you’ll be fine.
This recipe is built around pantry staples, so you probably have most of this stuff already. We are using creamy peanut butter because chunky can sometimes throw off the texture when it melts into the hot liquid. Keep everything measured out before you even turn on the stove—this process moves fast once we start boiling!
| Amount | Ingredient |
|---|---|
| 1/2 cup | Butter, cut into pieces |
| 2 cups | Granulated Sugar |
| 1/2 cup | Whole Milk |
| 1/4 cup | Unsweetened Cocoa Powder |
| 1/2 cup | Creamy Peanut Butter |
| 1 teaspoon | Vanilla Extract |
| 3 cups | Rolled or Quick Cooking Oats |
Ingredient Clarity and Notes
The only real decision you have to make here is the oats. Grandma always used rolled oats, which gives the cookies a bit more structure and a coarser bite—you really feel like you’re eating something substantial. If you prefer a chewier, softer cookie where the oats almost disappear into the chocolate matrix, go ahead and use quick cooking oats.
Either way, make sure you measure exactly three cups. I know it seems like a lot of oats compared to the liquid mixture, but that’s what gives these no bake cookies their body and keeps them from spreading out into a giant puddle on the parchment paper. Don’t substitute the milk for anything thinner, either; whole milk has the right fat content we need! If you want to see other recipes that use simple pantry items, check out my snacks category.
Essential Equipment List for No Bake Cookies
You don’t need anything fancy for these no bake cookies, which is why they are so perfect for beginners. You just need a reliable medium-sized saucepan—nothing too small, or it will boil over! Make sure you have measuring cups ready, a good sturdy spoon for stirring the thick mixture later, and, this is important, a sheet of parchment paper ready to go on the counter.
You’ll also want a timer, which I’ll talk more about later, but it’s essential for that one-minute boil. Besides that, just a couple of bowls for your dry ingredients. That’s it! No stand mixer, no fancy cake pans, just straightforward stovetop success for your first batch of no bake cookies.
Step-by-Step Instructions for Perfect No Bake Cookies
Now we get to the fun part! Remember how I said these are faster than preheating an oven? It’s true. The key to successful no bake cookies is keeping your stirring motion steady but not frantic. We are building a candy base here, so we need everything to dissolve evenly before we hit the heat. Get all your measuring done first, and then let’s head to the stove. You’re going to be amazed at how fast this comes together!
Put your butter pieces, sugar, milk, and cocoa powder into your saucepan. Start heating this over medium heat. You need to stir this mixture constantly at first until that butter melts completely and the sugar starts dissolving into that rich chocolate liquid. It should look smooth and glossy before you even think about letting it bubble up.
The Crucial Boiling Stage for These No Bake Cookies
This is where 90% of people mess up their no bake cookies, so listen closely! Once the mixture reaches a full, rolling boil—meaning it’s bubbling vigorously across the whole surface—you must start your timer. You let it boil for exactly 60 seconds. Not 45 seconds, and definitely not 90 seconds. If you under-boil, the sugar won’t reach the right temperature to crystallize properly, and your cookies will stay gooey and never set.
Set a timer on your phone right now! While it boils, keep stirring gently, just enough to keep things moving. The second that minute is up, yank that pan right off the burner. Don’t even let it sit there for an extra second thinking about cooling down. That 60-second rule is the absolute secret weapon for perfect no bake cookies that firm up just right on the counter.
Mixing and Dropping the No Bake Cookies
Once the pan is off the heat, you have about 30 seconds to work quickly before the mixture starts to seize up. First, drop in the peanut butter and the vanilla extract. Stir those in until they are completely melted and incorporated into the hot base. It will look incredibly smooth and glossy again—what a transformation!
Next, dump in all three cups of your oats. This is where things get thick fast! You need to fold those oats in rapidly until every single one is coated in that chocolatey goodness. Don’t overmix once the oats are in, or the mixture gets too heavy. Grab a spoon, drop tablespoon-sized dollops onto your prepared parchment paper, and try to give them a little space. They won’t spread much, so you can make them look as rustic as you want. Let them sit and work their magic!

Tips for Success When Making No Bake Cookies
I know that stovetop recipes can feel a little intimidating when you’re first starting out, but these no bake cookies are so forgiving once you know the two main rules. My biggest piece of advice is treating that one-minute boil like law—it’s non-negotiable for a firm cookie. The second rule is that you have to move fast once you take the pan off the heat. You can’t dawdle while stirring in the peanut butter or adding the oats! If you want to see more of my cooking tips, follow me on Facebook.
If you follow the timing, you are going to end up with the best, most satisfying chocolate oatmeal cookies you’ve ever made. I’ve made hundreds of batches, and I still get a thrill watching them solidify on the counter. Remember, if you mess up, just scrape it back into the pot, add a tiny splash more milk, reheat it gently, and try the boil again. It’s hard to truly ruin these no bake cookies!
Troubleshooting Common No Bake Cookies Issues
The most common problem people run into is the cookies not setting up firm enough. If your cookies are still soft and gooey an hour later, it almost always means you didn’t boil the sugar mixture long enough. It just didn’t reach the proper temperature to set hard. If this happens, don’t throw them out! Scoop them into a bowl, gently reheat them on the stove until they melt down again, and give that boil a solid 70 seconds next time.
The other issue is sticking. If your cookies are sticking to the parchment paper, it usually means one of two things: either you didn’t use parchment paper (which I highly recommend!), or you let the mixture sit too long in the pan before you dropped them. If the mixture cools too much in the saucepan, it starts to harden up right there, and it’s harder to scoop cleanly. Work quickly when dropping those spoonfuls! If you are looking for other easy recipes, check out my guide on dinner and lunch ideas.
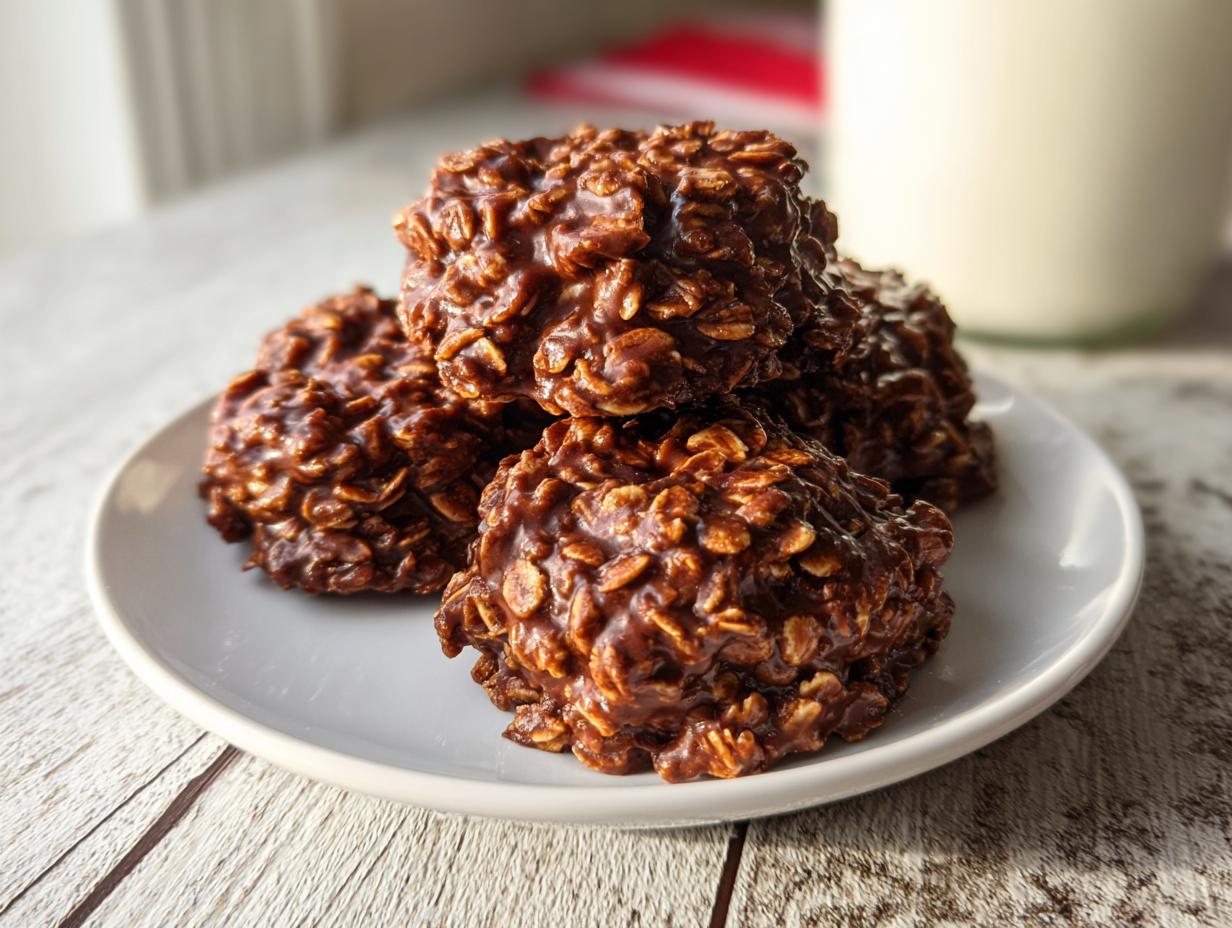
Serving Suggestions for Your No Bake Cookies
These treats are amazing all on their own, right off the parchment paper. They are so rich with chocolate and peanut butter that they don’t really need anything extra, but let’s be honest, everything tastes better with a classic pairing, right?
The absolute best thing to serve alongside these is a big, ice-cold glass of whole milk. The coolness of the milk cuts through the richness of the chocolate and helps balance that sweetness perfectly. It’s the ultimate throwback combination.
If you’re having these as an afternoon snack instead of dessert, a strong, black cup of coffee is fantastic. The bitterness of the coffee really wakes up the cocoa flavor in the cookie. My personal favorite way to eat them when I’m working late is to let one soften up slightly—maybe just 15 seconds on a microwave-safe plate if you like them gooey—and eat it with a spoon like pudding. Crazy, I know, but it works when you can’t wait for them to fully firm up! For more sweet ideas, check out my caramel cookie bars.
Storing and Serving Leftover No Bake Cookies
One of the best things about these no bake cookies is that they are actually better the next day! They firm up beautifully as they sit, and the flavors have time to really meld together. You don’t need to do anything special to store them, which is just another win for the beginner baker.
However, you do need to make sure they are completely cool before you try to stack them or put them in a container. If you try to store them when they are even slightly warm, you’ll end up with a sticky, melted mess that adheres perfectly to whatever container you use. Trust me, I’ve learned that lesson the hard way!
Because these no bake cookies rely on the sugar crystallizing to harden, temperature matters. If your kitchen is really warm, they might stay a little softer than you’d like, so we need a good storage plan. Here is the breakdown of how I keep mine fresh:
| Storage Method | Temperature | Estimated Freshness |
|---|---|---|
| Airtight Container | Room Temperature | 3 to 5 days |
| Airtight Container | Refrigerator | Up to 2 weeks |
| Freezer | Freezer Safe Bag/Container | Up to 3 months |
If you keep them in the fridge, they will get quite firm—almost hard—because of the butter content. That’s fine! If you prefer the classic, slightly chewy texture of no bake cookies, just pull them out of the refrigerator about 30 minutes before you plan to serve them. If you’re freezing them, let them thaw on the counter for an hour. They are just as delicious straight from the freezer if you like that super hard, chocolatey crunch! You can find more great storage tips on Pinterest.
Frequently Asked Questions About These Easy Dessert Treats
I get so many questions about these quick recipes, especially when people are trying them for the first time. It’s natural to wonder about substitutions, but for a recipe this simple, we have to be careful about changing the core structure. Here are the things people ask me most often about making these chocolate oatmeal cookies!
Can I Substitute the Peanut Butter in these No Bake Cookies?
This is a tricky one, and my advice is usually no, but if you absolutely must substitute the peanut butter, you need to choose something with a very similar fat and oil content. Almond butter or cashew butter are your best bets because they melt and incorporate almost identically to creamy peanut butter when heated with the sugar mixture. If you use sunflower seed butter, you might notice a slightly grainier texture, but it should still set.
Do not try to substitute with something like jam or honey; those are mostly sugar and water, and they won’t provide the necessary fat structure to help these cookies firm up. If you skip the fat, you end up with a sticky, sweet mess that won’t harden. Stick to smooth nut or seed butters if you need an alternative!
How Long Do These No Bake Cookies Take to Set?
The setting time really depends on how hot or humid your kitchen is, but generally, you want to give them at least 30 minutes at room temperature before you even try to move them. If you’re impatient—and I totally get it—you can pop them into the refrigerator after about 15 minutes on the counter. In the fridge, they’ll be fully firm and ready to eat in about 20 minutes total.
I always tell people that if they are still soft after an hour on the counter, they probably didn’t boil the mixture quite long enough. But don’t worry! They will eventually firm up. Just give them time, or put them in the cold air. They are worth the wait!
Share Your No Bake Cookies Experience
I truly hope that making these no bake cookies gave you the same rush of cooking confidence that it gave me years ago. Seeing those simple ingredients transform into a perfect, chewy chocolate treat without ever touching an oven is genuinely satisfying! I poured all my beginner-focused knowledge into making sure this recipe is crystal clear.
Now it’s your turn! I absolutely love hearing how these recipes turn out for you all. Did you use rolled oats for that classic texture, or did you go for the quick-cooking kind? Did you manage to stick to that one-minute boil perfectly? Don’t be shy—I want to know everything!
If you loved how easy these turned out, please leave me a rating right here on the recipe card. And if you have any questions, drop them in the comments below. I read every single one, and I’m here to help you troubleshoot or just celebrate your success with these amazing no bake cookies. Happy stirring!
Print
Amazing 1-Minute No Bake Cookies Win
- Total Time: 20 minutes
- Yield: 35 cookies
- Diet: Vegetarian
Description
No Bake Cookies are a quick and easy treat perfect for beginner cooks. You mix, boil briefly, stir in oats, and drop onto parchment paper. They set up fast without needing an oven. This recipe delivers a classic, satisfying chocolate peanut butter flavor.
Ingredients
- 1/2 cup butter, cut into pieces
- 2 cups granulated sugar
- 1/2 cup whole milk
- 1/4 cup unsweetened cocoa powder
- 1/2 cup creamy peanut butter
- 1 teaspoon vanilla extract
- 3 cups rolled or quick cooking oats
Instructions
- Place the butter, sugar, milk, and unsweetened cocoa powder in a saucepan. Heat over medium heat.
- Stir often until the butter melts and all ingredients combine.
- Bring the mixture to a boil. Allow it to boil for exactly 60 seconds, stirring occasionally. Set a timer.
- Remove the saucepan from the heat.
- Stir in peanut butter and vanilla extract until fully combined.
- Stir in the oats and mix until all oats coat with the mixture.
- Drop spoonfuls of the mixture onto parchment paper.
- Cool the cookies completely before serving or storing. They harden as they cool.
Notes
- This recipe makes approximately 35 cookies.
- Use rolled oats for a courser texture. Use quick cooking oats for a less coarse and more chewy texture.
- Prep Time: 10 minutes
- Cook Time: 5 minutes
- Category: Dessert
- Method: Stovetop
- Cuisine: American