Old-Fashioned Buttermilk Donut Bars are a game-changer, seriously! When I first started NoobRecipes, my kitchen was a total disaster zone of flour explosions and questionable baking attempts. I remember trying to make *any* kind of fried dough, and let’s just say it usually ended up looking more like a sad, greasy pancake. Buttermilk donuts always seemed so intimidating, with their perfect shape and that little divot in the middle. I figured they were only for super experienced bakers. That is, until I figured out a way to make them totally approachable for beginners. These bars are my little secret weapon for proving that *anyone* can make amazing, bakery-worthy treats right at home. They’ve got that perfect tender crumb from the buttermilk, a glaze that will make you weak in the knees, and they’re surprisingly simple. Get ready to impress yourself (and everyone else)!

Why You’ll Love These Old-Fashioned Buttermilk Donut Bars
Seriously, these donut bars are a total win, especially if you’re just dipping your toes into baking. They’re proof that you don’t need to be a pastry chef to make something incredible. Here’s why you’ll be obsessed:
- Tender, Cake-Like Texture: That secret ingredient, buttermilk, gives these bars the most amazing soft, fluffy crumb. It’s pure deliciousness in every bite.
- Dreamy Glaze: We’re talking brown butter, maple, and real vanilla bean. It sounds fancy, but it’s super easy to whip up and tastes like pure comfort.
- That Classic Look: The little indentation down the middle? It’s iconic! And guess what? It’s surprisingly simple to achieve, making your homemade donuts look professionally done.
- Beginner-Friendly: I designed this recipe with you in mind. No complicated techniques, just straightforward steps that lead to amazing results.
- Perfect Anytime Treat: Whether it’s a lazy Saturday morning breakfast or a sweet afternoon pick-me-up, these bars are always a good idea.
Ingredients for Old-Fashioned Buttermilk Donut Bars
Okay, let’s talk ingredients! When I first started out, I used to get so overwhelmed looking at ingredient lists. But trust me, with these Old-Fashioned Buttermilk Donut Bars, it’s all about having the right stuff ready to go. It makes the whole process so much smoother, and you’ll actually have fun! We’ve got our dry ingredients like cake flour – which is key for that super tender texture – along with baking powder, salt, nutmeg (my favorite warm spice!), and baking soda. Then come the wet ingredients: both brown and granulated sugars for sweetness and depth, a little bit of melted butter, two large eggs plus an extra yolk for richness, and good old vanilla extract. The star, of course, is the buttermilk, which gives these bars their signature tang and tenderness. Just a heads-up on the buttermilk: if you don’t have any on hand, a little apple cider vinegar or lemon juice mixed into regular milk works like a charm. And for frying, any high-heat oil will do the trick. The glaze ingredients are super simple but pack a punch: powdered sugar, butter that we’ll brown for amazing flavor, real maple syrup, a splash of milk, and more vanilla. Having everything measured out beforehand really makes a difference, especially when you’re working with sticky dough!
| Ingredient | Quantity | Preparation Notes |
|---|---|---|
| Cake flour | 3 1/2 cups (440g) | |
| Baking powder | 2 1/2 tsp (10g) | |
| Salt | 1 tsp (6g) | |
| Nutmeg | 3/4 tsp (1g) | Ground |
| Baking soda | 1/4 tsp (2g) | |
| Brown sugar | 1/2 cup (120g) | Packed |
| Granulated sugar | 1/2 cup (110g) | |
| Salted butter | 1/4 cup (58g) | Melted and cooled |
| Eggs | 2 | Large, at room temperature |
| Egg yolk | 1 | Large, at room temperature |
| Vanilla extract | 1 tbsp | |
| Buttermilk | 3/4 cup (180ml) | Or 1 tbsp apple cider vinegar + 3/4 cup milk choice |
| High heat oil (e.g., olive/avocado) | 4-6 cups | For frying |
| Powdered sugar | 1 1/2 cups (190g) | |
| Salted butter | 6 tbsp (85g) | Melted and browned |
| Maple syrup | 1/3 cup (113g) | |
| Milk of choice | 2 tbsp (30ml) | For glaze |
| Vanilla extract or paste | 1 tsp (4g) | |
| Salt | Pinch | For glaze |
How to Prepare Old-Fashioned Buttermilk Donut Bars
Alright, let’s get these amazing donut bars made! It might seem like a few steps, but trust me, each one is super straightforward, and the result is totally worth it. We’re going to go from a sticky dough to golden, glazed perfection. Just follow along, and you’ll see how easy it is to whip up something truly special.
Preparing the Donut Bar Dough
First things first, let’s get our dough ready. In a big bowl, whisk together all your dry ingredients: the cake flour, baking powder, salt, nutmeg, and baking soda. This just makes sure everything is evenly distributed. Now, in another bowl, grab your sugars and that melted butter. Give it a good whisk, then add in your eggs, egg yolk, and vanilla. Whisk it all up until it’s nicely combined. Pour in your buttermilk and give that a quick stir. Now, add your dry ingredients to the wet ingredients and just fold them together until they’re *just* combined. Don’t go crazy mixing! The dough will be pretty sticky – that’s exactly what we want. Cover the bowl and pop it in the fridge for about 30 to 60 minutes. This chilling step is super important because it makes that sticky dough much easier to handle when we shape it.
Shaping Your Old-Fashioned Buttermilk Donut Bars
Okay, time to get these into their signature shape! Sprinkle a good amount of flour all over your clean counter or a large cutting board. You’ll want to flour your hands too – this dough is sticky, so don’t be shy with the flour! Gently pat or roll out the chilled dough into a rectangle about 18 inches long and 3.5 inches wide, keeping it about half an inch thick. Use more flour as needed to prevent sticking. Now, grab a bench scraper or a knife that’s been floured. Cut the dough lengthwise right down the middle to divide it into two long strips. Then, make about 8 or 9 cuts widthwise across each strip. You should end up with around 16 to 18 bars. Here’s the fun part: take your floured bench scraper and gently press down the center of each bar lengthwise. You want to make a nice little indentation, but don’t cut all the way through! This gives them that classic old-fashioned look.
Frying the Donut Bars to Golden Perfection
Now for the magic of frying! Grab a large, heavy-bottomed pot or Dutch oven and pour in about 2 inches of your high-heat oil. Let it heat up over medium-high heat until it reaches between 350°F and 370°F. A thermometer is your best friend here! While the oil heats, line a wire cooling rack with paper towels. This is where your donuts will drain and cool. Carefully, using your bench scraper or a spatula, lower 3 or 4 donut bars at a time into the hot oil. Try to place them indentation-side up. Be careful, they’ll sizzle! Let them fry for about 1 to 2 minutes until they’re beautifully golden brown on the bottom. Gently flip them over with tongs or your scraper and fry the other side for another 1 to 2 minutes. Once they’re golden all over, carefully lift them out and place them on the prepared cooling rack. Repeat with the rest of your donut bars, making sure the oil temperature stays in that sweet spot!
Glazing and Finishing Your Old-Fashioned Buttermilk Donut Bars
We’re almost there! Time for that incredible glaze. In a medium bowl, whisk together the powdered sugar, that glorious browned butter, maple syrup, a splash of milk, and the vanilla extract or paste, plus a tiny pinch of salt. Whisk it all until it’s super smooth. If the glaze seems a bit too thick for dipping, just add a tiny bit more milk, like a teaspoon at a time, until you get a nice, dippable consistency. Now, take your cooled donut bars and carefully dunk the top side into the glaze, letting any excess drip off. Place them back on the cooling rack, glaze-side up, and let them sit for a bit until the glaze sets. And voilà! You’ve got incredible, homemade Old-Fashioned Buttermilk Donut Bars ready to devour!
Tips for Success with Old-Fashioned Buttermilk Donut Bars
Okay, so you’re ready to tackle these Old-Fashioned Buttermilk Donut Bars, and I’ve got a few little secrets to make sure they turn out absolutely perfect, even if it’s your first time! Think of these as my little nudges to help you nail it. I’ve definitely learned a thing or two over the years, and sharing these tips is part of what makes NoobRecipes so great – we learn together!
- Handling Sticky Dough: Seriously, don’t freak out if the dough feels super sticky. That’s exactly what you want for tender donuts! Just embrace it and use plenty of flour on your hands and your work surface when you’re rolling and cutting. It makes all the difference.
- Oil Temperature is Key: This is probably the MOST important tip for frying. You really need a thermometer to keep your oil steady between 350°F and 370°F. If it’s too low, your donuts will soak up oil and be greasy. Too high, and they’ll burn before they cook through. Keep an eye on it!
- Don’t Overmix the Dough: I know I said it in the instructions, but it’s worth repeating! Mix the dry ingredients into the wet *just* until they’re combined. Overmixing develops gluten, which can make these bars tough instead of tender and cake-like. Stop as soon as you don’t see any dry flour streaks.
- Glaze Consistency: Getting the glaze just right is super easy, but you have to be patient. Whisk everything together, and if it’s too thick to dip your bars into nicely, add milk just a teaspoon at a time. You want it pourable but thick enough to coat the donut bars without running off completely.
Equipment You’ll Need
Alright, getting your kitchen ready is half the battle, right? For these Old-Fashioned Buttermilk Donut Bars, you don’t need anything super fancy, just a few trusty tools that most beginner bakers already have. Having these ready before you start will make the whole process so much smoother. You’ll want a couple of large mixing bowls for all our ingredients, and a good whisk to combine everything nicely. A bench scraper or a sturdy knife is essential for cutting those perfect bars and making that signature little indent. For frying, a heavy-bottomed pot or a Dutch oven is perfect because it holds heat well. And, super important, grab a wire cooling rack and some paper towels to drain those beautiful fried bars. Oh, and don’t forget a thermometer – a candy or deep-fry thermometer is a lifesaver for keeping that oil at the perfect temperature!
- Large mixing bowls
- Whisk
- Bench scraper or knife
- Heavy-bottomed pot or Dutch oven
- Wire cooling rack
- Paper towels
- Thermometer (candy or deep-fry)
Frequently Asked Questions about Old-Fashioned Buttermilk Donut Bars
Got questions about these yummy Old-Fashioned Buttermilk Donut Bars? I totally get it! When I started NoobRecipes, I had a million questions about everything. Here are some common ones I hear, and I’m happy to spill the beans!
Q: Can I use regular milk if I don’t have buttermilk for these Old-Fashioned Buttermilk Donut Bars?
Absolutely! Don’t let a missing ingredient stop you. Just take your regular milk (any kind will do!) and stir in about a tablespoon of apple cider vinegar or lemon juice. Let it sit for about 5 minutes, and it’ll curdle just like buttermilk. Easy peasy!
Q: How do I get the signature indentation on my donut bars?
That little groove is what makes them look so classic! It’s super simple: just make sure your bench scraper or knife is well-floured, and then gently but firmly press it down the center of each bar before you fry them. You’re just making a gentle crease, not cutting through the dough.
Q: Can I bake these instead of frying them?
These are really designed to be fried – that’s where you get that perfect golden crispiness and the classic donut texture. You *could* try baking them as bars, but they’ll turn out more like a cake or biscuit, and you’ll miss out on that amazing fried goodness. I recommend sticking to frying them for the best Old-Fashioned Buttermilk Donut Bar experience!
Q: How long do Old-Fashioned Buttermilk Donut Bars stay fresh?
Honestly, these are best enjoyed the day you make them. They’re at their absolute peak when they’re fresh out of the fryer and glazed. If you have any leftovers, they’ll still be pretty good for a day or two if you store them in an airtight container at room temperature, but they might lose a little of their crispness.
Storage and Reheating
You know, these Old-Fashioned Buttermilk Donut Bars are honestly best when they’re fresh, but life happens, and sometimes you have leftovers! Don’t worry, you can totally still enjoy them. The key is to store them properly so they don’t get all soggy. Once they’ve cooled down completely from being fried and glazed, pop them into an airtight container. They’ll keep at room temperature for a day or two. If you’re looking to bring back a little bit of that just-fried crispness, a quick trip in a low oven is your best bet. Just pop them onto a baking sheet and warm them up in a 300°F oven for about 3-5 minutes. They’ll be almost as good as new! If you’re not worried about that extra crisp, they’re perfectly delicious just at room temperature too.
| Method | Instructions |
|---|---|
| Storage | Store cooled donut bars in an airtight container at room temperature for up to 2 days. |
| Reheating | For a slightly crisper exterior, reheat gently in a 300F (150C) oven for 3-5 minutes. Otherwise, enjoy at room temperature. |
Understanding the Nutrition of Old-Fashioned Buttermilk Donut Bars
Alright, let’s talk about the numbers behind these delicious Old-Fashioned Buttermilk Donut Bars. Now, I’m all about making amazing food accessible, but I’m not a registered dietitian, so take these figures with a grain of salt. They’re estimates, for sure, because how much oil you use, the exact size of your bars, and even the brands of ingredients you pick can change things up a bit. Think of this as a helpful guide rather than a strict rulebook. It just gives you a general idea of what you’re getting into with a homemade treat like this!
| Nutrient | Estimated Amount (per bar) |
|---|---|
| Calories | 350-400 |
| Fat | 18-22g |
| Saturated Fat | 8-10g |
| Unsaturated Fat | 10-12g |
| Trans Fat | 0g |
| Carbohydrates | 45-50g |
| Fiber | 1-2g |
| Sugar | 30-35g |
| Protein | 3-4g |
| Sodium | 200-250mg |
| Cholesterol | 70-80mg |
(Note: Nutritional information is an estimate and will vary based on specific ingredients, brands, and preparation methods. This information is provided for guidance only.)
If you enjoyed this recipe, be sure to check out our other delicious treats! You might also like our Strawberry Shortcake Puppy Chow or our Banana Bread Muffins. For more baking inspiration, follow us on Pinterest!
Print
Amazing Old-Fashioned Buttermilk Donut Bars 2 Ways
- Total Time: 50 minutes
- Yield: 16-18 bars
- Diet: Vegetarian
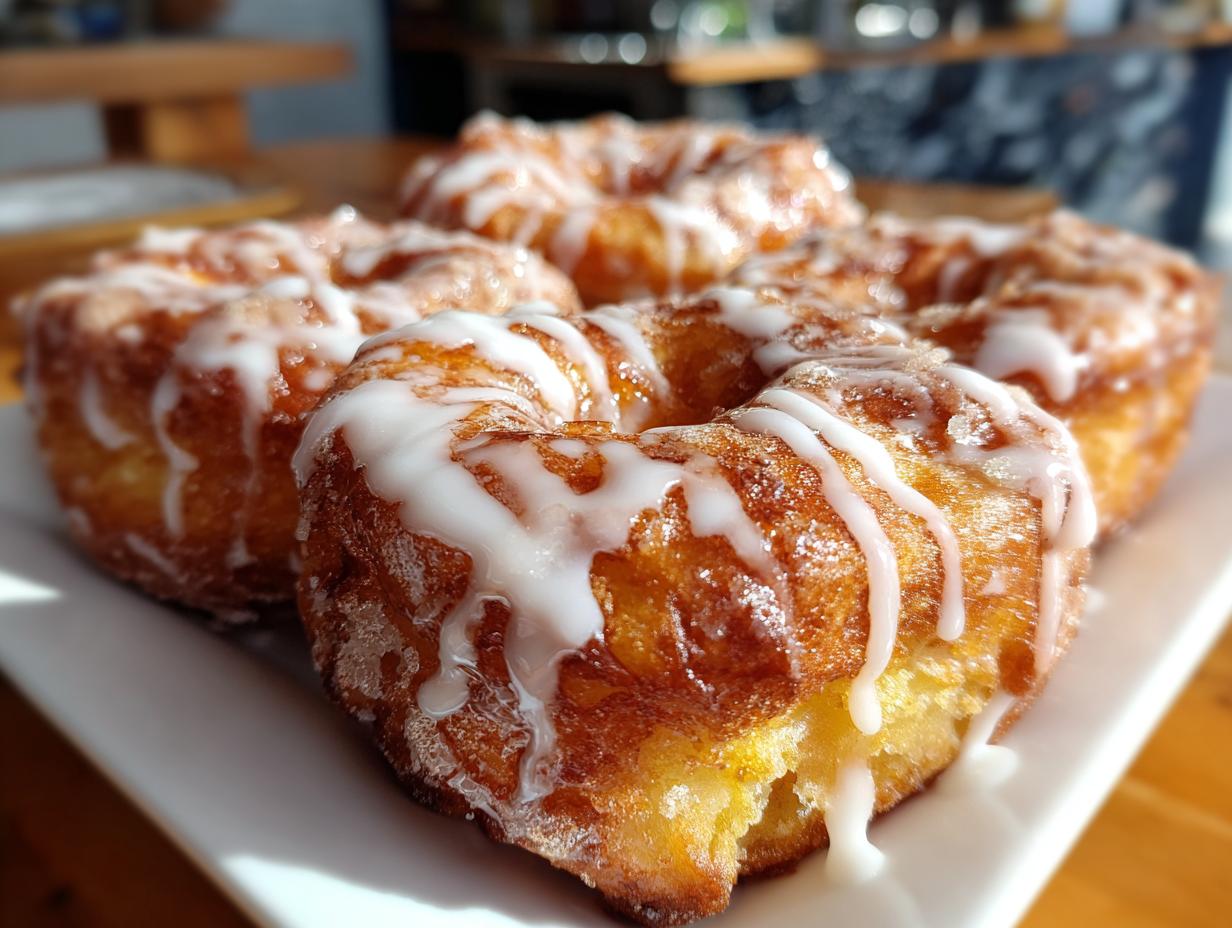
Description
These Old-Fashioned Buttermilk Donut Bars are a delightful treat, perfect for a weekend breakfast or a sweet indulgence. They feature a tender, cake-like crumb from the buttermilk and are topped with a rich brown butter maple vanilla bean glaze. The classic indentation gives them their signature look.
Ingredients
- 3 1/2 cups (440g) cake flour
- 2 1/2 tsp (10g) baking powder
- 1 tsp (6g) salt
- 3/4 tsp (1g) nutmeg
- 1/4 tsp (2g) baking soda
- 1/2 cup (120g) brown sugar
- 1/2 cup (110g) granulated sugar
- 1/4 cup (58g) salted butter, melted
- 2 eggs + 1 egg yolk, at room temperature
- 1 tbsp vanilla extract
- 3/4 cup (180ml) buttermilk (or 1 tbsp apple cider vinegar or lemon juice mixed with 3/4 cup milk of choice)
- 4-6 cups high heat olive oil or avocado oil, for frying
- 1 1/2 cups (190g) powdered sugar
- 6 tbsp (85g) salted butter, melted and browned
- 1/3 cup (113g) maple syrup
- 2 tbsp (30ml) milk of choice
- 1 tsp (4g) vanilla extract or paste
- Pinch of salt
Instructions
- Prepare the dough: In a large bowl, whisk together cake flour, baking powder, salt, nutmeg, and baking soda. Set aside. In a separate large bowl, whisk together both sugars and melted butter. Add eggs, egg yolk, and vanilla; whisk until combined. Whisk in buttermilk. Add dry ingredients to wet and fold until just combined. The dough will be sticky. Cover and chill for 30-60 minutes.
- Shape the donut bars: Flour a work surface and hands. Roll or pat the chilled dough into an 18×3.5 inch rectangle, 1/2 inch thick, using more flour as needed. Flour a bench scraper or knife and cut the dough lengthwise to divide it in half. Make 8-9 cuts widthwise to get 16-18 bars. Gently press the floured bench scraper down the center of each bar lengthwise to create a light indentation without cutting through.
- Fry the donut bars: Fill a large, heavy-bottomed pot with about 2 inches of oil. Heat oil to 350F-370F. Line a wire cooling rack with paper towels. Carefully transfer 3-4 donut bars at a time into the hot oil, indentation side up. Fry for 1-2 minutes until golden. Gently flip and fry for another 1-2 minutes until golden. Transfer to the prepared cooling rack. Repeat with remaining donuts.
- Make the glaze, coat the donuts, and serve: Whisk together powdered sugar, browned butter, maple syrup, milk, vanilla, and salt until smooth. Add more milk, 1 tsp at a time, if the glaze is too thick. Dunk each donut bar, top side down, into the glaze. Place on a cooling rack until the glaze sets. Serve and enjoy.
Notes
- The dough is very sticky; do not be afraid to use extra flour when shaping.
- Ensure the oil temperature remains between 350F-370F for best results.
- If the glaze is too thick, add milk one teaspoon at a time until desired consistency is reached.
- Prep Time: 30 minutes
- Cook Time: 20 minutes
- Category: Dessert
- Method: Frying
- Cuisine: American