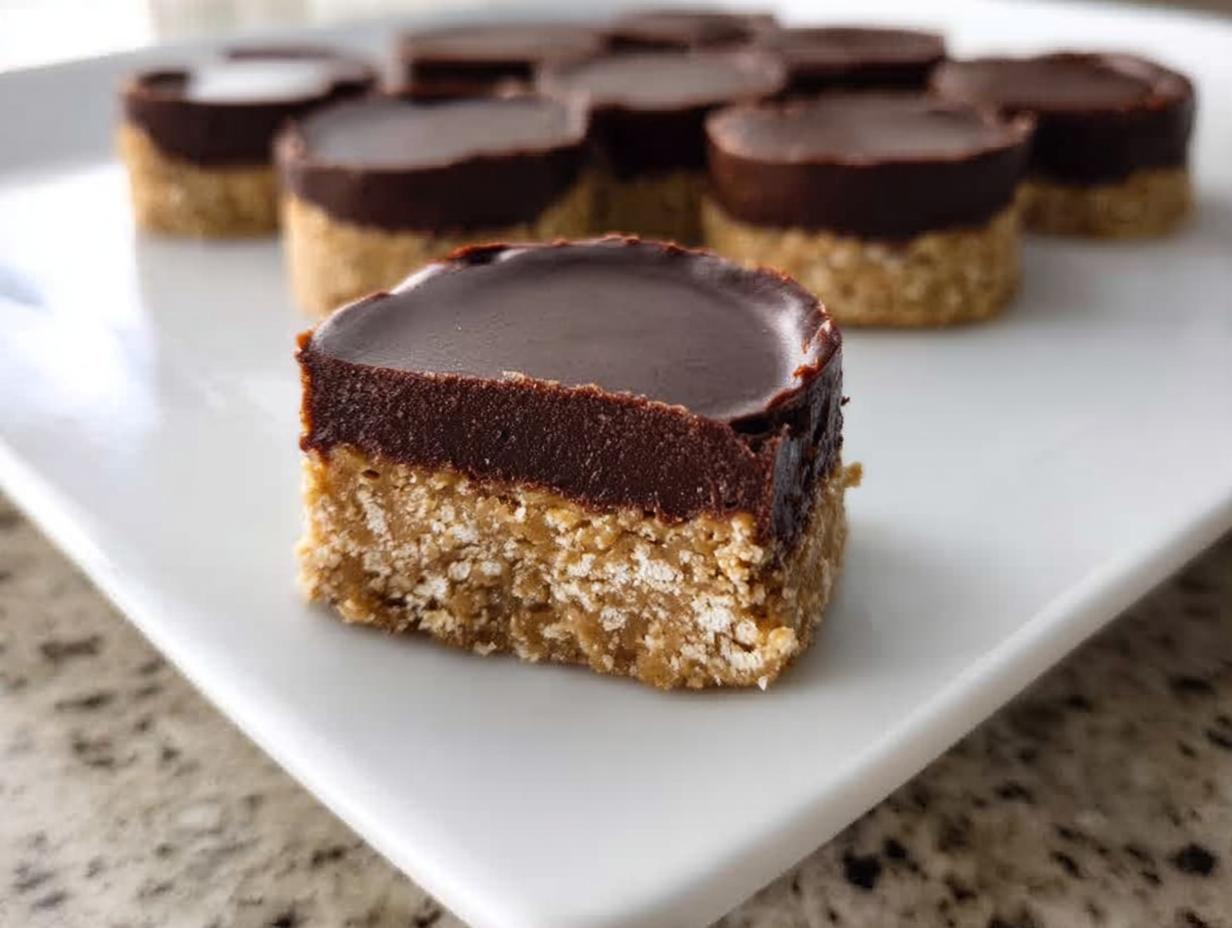
If you are looking for that perfect marriage of sweet, salty, and ridiculously easy, you have found your holy grail! Seriously, these No Bake Peanut Butter Bars with Chocolate are my absolute go-to when I need a crowd-pleasing dessert without turning the oven on, even in the middle of summer. We’re talking about a rich, salty pretzel base, creamy peanut butter filling, and that luxurious chocolate layer on top. I’ve tested this recipe more times than I care to admit—I wanted it to be foolproof, so you can trust that this method works every single time.

My Journey to the Best No Bake Peanut Butter Bars with Chocolate
When I first started seriously baking, I was terrified of anything that involved complex techniques or timing. I needed recipes that just *worked*. That’s how this recipe was born! I remember trying to make a baked peanut butter cookie once, and it was an absolute disaster—dry and crumbly. I vowed right then that I would master the no-bake route.
This recipe became my secret weapon for last-minute gatherings. It’s so simple, even my nephew, who was about ten at the time, successfully made the base layer while I was just supervising. It’s proof that you don’t need fancy equipment or years of experience to make something truly delicious.
Understanding the Simplicity of No Bake Peanut Butter Bars with Chocolate
The beauty of these bars is right there in the name: no bake! That means less cleanup and zero worries about overbaking or uneven rising. We rely on chilling time instead of heat to set everything up perfectly. I’ve tweaked the ratios of pretzel to peanut butter dozens of times over the years to make sure the base is sturdy enough to hold that chocolate topping without falling apart.
Because we aren’t using eggs or flour, the focus is really on getting the right density when you press that bottom layer down. Trust me, the firmer you press it in, the better those bars will look when you slice them later. It’s a simple recipe, but the successful testing phase made it authoritative! Peanut butter cake is another great option if you want something baked!
Gathering Your No Bake Peanut Butter Bars with Chocolate Ingredients
Okay, getting ready for these peanut butter bars is almost as fun as eating them, mostly because you don’t have to wait for the oven to preheat! The ingredient list looks short, which is another huge win, but the prep on a couple of things really makes all the difference. Don’t just grab anything; we need specific textures here to make sure these set up right and taste incredible.
I always lay everything out on the counter before I start mixing. It’s the best way to avoid that frantic search for the vanilla extract when you’re already covered in powdered sugar. The magic here happens because we use both melted butter and peanut butter, which creates that perfect creamy binder for our salty crunch.
Precise Measurements for No Bake Peanut Butter Bars with Chocolate
The texture of the base layer is entirely dependent on what you use for your dry ingredients. You absolutely must use finely crushed pretzels. I just toss mine in a zip-top bag and give them a good whack with a rolling pin—instant, perfectly textured crumbs! Also, note that we use peanut butter twice, once for the base and a bit more for the topping to keep it smooth. Don’t substitute regular peanut butter for the topping if you can help it; it needs to be creamy.
Here is exactly what you need to pull together:
| Ingredient | Amount |
|---|---|
| Unsalted Butter (melted) | 6 tablespoons |
| Vanilla Extract | 1/2 teaspoon |
| Finely Crushed Pretzels | 1 cup |
| Creamy Peanut Butter (for base) | 2/3 cup |
| Powdered Sugar | 1 cup |
| Chocolate Baking Chips | 3/4 cup |
| Creamy Peanut Butter (for topping) | 3 tablespoons |
Equipment Needed for This Simple Dessert
You don’t need a stand mixer for this recipe, which I love! Keep it simple. The most important piece of equipment is your baking pan. Since these are no-bake, we need something that helps us lift the whole thing out cleanly later on.
- 8 by 8 inch baking pan (this size is crucial for the right thickness!)
- Large mixing bowl
- Microwave-safe bowl (for melting the topping)
- Whisk or sturdy spatula for mixing
- Parchment paper—don’t skip this!
Step-by-Step Instructions for No Bake Peanut Butter Bars with Chocolate
This is where the magic happens, and I promise you, it moves fast! Since we aren’t baking, the steps are all about combining, pressing, and chilling. The key to success here is not rushing the chilling phases, even if that little 10-minute wait feels like an eternity when you’re hungry!
Preparing the Base Layer for No Bake Peanut Butter Bars with Chocolate
First things first, get your pan ready. Line that 8 by 8 inch pan with parchment paper, making sure you leave a generous overhang on two sides. This overhang acts like little handles so you can just lift the whole set dessert out later, which is a lifesaver, trust me. Now, grab a large bowl. We start by mixing our wet ingredients: the melted butter and that splash of vanilla extract. Just give those a quick whisk.
Next, dump in your dry stuff—the crushed pretzels, the main portion of peanut butter, and all that powdered sugar. You’ll need to mix this really well until it looks like thick, slightly crumbly dough. Use a sturdy spatula for this; it gets pretty stiff! Once it’s fully combined, press that mixture firmly into your prepared pan. I mean *firmly*. Use the bottom of a measuring cup or glass to really pack it down evenly. This base needs to be solid! Pop that pan into the fridge for just 10 minutes while you get the topping ready.
Creating the Smooth Chocolate Topping for No Bake Peanut Butter Bars with Chocolate
While the base is chilling, we make the glorious chocolate top. Put your chocolate chips and the remaining three tablespoons of peanut butter into a microwave-safe bowl. This combination helps the chocolate melt beautifully and keeps it from seizing up or getting too hard once it sets.
Here’s my trick for melting chocolate perfectly: heat it in 30-second bursts. Stir it really well after the first 30 seconds, even if it doesn’t look melted yet. Then keep going in 30-second increments, stirring thoroughly between each one. As soon as it looks mostly smooth, take it out. The residual heat will melt the last little bits as you stir. You want this topping shiny and totally pourable!
Assembling and Setting Your No Bake Peanut Butter Bars with Chocolate
Take your base layer out of the fridge. It should be cool to the touch. Pour that warm, smooth chocolate mixture right over the top. Work quickly but gently to spread it evenly across the peanut butter layer right to the edges. You don’t want to disturb the base underneath, so avoid aggressive spreading!
Once it’s all smoothed out, it’s time for patience. Place the whole pan back into the refrigerator. You need it to chill for at least one full hour. I usually leave mine for an hour and a half just to be safe, especially if the kitchen is warm. This chilling time is non-negotiable; it’s what turns our soft mixture into firm, sliceable bars. When it’s set, use those parchment paper handles to lift the block out and slice it into 16 nice squares!

Tips for Success with No Bake Peanut Butter Bars with Chocolate
Even though these are super easy, there are two little things that separate a good batch from a truly spectacular one. These aren’t complicated steps, but they really boost the texture and make sure you get clean slices later on. Pay attention to these, and you’ll look like a professional no-bake wizard!
Achieving the Perfect Texture in Your No Bake Peanut Butter Bars with Chocolate
The base layer is everything here. When you press that pretzel mixture into the pan, you need to use real force—I mean, really compact it down. If you leave it loose, the bars will crumble when you try to cut them, and that’s just sad. You want that dense, salty foundation to support the topping.
For the chocolate, the biggest pitfall is overheating it. If you use too much power in the microwave or heat it for too long, the chocolate gets grainy or hard too fast. Remember to stir after every 30 seconds! You want that topping to be glossy and pourable, not stiff. If it looks a little dull when you pour it, it might set up too hard, so keep stirring until it shines!
Variations on No Bake Peanut Butter Bars with Chocolate
One of the great things about simple recipes like this is how easily you can tweak them to suit what you have on hand or what you’re craving that day. These bars are very forgiving! If you or a guest has a nut allergy, swapping out the peanut butter is simple enough. Sunflower seed butter works wonderfully in both layers—it keeps that salty-sweet profile we love.
If you aren’t worried about nuts, almond butter is a fantastic substitute, giving the base a slightly different depth of flavor. For the chocolate layer, you can always mix in a couple of tablespoons of finely chopped pecans or walnuts right before you spread it on top for an extra crunch. My favorite little addition, though? Just before the bars go into the fridge, I sprinkle a tiny pinch of flaky sea salt right over the chocolate. It really makes the sweet and salty components pop!
Storing and Serving Your No Bake Peanut Butter Bars with Chocolate
These bars travel well and are fantastic for making ahead of time, which is why I love them for parties! Since we aren’t baking anything, we rely entirely on the cold to keep everything firm and fresh. You never want to leave these sitting out on the counter for too long, especially if it’s a warm day, because that chocolate topping can get soft fast.
The best part about storing these is that they actually taste even better the next day once everything has really settled together in the fridge. If you cut them right away, they can be a little messy, so letting them firm up overnight is my secret for perfect presentation! You can see more of my kitchen adventures on Facebook.
Proper Storage for No Bake Peanut Butter Bars with Chocolate
You absolutely must keep these chilled. They won’t stay together at room temperature for more than an hour or two, tops. When you store them, make sure they are covered well so they don’t absorb any funky fridge smells. I like to place them in an airtight container, maybe with a layer of wax paper between any stacked layers to prevent sticking.
Here’s the simple guide on how long they last:
| Storage Method | Duration | Temperature |
|---|---|---|
| Airtight Container | Up to 5 days | Refrigerator |
| Freezing (Wrapped tightly) | Up to 1 month | Freezer |
If you freeze them, just let them sit on the counter for about 15 minutes before serving. They thaw quickly and taste almost freshly made! For more great dessert ideas, check out my vanilla frozen custard recipe.
Frequently Asked Questions About No Bake Peanut Butter Bars with Chocolate
I know sometimes you just need a quick answer before diving into the mixing bowl! These No Bake Peanut Butter Bars with Chocolate are so popular that I get asked the same few things over and over again. It’s all about making sure your bars set perfectly and taste exactly how you want them to.
Here are the most common questions I hear from people making these for the first time. Hopefully, this saves you a trip to the comments section! You can also find me sharing tips on Pinterest.
Can I substitute the peanut butter in this No Bake Peanut Butter Bars with Chocolate recipe?
Yes, you absolutely can! If you need to avoid peanuts, sunflower seed butter is a fantastic swap. It has a similar texture and provides that necessary salty contrast. Just make sure whatever you use is creamy, not crunchy, so it incorporates smoothly into the base and melts nicely into the topping.
If you use a natural style peanut butter that separates a lot, you might need to stir it extra well before measuring to ensure you get the right consistency, or you might need a tiny bit more powdered sugar to firm up the base if the natural butter is too oily.
How long do No Bake Peanut Butter Bars with Chocolate need to chill?
The recipe technically requires a minimum of one full hour in the refrigerator for the chocolate topping to firm up enough so you can handle it. However, I always tell people that if you can wait longer, do it!
If you chill them for two or even three hours, the base layer gets much firmer, and when you go to cut them into those perfect squares, they slice like a dream. If you try to cut them too soon, the base tends to squish a little under the knife. Patience pays off for those clean edges!
Understanding the Nutrition of No Bake Peanut Butter Bars with Chocolate
Now, I always tell people that these delicious No Bake Peanut Butter Bars with Chocolate are a treat, not a health food! We’ve got butter, peanut butter, and chocolate chips in here, so they are wonderfully rich. Because this is a no-bake recipe relying on fats and sugars for structure rather than flour or eggs, the numbers reflect that decadence.
I’ve pulled together the estimated nutrition facts below based on the 16 servings this recipe yields. Please remember this is just an estimate, as the exact numbers depend on the specific brands of peanut butter and chocolate chips you end up using. But hey, knowing the details makes enjoying that first bite even sweeter, right? You can read more of my thoughts on food over on Medium.
Estimated Nutritional Breakdown per Serving of No Bake Peanut Butter Bars with Chocolate
This gives you a good ballpark idea of what you’re digging into when you grab one of these perfect squares:
| Nutrient | Estimate Per Bar |
|---|---|
| Calories | 260 |
| Fat | 16 g |
| Carbohydrates | 26 g |
| Protein | 5 g |
They pack a good little punch of protein from the peanut butter, which is nice! But mostly, they are pure, salty-sweet comfort food.
Share Your No Bake Peanut Butter Bars with Chocolate Experience
I truly hope you loved making these as much as I love sharing them with you! Now it’s your turn to jump into the kitchen and give these a try. Did you crush your pretzels just right? Did you sprinkle on that extra sea salt I mentioned?
I absolutely want to hear all about it! Please leave a rating below so I know how they turned out for you, and drop a comment if you have any questions or if you tried a fun variation. Happy snacking!
Print
Glorious 16 No Bake Peanut Butter Bars with Chocolate
- Total Time: 15 minutes plus chilling
- Yield: 16 bars
- Diet: Vegetarian
Description
These no bake peanut butter bars are sweet, salty, and topped with smooth chocolate for an easy dessert that sets in the fridge.
Ingredients
- 6 tablespoons unsalted butter melted
- 1/2 teaspoon vanilla extract
- 1 cup finely crushed pretzels
- 2/3 cup creamy peanut butter
- 1 cup powdered sugar
- 3/4 cup chocolate baking chips
- 3 tablespoons creamy peanut butter
Instructions
- Line an 8 by 8 inch baking pan with parchment paper, leaving an overhang for easy removal.
- Stir together the melted butter and vanilla extract in a large bowl.
- Add the crushed pretzels, peanut butter, and powdered sugar. Mix until fully combined and thick.
- Press the mixture firmly into the prepared pan to form an even layer. Chill for 10 minutes.
- Place the chocolate chips and peanut butter in a microwave safe bowl. Heat in 30 second intervals, stirring each time, until smooth and melted.
- Spread the chocolate mixture evenly over the chilled peanut butter layer.
- Refrigerate for at least 1 hour, until fully set.
- Lift from the pan and cut into bars before serving.
Notes
- Store bars covered in the refrigerator for up to 5 days.
- Prep Time: 15 minutes
- Cook Time: 0 minutes
- Category: Dessert
- Method: No Bake
- Cuisine: American