Listen, if you think making real, restaurant-quality frozen custard at home is some kind of impossible baking magic trick, I’m here to tell you you’re totally wrong! I used to think that too. Seriously, the first time I tried to make anything with egg yolks, I was convinced I was going to end up with scrambled eggs floating in milk. That’s why I kept putting off making this Vanilla Frozen Custard Creamy Homemade Dessert.
But this recipe? It’s the one that changed everything for me. It’s so straightforward, and the secret is just paying attention during that one heating step. The richness comes from those egg yolks—it’s what makes it luxurious, not just icy.
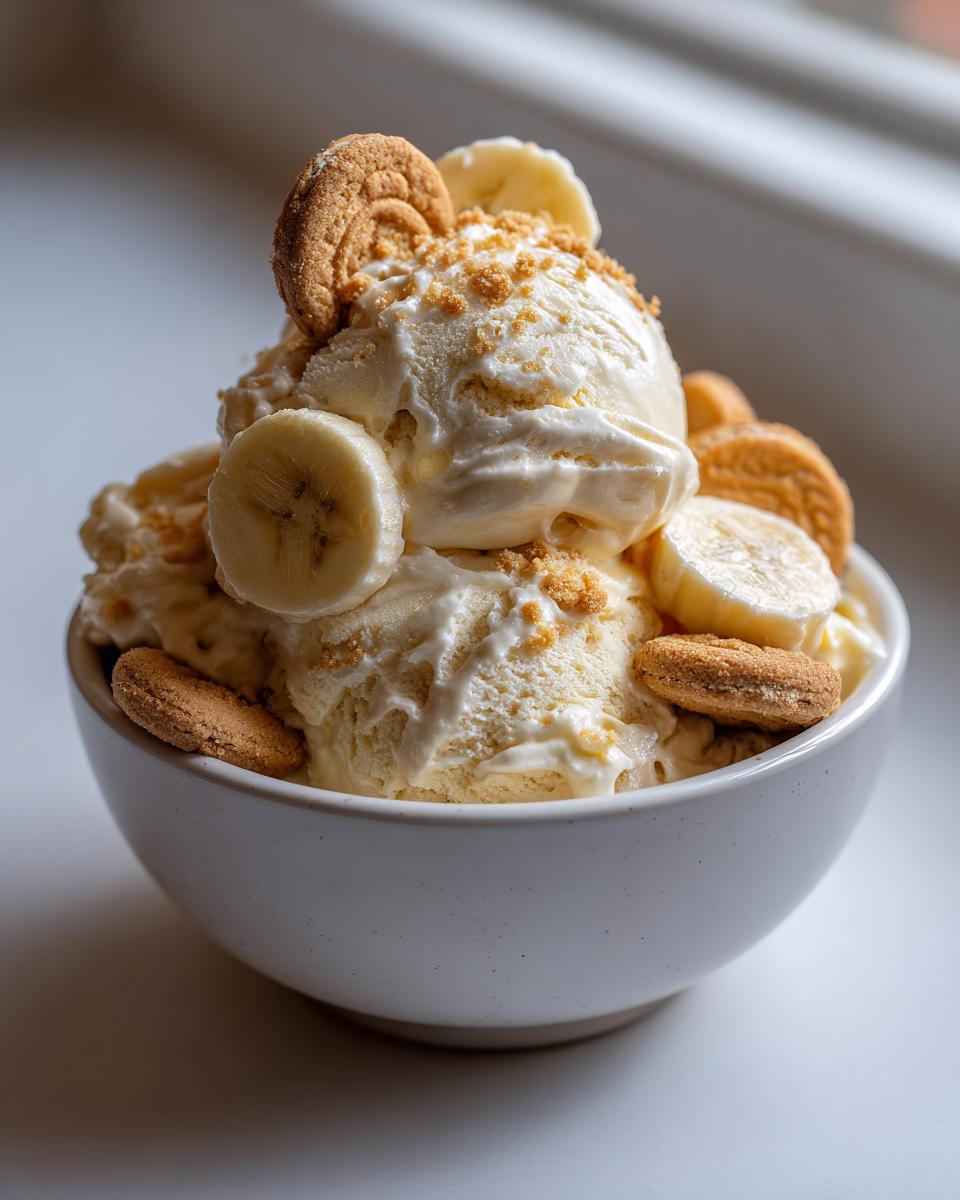
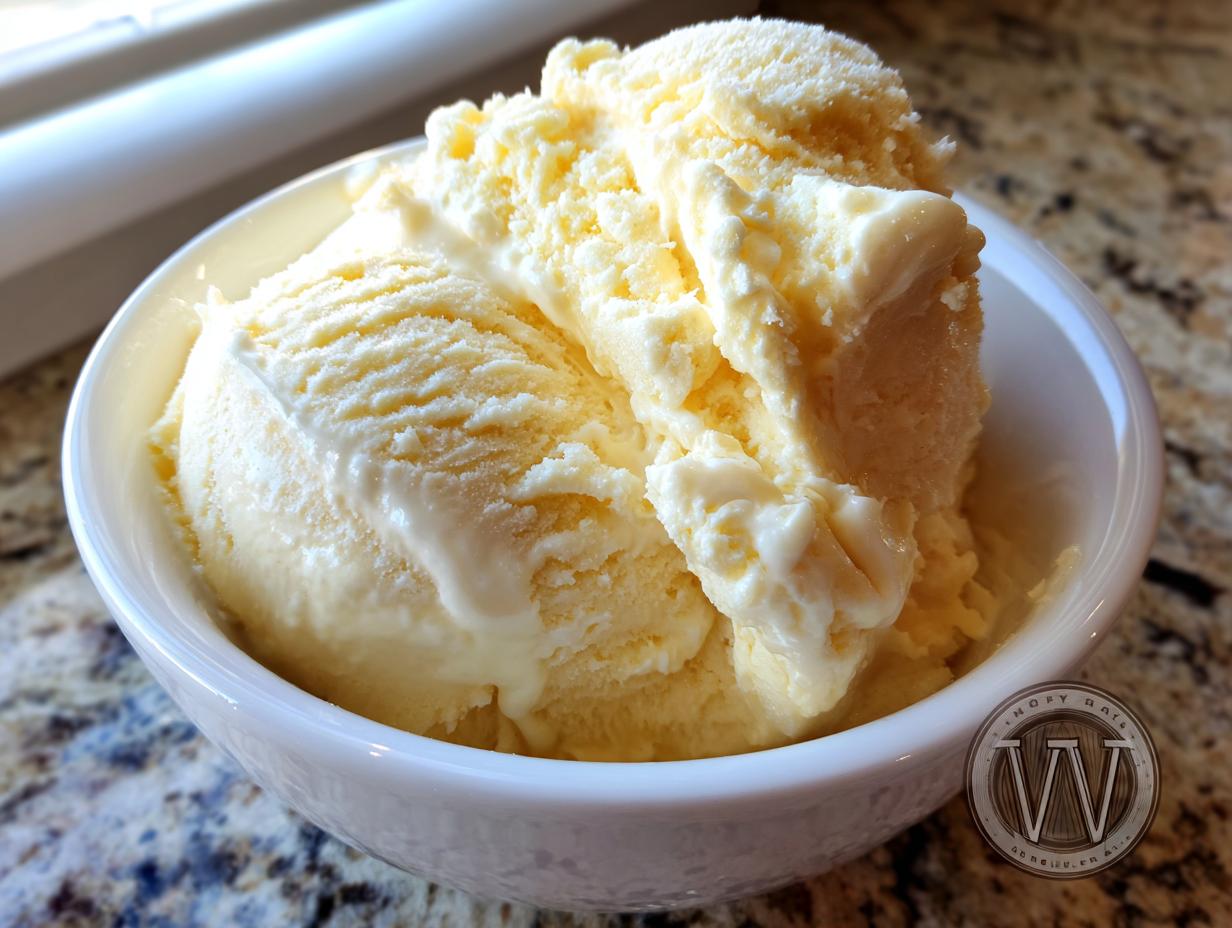
My biggest selling point for you is the texture. It’s unbelievably smooth. I mean, we’re talking scoop-able perfection right out of the freezer, not rock-hard ice cubes! This recipe is my go-to when I need a seriously impressive dessert but only have a little time. Trust me, once you taste this homemade custard, you’ll never look at store-bought vanilla ice cream the same way again.

Gathering Supplies for Vanilla Frozen Custard Creamy Homemade Dessert
Okay, before we get into the good stuff, let’s talk tools. You don’t need a professional kitchen for this, but you do need a few specific things to make sure your Vanilla Frozen Custard Creamy Homemade Dessert turns out perfectly smooth and not chunky. The most important piece is, obviously, the ice cream maker. If you have one of those freezer bowl types, make sure that bowl has been chilling for the full 24 hours it needs!
We also need a decent saucepan and a whisk. That’s really it for the cooking part. Pay attention to the bowls you use for chilling too—you want something that seals well so the custard base doesn’t pick up any weird fridge smells overnight. It’s all about having your ducks in a row before you start heating things up!
Equipment Needed for Perfect Vanilla Frozen Custard Creamy Homemade Dessert
Here’s the short list of what you’ll need to pull off this incredible Vanilla Frozen Custard Creamy Homemade Dessert:
- An ice cream maker (make sure the freezer bowl is ready!)
- A medium saucepan
- A sturdy whisk
- Two mixing bowls (one for tempering, one for chilling)
- A fine mesh strainer
- A rubber spatula
Essential Ingredients for Vanilla Frozen Custard Creamy Homemade Dessert
This recipe relies on simple, high-quality ingredients, and honestly, that’s why the final result tastes so amazing. We aren’t hiding behind tons of stabilizers or artificial flavors here—it’s pure, rich dairy and real vanilla. When you’re making something as straightforward as a Vanilla Frozen Custard Creamy Homemade Dessert, the quality of your heavy cream and whole milk really shines through. Don’t skimp on the yolks either; they are the backbone of that beautiful, custardy texture we’re aiming for!
I always buy the freshest eggs I can find because they are going to be gently cooked, and you want to trust what you are working with. The sugar is just sugar, but the vanilla—oh, the vanilla! Use the best extract you have, or if you’re feeling fancy, scrape a whole bean right into the heating milk. That little bit of effort makes a huge difference in the final aroma.
Ingredient Specifications and Preparation Guidance
Here is what you need and what you absolutely must do before you even turn on the stove. Seriously, read this part first, especially about those yolks!
| Ingredient | Amount | Preparation Note |
|---|---|---|
| Heavy Cream | 2 cups | Must be cold before heating. |
| Whole Milk | 1 cup | Use full fat for the best texture. |
| Granulated Sugar | ⅔ cup | Measure accurately; this impacts freezing point. |
| Kosher Salt | Pinch | Just a tiny pinch balances the sweetness. |
| Large Egg Yolks | 6 | Separate these carefully! No whites allowed. |
| Vanilla Extract | 2 teaspoons | Stir in *after* cooking is complete. |
Step-by-Step Instructions for Vanilla Frozen Custard Creamy Homemade Dessert
Alright, deep breath! This is where we turn those lovely ingredients into something magical. The key to making this Vanilla Frozen Custard Creamy Homemade Dessert is not rushing the heating process and, most importantly, not letting anything boil. Boiling the milk mixture or the custard itself is the fastest way to ruin it, turning your smooth base into sweet, eggy cottage cheese. We want velvet, not curds, so keep that heat on medium-low and have your whisk ready!
Creating the Custard Base
First things first, get your dairy and sugar going. Pour the heavy cream, milk, sugar, and that tiny pinch of salt into your saucepan. Set it over medium-low heat. You’re looking for the sugar to completely dissolve—give it a stir every minute or so for about three to five minutes. You’ll see steam rising, maybe some little bubbles forming around the edge, but you absolutely must pull it off the heat before it starts a rolling boil. That’s rule number one!
While that’s warming, take your six egg yolks and whisk them vigorously in a separate, clean bowl until they look nice and smooth. Now comes the tempering step, which is just a fancy word for slowly introducing them to the heat so they don’t panic and scramble. Take about half a cup of that warm cream mixture and drizzle it in *very slowly* while you whisk the yolks nonstop. Seriously, don’t stop whisking! This raises the temperature of the yolks gently.
Once those yolks are tempered, you can pour the whole yolk mixture back into the saucepan with the rest of the warm dairy. Put it back on medium-low heat. This is the cooking phase where the custard thickens. You need to stir constantly—and I mean constantly—for about four to six minutes. Use a wooden spoon or silicone spatula and continuously scrape the bottom so nothing sticks and burns. You’ll know it’s ready when it coats the back of your spoon nicely. If you run your finger across the back of the spoon, the line should hold clear for a second or two. Remember: Do NOT let it boil!
Chilling and Churning Your Vanilla Frozen Custard Creamy Homemade Dessert
As soon as it coats the spoon, yank it off the heat! Stir in your two teaspoons of good vanilla extract. Now, we need to stop the cooking immediately, so pour that whole mixture through that fine mesh strainer into a clean bowl. The strainer catches any tiny bits of cooked egg you might have accidentally made—insurance! Let it cool down on the counter for a bit, uncovered, until it’s just warm to the touch.
This next part is non-negotiable for the creamiest results: chilling. Cover that bowl tightly and stick it in the fridge for a minimum of four hours, but honestly, overnight is what gives you that truly perfect texture for your Vanilla Frozen Custard Creamy Homemade Dessert. The base has to be ice cold before it hits the machine.
Once it’s chilled, pour it into your ice cream maker and churn according to the machine’s instructions. It usually takes about 20 to 30 minutes until it looks like thick, soft-serve ice cream. If you want it firmer—like scoopable, classic custard—transfer it to an airtight container and freeze it for another hour or two. Enjoy that moment when you taste the first spoonful!

Tips for Achieving Vanilla Frozen Custard Creamy Homemade Dessert Perfection
You’ve done the hard work of cooking the base, and now it’s time to set yourself up for success in the freezer! The biggest pitfall people run into when making this Vanilla Frozen Custard Creamy Homemade Dessert is texture. We want that signature dense, smooth mouthfeel, not a block of ice.
My number one tip, which I cannot stress enough, is the chilling time. If you rush the chilling step, the custard base will be too warm when it hits the machine. This means your ice cream maker has to work overtime churning ice crystals instead of blending them smoothly. Give it that full four hours, or better yet, overnight. Patience pays off here!
Another thing people worry about is the tempering—the part where you slowly add hot milk to the eggs. If you see little flecks of cooked egg after straining, don’t panic! That’s why we use the fine mesh strainer. Those tiny bits won’t ruin the flavor, they just won’t be perfectly smooth. Also, remember that soft-serve consistency right out of the churn is the *softest* it will ever be. If you like it firm, make sure you transfer it to a shallow, wide container in the freezer; a deep container freezes unevenly and creates ice crystals on the sides.
Common Questions About Your Vanilla Frozen Custard Creamy Homemade Dessert
I get so many messages asking about swaps or what to do if things go slightly wrong. It’s totally normal when you’re new to making custard bases! Don’t stress if your first batch isn’t exactly what you expected. We troubleshoot together!
For example, people always ask if they can skip the yolks. And look, you *can*, but then you aren’t really making a true custard, are you? The yolks are what give this Vanilla Frozen Custard Creamy Homemade Dessert its richness and structure. Without them, you’re just making a fancy ice milk. If you are interested in other simple dessert recipes, check out our 3-Ingredient Banana Bark.
Another common panic point is that boil warning. If your custard *does* curdle slightly, don’t throw it out! Immediately take it off the heat and run it through a blender or use an immersion blender for about 10 seconds. It often smooths right back out. If it’s truly scrambled, well, that’s breakfast! For more baking tips, you can follow us on Pinterest.
Storage and Enjoying Leftover Vanilla Frozen Custard Creamy Homemade Dessert
This custard is best eaten fresh, right after churning or after a couple of hours of firming up. But let’s be real, who only eats one serving? Storing it correctly keeps that creamy texture we worked so hard for.
The biggest enemy in the freezer is air! Air causes freezer burn and creates those unwelcome ice shards. You want to press a layer of plastic wrap directly onto the surface of the custard before you seal the container lid. This keeps your Vanilla Frozen Custard Creamy Homemade Dessert tasting fresh longer. If you want to see more of our recipe development process, visit our Medium page.
| Storage Duration | Best Practice | Serving Tip |
|---|---|---|
| 1 Week | Airtight container with plastic wrap barrier. | Let sit on the counter for 10-15 minutes before scooping. |
| 2-4 Weeks | Deep freeze in an extra-thick, sealed container. | May require a 15-20 minute countertop softening time. |
| Over 1 Month | Texture starts to suffer; best for milkshakes. | Blend with a splash of milk to revive the texture. |
Understanding the Nutritional Snapshot of This Vanilla Frozen Custard Creamy Homemade Dessert
I know some of you are watching what you eat, and since this is a rich treat made with heavy cream and egg yolks, it’s definitely an indulgence! But if you’re going to treat yourself to a luxurious dessert, you might as well know what you’re getting into. This Vanilla Frozen Custard Creamy Homemade Dessert is made with real dairy and eggs, so it packs a good nutritional punch, especially in the fat and protein department. It’s definitely a weekend treat, not an everyday scoop!
We base these numbers on the 6 servings listed in the recipe, so keep in mind that portion size matters a lot here. I tried to keep the sugar content reasonable by using ⅔ cup for the whole base, but that richness truly comes from the dairy fat content. Here’s a quick look at the estimated breakdown per serving: If you are looking for lighter options, check out our Peanut Butter and Jelly Trail Mix.
| Nutrient | Amount (Per Serving) |
|---|---|
| Calories | 440 |
| Fat | 35 g |
| Carbohydrates | 27 g |
| Protein | 5 g |

Amazing 6-Ingredient Vanilla Frozen Custard Creamy Homemade Dessert
- Total Time: 4 hours 40 minutes
- Yield: 6 servings
- Diet: Vegetarian
Description
This vanilla frozen custard is ultra creamy and rich with real vanilla and egg yolks. Make this easy homemade frozen custard in an ice cream maker for a luxurious dessert.
Ingredients
- 2 cups heavy cream
- 1 cup whole milk
- ⅔ cup granulated sugar
- Pinch kosher salt
- 6 large egg yolks
- 2 teaspoons vanilla extract
Instructions
- Add the heavy cream, whole milk, granulated sugar, and salt to a medium saucepan over medium low heat.
- Heat for 3 to 5 minutes, stirring often, until the sugar dissolves and the mixture steams but does not boil. Remove from heat.
- Whisk the egg yolks in a separate bowl until smooth.
- Slowly drizzle about ½ cup of the warm cream mixture into the egg yolks while whisking constantly to temper the eggs.
- Pour the tempered egg mixture back into the saucepan and whisk to combine.
- Return the saucepan to medium low heat and cook, stirring constantly, until the mixture thickens slightly and coats the back of a spoon, about 4 to 6 minutes. Do not boil.
- Remove from heat and stir in the vanilla extract.
- Pour the custard through a fine mesh strainer into a clean bowl.
- Cool to room temperature, then cover and refrigerate at least 4 hours or overnight until completely chilled.
- Churn the custard in an ice cream maker according to manufacturer instructions, about 20 to 30 minutes, until soft serve consistency.
- Serve immediately or transfer to an airtight container and freeze 1 to 2 hours for a firmer texture.
Notes
- Do not let the custard boil or the eggs may curdle.
- Prep Time: 5 minutes
- Cook Time: 10 minutes
- Category: Dessert
- Method: Ice Cream Maker
- Cuisine: American