Oh, caramel apples! Just saying the words makes me think of crisp autumn air and the smell of sugar cooking down into that perfect, glossy shell. You know, I remember my very first attempt at making these. It was a complete sticky disaster! The caramel was runny, it slid right off the apples, and I ended up with a sticky mess on my counter. Yuck.
But don’t you worry one bit, because this version is the one that changed everything for me. We’re making a Basic Gourmet Caramel Apple Base here, and I promise you, it is beginner-friendly but tastes like it came straight from a fancy candy shop. The secret isn’t complicated; it’s just following the temperature cues exactly. We’re keeping the ingredients simple so you can focus on getting that rich, buttery flavor and a shell that actually *stays* put.
Forget the complicated steps you see online. This recipe is straightforward, and when you follow the instructions for chilling those apples and trusting your thermometer, you’ll have picture-perfect treats every single time. Seriously, it’s foolproof!

Essential Components for Your Basic Gourmet Caramel Apple Base
To get that amazing, glossy finish that screams gourmet, you can’t just toss anything into the pot. Quality matters here, especially with something as simple as a caramel. I’ve listed out everything you need below. Pay close attention to the sugar and butter—those are the heavy hitters in this Basic Gourmet Caramel Apple Base recipe and they need to be spot on!
This isn’t the time to skimp on ingredients. Using good quality butter and making sure you have the right kind of corn syrup really makes the difference between a chewy disaster and that perfect, slightly firm shell.
Gathering Ingredients for the Basic Gourmet Caramel Apple Base
When you’re gathering your supplies, grab that packed brown sugar first. You need two full cups, packed tight! That molasses content is key for deep flavor. Also, make sure that butter is unsalted, because we are controlling the salt ourselves with just a tiny pinch at the end. Don’t forget the sweetened condensed milk; that’s what gives our Basic Gourmet Caramel Apple Base its incredible richness and smooth texture. Everything else is straightforward, but precision on the sugar and butter is non-negotiable for the best results!
| Ingredient | Amount |
|---|---|
| Crisp Apples (Chilled) | 10 to 15 |
| Packed Brown Sugar | 2 cups |
| Unsalted Butter | 1 cup |
| Light Corn Syrup | 1 cup |
| Sweetened Condensed Milk (14 oz can) | 1 can |
| Vanilla Extract | 1 teaspoon |
| Fine Sea Salt | Pinch |
Necessary Equipment for Success
You absolutely need the right tools, or you’ll be stirring forever and burning the bottom! First up, get yourself a heavy-bottomed pot. Seriously, don’t try this in a thin saucepan; the heat won’t distribute evenly, and your caramel will scorch instantly. I learned that the hard way!
The most important piece of gear, though, is a reliable candy thermometer. You are aiming for the soft-ball stage, and guessing just won’t cut it here. You need to clip that thermometer right onto the side of the pot so you can watch the temperature climb accurately. Also, make sure your parchment paper is ready to go before you even turn the stove on!
Step-by-Step Instructions for Basic Gourmet Caramel Apple Base
Okay, once you have your ingredients lined up and your equipment ready, this part moves pretty fast, especially once the caramel starts cooking! The key here is to stay near the stove—don’t walk away to answer the phone or scroll through social media. We are building flavor layer by layer, and we need to monitor that heat like a hawk.
Follow these steps exactly, and you’ll see why this Basic Gourmet Caramel Apple Base is so dependable. It’s all about timing, patience in the beginning, and speed at the end!
Apple Preparation: The Crucial First Step
Before anything touches the heat, we have to get those apples ready. This step is non-negotiable, so listen up! You need to wash every apple thoroughly in warm water. Why? Because the grocery store wax coating will make the caramel slide right off, and nobody wants a slippery apple! Dry them until you think they are dry, and then dry them again. Seriously!
Once they are bone dry, pop them in the fridge until they are super cold. Cold apples shock the caramel and help it set fast. While they chill, twist out those little stems and push your wooden stick or straw firmly right into the center. Make sure it feels secure!
Cooking the Basic Gourmet Caramel Apple Base to Temperature
Time to cook! Grab your heavy pot and toss in the brown sugar, butter, corn syrup, and the whole can of condensed milk. Stir it gently until everything just looks combined and the butter is starting to melt a little. Now, put it over medium heat. This is where your candy thermometer comes in handy!
You need to stir often, especially scraping the bottom where things tend to stick first. Keep stirring and watching until that thermometer hits 238 to 240 degrees Fahrenheit. That’s the soft-ball stage, and it’s the magic number for a shell that sets nicely but isn’t rock hard. If you go past 245°F, you’re entering hard candy territory, so watch it closely! Once you hit the target, yank that pot off the burner immediately. Stir in your vanilla and salt.
Dipping and Setting the Caramel Apples
Now for the fun part! You should have your parchment-lined sheets ready to go. Take one cold apple by its stick. Tilt the pot slightly—don’t try to dunk the whole thing! Dip the apple into the warm caramel, giving it a slow turn to coat evenly. Let the excess drip back into the pot for a second or two.
Here’s a pro trick: after you pull the apple out, turn it upside down for just a few seconds. This helps the caramel settle and prevents that big, thick pool of caramel from forming at the bottom where the stick goes in. Place it gently on the prepared mat. If you are adding toppings, do it right now before the caramel cools down!

Topping Strategies for Your Basic Gourmet Caramel Apple Base
Once you have that perfect shell from your Basic Gourmet Caramel Apple Base, you have to move fast if you want toppings to stick! This is where having all your bowls ready by the dipping station really pays off. You can go super simple, or you can create a whole dessert bar for your guests.
I love seeing people get creative here. You can stick with the classics like peanuts, or you can get wild with crushed Oreos or pretzels. The main thing to remember is timing; some toppings need the caramel hot, and others need it cool. It all depends on what you are aiming to achieve with your final gourmet apple!
Applying Immediate Toppings
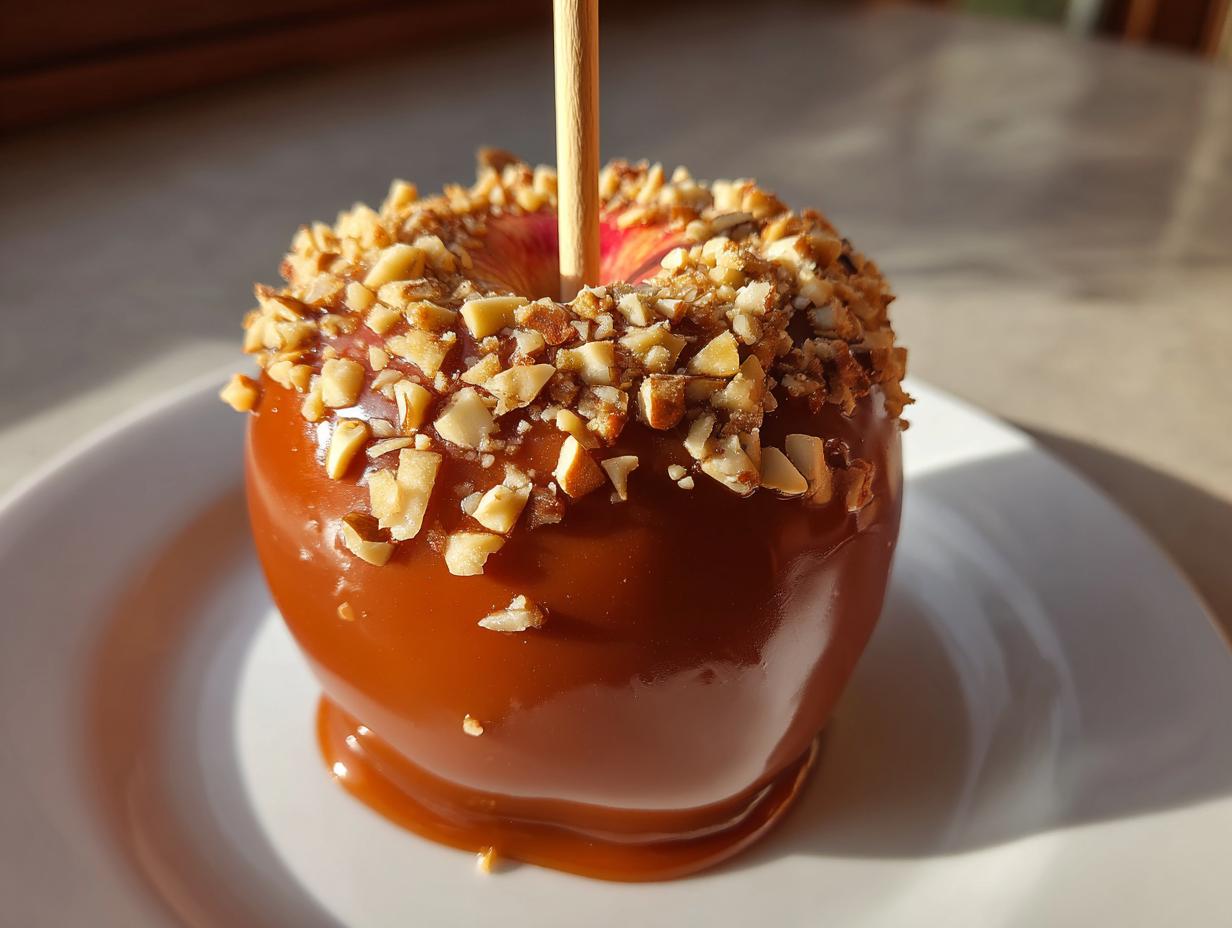
If you are using anything that needs to physically stick to the caramel—like chopped nuts, crushed cookies, or mini marshmallows—you have to work immediately after dipping. As soon as you set the apple on the parchment, quickly roll the sides in your topping bowl, or just press the toppings gently onto the sides. They should adhere right away because the caramel is still soft and tacky.
Finishing with a Chocolate Drizzle
If you want that gorgeous, professional-looking chocolate drizzle over the top of your caramel, you absolutely must wait until the caramel has set up a bit. If you try to drizzle melted chocolate over warm caramel, it will just melt into the base layer. Let the apples sit for about 20 minutes until the caramel is firm to the touch, then melt your chocolate choice and drizzle it haphazardly across the top for a beautiful final touch on your Basic Gourmet Caramel Apple Base.
Expert Tips for Perfect Basic Gourmet Caramel Apple Base Results
Look, even when you follow the recipe perfectly, sometimes things go slightly sideways, right? That’s why I wanted to pull out the most important troubleshooting tips from my years of making these things. Trust me, these little bits of wisdom will save you a massive headache and ensure your Basic Gourmet Caramel Apple Base turns out perfectly glossy and delicious every single time. These aren’t just suggestions; they are hard-earned rules!
We’re talking about the difference between a beautiful holiday treat and a sticky kitchen disaster. Focus on these two things, and you’ll be golden! If you want to see more of my favorite holiday treats, check out my Black Forest Trifle.
Temperature Control and Apple Dryness
If your caramel is sliding off the apple like cheap paint, 99% of the time it’s because the apple wasn’t cold enough. I mean refrigerator cold! A warm apple heats the caramel instantly, keeping it too liquid. Also, make sure you are not skipping the step of washing off that awful wax coating. If you don’t use a candy thermometer, you are just guessing, and with caramel, guessing is dangerous for your final product. Be precise with that temperature!
Preventing Caramel Sliding and Scorching
Once you hit that 240°F mark and pull the pot off the heat, don’t panic and try to dip immediately. Let the caramel sit for just a few minutes. This brief rest lets it thicken up just enough so it clings beautifully instead of running off like water. This small pause is crucial for a sturdy Basic Gourmet Caramel Apple Base! If you need more dipping inspiration, see my guide on Caramel Apple Dip.
Also, remember that stirring constantly while it cooks is essential, especially near the end. If you see dark spots forming on the bottom of the pot, that’s scorching starting! Stirring constantly prevents those bitter burnt pockets from ruining your entire batch of caramel.
Storing Your Finished Basic Gourmet Caramel Apple Base Treats
You’ve done the hard work, and now you want these beauties to last, right? The good news is that this Basic Gourmet Caramel Apple Base holds up really well, but you can’t just leave them sitting on the counter indefinitely, especially if your kitchen runs warm. They taste best when the caramel is firm but still slightly yielding.
You need to be mindful of where you keep them. They don’t love being too warm, and freezing them is a big no-no because it ruins the texture of the caramel shell. Here’s a quick rundown of how to keep your amazing treats looking and tasting fresh! For more dessert storage tips, check out my post on No Bake Cookies.
| Storage Location | Maximum Duration |
|---|---|
| Cool Room Temperature | Up to 2 days |
| Refrigerated (Warm Kitchen) | Up to 3 days |
| Freezer | Do Not Freeze |
Best Practices for Holding Caramel Apples
For the absolute best texture, I always recommend storing them at a cool room temperature for up to two days. If your kitchen is hot, or if you need them to last longer, pop them in the fridge. Just remember, refrigeration can sometimes make the caramel a bit harder, so let them sit out for about 20 minutes before serving so they soften up nicely!
Addressing Common Questions About Caramel Apples
I get asked about these all the time because everyone wants that perfect, glossy finish on their apples. Whether you’re a first-timer or you’ve made them before, there are always little things that trip people up. I’ve gathered the most common worries people have about my Basic Gourmet Caramel Apple Base recipe right here. Hopefully, these answers will give you the confidence you need to get dipping!
Don’t hesitate to try this recipe—it really is the most reliable foundation for making incredible gourmet caramel apples you’ll ever find! If you enjoy this recipe, please follow along on Pinterest for more great ideas.
Frequently Asked Questions
Q1. Why is my caramel sliding off the apples even though I chilled them?
Nine times out of ten, it’s the wax from the store! You must wash those apples thoroughly in warm water to strip that coating off before you dry them. If the apple isn’t completely naked and frozen solid, the caramel won’t grip. Also, let the caramel rest for just a minute or two off the heat so it thickens slightly before dipping.
Q2. My caramel got too thick in the pot while I was dipping! What do I do?
Oh, that happens when you get deep into a batch! If it gets too stiff to dip, you can put the pot back on the lowest possible heat setting for just 30 seconds or so, stirring constantly, until it loosens up again. You need to be careful not to overheat it, though, or you’ll ruin the texture of the Basic Gourmet Caramel Apple Base.
Q3. How long do the apples need to sit out before I can eat them?
This depends on your kitchen temperature! If it’s cool, they might firm up enough in 30 minutes. If it’s warm, leave them alone for an hour. You want the caramel to be set—not totally hard, but definitely not gooey when you touch it. Patience here means you don’t smear your beautiful work!
Q4. Can I substitute the corn syrup for something else in this recipe?
I really advise against it when making a Basic Gourmet Caramel Apple Base like this. Corn syrup is designed to keep sugar from crystallizing, which is exactly what gives you that smooth, non-grainy shell. Alternatives often lead to grainy or overly hard caramel. You can also find more updates on our Medium page.
Sharing Your Basic Gourmet Caramel Apple Base Creations
Now you have the secret to making a truly stunning Basic Gourmet Caramel Apple Base! I’m so excited for you to try this out. When you make your batch, please come back and tell me how they turned out! Did you use pretzels? Did you try the orange zest in your glaze? Drop a comment below and let me know your favorite topping combination! You can also share your photos on our Facebook page.
Print
Basic Gourmet Caramel Apple Base: 1 Amazing Shell
- Total Time: 45 minutes
- Yield: 10 to 15 caramel apples
- Diet: Omnivore
Description
This basic gourmet caramel apple base creates a glossy, rich caramel shell perfect for dipping 10 to 15 apples. Use it as a foundation for various toppings like nuts, cookies, or chocolate drizzle.
Ingredients
- 10 to 15 small crisp apples, chilled and very dry
- 10 to 15 sturdy wooden sticks or paper straws
- 2 cups packed brown sugar
- 1 cup unsalted butter
- 1 cup light corn syrup
- 1 can sweetened condensed milk, 14 ounces
- 1 teaspoon vanilla extract
- Pinch of fine sea salt
- Optional Toppings: Chopped nuts, crushed cookies, mini chocolate chips, melted chocolate for drizzle
Instructions
- Wash apples in warm water to remove wax, dry them completely, and chill them in the refrigerator until cold. Remove stems and insert a wooden stick straight down into the center of each apple.
- Line one or two large baking sheets with parchment or silicone mats and lightly grease them.
- In a heavy-bottomed pot, combine brown sugar, unsalted butter, light corn syrup, and sweetened condensed milk, stirring just until evenly mixed.
- Set the pot over medium heat. Cook the mixture, stirring often and scraping the bottom, until it reaches 238 to 240°F (soft-ball stage) on a candy thermometer.
- Remove the pot from the heat. Stir in vanilla extract and salt until fully incorporated. Let the caramel sit a few minutes to thicken slightly.
- Hold one apple by its stick, tilt the pot, and dip the cold apple into the warm caramel, turning to coat evenly. Let excess caramel drip back into the pot.
- Invert the apple for a few seconds so the caramel settles smoothly, then place it on the prepared baking sheet.
- If using toppings, immediately roll or press the freshly dipped apples into bowls of nuts, cookies, candy, or mini chips while the caramel is soft.
- For a chocolate drizzle, let the caramel set first. Melt your chocolate choice and drizzle it over the apples in thin lines using a spoon or piping bag.
- Allow the decorated caramel apples to sit at cool room temperature until the caramel is firm before serving or wrapping.
Notes
- Chill apples before dipping to help the caramel set quickly and cling evenly.
- Stir the caramel constantly near the end of cooking to prevent scorching.
- Let the caramel thicken briefly off the heat before dipping so it does not slide off the apples.
- Rotate each apple over the pot after dipping to avoid thick caramel pools at the base.
- Have toppings measured and ready in shallow bowls for immediate decoration after dipping.
- Store coated apples at cool room temperature for up to 2 days, or refrigerate for up to 3 days if the kitchen is warm.
- Do not freeze caramel apples.
- Prep Time: 20 minutes
- Cook Time: 25 minutes
- Category: Dessert
- Method: Stovetop Cooking and Dipping
- Cuisine: American