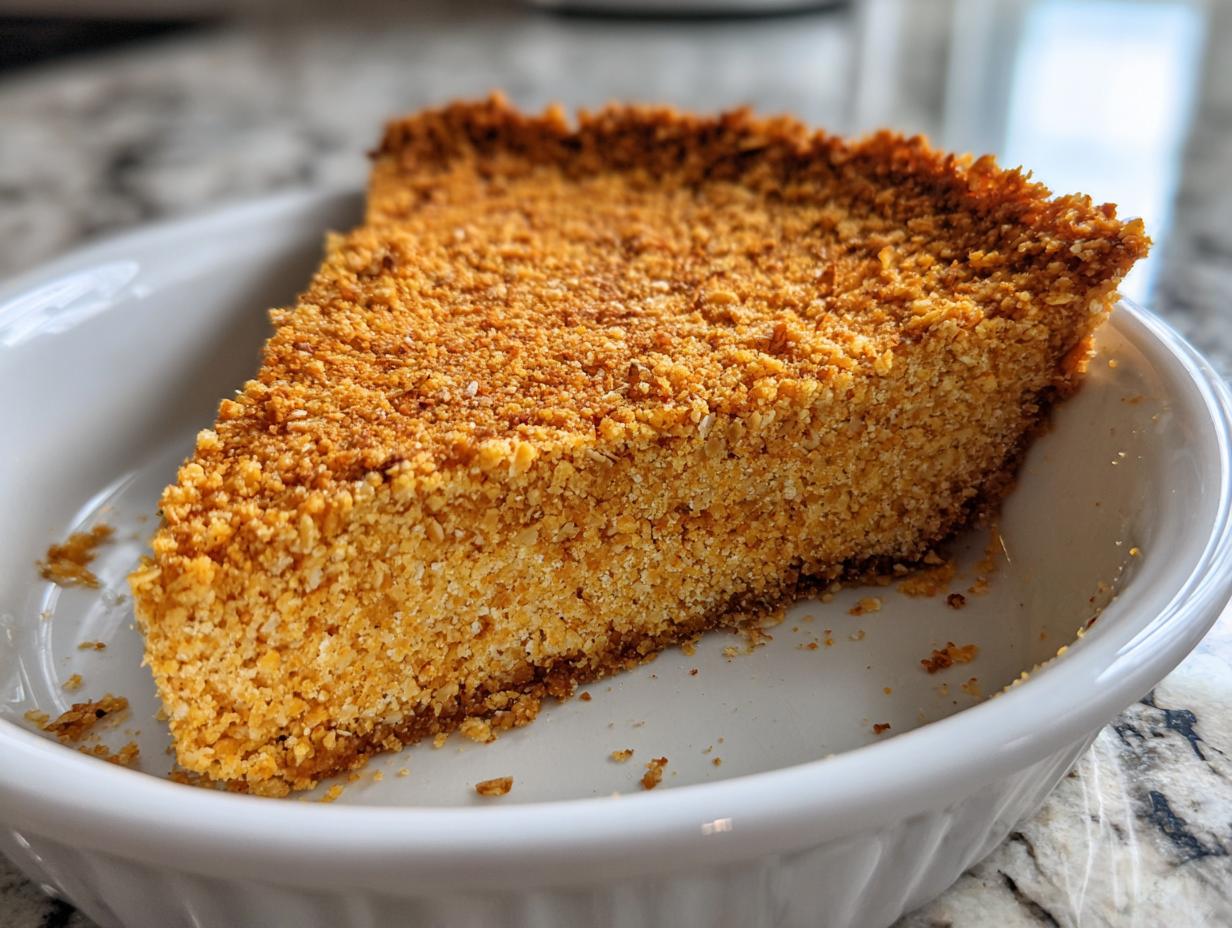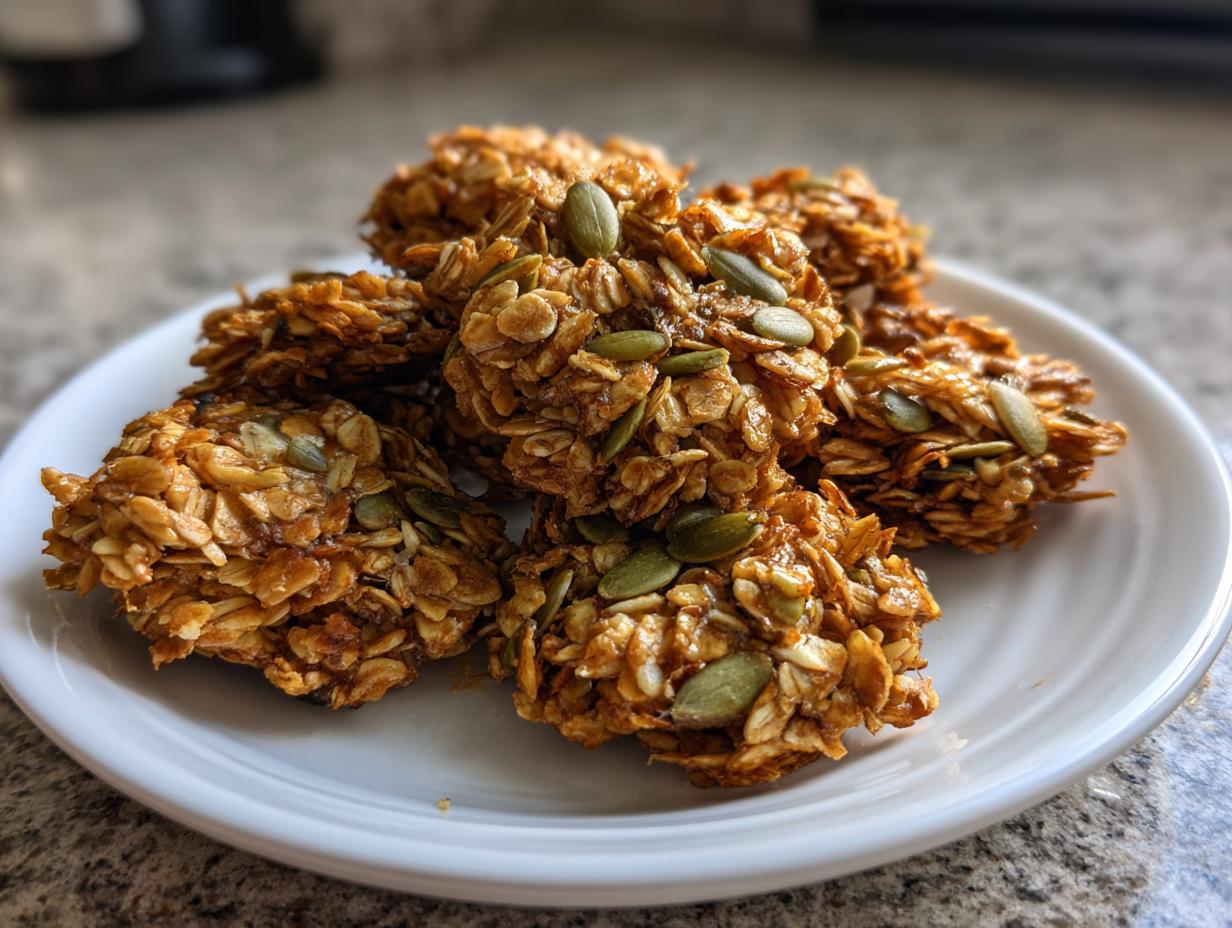
Forget those sad, crumbly bowls of cereal you call granola! We’re talking about big, satisfying, crunchy Granola Clusters with Honey and Seeds here. If you’ve ever tried making granola only to end up with dust, don’t worry for a second—I was right there with you. My first batch looked like birdseed after a tornado hit it; it was pathetic!
But I figured out the secret, and it’s all about technique, not fancy equipment. This recipe guarantees those glorious, thick chunks you see in expensive bags at the store. The magic is in the compacting and, honestly, leaving it completely alone while it cools. I remember the first time I pulled a tray out and saw huge, golden pieces—I thought I’d invented something! It’s that simple combination of honey and oil that glues everything together.
Once you get this down, you’ll never buy the store stuff again. Trust me, once you taste the fresh oats, nuts, and that natural sweetness from the honey, you’ll be hooked on these homemade clusters!

Essential Ingredients for Granola Clusters with Honey and Seeds
The real trick to getting those amazing, big chunks in your baked snack isn’t just the baking time; it’s what you put in the bowl first. When I first started, I just threw whatever nuts I had into the mix. Now, I’m very particular because I learned that the right ratio of dry to wet makes or breaks the crunch factor. We need enough structure from the oats and enough stickiness from the syrup.
Every ingredient listed here plays a specific role in achieving that perfect, durable cluster. If you skip one, you might end up back at that birdseed stage I mentioned earlier!
Dry Components for Optimal Texture
You absolutely must use old-fashioned rolled oats here. Quick oats are too fine; they break down too much during baking and won’t give you the structure needed for those large clusters. We’re using a hearty blend of almonds, pumpkin seeds, and sunflower seeds for texture variety. Don’t skimp on the coconut flakes either—they toast up beautifully and add a lovely chewiness around the edges of the clusters. And the chia seeds? They soak up a little bit of the moisture while baking, which helps bind the whole thing together once it cools.
Wet Binders and Sweeteners
Honey is the star binder, hands down. It’s thick, it caramelizes well, and it gives that classic flavor we want in our Granola Clusters with Honey and Seeds. I also use coconut oil because when it cools, it solidifies slightly and helps keep things locked in place, much better than just plain vegetable oil. The brown sugar adds a little bit of molasses flavor that white sugar just can’t touch, deepening the overall taste profile. Finally, a splash of vanilla extract—because everything tastes better with vanilla, right?
Equipment Needed for Making Granola Clusters with Honey and Seeds
You don’t need a ton of fancy gear for this, which is part of why I love it so much! The most important item is a large, rimmed baking sheet. You need that rim because we want to press the mixture down, and we don’t want the honey creeping over the sides. Seriously, get one that’s big enough so you can spread the mixture in a single, thin layer.
You’ll also need a sturdy, large mixing bowl for tossing everything together. And for melting the wet stuff, just grab a small saucepan. That’s it! No stand mixer required, just a good wooden spoon for mixing and a spatula for pressing. Easy peasy!
Step-by-Step Instructions for Granola Clusters with Honey and Seeds
Okay, now for the actual making! Even though this is mostly mixing, the order and the way you handle the ingredients makes all the difference between a good snack and truly amazing, crunchy clusters. Don’t rush the mixing, and whatever you do, don’t touch it while it cools!
Preparation and Mixing the Dry Base
First things first: get that oven hot! Preheat it to 325 degrees Fahrenheit. While it’s warming up, grab your biggest rimmed baking sheet and line it with parchment paper. This parchment paper is your best friend; it prevents sticking and makes cleanup a breeze. Next, grab your large mixing bowl. We are going to dump in all the dry stuff: the rolled oats, the almonds, both types of seeds, the coconut flakes, cinnamon, and salt. Just toss it all in there. Now, take your time with this step. You need to stir this mixture really well—like, really, really well. You want to make sure that cinnamon and salt are evenly distributed throughout all the oats and seeds, otherwise, you might get one bite that’s super salty and the next one is bland. Keep stirring until it looks uniform!
Creating and Incorporating the Honey Coating
Time for the glue! Grab a small saucepan. We’re going to combine the honey, the coconut oil, the brown sugar, and the vanilla extract. Put this over low heat. You need to stir this constantly so the coconut oil melts completely and the brown sugar dissolves into the honey. We aren’t boiling this; we just want it warm and perfectly smooth. When it looks like one beautiful, glossy liquid, take it off the heat immediately. Now, pour that warm honey mixture right over your big bowl of dry ingredients. This is where the real work happens. Use a big spoon or a spatula and fold everything together gently but thoroughly. Keep mixing until every single oat and seed looks shiny and coated. There should be absolutely no dry, powdery spots left at the bottom of the bowl.
Baking and The Crucial Cooling Phase
Once you’ve got everything coated, transfer that sticky granola mixture onto your prepared baking sheet. Spread it out into one even layer. Here is a major pro tip for those big clusters: take the back of your spatula or the bottom of a sturdy measuring cup and press the mixture down firmly. Really compact it! This forces the ingredients together, which is what creates those big, solid chunks later. Pop the sheet into the preheated oven and bake for about 25 to 30 minutes. You are looking for golden brown edges. The most important part comes next: DO NOT TOUCH IT. When you pull the tray out, leave it completely alone on the counter for at least one full hour. It needs this time to cool and harden completely. If you try to stir it or break it up while it’s warm, it will turn into crumbs. Patience pays off here!

Tips for Achieving Large Granola Clusters with Honey and Seeds
If your goal is those chunky, satisfying pieces of Granola Clusters with Honey and Seeds, you need to treat the pan gently—but only after you’ve been firm with the ingredients! The biggest mistake I see people make is treating the granola mixture like oatmeal; you can’t stir it halfway through baking. That stirring breaks up the bonds the honey is trying to form.
Remember when we mixed everything? You have to press that mixture down onto the baking sheet like you mean it. Think of it like packing brown sugar for a sandcastle. The firmer you pack it before it goes in the oven, the bigger and more robust your clusters will be when they come out. That initial compaction sets the stage!
While baking, just let it be. Resist the urge to peek or nudge the pan. The heat needs to work undisturbed to solidify that honey coating. Then, the cooling phase is non-negotiable! Do not break the clusters until they are stone cold. Seriously, wait the full hour. That cooling time is when the magic happens and those big, beautiful chunks lock into place. It’s pure patience, but it’s worth every second!
Ingredient Notes and Simple Substitutions
One of the joys of homemade granola is being able to tweak it based on what you have or what you prefer. You asked about swapping out the honey? Absolutely! If you want a deeper, more caramel-forward sweetness, try using maple syrup instead of honey. Maple syrup is a fantastic binder too, though it tends to stay slightly softer than honey once cooled, so keep that in mind. If you are interested in other easy breakfast recipes, check out this guide on overnight oats.
For the nuts, feel free to switch out the almonds for chopped walnuts or pecans—whatever you love! Just make sure they are roughly the same size as the almonds so they mix evenly. If you need extra fiber, adding ground flax seeds right in with the dry ingredients is a great move. And if you want that bit of chewiness after baking, toss in some dried cranberries or raisins once the granola has cooled down completely. Don’t bake the fruit; it just gets too hard!
Storing Your Homemade Granola Clusters with Honey and Seeds
Now that you’ve made these perfect, crunchy Granola Clusters with Honey and Seeds, you need to protect that hard-earned crunch! The biggest enemy of great granola is moisture in the air. You must store these in an airtight container. I use big glass jars with tight-sealing lids. If you leave them exposed, they’ll go soft faster than you can say “oatmeal.”
I usually make a huge batch, and they last me about two weeks at room temperature. If you packed them tightly, they might last a tiny bit longer, but I always try to eat them within 14 days for peak crispness. Seriously, they are so good you probably won’t have to worry about storage for long! If you want to see more snack ideas, take a look at our collection of snacks.
Storage and Reheating Guide
Sometimes, if the weather is really humid, I find my clusters lose a little snap. Don’t panic! You can refresh them easily. Just spread them out on a baking sheet and pop them into a low oven for a few minutes. It brings the crispness right back. Here is a quick reference for keeping them perfect.
Storage and Reheating Table
-
Storage Method Duration Reheating Instructions Airtight Container (Room Temp) Up to 2 Weeks Spread on baking sheet, bake at 300\u00b0F for 5 minutes. Freezer (Airtight Bag) Up to 2 Months Thaw on counter, then briefly reheat if desired.
Frequently Asked Questions About Granola Clusters with Honey and Seeds
I get so many questions once people start making these clusters! It’s usually about texture or substitutions, which is totally normal when you’re moving away from store-bought stuff. Here are the things folks ask me most often about getting those perfect Granola Clusters with Honey and Seeds.
Q1. Why didn’t my granola stick together into clusters?
This is almost always because you stirred it while it was baking, or you didn’t press the mixture down firmly enough onto the pan before baking. Remember, the cooling phase is critical! If you disturb it while it’s cooling, those bonds break.
Q2. Can I use maple syrup instead of honey?
Yes, you can! Maple syrup works great as a binder, but it gives a slightly different flavor profile—a little deeper, maybe. Just know that honey tends to create a slightly harder, crunchier cluster once it sets completely. For more baking tips, follow us on Pinterest.
Q3. Should I use quick oats or rolled oats for this recipe?
You really must use old-fashioned rolled oats. Quick oats break down too much during baking, and they won’t give you the necessary structure for those big, satisfying chunks in your baked snack.
Q4. Can I add dried fruit to my honey and seeds mixture?
If you want chewy dried fruit, add it after the granola has cooled completely. If you bake the raisins or cranberries along with the oats, they dry out too much and become hard little pebbles instead of chewy additions.
Share Your Success with Granola Clusters with Honey and Seeds
I absolutely love hearing when you all have success in the kitchen! If you made these big, crunchy clusters and they turned out perfectly, please let me know how it went in the comments below. Did you get huge chunks? What substitutions did you try? You can also share your creations with us on Facebook.
Rate this recipe and share your photos—it truly makes my day to see your amazing homemade Granola Clusters with Honey and Seeds! For more recipe ideas, check out our Medium page.
Print
Amazing Granola Clusters with Honey and Seeds 1
- Total Time: 1 hour 40 minutes
- Yield: 10 servings
- Diet: Vegetarian
Description
Bake crunchy granola clusters with honey and seeds in 35 minutes. Perfect snackable chunks with oats, nuts, and natural sweetness.
Ingredients
- 3 cups old-fashioned rolled oats
- ⅜ cup sliced almonds
- ½ cup pumpkin seeds (pepitas)
- ½ cup sunflower seeds
- ⅜ cup unsweetened coconut flakes
- 2 tablespoons chia seeds
- 1 teaspoon ground cinnamon
- ½ teaspoon sea salt
- ½ cup honey
- ¼ cup coconut oil
- 2 tablespoons brown sugar
- 1½ teaspoons vanilla extract
Instructions
- Preheat oven to 325°F and line a large rimmed baking sheet with parchment paper.
- Combine oats, sliced almonds, pumpkin seeds, sunflower seeds, coconut flakes, chia seeds, cinnamon, and sea salt in a large mixing bowl and stir thoroughly.
- Add honey, coconut oil, brown sugar, and vanilla extract to a small saucepan and heat over low heat, stirring continuously until melted and completely smooth.
- Pour the warm honey mixture over the dry ingredients and stir with a large spoon until everything is evenly coated and no dry spots remain.
- Transfer the granola mixture to the prepared baking sheet and spread into an even layer, then press down firmly with the back of a spatula to compact it.
- Bake for 25 to 30 minutes without stirring, until the granola is golden brown around the edges.
- Remove from oven and let cool completely on the baking sheet for at least 1 hour without touching or stirring, as this is when clusters form.
- Once fully cooled, break the granola into large clusters with your hands or a spatula.
- Store clusters in an airtight container at room temperature and consume within 2 weeks.
Notes
- Replace coconut oil with melted butter or vegetable oil for different flavors.
- Use maple syrup instead of honey for a deeper caramel sweetness.
- Swap almonds for chopped walnuts, pecans, or cashews based on preference.
- Add 2 tablespoons of ground flax seeds for extra fiber and omega-3s.
- Mix in ½ cup of dried cranberries or raisins after baking for chewy fruit additions.
- Use quick oats instead of old-fashioned oats for a finer texture.
- Press the granola mixture down very firmly on the baking sheet to ensure large clusters form.
- Do not stir or disturb the granola while baking to prevent cluster formation.
- Let granola cool completely before breaking into clusters; it continues to crisp as it cools.
- Store in an airtight container to maintain crispness.
- Prep Time: 10 minutes
- Cook Time: 30 minutes
- Category: Snack
- Method: Baking
- Cuisine: American