Oh my goodness, who doesn’t love a s’more? I swear, the smell of toasted marshmallows and melted chocolate takes me right back to camping trips and bonfires. But let’s be real, sometimes you just crave that gooey, chocolatey, marshmallowy goodness without needing a whole campfire setup! That’s where these Gooey S’mores Bars come in. They capture all that magic right in your own kitchen, and trust me, they are SO easy.
I remember one time we were trying to make s’mores after dark, and the marshmallows just kept catching fire! My dad finally just grabbed some chocolate and graham crackers and made them himself. That sparked the idea for these bars, and they’ve been a family favorite ever since. You get that perfect bite every single time, no burnt fingers involved!
Why You’ll Love These Gooey S’mores Bars
Seriously, why wouldn’t you love these? They’re a total game-changer for satisfying that s’mores craving:
- Super Fast & Easy: You can whip these up in no time, perfect for when a craving hits!
- Pure Nostalgia: It’s like a campfire hug in every bite, bringing back all those happy memories.
- Crowd Pleaser: Everyone, and I mean everyone, goes crazy for these gooey bars.
- Minimal Mess: No sticky fingers from toasting marshmallows over an open flame!
Quick and Easy Preparation for Gooey S’mores Bars
The best part? These bars are ridiculously simple. You’re basically mixing a crust, pressing it down, and then layering on the good stuff. Seriously, if you can press crumbs into a pan and sprinkle some chocolate and marshmallows, you can make these Gooey S’mores Bars. It’s baking made utterly foolproof!
Irresistible Flavor Combination
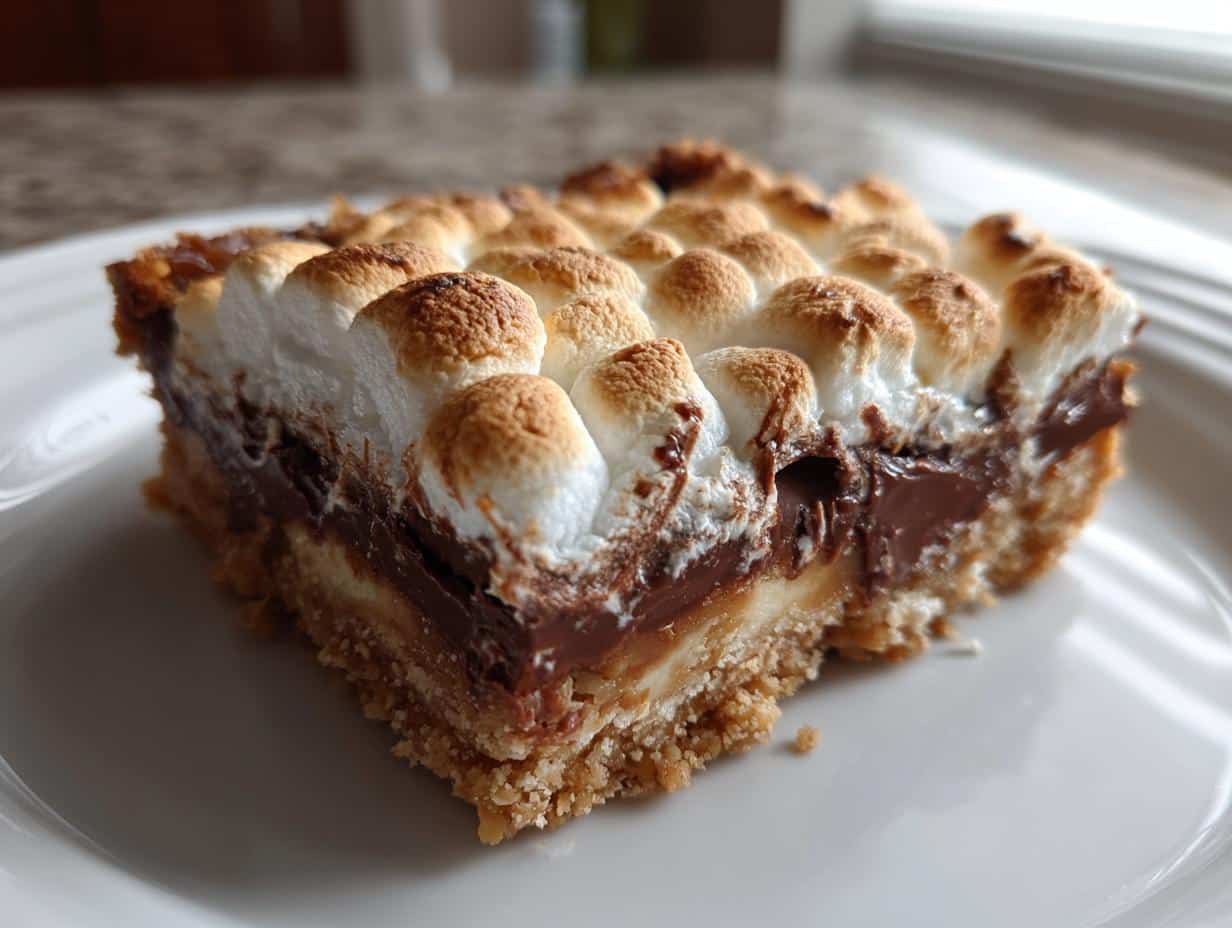
It’s the classic trio, perfected! You get that sweet, crunchy graham cracker base, followed by melty, rich chocolate chips, and then topped with those glorious, puffy, gooey marshmallows that get perfectly toasted. Honestly, it’s pure s’mores bliss in bar form, and these Gooey S’mores Bars nail every single flavor note.
Gather Your Gooey S’mores Bars Ingredients
Okay, let’s get our ingredients ready for these amazing Gooey S’mores Bars! It’s pretty straightforward, which is part of why I love them so much. You probably have most of this stuff in your pantry already, which is always a bonus, right?
Here’s what you’ll need to grab:
| Graham Cracker Crumbs: 2 cups |
| Unsalted Butter: ½ cup, melted |
| Semi-Sweet Chocolate Chips: 4 cups |
| Gelatin-Free Mini Marshmallows: 1 (10 ounce) package |
That’s it! Seriously, it’s such a short list, making these bars super accessible. Just make sure your butter is properly melted, and you’re golden.
Ingredient Notes and Substitutions for Gooey S’mores Bars
Now, about those marshmallows! I specifically call for gelatin-free mini marshmallows because, well, not everyone wants gelatin in their treats, and it’s just a good practice to offer options. Plus, they toast up just as beautifully! If you can’t find them or prefer regular marshmallows, go right ahead – they’ll work perfectly fine too.
As for the chocolate chips, semi-sweet is my go-to because it strikes that perfect balance between sweet and rich, which is exactly what you want when you’re mimicking a s’more. But hey, feel free to use milk chocolate chips if you like things a bit sweeter, or even dark chocolate chips if you’re feeling fancy! And graham crackers? Any brand will do, just make sure they’re finely crushed for a nice, even crust for your Gooey S’mores Bars.
Step-by-Step Guide to Making Gooey S’mores Bars
Alright, let’s get down to business and make these incredible Gooey S’mores Bars! It’s a pretty simple process, and honestly, it’s kind of fun. You don’t need to be a master baker for this, I promise!
Preparing the Graham Cracker Crust for Gooey S’mores Bars
First things first, grab your graham cracker crumbs and your melted butter. Give them a good stir in a bowl until all those crumbs are nicely coated and look like wet sand. Then, pour this mixture into your prepared 9×13 inch pan. Use the bottom of a glass or your hands to press it down really firmly. You want a nice, even base for your Gooey S’mores Bars so it doesn’t crumble apart later.
Assembling and Baking Your Gooey S’mores Bars
Now for the best part! Pop that crust into your preheated oven (that’s 350°F or 175°C) for about 8 minutes. You just want it to set a little, not get too brown. Once it’s out, sprinkle those 4 cups of chocolate chips evenly all over that warm crust. Don’t be shy with the chocolate! Then, pile on your gelatin-free mini marshmallows. Make sure they’re spread out nicely to cover the chocolate. Pop it back into the oven for about 20 minutes. You’re looking for those marshmallows to puff up and get beautifully golden brown. Keep an eye on them so they don’t burn! The whole kitchen will smell amazing. Once they’re done, let them cool completely – this is super important for them to set up properly. I usually pop mine in the fridge for a bit to make cutting easier. Then, just cut them into bars and enjoy your amazing Gooey S’mores Bars!

Essential Equipment for Perfect Gooey S’mores Bars
To make these dreamy Gooey S’mores Bars, you don’t need a whole fancy setup. Just a few basic kitchen tools will do the trick! You’ll definitely want your measuring cups and spoons to get those ingredients just right. A good mixing bowl is essential for combining the crust, and then another one might be handy for the marshmallows if you want to keep them separate. Of course, you’ll need a 9×13 inch baking pan – that’s where all the magic happens. And a spatula is super helpful for pressing the crust and getting every last bit of goodness out of the pan!
Tips for Achieving Gooey S’mores Bars Perfection
Okay, so you want these Gooey S’mores Bars to be absolutely perfect, right? I’ve got a few little tricks that make all the difference. First off, that graham cracker crust? Make sure it’s pressed down *really* well. A firm crust means your bars won’t fall apart when you cut them. And please, let them cool completely before you even think about cutting! I know it’s hard, but trust me, chilling them in the fridge for at least an hour makes cutting into clean, neat bars so much easier. It keeps that marshmallow topping from getting all stringy and messy.
Also, keep an eye on those marshmallows while they’re baking. They can go from perfectly golden to burnt in about two seconds flat! If you see them browning too fast, you can always loosely tent the pan with foil. And a little secret? Using good quality chocolate chips really does make a difference in the flavor. Don’t overbake them either; you want that gooey factor to really shine through!

Frequently Asked Questions about Gooey S’mores Bars
Got questions about these awesome Gooey S’mores Bars? I’ve got you covered!
Q: Can I use regular marshmallows instead of gelatin-free ones?
Absolutely! While I love offering a gelatin-free option with these Gooey S’mores Bars, regular mini marshmallows will work just as beautifully. They’ll toast up golden and gooey, no problem!
Q: How should I store these Gooey S’mores Bars?
The best way to keep them from getting *too* gooey and sticky is to store them in an airtight container in the refrigerator. They’ll stay fresh and hold their shape nicely. You can also layer them between parchment paper if you’re worried about them sticking together.
Q: Can I make these Gooey S’mores Bars ahead of time?
Yes, you totally can! They actually benefit from chilling, so making them a day ahead is a great idea. Just let them cool completely, cut them, and then store them in the fridge. They’re perfect for prepping before a party or gathering.
Q: What kind of chocolate chips are best for Gooey S’mores Bars?
I usually go for semi-sweet chocolate chips because they offer a nice balance of sweetness and richness that complements the marshmallows and graham crackers really well. But honestly, milk chocolate chips work great if you prefer something sweeter, and dark chocolate chips add a richer, more intense chocolate flavor. Use whatever you love!
Q: My marshmallows are burning! What am I doing wrong?
Oh, that happens! Marshmallows can go from perfectly golden to burnt super fast. If you notice them browning too quickly in your oven, just loosely tent the pan with aluminum foil for the last few minutes of baking. This shields them a bit while still letting them get nice and toasty. Keep a close eye on them!
Storing and Reheating Your Gooey S’mores Bars
So, you’ve got some leftover Gooey S’mores Bars? Lucky you! To keep that marshmallow topping perfectly gooey and the chocolate from getting too hard, the best spot for them is definitely the refrigerator. Pop them into an airtight container – this stops them from drying out or picking up any funky smells from other foods.
If you want to reheat them a bit, just pop a bar (or two!) onto a microwave-safe plate for about 10-15 seconds. They’ll get warm and a little melty again, just like fresh from the oven. You can also pop them in a toaster oven on low heat for a few minutes if you prefer. Enjoy!

Nutritional Estimate for Gooey S’mores Bars
Okay, so these Gooey S’mores Bars are pure deliciousness, but they’re definitely a treat! Since everyone uses different brands of ingredients, the exact nutritional info can bounce around a bit. But, based on typical ingredients, here’s a rough idea of what you’re looking at per bar. Remember, this is just an estimate, so your mileage might vary!
| Serving Size: 1 bar |
| Calories: Approximately 300-350 kcal |
| Fat: Around 15-20g |
| Carbohydrates: Roughly 40-45g |
| Protein: About 3-5g |
It’s a good idea to factor these into your daily intake, but honestly, they’re so worth it for that nostalgic, gooey s’mores fix!
Print
Irresistible Gooey S’mores Bars 3 Ways
- Total Time: 43 minutes
- Yield: 12-16 bars
- Diet: Vegetarian
Description
These gooey s’mores bars capture the campfire classic’s chocolatey goodness in your kitchen. They are quick and easy to make.
Ingredients
- 2 cups graham cracker crumbs
- ½ cup melted butter
- 4 cups chocolate chips
- 1 package gelatin-free mini marshmallows
Instructions
- Preheat oven to 350°F (175°C).
- Grease a 9×13 inch pan.
- Mix graham cracker crumbs and melted butter.
- Press mixture into the pan for the crust.
- Bake crust for 8 minutes.
- Sprinkle chocolate chips evenly over the crust.
- Add a layer of gelatin-free mini marshmallows.
- Bake for 20 minutes until marshmallows are golden brown.
- Let cool completely, then refrigerate to set.
- Cut into bars and serve.
Notes
- Use gelatin-free mini marshmallows for a gelatin-free recipe.
- Prep Time: 15 minutes
- Cook Time: 28 minutes
- Category: Dessert
- Method: Baking
- Cuisine: American