I have to tell you, when I first started baking bread, it was a disaster zone! I thought yeast was some kind of magic I just couldn’t master. But after wrestling with flat loaves and soggy bottoms for months, I finally cracked the code for this homemade garlic herb french bread. Seriously, forget those dry supermarket loaves!
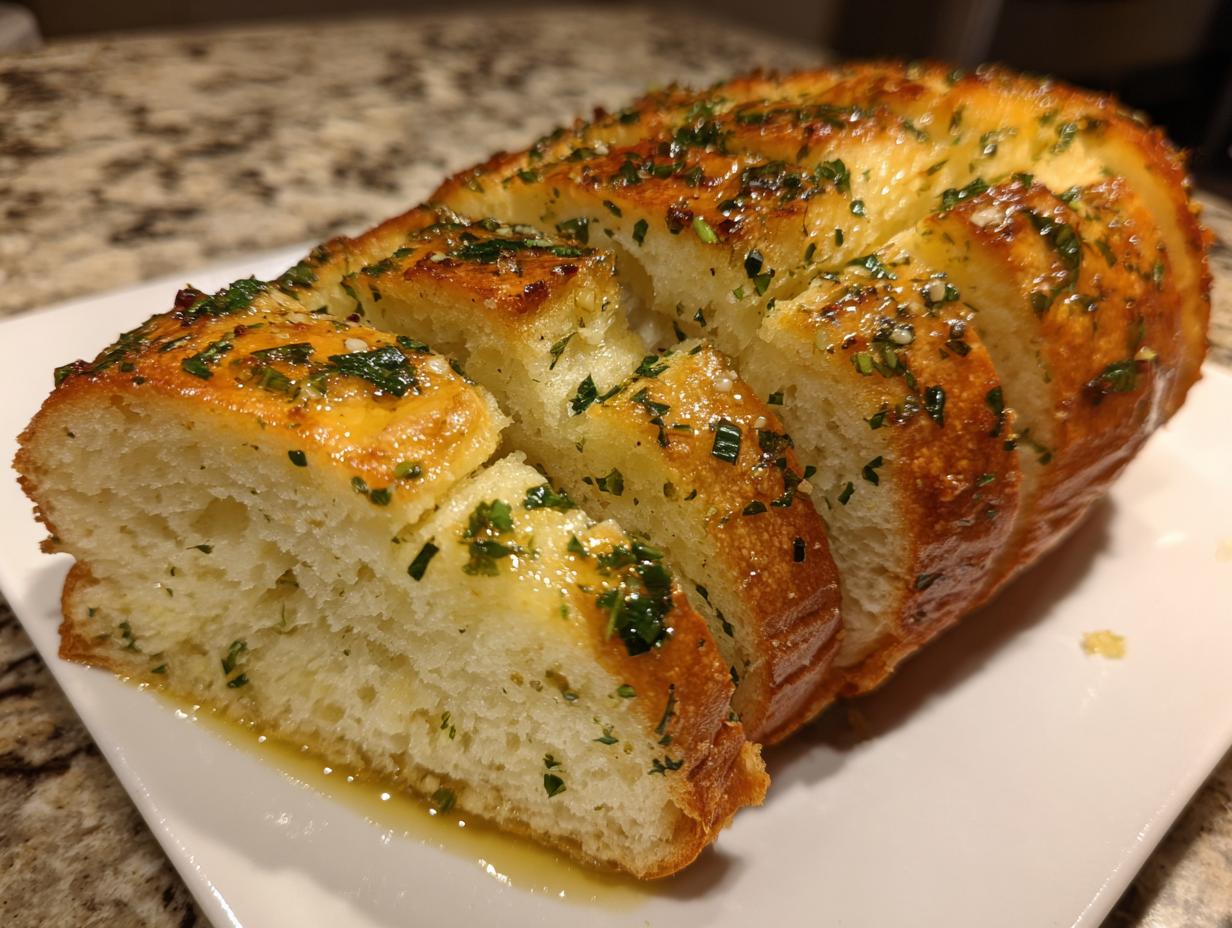
This recipe is my absolute go-to because it delivers that perfect textural contrast every single time: a shatteringly crisp crust that gives way to the softest, airiest interior you can imagine. And the flavor? Oh my goodness, the buttery glaze infused with all that fresh garlic and dried herbs makes your kitchen smell like an Italian dream.
What makes this the best version is the balance. We use just enough flour to keep it chewy, but not so much that it turns into a rock. Trust me, even if you’re scared of yeast, this process is straightforward, and the payoff when you pull that golden loaf out of the oven is just unbeatable. You are going to love making this!

Essential Ingredients for Perfect garlic herb french bread
Baking great bread isn’t about luck; it’s about respecting the ingredients, especially when making a savory treat like this garlic herb french bread. Every single element plays a crucial role, from activating the yeast to building that incredible herb flavor in the final glaze. Don’t swap things around willy-nilly here, or you might end up with something closer to a brick than a beautiful loaf!
Dry Ingredients Breakdown
We start with bread flour because it has higher protein, which gives us that lovely, chewy structure we want in a French loaf. The seasonings are key: dried thyme, basil, marjoram, and parsley all go right into the dry mix with the salt and sugar. I always make sure my measurements for the herbs are level—too much thyme and it gets medicinal, but the right balance makes the bread sing. And yes, the fresh minced garlic goes in with the dry ingredients to infuse the dough itself before baking!
Wet Ingredients and Glaze Components
The water temperature is non-negotiable; it needs to be warm, around 120 degrees Fahrenheit, to wake up the yeast gently. If it’s too hot, you kill the yeast, and that’s a waste of time! For the dough itself, I often use olive oil because it keeps the crumb slightly softer, but you need straight-up melted unsalted butter for the glaze. That butter melts onto the hot crust and carries all those extra herbs and garlic powder right into every nook and cranny. Don’t mix up the two fats!
Equipment Needed for Baking garlic herb french bread
You don’t need fancy gadgets, but having the right tools makes the process so much smoother. First off, you absolutely need a large mixing bowl because the dough expands quickly. A sturdy baking sheet is essential for shaping and baking the loaves—don’t use a dark pan unless you know it runs hot!
You’ll also want a damp kitchen towel to cover the dough while it rises—plastic wrap tends to stick! And for kneading, make sure you have a clean countertop space. Finally, a pastry brush is a must-have for applying that gorgeous, buttery glaze right when the bread comes out of the oven. That’s really it; simple tools for a spectacular result!
Step-by-Step Instructions for Amazing garlic herb french bread
Okay, let’s get our hands dirty! This is where the magic happens. Don’t rush the rising times; that’s the secret to that light interior structure in your garlic herb french bread. We are aiming for fluffy, not tough!
Mixing and First Rise of the Dough
Grab your big bowl and combine everything dry first—that’s 2 cups of flour, the salt, sugar, all those beautiful herbs (thyme, basil, marjoram, parsley), the minced garlic, and the yeast. Give it a quick whisk just to make sure the yeast is evenly distributed. Now, for the wet stuff: measure your water to hit that sweet spot around 120°F. If you don’t have a thermometer, it should feel comfortably warm, not hot, when you dip a finger in.
Pour in the warm water and the melted butter or oil. Stir everything together until you have a shaggy, slightly sticky mess. Now, start adding the remaining flour, just a little at a time, until the dough pulls away from the sides of the bowl. It should feel soft. Turn it out onto your floured surface. Forget the mixer for kneading! You need to work this dough for a good 5 to 7 minutes. Push it away with the heel of your hand, fold it over, and repeat. You’re looking for smooth and elastic—it shouldn’t be sticky anymore, but it should still feel supple.
Grease your bowl lightly, pop the dough in, turn it around so it’s coated, and cover it with a damp towel. Find a warm, draft-free spot—my oven, turned off but with the light on, works great. Let it sit for about 45 minutes, or until it’s doubled in size. Don’t poke it too much while it’s resting!

Shaping and Second Proofing
Once it’s puffed up, gently punch the air out—it’s satisfying! Turn it back onto your counter (no extra flour needed unless it’s sticking terribly). Divide that dough right in half. Now, for the shaping: work each piece into a long, uniform log. Gently stretch and tuck the edges underneath until you have a tight, smooth surface on top. If you want to make it fancy, this is the time to braid it! Just make sure the ends are pinched securely so they don’t unravel while baking.
Place your shaped loaves onto a lightly greased baking sheet. Cover them again with that damp towel. This second rise is important for the final texture, so let them relax in a warm place for another 30 to 40 minutes. They should look noticeably puffed up again.
Baking and Applying the Buttery Glaze
While that second rise is happening, crank your oven up to 400°F. High heat is what gives us that amazing crispy crust. Once the oven is hot and the loaves look ready, slide them in. Bake them for 15 to 20 minutes. Keep an eye on them—you want them deeply golden brown on top, not pale.
While the bread is baking, get your glaze ready. Melt that final 3 tablespoons of butter and quickly whisk in the dried parsley, basil, marjoram, thyme, and garlic powder. As soon as those loaves come out of the oven—and I mean immediately—brush that herby, garlicky butter all over the hot crust. The heat of the bread melts the butter instantly, letting it soak in and create that incredible flavor layer. Let it cool just long enough so you don’t burn your mouth off, and then slice it up!
Tips for Success with Your garlic herb french bread
Baking bread is super rewarding, but a few little hiccups can throw off the texture. My biggest piece of advice? Don’t rush the rise times! If you pull the dough out before it’s doubled, you’re going to end up with a dense, heavy loaf that just won’t cut right. Be patient during both rises; the dough is working hard to build those air pockets.
To guarantee that crispy exterior, make sure your oven is fully preheated to 400°F before the bread even thinks about going in. If you want an extra-crispy bottom crust, try placing a metal baking sheet on the lowest rack while the oven preheats. When you put the bread in, quickly pour about half a cup of hot water onto that hot sheet and immediately shut the door. That burst of steam helps the crust set beautifully crisp!
Also, when you’re kneading, stop as soon as the dough is smooth. Over-kneading develops too much gluten, making the final product tough instead of soft and chewy. Trust your hands on this one; the dough should feel alive and springy when you gently press it.
Ingredient Notes and Smart Substitutions for garlic herb french bread
I know some of you might look at the ingredient list and wonder about swapping things out, so let’s talk substitutions for this garlic herb french bread. The biggest difference you’ll notice is using olive oil instead of butter in the dough itself. Olive oil tends to yield a slightly softer crumb that stays tender longer, while butter gives you a richer flavor right in the bread matrix. Both are totally fine, but they change the texture slightly.
Now, for the garlic: we use fresh minced garlic in the dough because it imparts a deep, savory flavor as it bakes. But for the glaze, stick to garlic powder! Fresh garlic in that melted butter glaze burns really fast under the residual heat of the bread, turning bitter. The powder dissolves perfectly and gives you that aromatic garlic punch without the risk of scorching. Stick to those guidelines, and your bread will be perfect!
Storing and Reheating Leftover garlic herb french bread
It’s hard to have leftovers, honestly, but if you manage to save some of this delicious bread, you need to store it correctly. The enemy of good French bread is humidity, which makes that glorious crust turn soft and chewy overnight. We want to protect that crisp exterior!
Storage Guidelines
Once the bread has cooled completely—and I mean completely, or you’ll trap steam and create mush—wrap it tightly. I prefer using aluminum foil first, just a snug layer, and then placing the whole thing in a large zip-top bag or an airtight plastic container. Stored this way on the counter, it stays pretty good for about two days. Don’t put it in the fridge; refrigeration dries bread out faster than anything else!
How to Reheat for Freshness
If your crust has gone a little limp, don’t despair! The oven is your best friend for bringing back that fresh-baked snap. Preheat your oven to 350°F. You can wrap the bread tightly in foil and heat it for about 10 minutes—this steams the interior back to softness. If you want the full experience, unwrap it for the last 3 minutes of heating so the crust can crisp up again.
If you’re only reheating a slice or two, the toaster oven works wonders. Just lay the slice directly on the rack for 3 to 5 minutes. It heats up fast and gets that bottom crust crunchy again, ready for a little more melted butter if you’re feeling indulgent!
Frequently Asked Questions About garlic herb french bread
It’s natural to have questions when you’re mixing yeast and flour for the first time! Here are a few things I hear most often when people try out this recipe for the first time. Don’t worry if your first attempt isn’t perfect; baking is all about practice!
Can I make this dough ahead of time?
You absolutely can! This dough handles a cold fermentation really well, which actually develops a deeper flavor. After the first rise (Step 5), punch the dough down, lightly coat it with oil, and stick it in an airtight container in the fridge for up to three days. You might need to let it warm up on the counter for about an hour before shaping it for that second rise, though!
How do I ensure a crispy crust?
The steam trick I mentioned earlier is my favorite way to get that shatteringly crisp exterior. Preheat your oven, place an empty metal pan on the bottom rack, and when you slide the loaves in, quickly pour a cup of hot water into that pan and shut the door fast. That initial burst of humidity sets the crust beautifully, preventing it from getting tough.
My yeast did not rise, what went wrong?
Nine times out of ten, this comes down to the water temperature. If the water was too cold, the yeast stayed asleep. If it was too hot—over 130°F—you accidentally killed it. You need that Goldilocks zone, around 120°F, so it’s warm but not scalding. Also, make sure your yeast packet hasn’t been sitting open in the pantry for a year; old yeast won’t activate, no matter how warm the water is!
Sharing Your Homemade garlic herb french bread Creation
Now that you’ve pulled that golden loaf out of the oven and slathered it with that amazing buttery glaze, I really want to know how it went! Did your crust snap when you cut into it? Was the inside soft enough for dipping in soup?
Please take a moment to leave a star rating right below this section. Better yet, drop a comment and tell me your favorite thing to eat this bread with. Happy baking, friends! You can also follow our latest recipes on Facebook or save this recipe on Pinterest.
Print
5 amazing garlic herb french bread secrets
- Total Time: 1 hour 40 minutes (plus rising time)
- Yield: 2 loaves (24 slices)
- Diet: Omnivore
Description
Homemade garlic herb French bread brushed with a buttery herb glaze. It is crispy on the outside, soft inside, and perfect with pasta or soups.
Ingredients
- 2½ to 2¾ cups bread flour
- 1 teaspoon dried thyme
- 1 teaspoon dried basil
- 1 teaspoon dried marjoram
- 1 tablespoon dried parsley
- 1 tablespoon minced garlic (about 4 fresh cloves)
- 1 teaspoon sea salt
- 1 tablespoon sugar
- 2¼ teaspoons active dry yeast
- 1 cup warm water (about 120°F)
- 3 tablespoons melted unsalted butter or olive oil
- 3 tablespoons melted butter (for glaze)
- 1 teaspoon dried parsley (for glaze)
- ⅘ teaspoon dried basil (for glaze)
- ⅘ teaspoon dried marjoram (for glaze)
- ⅘ teaspoon dried thyme (for glaze)
- ⅘ teaspoon garlic powder (for glaze)
Instructions
- Combine 2 cups of flour, salt, sugar, thyme, basil, marjoram, parsley, garlic, and yeast in a large bowl.
- Add warm water and butter (or oil). Stir until smooth.
- Gradually add remaining flour until you form a soft dough.
- Turn the dough onto a floured surface. Knead for 5–7 minutes until the dough is elastic and smooth.
- Place the dough in a greased bowl, turn it once to coat, and cover with a damp towel. Let it rise in a warm spot for about 45 minutes, or until doubled in size.
- Punch down the dough and divide it in half. Shape the dough into two long loaves or braid it into one large loaf.
- Place the shaped loaves on a greased baking sheet, cover, and let them rise for another 30–40 minutes until doubled.
- Preheat your oven to 400°F. Bake the bread for 15–20 minutes, or until golden brown.
- While the bread bakes, melt the butter for the glaze and stir in the parsley, basil, marjoram, thyme, and garlic powder.
- Brush the hot loaves generously with the herb butter immediately after removing them from the oven.
- Cool the bread slightly before you slice and serve it warm.
Notes
- Use warm water around 120°F to activate the yeast properly.
- If using olive oil instead of butter for the dough, the final texture will be slightly different.
- You can braid the dough for a decorative presentation.
- Prep Time: 20 minutes
- Cook Time: 20 minutes
- Category: Bread
- Method: Baking
- Cuisine: American