Okay, listen up, because I’m about to let you in on the absolute best secret for dinner this week. Forget that greasy cardboard you get from the local spot. We are making fried rice that actually tastes fresh, packs a serious protein punch, and gets done faster than delivery can even get to your door! Seriously, I used to think making good fried rice at home was impossible—like you needed a giant, roaring restaurant wok or something magical.
I’m a huge fan of meal prepping, but I hate when my prepped meals taste sad by Wednesday. That’s why I spent ages tweaking this recipe until it was perfect for busy people who still want amazing flavor. It’s all about using simple pantry staples and keeping the heat high, which is easier than you think.
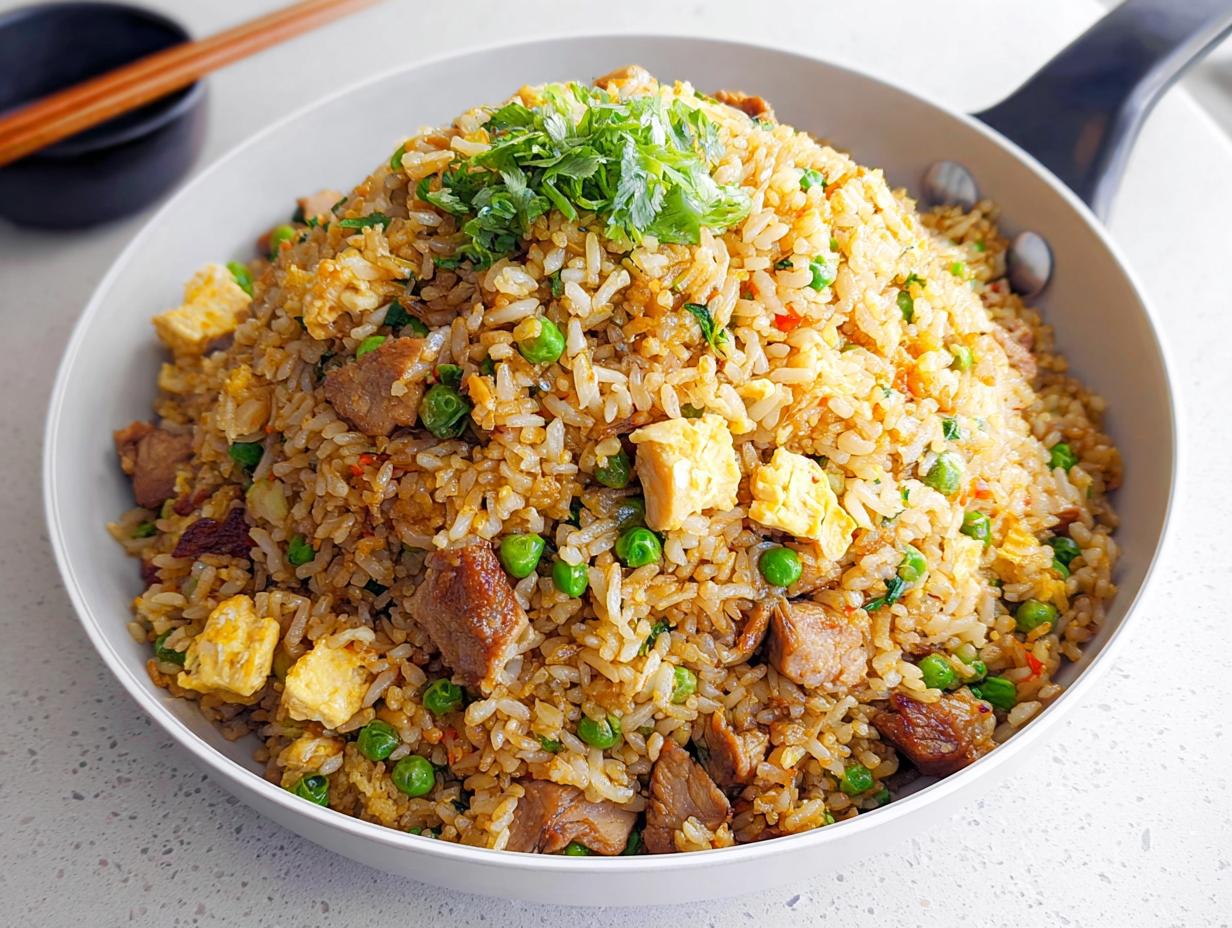
This isn’t just any rice dish; this is my go-to answer when anyone asks for the recipe for High Protein Chicken Fried Rice Better Than Takeout. It’s fast, it’s satisfying, and honestly, it’s so easy you’ll feel like a culinary genius when you pull it off in one pan. Trust me, once you try this, you won’t ever look at takeout menus the same way again!

Why You Will Make This High Protein Chicken Fried Rice Better Than Takeout
I know you have a million things going on, so I’m going to tell you exactly why this specific recipe—my amazing High Protein Chicken Fried Rice Better Than Takeout—is about to become your weeknight hero. It checks every single box, and I mean *every* box. You don’t need fancy ingredients or hours of fussing with complicated techniques.
- It’s lightning fast! Seriously, we are talking about 30 minutes total, start to finish.
- The protein is perfect for keeping you full right through dinner and beyond.
- Cleanup is a breeze; we only dirty one pan—my favorite part!
- And the flavor? It blows any delivery option out of the water, hands down.
Quick Prep and Cook Times
Don’t let the ingredient list scare you. Prep time is just 10 minutes because we aren’t doing anything crazy. The cooking itself takes maybe 20 minutes total. That means you can decide you want fried rice at 6:00 PM and be eating it by 6:30 PM. That’s faster than waiting for the phone to ring at the delivery place, I promise you that!
Ingredient Clarity for High Protein Chicken Fried Rice Better Than Takeout
Okay, let’s talk ingredients. I wanted this recipe to be something you could whip up on a Tuesday night when you thought you had nothing in the fridge. That’s why we rely on pantry staples combined with fresh chicken. The real magic trick, though, is the rice. You absolutely must use rice that’s been cooked and completely cooled—preferably from the day before. Warm rice turns mushy in the wok; we want those nice, separate grains! This is the secret to making this High Protein Chicken Fried Rice Better Than Takeout taste authentic.
Essential Components
I’ve laid out everything you need below. Don’t sweat the small stuff; most of these are just measuring spoons! I always get everything chopped and measured before the pan even hits the heat because stir-frying moves fast. Once you see the list, you’ll realize how simple it is to gather everything for this protein-packed meal.
For your convenience, I’ll put the full list in a table right after this, but first, let’s go over the prep work, because that’s where the real technique comes in! If you want more quick dinner ideas, check out my quick chicken stir fry recipe.
Ingredient Preparation Notes
A little prep goes a long way here. Make sure your chicken breast is cut into nice, small cubes—think bite-sized pieces so they cook evenly and quickly. Season that right away with the salt and pepper; don’t wait until it’s in the hot pan!
For the veggies, we need the onion and carrot diced small so they soften up quickly while the heat is high. The garlic needs to be minced—you want that intense flavor released fast! And those eggs? Just crack them into a small bowl and give them a quick whisk until the yolks and whites are just combined—we call that ‘lightly beaten.’ Remember, the rice needs to be cold. Seriously, if you use hot rice, I can’t guarantee the results!
Equipment Needed for Perfect High Protein Chicken Fried Rice Better Than Takeout
You don’t need a huge collection of fancy gear for this recipe, which is another reason I love it for quick weeknight meals. We are keeping it simple because we are aiming for that top-tier flavor in my High Protein Chicken Fried Rice Better Than Takeout without the fuss.
Here’s the short list of what you’ll need:
- A large skillet or, even better, a wok. It needs to hold everything without getting overcrowded!
- A good sharp knife and a sturdy cutting board for all that chopping.
- A few small bowls for separating your ingredients before you start cooking.

Step-by-Step Instructions for Making the Best High Protein Chicken Fried Rice Better Than Takeout
Alright, time to get cooking! This is where the magic happens, and remember, stir-frying means staying active. Keep things moving so nothing burns. We are aiming for that slightly smoky, toasted flavor that only high heat can give you. Follow these steps exactly for the absolute best High Protein Chicken Fried Rice Better Than Takeout experience.
Toasting the Rice
First things first, we need to toast the rice to get it ready. Put your largest skillet or wok over high heat—we mean *high*! Add just 1 tablespoon of that avocado oil. Once it shimmers, toss in your cold, cooked rice. You’re going to stir this constantly for about 3 to 4 minutes. Don’t stop stirring! You want those grains to get a little color and toast up beautifully. When it smells slightly nutty, scoop it all out immediately into a separate bowl. Don’t leave it in the pan, or it will burn while you cook the rest!
Cooking the Chicken
Now, drop the heat down just a tiny bit to medium-high. Add another tablespoon of oil to the pan. Toss in your cubed chicken breast, making sure you’ve seasoned it with the salt and pepper we talked about earlier. Let this cook for about 6 or 7 minutes. You need to stir it occasionally so it browns on all sides, but let it sit for a minute or two between stirs to get a nice crust. Once it’s cooked all the way through—no pink left—scoop it out and put it in the bowl with your toasted rice. We call that mise en place, but really, it just means keeping things organized!
Building the Flavor Base
Time for the veggies! Add that last tablespoon of oil to the skillet. Throw in the diced onion and the diced carrot. Cook these for 2 to 3 minutes. They should soften up nicely but still have a little bite left to them. Next, add your minced garlic and the frozen peas, along with those thinly sliced green onions. Stir them around for just 30 seconds. You’ll know it’s ready because the kitchen will suddenly smell amazing from the garlic waking up!
Combining and Finishing the Stir-Fry
Now we bring everything back together! Return both the toasted rice and the cooked chicken to the skillet with the veggies. Drizzle in the low-sodium soy sauce and the toasted sesame oil. Stir everything really well so every grain gets coated in that savory sauce. This is the point where you push all that yummy rice mixture up to the sides of the pan, creating a clear space right in the middle. Pour those lightly beaten eggs right into that empty space. Let them sit for about 15 seconds to start setting up, then gently scramble them with a spatula.
Once the eggs are mostly cooked, stir everything—chicken, rice, veggies, and eggs—all together until it’s perfectly mixed. Keep cooking for another 2 to 3 minutes until the eggs are totally set and everything is piping hot. I always check the chicken one last time just to be sure it hits that 165°F mark internally, just to be safe. Then, pull it off the heat and serve it right away. Enjoy that amazing flavor! If you want to see how I make honey mustard chicken salad, check out that recipe next.
Tips for Success When Making This Quick Chicken Fried Rice
I’ve made this recipe enough times to know exactly where people sometimes trip up, even though it’s supposed to be super straightforward. The biggest mistake people make when trying to achieve High Protein Chicken Fried Rice Better Than Takeout? They get nervous about the heat! You need that wok or skillet screaming hot for the toasting step, or the rice just steams instead of frying. Don’t be afraid of high heat; that’s where the flavor comes from.
Also, I can’t stress this enough: Cold rice is your best friend! If you try to use freshly cooked rice, you’ll end up with a sticky, gummy mess, and nobody wants that. That separation is key to the texture.
One last thing: Don’t overcrowd the pan. If you try to double this recipe in one go, everything will steam, and you’ll lose that fantastic sear on the chicken and rice. If you’re cooking for more than four people, do it in two batches. It takes an extra five minutes, but the results are worth it for that truly authentic texture! For more quick meal ideas, follow us on Facebook.
Storing and Reheating Your High Protein Chicken Fried Rice Better Than Takeout
The great thing about this power-packed dish is that it stores like a dream, making it ideal for your meal prep schedule. You absolutely must cool down your High Protein Chicken Fried Rice Better Than Takeout quickly after cooking. Don’t leave it sitting on the counter for hours; that’s just asking for trouble!
Once it’s cooled completely, portion it out into airtight containers. I find that individual containers are best so you can just grab one for lunch the next day. It keeps perfectly well in the refrigerator for up to three days. It tastes just as good, if not better, the next day once the flavors have really settled in! If you love meal prepping, you might also enjoy my guide on cottage cheese sweet potato beef bowl.
When it’s time to eat, reheating is super easy. Pop it back into a skillet over medium heat, stirring often, until it’s steaming hot again. If you use the microwave, stir it halfway through heating to avoid hot spots. Here’s a quick look at the storage details:
| Storage Detail | Guidance |
|---|---|
| Cooling | Refrigerate within 2 hours of cooking. |
| Container | Airtight containers only. |
| Refrigeration Time | Up to 3 days. |
Frequently Asked Questions About This Meal Prep Chicken Fried Rice
I always get questions whenever I post this recipe because everyone wants to know how to tweak it for their needs! It’s super versatile once you understand the basic technique. Here are some of the most common things people ask me about making this meal prep staple. You can also find more tips on our Pinterest page.
Q1. Can I make this vegetarian or vegan?
Absolutely! To make this vegetarian, just skip the chicken entirely and maybe add some extra firm tofu that you press and pan-fry until golden before you start the rice. For a vegan version, skip the chicken and use a plant-based protein, and swap the eggs for scrambled seasoned tofu or just use a few extra handfuls of frozen edamame for that extra protein boost!
Q2. My fried rice is too salty. How can I adjust the sodium?
That’s usually the soy sauce talking! Since I specified low-sodium soy sauce, you can easily cut that down even further if needed. My advice is to start with just 2 tablespoons, mix it in, and then taste before adding the final tablespoon. You can always add more saltiness later, but you can’t take it out easily!
Q3. What if I don’t have avocado oil? What’s the best substitute?
Avocado oil is great because it has a super high smoke point, which we need for that high heat. If you don’t have it, plain vegetable oil or canola oil works just fine in a pinch. Just make sure you watch it carefully when you’re toasting the rice to make sure it doesn’t smoke too aggressively! For more recipe insights, check out my writing on Medium.
Q4. Can I use brown rice instead of white rice?
You certainly can, but be warned: brown rice is denser and takes longer to cook through. If you use brown rice, you’ll need to cook it until it’s very tender before cooling it down. It will change the texture slightly, but it’s a great way to boost your fiber intake in this meal prep chicken fried rice!

Make 1 Amazing High Protein Chicken Fried Rice
- Total Time: 30 minutes
- Yield: 4 servings
- Diet: Omnivore
Description
This high protein chicken fried rice is quick, flavorful, and perfect for weeknight dinners or meal prep using simple pantry ingredients. It cooks in one pan and tastes better than takeout.
Ingredients
- 1 pound boneless skinless chicken breast cut into small cubes
- ¾ teaspoon kosher salt
- ½ teaspoon black pepper
- 3 cups cooked and cooled long grain white rice
- 3 tablespoons avocado oil divided
- 1 small yellow onion diced
- 1 medium carrot peeled and diced
- ¾ cup frozen peas
- 3 green onions thinly sliced
- 3 cloves garlic minced
- 3 tablespoons low sodium soy sauce
- 1 ½ teaspoons toasted sesame oil
- 3 large eggs lightly beaten
Instructions
- Heat 1 tablespoon avocado oil in a large skillet or wok over high heat. Add the rice and cook for 3 to 4 minutes, stirring often, until lightly toasted. Transfer rice to a bowl.
- Reduce heat to medium high and add 1 tablespoon avocado oil. Add the chicken, season with salt and pepper, and cook for 6 to 7 minutes, stirring occasionally, until cooked through. Remove chicken from the skillet.
- Add remaining 1 tablespoon avocado oil to the skillet. Add onion and carrot and cook for 2 to 3 minutes until softened.
- Stir in garlic, peas, and green onions and cook for 30 seconds until fragrant.
- Return rice and chicken to the skillet. Add soy sauce and sesame oil and stir to combine.
- Push the rice mixture to the sides of the skillet. Pour eggs into the center and scramble gently.
- Stir everything together and cook for 2 to 3 minutes until eggs are set and evenly distributed.
- Cook until chicken reaches an internal temperature of 165°F, then remove from heat and serve hot.
Notes
- Cool leftovers quickly and refrigerate in airtight containers for up to 3 days.
- Prep Time: 10 minutes
- Cook Time: 20 minutes
- Category: Main Dish
- Method: Stir-fry
- Cuisine: Asian