Oh my goodness, are you ready for the dessert that changed my life? Forget those huge, intimidating springform pans! We are diving into Easy Mini Cheesecakes with Almond Crust, and I promise you, if you can press a button on a muffin tin, you can nail these. Seriously, these little delights are my go-to when I need something impressive but don’t want to spend half the day wrestling with a giant cake.
I used to be terrified of cheesecake. Truly! Every time I tried, the middle cracked like the desert floor. It wasn’t until I stumbled upon this method for mini versions that I finally got brave enough to try. The almond flour crust is just genius—it’s naturally gluten-free, so my sister loves them, and it bakes up perfectly crisp in minutes. These little guys are so forgiving, which is why I call them my beginner’s secret weapon for any party! 
Essential Ingredients for Easy Mini Cheesecakes with Almond Crust
Okay, let’s talk about what makes these little treats work so well. The beauty of this recipe is that the ingredient list is short, but every single item has a job to do. We need to be specific, especially about the temperatures, or things can get messy fast. Trust me, a little prep here saves a huge headache later!
The crust is where we get that lovely nutty background flavor, and the filling is pure, unadulterated creamy bliss. Don’t try to substitute the cream cheese with light versions here; it just won’t set right. For the best results, read my notes below on preparation—it’s all about the details!
| Component | Ingredient | Quantity |
|---|---|---|
| Crust | Almond Flour | 1 1/4 cups |
| Crust | Granulated Sugar | 1/4 cup |
| Crust | Lemon Zest | 1 tablespoon |
| Crust | Unsalted Butter (Melted) | 3 tablespoons |
| Filling | Cream Cheese (Softened) | 16 ounces |
| Filling | Granulated Sugar | 1/2 cup |
| Filling | Large Eggs | 2 |
Crust Components Clarity
For the crust, we start with almond flour—make sure it’s finely ground almond flour, not coarse almond meal, or it won’t pack down properly. The lemon zest is non-negotiable; it brightens everything up and cuts through the richness of the cream cheese. And the butter? It must be fully melted and then cooled slightly. If it’s too hot, it will start cooking the almond flour before it even hits the oven!
Creamy Filling Requirements
The most important thing for the filling is the cream cheese. It absolutely has to be fully softened to room temperature. If you see any hard lumps when you start mixing, stop right there and let it sit longer! Lumpy cream cheese equals a lumpy cheesecake, even with a good mixer. Also, the eggs must be room temperature, too. Cold eggs shock the batter and can cause it to curdle or crack when baking. Two large eggs are needed, and whisk them in gently!
Preparing Your Equipment List
You don’t need fancy gadgets for these mini cheesecakes, thankfully. We are keeping it simple! The star piece of equipment here is your standard 12-cup muffin tin. Make sure it’s clean and ready to go.
You will absolutely need paper liners—these are crucial for easy removal later, so don’t skip them! Grab your mixing bowls, a whisk or electric mixer, and a small rubber spatula for scraping down the sides. A measuring cup for dividing the batter is also handy!
Step-by-Step Instructions for Easy Mini Cheesecakes with Almond Crust
Alright, let’s get baking! This is where the magic happens, and honestly, it goes faster than you think. We’re going to work in three phases: the crust, the filling, and then the careful cooling process that keeps everything looking pristine. Remember, we are aiming for 350°F for the oven temperature, so get that preheated now!
Get your 12-cup muffin pan lined with those paper cups. Don’t skimp on lining them well; it makes the final step so much easier. Once the oven is hot, we move straight to the crust mixture we prepared earlier.
Forming and Pre-Baking the Almond Crust
Take your buttery almond flour mix and divide it evenly among the 12 liners. Now, this part requires a bit of elbow grease—you need to press it down firmly! I use the bottom of a small measuring cup or even just my knuckles to pack it tight. A firm crust prevents that sandy texture at the bottom of your cheesecake. Once packed, pop that pan into the 350°F oven for exactly 10 minutes. We want it lightly golden, not brown!
When those 10 minutes are up, pull them out. They’ll look a little fragile, but that’s okay. Let them cool right there in the pan for about 10 minutes while you whip up the filling. This little cool-down period stops the hot crust from scrambling the cold batter we’re about to pour on top.
Creating the Smooth Cheesecake Batter
Time for the creamy part! Grab your softened cream cheese and the sugar. Beat them together first—and I mean *beat* them—until they are completely smooth. If you see any little bits of cream cheese clinging to the side, stop and scrape them down. Once it looks like fluffy frosting, add the vanilla and salt. Mix just until they disappear.
Now, the eggs. This is where most people rush, so slow down! Add them one at a time on the *lowest* speed your mixer has. You only want to mix until the yellow yolk just disappears into the white batter. Overmixing the eggs incorporates too much air, and that air is the number one cause of cracking later on. Seriously, low and slow wins this race!
Spoon the batter into your slightly cooled crusts, filling each one only about two-thirds full. They puff up a little, so we don’t want them overflowing.
Final Bake and Critical Cooling Process
Back into the 350°F oven they go for a short time—usually just 10 to 12 minutes. You’ll know they are done when the edges look set, but the very center still has a slight, tiny jiggle, like very soft gelatin. If they look completely firm, they’re already overdone! Pull them out immediately.
This next step is the secret weapon against cracks: the slow cool-down. Turn the oven off completely, but leave the cheesecakes inside. Prop the oven door open just a crack—I usually wedge a wooden spoon in there. Let them sit in that residual warmth for a full hour. This gradual temperature drop prevents the sudden shrinkage that causes fissures. After that hour, you can move them to a wire rack to finish cooling, and then into the fridge for at least two hours. Don’t forget the fresh berries when you serve them! 
| Storage Method | Duration | Notes |
|---|---|---|
| Refrigerated (Covered) | Up to 4 days | Great for quick snacks. |
| Frozen | Longer term | Thaw overnight in the fridge. |
Tips for Perfect Easy Mini Cheesecakes with Almond Crust
I know I sound like a broken record, but the difference between a perfect mini cheesecake and a cracked mess is often just a few seconds of rushing. My biggest piece of earned wisdom here is about those eggs again. When you incorporate them, treat them gently! If you beat them on high speed, you introduce air bubbles that expand too fast in the heat, guaranteeing a collapse or a crack when they cool down.
Another thing I learned the hard way: don’t tap the pan hard on the counter after filling them! You might be tempted to pop any surface bubbles, but tapping too hard can actually deflate the batter you just worked so hard to keep smooth. If you see a big bubble, just gently poke it with a toothpick. That’s your expert move right there.
Also, never skip that hour-long cool-down inside the turned-off oven. That slow transition is what keeps the texture perfectly velvety. If you rush them straight from 350 degrees to the cold counter, they shrink too fast, and cracks appear. Patience here pays off massively in presentation! If you want to see more of my baking secrets, check out my Facebook page.
Ingredient Notes and Simple Substitutions
We talked a lot about getting the right temperature, but let’s quickly cover why those room temperature components are so vital. Cream cheese and eggs need to be soft so they emulsify beautifully with the sugar and fat. If they’re cold, you end up fighting lumps, and forcing the mixer to work harder introduces unwanted air.
If you absolutely run out of almond flour, you could try finely ground pecans, but the flavor profile changes quite a bit, and the texture might be slightly oilier. For the zest, if you don’t have a lemon, a tiny bit of orange zest works in a pinch, but it shifts the flavor profile away from that bright, clean taste I love. For more baking tips, feel free to browse my Medium articles.
And finally, the butter! Please, please use real unsalted butter for the crust. Margarine has too much water content, and it just won’t bind the flour crumbs correctly when it cools down.
Frequently Asked Questions about Easy Mini Cheesecakes with Almond Crust
I get so many questions about these little beauties, mostly because they seem so simple, but people still worry about messing up cheesecake! Don’t sweat it; these are very forgiving. Here are the things I hear most often from folks baking them for the first time.
If you follow the cooling instructions exactly, you’ll be fine. But I know sometimes life gets in the way, so let’s cover the big ones! If you’re looking for more quick dessert ideas, you can always check out my vanilla frozen custard recipe.
Can I make Easy Mini Cheesecakes with Almond Crust ahead of time?
Oh, absolutely! In fact, I think they taste even better the next day. These are the ultimate make ahead dessert. You can bake them completely, chill them thoroughly—at least two hours, but overnight is better—and keep them covered in the fridge for up to four days. They are perfect party food because you make them the day before, and they are ready to grab and serve straight from the cold!
How do I stop my mini cheesecakes from cracking?
This is the million-dollar question! The two biggest culprits are overmixing the eggs and shocking the temperature. Make sure you mix those eggs on the lowest speed just until incorporated—no fluffing them up! But the real insurance policy is the cooling process we went over. After turning the oven off, leave them sitting inside with the door cracked open for a full hour. That slow descent in temperature lets the structure settle perfectly without shrinking too fast. For more visual inspiration, see my Pinterest boards.
Serving Suggestions for Your Easy Mini Cheesecakes with Almond Crust
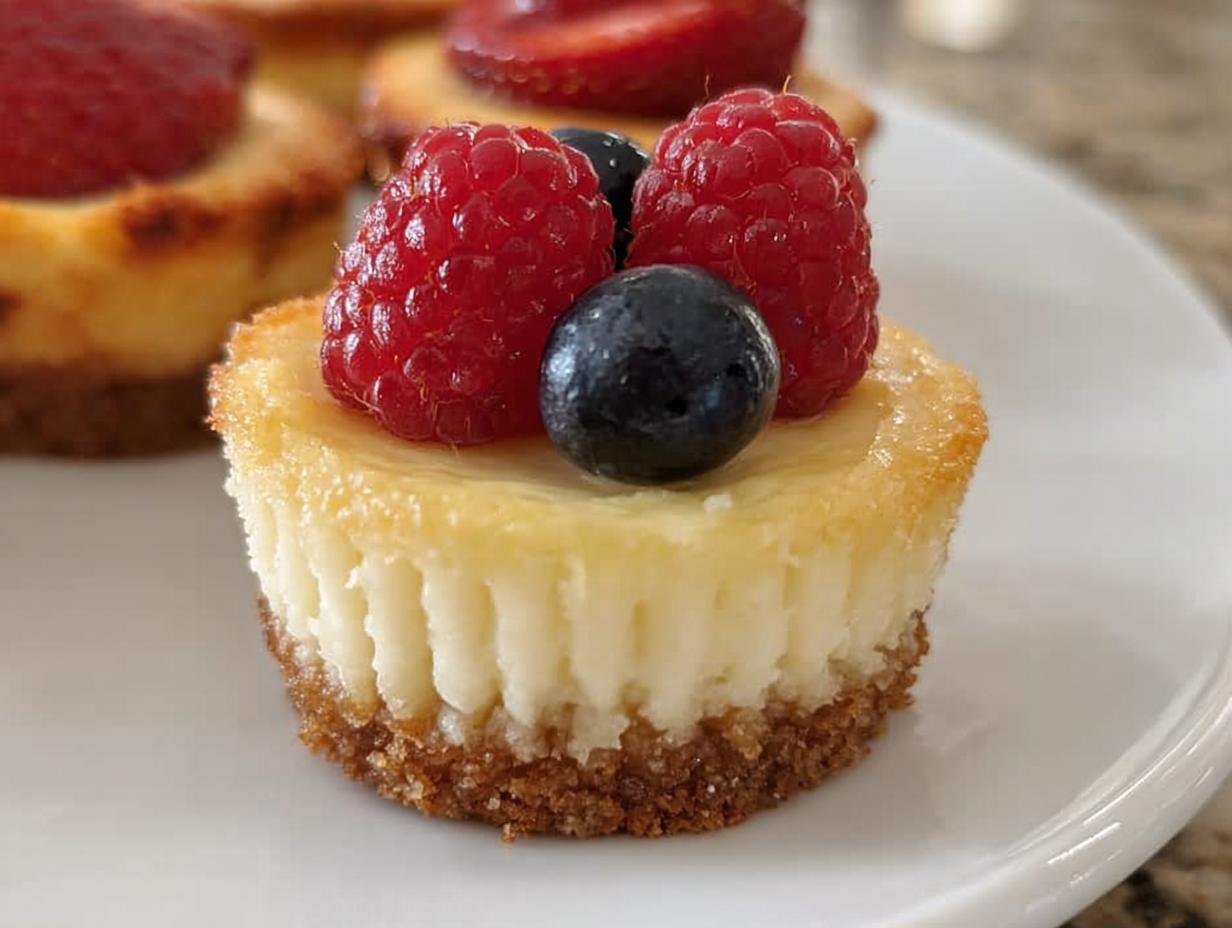
Once these little gems are perfectly chilled, they are ready to shine! My favorite way to present them is exactly as the recipe suggests: topped with a vibrant pile of fresh berries. A mix of raspberries and blueberries looks stunning against that pale, creamy white.
If you want to get a little fancy for a special gathering, try dusting the tops lightly with powdered sugar right before serving. It gives them a beautiful, snowy look. For pairing, they go wonderfully with a strong cup of coffee or a crisp, chilled glass of prosecco. Honestly though, they are so rich and satisfying, they don’t really need anything extra. Just pull them out of the fridge and watch them disappear!
Estimated Nutritional Data for Easy Mini Cheesecakes with Almond Crust
I’m not a nutritionist, so please take these numbers as a rough guide—baking is more about love than exact science, right? But based on the ingredients we used, especially with that almond flour crust, these little treats aren’t too heavy! Since we used standard amounts of sugar and cream cheese, we can get a pretty good idea of what you’re eating.
This estimate is calculated based on yielding exactly 12 mini cheesecakes. If you sneak a taste during the mixing process, that count might go up slightly! They are a wonderful treat because the portion size is already built in!
| Nutrient | Estimated Amount |
|---|---|
| Calories | 250 |
| Total Fat | 14 g |
| Carbohydrates | 26 g |
| Protein | 5 g |

Amazing 12 Easy Mini Cheesecakes with Almond Crust
- Total Time: 2 hours 42 minutes (includes 2 hours chilling)
- Yield: 12 mini cheesecakes
- Diet: Vegetarian
Description
These easy mini cheesecakes feature a rich, creamy filling atop a simple, lightly sweet almond crust. They are perfect for portion control and entertaining.
Ingredients
- Crust: 1 1/4 cups almond flour
- Crust: 1/4 cup granulated sugar
- Crust: Pinch of salt
- Crust: 1 tablespoon lemon zest
- Crust: 3 tablespoons unsalted butter melted and cooled
- Filling: 16 ounces cream cheese softened
- Filling: 1/2 cup granulated sugar
- Filling: 1 teaspoon vanilla extract
- Filling: Pinch of salt
- Filling: 2 large eggs room temperature
- Topping: Fresh berries
Instructions
- Preheat your oven to 350°F. Line a 12 cup muffin pan with paper liners.
- In a bowl, mix the almond flour, sugar, salt, and lemon zest. Stir in the melted butter until fully combined.
- Divide the crust mixture evenly among the liners and press firmly into the bottoms.
- Bake the crusts for 10 minutes until lightly golden. Remove and cool for 10 minutes.
- Beat the cream cheese and sugar until smooth and creamy. Add vanilla and salt and mix just until combined.
- Beat in the eggs one at a time on low speed until just incorporated.
- Fill each crust about two thirds full with cheesecake batter.
- Bake for 10 to 12 minutes until the centers are just set and do not jiggle when the pan is gently tapped.
- Turn off the oven, open the door slightly, and let the cheesecakes cool in the oven for 1 hour.
- Chill in the refrigerator for at least 2 hours before serving. Top with berries if desired.
Notes
- Store covered in the refrigerator for up to 4 days.
- You can freeze these for longer storage.
- Prep Time: 20 minutes
- Cook Time: 22 minutes
- Category: Dessert
- Method: Baking
- Cuisine: American