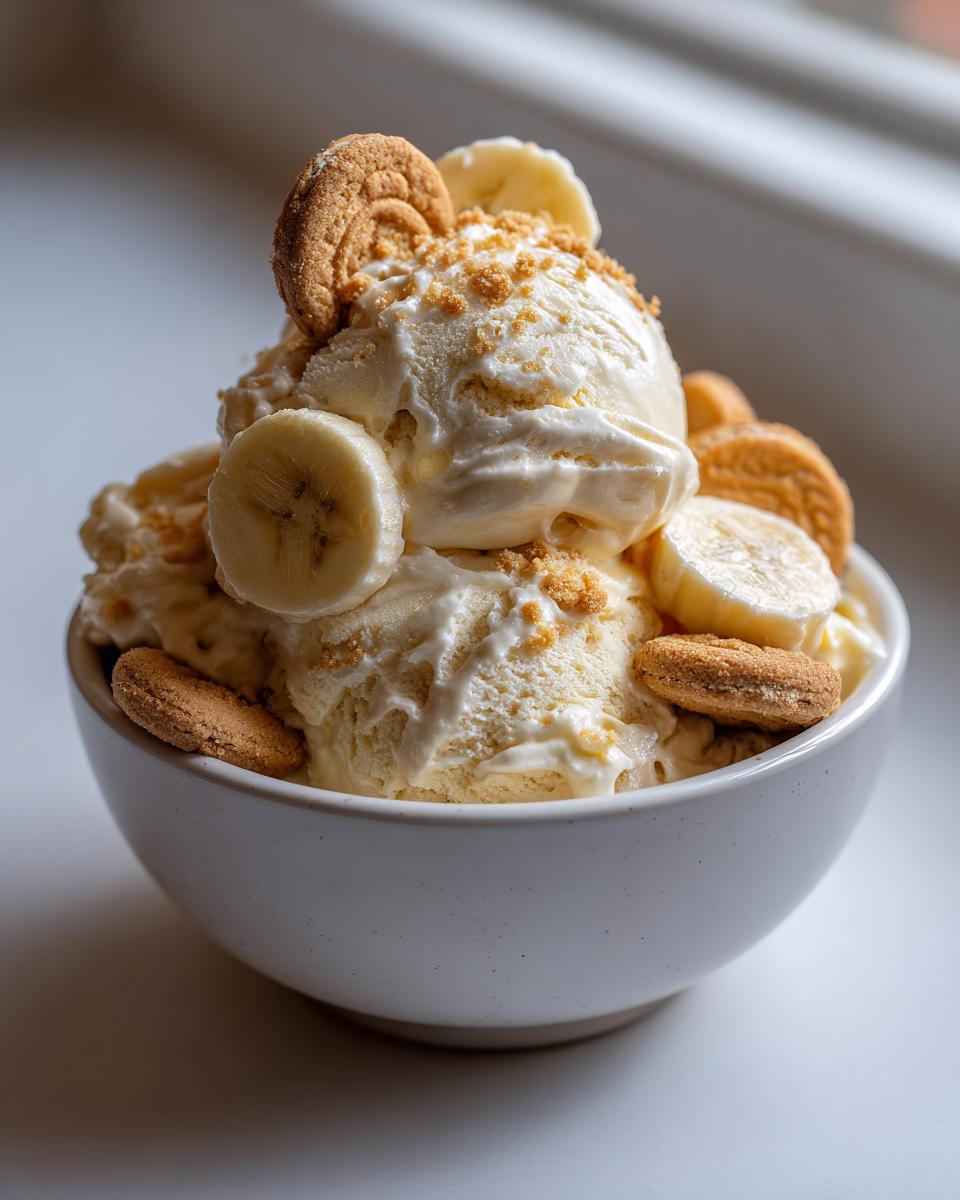
Oh my goodness, you HAVE to try this Banana Pudding Ice Cream! I was messing around in the kitchen one day, totally craving that classic banana pudding flavor but wanting something super easy, and this Banana Pudding Ice Cream No Churn Easy recipe was born. It’s the perfect blend of creamy, sweet banana and those yummy vanilla wafer cookies, all without needing an ice cream maker. Seriously, it’s a game-changer for homemade treats!

What I love most is how unbelievably simple it is. No complicated steps, just a few ingredients and a little bit of folding. It’s seriously one of the best no-churn recipes I’ve whipped up, and my family devours it every single time. Get ready for the creamiest, dreamiest ice cream you’ve ever made at home!
Why You’ll Love This Banana Pudding Ice Cream No Churn Easy Recipe
- It’s ridiculously easy – no ice cream maker needed!
- Tastes just like classic banana pudding, but frozen!
- Super creamy texture that melts in your mouth.
- Uses simple, pantry-staple ingredients.
- Perfect for a quick, crowd-pleasing dessert.
Gather Your Ingredients for Easy Banana Pudding Ice Cream No Churn
Okay, so for this simple but totally delicious ice cream, you’re going to need just a few things. Don’t worry, they’re all super easy to find!
- 2 cups cold heavy whipping cream (this is key for that fluffy texture!)
- 1 can (14 ounces) sweetened condensed milk (hello, sweetness!)
- 2 ripe bananas, mashed smooth (the browner, the better!)
- 1 tablespoon lemon juice (just a splash to keep it fresh)
- 1 teaspoon vanilla flavoring (good old vanilla!)
- 1/2 teaspoon salt (balances out all that sweetness)
- 1 cup vanilla wafer cookies, broken into chunks (for that classic crunch)
- 1/2 cup sliced bananas (extra banana goodness!)
Simple Steps for Your No Churn Easy Banana Pudding Ice Cream
Okay, let’s get this amazing ice cream going! It’s honestly so straightforward, you’ll be shocked it tastes this good. I like to get everything prepped before I start mixing, just so things run smoothly. You know how it is when you’re in the zone!
Step 1: First things first, grab a bowl and mash those ripe bananas until they’re super smooth. I mean, really get in there! Then, stir in the lemon juice, vanilla flavoring, and that little pinch of salt. This is where the base flavor starts to build, and the lemon juice helps keep everything bright and keeps the bananas from getting too brown.
Step 2: Pour the sweetened condensed milk into your banana mixture. Give it a good stir until it’s all beautifully combined. You want it to be a nice, smooth, homogenous blend. It’s going to start looking thick and luscious already!
Step 3: Now for the magic that makes it ice cream! In a completely separate bowl – and make sure it’s cold, along with your mixer attachments! – whip that cold heavy cream. You’re going to beat it on medium-high speed for about 3 to 4 minutes. Keep going until you see stiff peaks forming. That means when you lift the beaters, the cream stands straight up. Don’t overdo it though; we don’t want butter!
Step 4: This is where the folding comes in. Gently, and I mean *gently*, fold about a third of your whipped cream into the banana and condensed milk mixture. Then, add the rest of the whipped cream and fold it in batches. You want to keep as much air in there as possible, so use a spatula and a light hand. The goal is a light, airy, creamy base, not a deflated mess!
Step 5: Time for those delicious mix-ins! Gently fold in half of your broken vanilla wafer cookies and half of your sliced bananas into the ice cream base. Get them distributed evenly, but again, be gentle. We’re building layers of flavor and texture here.
Step 6: Grab a loaf pan, a freezer-safe container, whatever you’ve got that holds about 1.5 to 2 quarts. Spoon about half of your ice cream mixture into the pan. Smooth it out a little bit. Then, sprinkle some of your remaining vanilla wafer cookies over the top. It’s like a little surprise waiting to happen!
Step 7: Now, add the rest of your ice cream mixture on top of those cookies. Gently spread it out to the edges. Finish it off with the rest of those yummy cookie chunks and the remaining banana slices. It should look pretty and inviting, ready for its chill time.

Step 8: Cover that pan *really* well. I usually use plastic wrap pressed directly onto the surface of the ice cream to prevent ice crystals, then a layer of foil or the pan’s lid. Pop it in the freezer for at least 6 hours, but honestly, overnight is even better. You want it completely firm and scoopable.
Step 9: Before you serve, let it sit on the counter for about 5 to 10 minutes. This little bit of softening time makes all the difference for scooping! If you try to scoop it right out of the freezer, it’s going to be rock solid. A little patience goes a long way for that perfect scoop. If you’re looking for more light fruit desserts, you might enjoy these light summer desserts with fresh fruit, or even some banana oat breakfast cookies!
What to Serve with Your Banana Pudding Ice Cream No Churn Easy
This ice cream is pretty much a complete dessert on its own, but if you want to jazz things up a bit, here are a few ideas:
Fresh Berries: A little bowl of fresh strawberries or raspberries adds a lovely tartness that cuts through the sweetness perfectly. Think of it like giving your ice cream a little fruity hug! Some strawberry yogurt bark would be amazing too!
Whipped Cream: Because why not make it even more decadent? A big dollop of homemade whipped cream is never a bad idea, especially with this creamy dream.
A Sprinkle of Toasted Coconut: This adds a slightly chewy texture and a subtle tropical vibe that pairs wonderfully with the banana. It’s like a mini vacation for your taste buds.
A Light, Fruity Salad: Honestly, a simple peach caprese salad with mint would be unexpectedly delicious, offering a refreshing contrast to the rich ice cream.
Storing and Re-freezing Your Easy No Churn Banana Pudding Ice Cream
So, what if you somehow have leftovers? (I mean, who am I kidding, usually I eat it all in one sitting, but let’s pretend!). The best way to keep this amazing ice cream is by storing it in an airtight container in the freezer. I like to press a piece of parchment paper or plastic wrap right onto the surface of the ice cream before I put the lid on. This really helps prevent those pesky ice crystals from forming. It should stay good in the freezer for about 1-2 weeks, though honestly, the texture is best within the first week. It’s perfect for making ahead and stocking up your freezer for those random sweet cravings!
This recipe is also fantastic for meal prep, just like how we handle no-bake cheesecake. You can make a big batch on the weekend and have it ready for the whole week. Just scoop and enjoy whenever the mood strikes! Since it’s no-churn, it refreezes beautifully if you happen to have any stragglers left, though you might want to give it a good stir if it’s been in there for a while.
Frequently Asked Questions about Banana Pudding Ice Cream No Churn Easy
Got questions about this dreamy ice cream? I’ve got you covered!
What makes this ice cream “no churn”?
The magic is in the combination of sweetened condensed milk and whipped heavy cream! The condensed milk provides the sweetness and helps keep the ice cream from freezing solid like an ice cube, while the whipped cream incorporates air, giving it that light and fluffy texture you’d normally get from churning. It’s honestly foolproof!
Can I use different cookies instead of vanilla wafers?
Absolutely! While vanilla wafers are classic for banana pudding flavor, feel free to get creative. Graham crackers would add a nice honey note, or even some crushed shortbread cookies would be delicious. Just make sure you break them into chunks so you get lovely little bites throughout your ice cream. For another awesome no-bake idea, check out this no-bake mango cheesecake!
How can I make this vegan or dairy-free?
That’s a great question! To make this plant-based, you’d need to swap the heavy cream for a good quality full-fat coconut cream (make sure it’s chilled and just use the solid part) and use a dairy-free sweetened condensed milk alternative. You’d still mash your bananas and add those yummy cookie chunks. It’s a fun challenge, and you might end up with something delicious, like this easy strawberry ice cream!
Enjoy Your Homemade Banana Pudding Ice Cream!
I really hope you get a chance to whip up this easy Banana Pudding Ice Cream soon! It’s such a treat, and I’d love to hear what you think. Drop a comment below or leave a rating if you give it a try – your feedback is so helpful for other cooks! For another sweet treat idea, check out these strawberry cheesecake jars!
Print
No Churn Banana Pudding Ice Cream
- Total Time: 15 min
- Yield: 6 servings
- Diet: Vegetarian
Description
Easy no churn banana pudding ice cream with creamy texture, fresh bananas, and cookie layers. A homemade frozen treat with classic flavor.
Ingredients
- 2 cups cold heavy whipping cream
- 1 can (14 ounces) sweetened condensed milk
- 2 ripe bananas, mashed smooth
- 1 tablespoon lemon juice
- 1 teaspoon vanilla flavoring
- 1/2 teaspoon salt
- 1 cup vanilla wafer cookies, broken into chunks
- 1/2 cup sliced bananas
Instructions
- In a large bowl, mash the ripe bananas until smooth. Mix in lemon juice, vanilla flavoring, and salt.
- Add the sweetened condensed milk to the banana mixture and stir until fully combined.
- In a separate bowl, whip the cold heavy cream using a hand mixer on medium-high speed for 3 to 4 minutes until stiff peaks form.
- Gently fold the whipped cream into the banana mixture in batches, keeping the mixture light and airy.
- Fold in half of the vanilla wafer cookies and sliced bananas.
- Pour half of the mixture into a loaf pan. Sprinkle with some of the remaining cookies.
- Add the remaining ice cream mixture on top and finish with the rest of the cookies and banana slices.
- Cover tightly and freeze for at least 6 hours or until firm.
- Let sit at room temperature for 5 minutes before scooping and serving.
Notes
- Use very ripe bananas with brown spots for natural sweetness and flavor.
- Prep Time: 15 min
- Cook Time: 0 min
- Category: Dessert
- Method: Freezing
- Cuisine: American