If you’ve ever stared down a toaster slot, felt that little lever stick, and ended up with bread that’s either pale and floppy or charcoal black, I get it. Seriously, I used to burn toast constantly! That’s why I developed this method for simple bread toast. It’s my go-to for beginners because it takes all the guesswork out of the equation.
Forget those complicated timers. We’re taking it to the stovetop. The beauty of using a skillet is that you have complete visual control. You can see the moment that butter starts to sizzle and watch the edges turn that perfect, deep golden brown. This technique guarantees that beautiful crisp exterior while keeping the inside soft—the ideal texture, trust me.

When I first started cooking for myself, making toast felt like a huge accomplishment. If you can master this stovetop method for simple bread toast, you can conquer any breakfast! It only takes about five minutes, and the result is miles above anything that comes out of a standard slot toaster.
Essential Ingredients for Simple Bread Toast
You don’t need fancy items for amazing toast—we are sticking to the real basics here. Good simple bread toast relies on having the right proportions of just three things you probably already have sitting on your counter. Forget specialty ingredients; we are going for classic comfort!
When you gather your supplies, be specific! Don’t just grab any bread or butter. The quality of these simple staples really shows through when you cook it this way.
Clarifying Your Simple Bread Toast Components
For the best texture—that slight crunch without being rock-hard—the thickness of your bread matters a lot. Aim for slices that are about a half-inch thick. Anything too thin burns before the center warms up, and anything too thick won’t heat through properly on medium-low heat.
And the butter! Don’t skimp here, but don’t drown the bread either. Two tablespoons spread across the pan is just right for four slices. Here’s exactly what you’ll need:
- 4 slices sandwich bread about 1/2 inch thick
- 2 tablespoons unsalted butter
- 1/8 teaspoon salt
Equipment Needed for Your Simple Bread Toast
Honestly, you only need a couple of things for this classic simple bread toast. We’re keeping it minimal because the flavor comes from the butter and the heat, not a bunch of fancy gadgets. If you have a pan and a way to flip the bread, you’re good to go!
Choosing the Right Skillet for Stovetop Toast
The skillet is your most important tool here. You absolutely need a good nonstick surface. If your pan sticks, the beautiful golden crust you’re working for will tear right off when you try to flip it. Make sure your skillet is big enough so all four slices fit in a single layer—no crowding allowed! Crowding traps steam, and steamed bread is soggy toast, which we definitely don’t want.
Step-by-Step Instructions for Perfect Simple Bread Toast
Now for the fun part! Watching the transformation happen is what makes this simple bread toast method so satisfying. I’m going to walk you through the timing because that’s where most people rush things. Remember, we are aiming for golden, not burnt, so patience is your secret spice here.
We are working with four slices, so make sure your skillet is large enough to hold them all without them touching. If they overlap, they steam instead of toast, and that ruins the crisp edge we are chasing.
Setting Up the Heat for Your Simple Bread Toast
First things first: turn your burner to medium-low heat. I cannot stress this enough. If you start too high, the outside will burn before the center warms up, leaving you with a cold, hard center. Don’t do it!
Next, toss in your two tablespoons of butter. Let it melt slowly. You want it to coat the bottom of the pan completely and start to gently sizzle—that’s the sound of success! Swirl the pan around so every bit of the nonstick surface is slick with fat. This butter is what gives your toast that rich flavor that a standard toaster just can’t replicate.
Achieving Golden Perfection on Both Sides
Once the butter is melted and happy, lay your four slices of bread carefully into the skillet. Spread them out so they have room to breathe. Now, just watch them. For the first side, it usually takes about two to three minutes. Don’t touch them! Peek underneath once or twice if you must, but resist the urge to poke them.
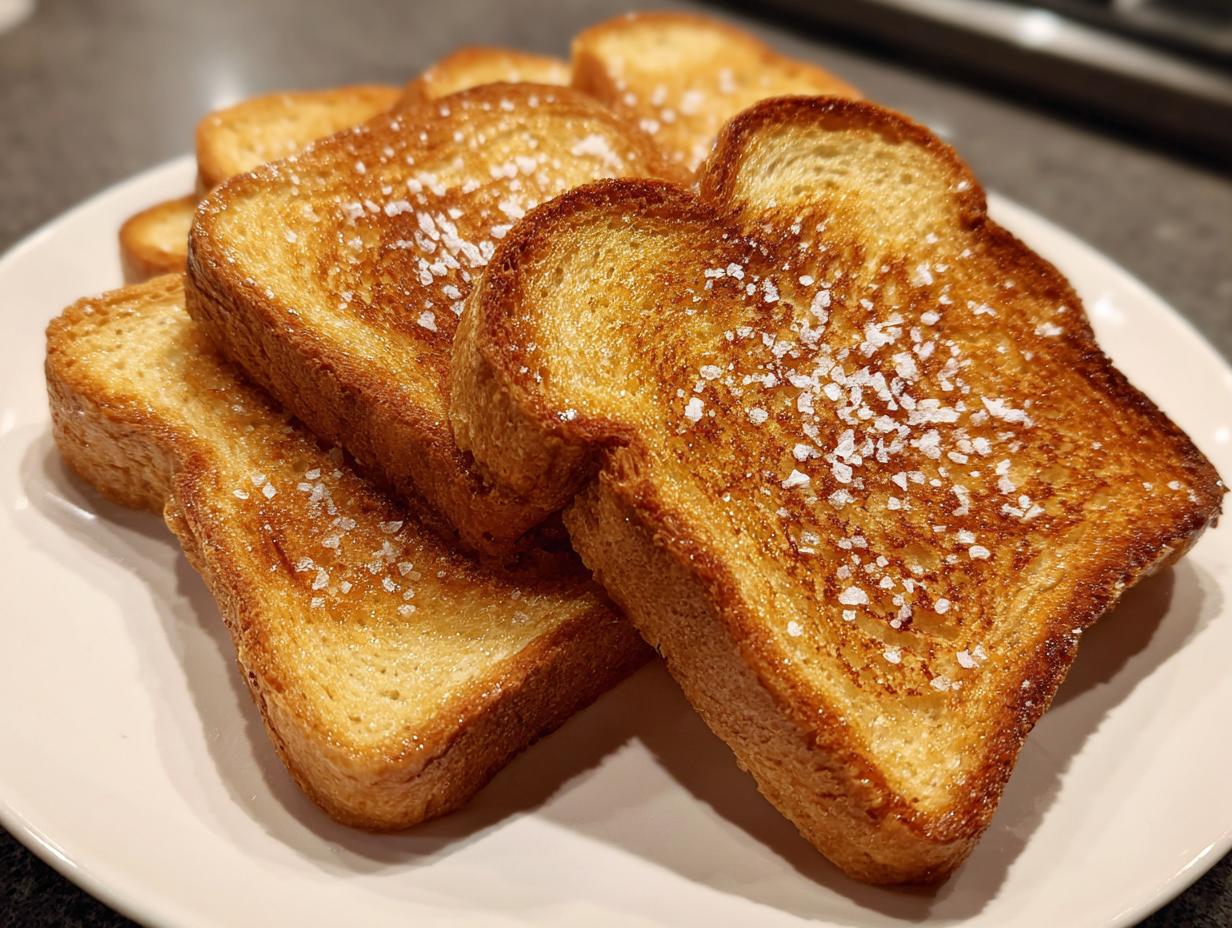
When the bottom looks deeply golden brown—like a perfect caramel color—it’s time to flip. Use a sturdy spatula for this. Once flipped, the second side cooks faster, usually just one to two minutes. This side doesn’t need as long because the pan is already hot. As soon as that second side hits your desired level of crispness, sprinkle them lightly with salt right there in the pan. Then, pull them immediately out of the skillet and onto your plate. Serve them hot!

Why You Will Love This Simple Bread Toast Method
Honestly, ditching the toaster for this stovetop method changes everything. It’s foolproof, and the results are just spectacular. I want everyone to try this because it completely changes the game for a quick morning meal. You’ll never go back!
- Ultimate Control: You physically see the browning process, eliminating the fear of burning your simple bread toast.
- Superior Texture: The butter creates an irresistible crisp edge and a wonderfully warm, soft center.
- Beginner Friendly: If you can melt butter, you can master this technique in under seven minutes flat.
Tips for Truly Great Simple Bread Toast
Mastering this simple bread toast comes down to respecting the heat and treating your ingredients right. It seems obvious, but paying attention to the small details makes a huge difference between okay toast and truly fantastic toast. Don’t rush the butter melting step; that fat layer is your protective shield against burning!
Also, try to use day-old bread if you have it. Super fresh, squishy bread can sometimes get too soggy in the butter before it crisps up. Slightly stale bread holds its structure better under the heat, giving you that perfect sturdy base for whatever you plan to top it with. If you are interested in other bread techniques, check out our guide on 18 Best Bread Recipes.
Adjusting Crispness in Your Simple Bread Toast
This is where you customize your experience! The beauty of the skillet method is that you control the crunch factor completely. If you love that deep, hard crunch—the kind that shatters slightly when you bite it—just leave the bread on the first side for closer to four minutes instead of three.
For the second side, if you want maximum crispness, let it cook for that full two minutes. If you prefer your simple bread toast warm and soft in the middle with just a whisper of crispness on the edges, pull it off the heat right around the one-minute mark on the second side. Always taste test your first slice until you nail the timing that works for your personal crunch level! You might also enjoy our recipe for Blueberry Lemon Sourdough Bread.
Ingredient Notes and Substitutions for Simple Bread Toast
While my recipe calls for unsalted butter, which I strongly prefer for controlling the final saltiness of your simple bread toast, you certainly have options if you’re missing it. You can absolutely swap the butter out for an equal amount of oil—I find a neutral one like vegetable oil works best so it doesn’t compete with the bread flavor.
If you use margarine, just be aware that it has a higher water content than real butter, so your toast might brown slightly slower or absorb a tiny bit more moisture. It still works, but the flavor isn’t quite as rich!
As for the bread, while standard sandwich bread is the baseline, you can experiment! Thicker-cut sourdough or brioche are amazing, but watch the heat closely. Thicker bread needs that medium-low setting for a longer time—maybe an extra minute per side—to warm through without burning the outside. Just remember, the thinner the bread, the quicker it cooks! For a savory twist, consider our Caramelized Onion Grilled Cheese Recipe.
Serving Suggestions for Your Simple Bread Toast
Once you have that perfect piece of hot, buttery, golden simple bread toast, what do you put on it? Honestly, sometimes I just eat it plain standing over the sink—it’s that good! But if you’re feeling fancy, we keep the toppings simple too.
Classic pairings are unbeatable. A thin smear of good quality jam or marmalade is divine. If you prefer savory, a soft scrambled egg placed right on top works beautifully. And, of course, you can never go wrong with a light drizzle of honey right after it comes out of the pan. Enjoy that warmth!
Storing and Reheating Leftover Simple Bread Toast
Look, the absolute best way to enjoy this simple bread toast is straight out of the skillet, piping hot and buttery. But hey, sometimes life gets in the way, and you have leftovers. If you plan on saving any, you have to handle it carefully because toast really hates moisture retention!
If you must store it, do NOT put it in a sealed plastic container. That traps steam, and you’ll wake up to soft, sad bread. Instead, let the toast cool completely first. Once it’s totally cool, you want to store it in a paper bag or wrap it loosely in a clean kitchen towel. This allows any residual moisture to escape while keeping the toast from going stale too fast.
Reheating is key to bringing back some of that original crispness. You can use the toaster again, but honestly, the skillet method works even better for reviving it. Just use a tiny dab of butter or even skip the fat entirely if you’re worried about burning.
| Method | Time | Result Tip |
|---|---|---|
| Skillet Reheat | 1 minute per side | Use medium heat and no extra butter for best crispness. |
| Oven Reheat | 3-5 minutes | Place directly on the rack at 350°F (175°C). |
Frequently Asked Questions About Simple Bread Toast
I get so many questions about this recipe, which just proves how many of us struggle with basic breakfast! Don’t worry, making simple bread toast shouldn’t require a culinary degree. Here are the things I hear most often when people are trying this stovetop method for the first time.
Can I Make Simple Bread Toast Healthier
You absolutely can tweak this recipe to fit your needs! If you’re looking to cut down on fat, you can substitute the butter with a light spray of olive oil or even just use half the amount of butter recommended. The flavor won’t be quite as rich, but it still toasts up nicely. Also, swapping out standard white bread for whole wheat or a whole-grain loaf is an easy way to boost your fiber content immediately.
What is the Best Bread for Simple Bread Toast
For this specific recipe—the stovetop method—I really stick to standard sandwich bread that is maybe half an inch thick. It’s the perfect vehicle for absorbing just enough butter without getting greasy. While sourdough and brioche are delicious, they often have different moisture levels and densities, which means you have to adjust the cooking time significantly to avoid burning the outside. Stick to the basics for your first few tries!
Q3. Why is my toast soggy instead of crisp?
This almost always means your heat was too high or you crowded the pan! If the heat is too high, the bread steams in the melting butter before it has a chance to crisp up. Make sure your skillet is large enough so the slices aren’t touching. Medium-low heat is the key to achieving that perfect snap!
Q4. Can I use salted butter instead of unsalted?
Sure you can, but you have to skip the extra salt sprinkled on top! My recipe calls for unsalted butter so I can control the sodium exactly, but if you only have salted butter on hand, just leave out the 1/8 teaspoon of salt called for in the final step. Taste it first before adding any extra!
Share Your Experience Making Simple Bread Toast
Okay, now it’s your turn! I poured my heart into making this simple bread toast foolproof for you. Did it work? Did you get that perfect golden color on your first try?
Seriously, hop down to the comments below and let me know! Rate this recipe and tell me what you topped it with. I love seeing how everyone makes this classic breakfast their own! You can also follow our journey on Facebook or see our latest pins on Pinterest.
Print
Foolproof Simple Bread Toast in 5 Minutes
- Total Time: 7 minutes
- Yield: 2 servings
- Diet: Omnivore
Description
Simple bread toast for beginners made on the stovetop with perfect golden color and crisp edges using basic pantry ingredients.
Ingredients
- 4 slices sandwich bread about 1/2 inch thick
- 2 tablespoons unsalted butter
- 1/8 teaspoon salt
Instructions
- Place a nonstick skillet over medium low heat.
- Add the butter and let it melt evenly across the skillet.
- Place the bread slices in the skillet in a single layer.
- Cook for 2 to 3 minutes until the bottoms are golden.
- Sprinkle lightly with salt.
- Flip the bread slices.
- Cook for 1 to 2 minutes until the second side is lightly crisp and warmed through.
- Remove from the skillet and serve immediately.
Notes
- You can use a toaster instead of a skillet for quicker preparation.
- Adjust cooking time based on your desired level of crispness.
- Butter can be substituted with oil or margarine.
- Prep Time: 2 minutes
- Cook Time: 5 minutes
- Category: Breakfast
- Method: Stovetop
- Cuisine: American