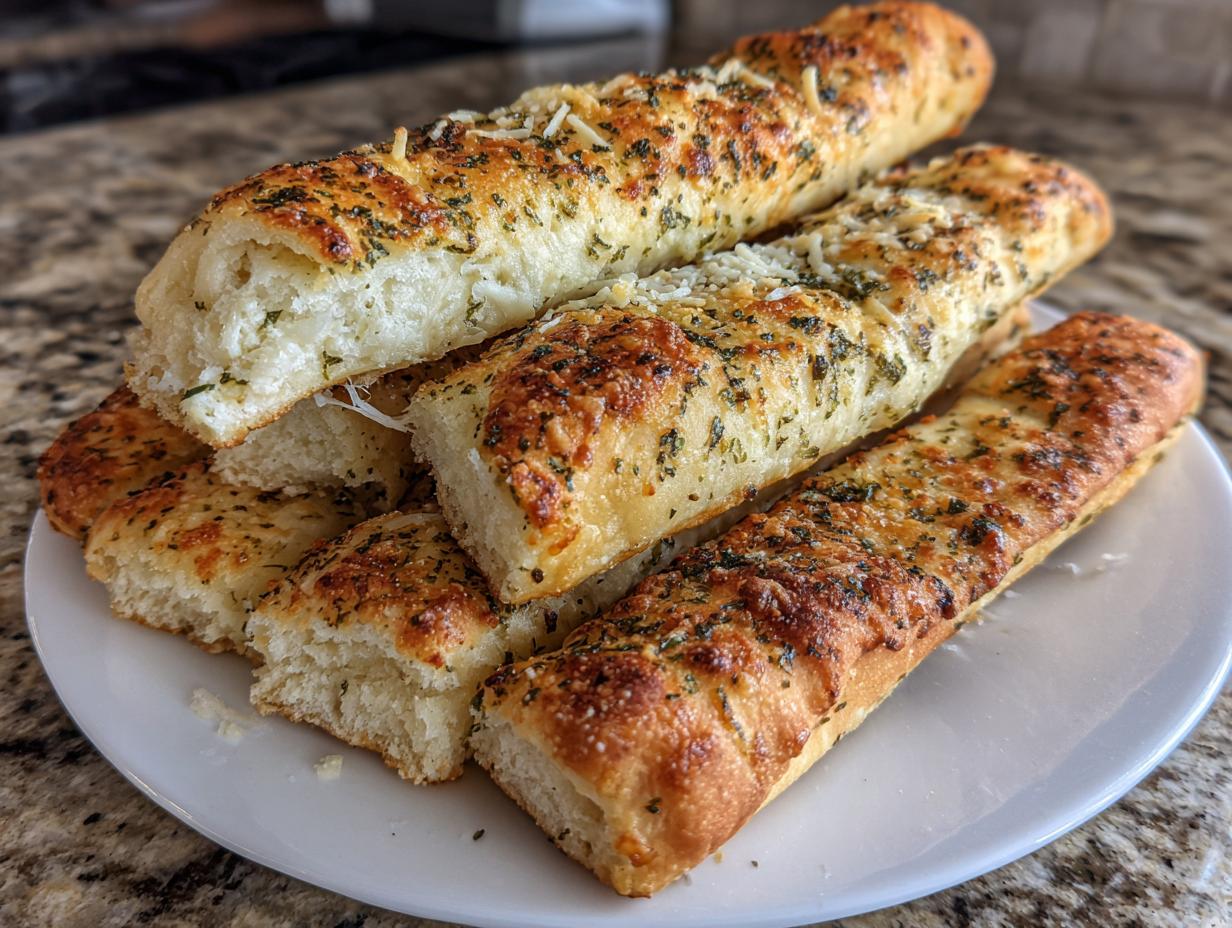
If you’ve ever felt intimidated by making bread from scratch, stop right there! Seriously, put down the frozen pizza rolls. I used to think bread required hours of complicated kneading and praying to the baking gods. Then I found this method, and suddenly, the world of homemade bread opened up! These sheet pan breadsticks are truly the easiest garlic parmesan sticks you will ever make. They are fluffy, buttery, and taste like they came straight from your favorite Italian joint, but they are baked all at once on one simple pan. That’s the magic right there—maximum flavor with minimum fuss.
When I first tried making yeast bread, I ended up with doorstops. I’d over-knead, under-rise, and generally panic. But these sheet pan breadsticks changed everything because the process is just so straightforward. You mix, you wait a bit, you stretch it out, and BAM! Perfect golden-brown sticks ready for dipping. Forget fancy shaping or multiple pans; we are keeping this simple so you can focus on that incredible garlic butter aroma filling your kitchen. Trust me, once you nail this, you’ll never buy the frozen kind again.

Gathering Supplies for Your sheet pan breadsticks
Before we even think about waking up that yeast, let’s make sure our station is ready to go. Having everything lined up makes the whole process flow so smoothly, and you won’t be scrambling when the dough starts getting happy. This recipe is designed for simplicity, but a little preparation goes a long way to ensure success. We want to keep things moving once the rising starts, so grab these items now while you read the next step.
You don’t need a ton of fancy gadgets for this, which is part of why I love it so much. Mostly, it’s about having the right foundation for that dough to bake on evenly. Make sure you have your large mixing bowl ready for the first rise. That’s where the action starts!
Essential Tools for Perfect sheet pan breadsticks
You’ll need a sturdy mixing bowl, of course, and I highly recommend having a stand mixer with a dough hook if you have one. It saves your arms during the kneading phase! If you’re mixing by hand, grab a solid wooden spoon or spatula.
The most critical piece of equipment here is your sheet pan. You absolutely need one large, rimmed baking sheet—a standard half sheet pan (around 18×13 inches) works perfectly for this amount of dough. And please, please use parchment paper. It makes cleanup nearly nonexistent!
Ingredients Needed for Amazing sheet pan breadsticks
Okay, now for the fun part: gathering the ingredients that turn simple flour and water into these incredible sheet pan breadsticks! Precision matters here, especially with the yeast, but don’t stress too much about the rest. We are aiming for fluffy, savory goodness, and these ingredients are the key players. I’ve put everything into a little chart below just to make shopping or gathering easier. See how simple this list is? No weird specialty flours needed!
| Ingredient | Quantity |
|---|---|
| Warm Water (110°F) | 1\u00bd cups |
| Granulated Sugar | 2 tablespoons |
| Active Dry Yeast | 1 tablespoon |
| Salt | 1 teaspoon |
| All-Purpose Flour | 3\u00be cups |
| Melted Unsalted Butter | \u2153 cup |
| Grated Parmesan Cheese | \u00bd cup |
| Garlic Powder | 1 teaspoon |
| Italian Seasoning | 1 teaspoon |
Flour, Yeast, and Liquids
The water temperature is non-negotiable when you start! If it’s too cold, your yeast won’t wake up, and you’ll end up with dense dough. If it’s boiling hot, you’ll kill it! Aim for that sweet spot around 110 degrees Fahrenheit—it should feel warm, but not hot, on your wrist. The sugar is just food for the yeast, helping it get bubbly and active within five to ten minutes. That foam on top is your signal that the yeast is ready to work its magic on the flour!
Flavor Builders: Parmesan and Seasoning
This is where the flavor explosion happens! I cannot stress this enough: use finely grated Parmesan, not the pre-shredded stuff in a bag if you can help it. The freshly grated stuff melts better into the butter and doesn’t dry out the crust. The garlic powder and Italian seasoning—that’s the classic combo that makes these irresistible. They go on top of the butter layer, so they toast up beautifully while baking.

Step-by-Step Guide to Making sheet pan breadsticks
Alright, deep breaths! We are moving from ingredients to actual baking. Don’t let the yeast scare you; it’s really simple once you see it happen. We are going to move quickly through the mixing, but we have to respect the rising times—that’s where the fluffiness comes from. Follow these steps closely, and you will have the best homemade garlic parmesan sheet pan breadsticks ever. I promise this is way easier than rolling out individual dough balls!
Activating the Yeast and Mixing the Dough
First things first, get that warm water and sugar into your big bowl, then sprinkle the yeast right on top. Give it a gentle stir—don’t whip it—and then just walk away for about five to ten minutes. You need to see foam! If it looks like a creamy head on a beer, your yeast is happy and ready to go to work. If nothing happens, toss it and start over with different water temperature, because that yeast is dead.
Once it’s foamy, add your salt, and then start adding the flour slowly. If you have a stand mixer, use the dough hook attachment on low speed. If you’re mixing by hand, use a sturdy spoon. Keep adding flour until a shaggy, soft dough forms. Now, knead it! If you’re using a mixer, let it run for three to five minutes until the dough looks smooth and springs back a little when you poke it. It should still feel soft, not stiff like a rock.
The Rise and Preparation of the Pan
Cover that bowl with a clean kitchen towel—nothing fancy needed. Find a warm spot in your kitchen for the dough to relax and double in size. This usually takes about 40 minutes, but honestly, just watch the dough, not the clock. If your kitchen is chilly, turn your oven off, let it warm up for a minute, then turn it off again, and put the bowl inside. That little bit of warmth helps tremendously.
While the dough is taking its first nap, get your sheet pan ready! Line it with parchment paper, and then take about half of that melted butter and brush it right onto the parchment. This creates a buttery base layer before the dough even hits the pan. Preheat your oven to 350 degrees Fahrenheit now so it’s ready when the dough is.
Shaping, Topping, and Second Rise for sheet pan breadsticks
Gently punch down the dough to release all that air, and then move it right onto your prepared, buttery pan. Now, this is important: use your fingertips to gently press and stretch the dough out until it covers the entire pan edge-to-edge. Don’t worry about being perfect; you can stretch it a bit more later!
Brush the remaining melted butter generously all over the surface of the dough. Then, shower it with the Parmesan cheese, garlic powder, and Italian seasoning. Sprinkle it evenly—make sure you get those corners! Let the whole thing rest again on the counter for just 15 to 20 minutes while the oven finishes heating. Just before baking, use a pizza cutter to slice the dough into strips or squares. This makes separating the sheet pan breadsticks so much easier later.
Achieving Golden Perfection in the Oven
Slide that pan carefully into your preheated 350°F oven. They bake fast because they are thin! You are looking for about 18 to 20 minutes. The visual cue is key here: the edges should be deeply golden brown, and the cheese topping should be bubbling slightly and look toasted. Don’t overbake them, or they’ll lose that lovely fluffy interior texture we worked so hard to achieve.
Pull them out, let them cool on the pan for just five minutes so they firm up slightly, and then you can easily pull apart those perfect, buttery strips. Serve them warm!
Tips for Success with Your Homemade sheet pan breadsticks
Making these sheet pan breadsticks is already easy, but a couple of tiny tricks can make them legendary. First, when you are pressing the dough out onto the pan, if it keeps shrinking back on you, just let it rest for five minutes before trying to stretch it again. Dough has a memory, and resting lets the gluten relax! Also, for extra garlicky goodness, try mixing one minced fresh garlic clove into that final melted butter wash. It adds a little bit more punch when it toasts up on top.
My final pro-tip is about the cheese: If you notice your Parmesan topping browning too quickly before the dough looks fully cooked, just loosely tent a piece of aluminum foil over the pan for the last five minutes of baking. That protects the topping while letting the inside finish baking through.
Common Questions About sheet pan breadsticks
I get asked about these all the time because they are just so handy for weeknight dinners. People often ask if they can skip the rising steps, but I really wouldn’t recommend it if you want those fluffy results. The rise is what gives you that wonderful texture in your easy breadsticks.
Another common question is about substitutions. Can you use dried herbs instead of Italian seasoning? Yes, absolutely, just make sure you use a blend you love! These are great for using up bits of herbs you have lying around. People also ask if they can freeze the baked breadsticks. Yes, you can! They reheat beautifully, which is why they make such great make-ahead snacks.
Can I make the dough ahead of time?
You definitely can make the dough ahead! After you knead it the first time (before the first rise), place the dough ball in a lightly oiled bowl, cover it tightly with plastic wrap, and stick it in the fridge for up to three days. When you’re ready to bake, let it sit on the counter for about an hour to warm up slightly before pressing it onto the pan for the second rise.
What kind of Parmesan cheese works best?
For the best melting and flavor in your homemade bread, use real, block Parmesan that you grate yourself. The stuff in the shaker cans has anti-caking agents that prevent it from melting smoothly, which can leave your topping a bit gritty instead of beautifully golden and slightly crisp.
Storing and Enjoying Your Leftover sheet pan breadsticks
If you actually have leftovers—which is rare in my house—storage is super easy. These breadsticks are best eaten the day they are made, but they hold up well for a couple of days if stored correctly. Don’t stick them in the fridge unless you absolutely must, because the cold air dries them out fast.
The best way to keep them fresh is to let them cool completely, then store them in an airtight container at room temperature. If they do get a little stale, don’t fret! Reheating brings them right back to life. Microwave them for just 10 to 15 seconds, or pop them in a 300°F oven for five minutes until they are soft again.
| Storage Method | Duration | Reheating Tip |
|---|---|---|
| Airtight Container (Room Temp) | Up to 2 days | Quick microwave zap or 5 min in 300°F oven |
| Freezer (Airtight Bag) | Up to 1 month | Thaw on counter, then reheat in oven |
Share Your Experience with Our sheet pan breadsticks
Seriously, I want to know how these turned out for you! Did you add that fresh garlic clove to the butter? Did your kids devour the entire pan in one sitting? Let me know in the comments below! I love hearing how you customize this recipe. Rate these sheet pan breadsticks and tell me what you served them with—you’ve officially mastered easy homemade bread! You can also share your creations with us on Facebook or save this recipe on Pinterest.
Tips for Success with Your Homemade sheet pan breadsticks
Making these sheet pan breadsticks is already easy, but a couple of tiny tricks can make them legendary. First, when you are pressing the dough out onto the pan, if it keeps shrinking back on you, just let it rest for five minutes before trying to stretch it again. Dough has a memory, and resting lets the gluten relax! Also, for extra garlicky goodness, try mixing one minced fresh garlic clove into that final melted butter wash. It adds a little bit more punch when it toasts up on top.
My final pro-tip is about the cheese: If you notice your Parmesan topping browning too quickly before the dough looks fully cooked, just loosely tent a piece of aluminum foil over the pan for the last five minutes of baking. That protects the topping while letting the inside finish baking through.
Common Questions About sheet pan breadsticks
I get asked about these all the time because they are just so handy for weeknight dinners. People often ask if they can skip the rising steps, but I really wouldn’t recommend it if you want those fluffy results. The rise is what gives you that wonderful texture in your easy breadsticks.
Another common question is about substitutions. Can you use dried herbs instead of Italian seasoning? Yes, absolutely, just make sure you use a blend you love! These are great for using up bits of herbs you have lying around. People also ask if they can freeze the baked breadsticks. Yes, you can! They reheat beautifully, which is why they make such great make-ahead snacks.
Can I make the dough ahead of time?
You definitely can make the dough ahead! After you knead it the first time (before the first rise), place the dough ball in a lightly oiled bowl, cover it tightly with plastic wrap, and stick it in the fridge for up to three days. When you’re ready to bake, let it sit on the counter for about an hour to warm up slightly before pressing it onto the pan for the second rise.
What kind of Parmesan cheese works best?
For the best melting and flavor in your homemade bread, use real, block Parmesan that you grate yourself. The stuff in the shaker cans has anti-caking agents that prevent it from melting smoothly, which can leave your topping a bit gritty instead of beautifully golden and slightly crisp.
Storing and Enjoying Your Leftover sheet pan breadsticks
If you actually have leftovers—which is rare in my house—storage is super easy. These breadsticks are best eaten the day they are made, but they hold up well for a couple of days if stored correctly. Don’t stick them in the fridge unless you absolutely must, because the cold air dries them out fast. They lose that fresh-from-the-oven softness easily!
The best way to keep them fresh is to let them cool completely, then store them in an airtight container at room temperature. If they do get a little stale, don’t fret! Reheating brings them right back to life. Microwave them for just 10 to 15 seconds, or if you want that crispy crust back, pop them in a 300°F oven for about five minutes until they are soft again. They are so good reheated, it’s like making them all over again!
| Storage Method | Duration | Reheating Tip |
|---|---|---|
| Airtight Container (Room Temp) | Up to 2 days | Quick microwave zap or 5 min in 300°F oven |
| Freezer (Airtight Bag) | Up to 1 month | Thaw on counter, then reheat in oven |
Share Your Experience with Our sheet pan breadsticks
Seriously, I want to know how these turned out for you! Did you add that fresh garlic clove to the butter? Did your kids devour the entire pan in one sitting? Let me know in the comments below! I love hearing how you customize this recipe. Rate these sheet pan breadsticks and tell me what you served them with—you’ve officially mastered easy homemade bread!
Print
Fluffy 18-Minute sheet pan breadsticks Good
- Total Time: 1 hour 35 minutes
- Yield: 24 breadsticks
- Diet: Vegetarian
Description
Soft, buttery garlic parmesan sheet pan breadsticks baked on one pan. They are fluffy with a golden crust, perfect for serving with meals or eating alone.
Ingredients
- 1½ cups warm water (about 110°F)
- 2 tablespoons granulated sugar
- 1 tablespoon active dry yeast
- 1 teaspoon salt
- 3¾ cups all-purpose flour
- ⅓ cup melted unsalted butter
- ½ cup grated parmesan cheese
- 1 teaspoon garlic powder
- 1 teaspoon Italian seasoning
Instructions
- Combine warm water, sugar, and yeast in a large bowl. Stir gently and wait 5 to 10 minutes until bubbly.
- Add salt and slowly mix in flour using a dough hook or spoon until soft dough forms. Knead for 3 to 5 minutes until smooth.
- Cover the bowl with a towel and let the dough rise for 40 minutes, or until doubled.
- Preheat oven to 350°F. Line a sheet pan with parchment paper and brush half the melted butter onto it.
- Move dough to the prepared pan and press it evenly to the edges with your fingertips.
- Brush the remaining butter over the top. Sprinkle evenly with parmesan, garlic powder, and Italian seasoning.
- Let the dough rise again for 15 to 20 minutes. Slice into rows or squares with a pizza cutter.
- Bake for 18 to 20 minutes, until the edges are golden brown.
- Cool slightly before separating and serving warm.
Notes
- For extra flavor, mix 1 minced garlic clove into the melted butter before brushing on top.
- Prep Time: 1 hour 15 minutes
- Cook Time: 20 minutes
- Category: Bread
- Method: Baking
- Cuisine: American