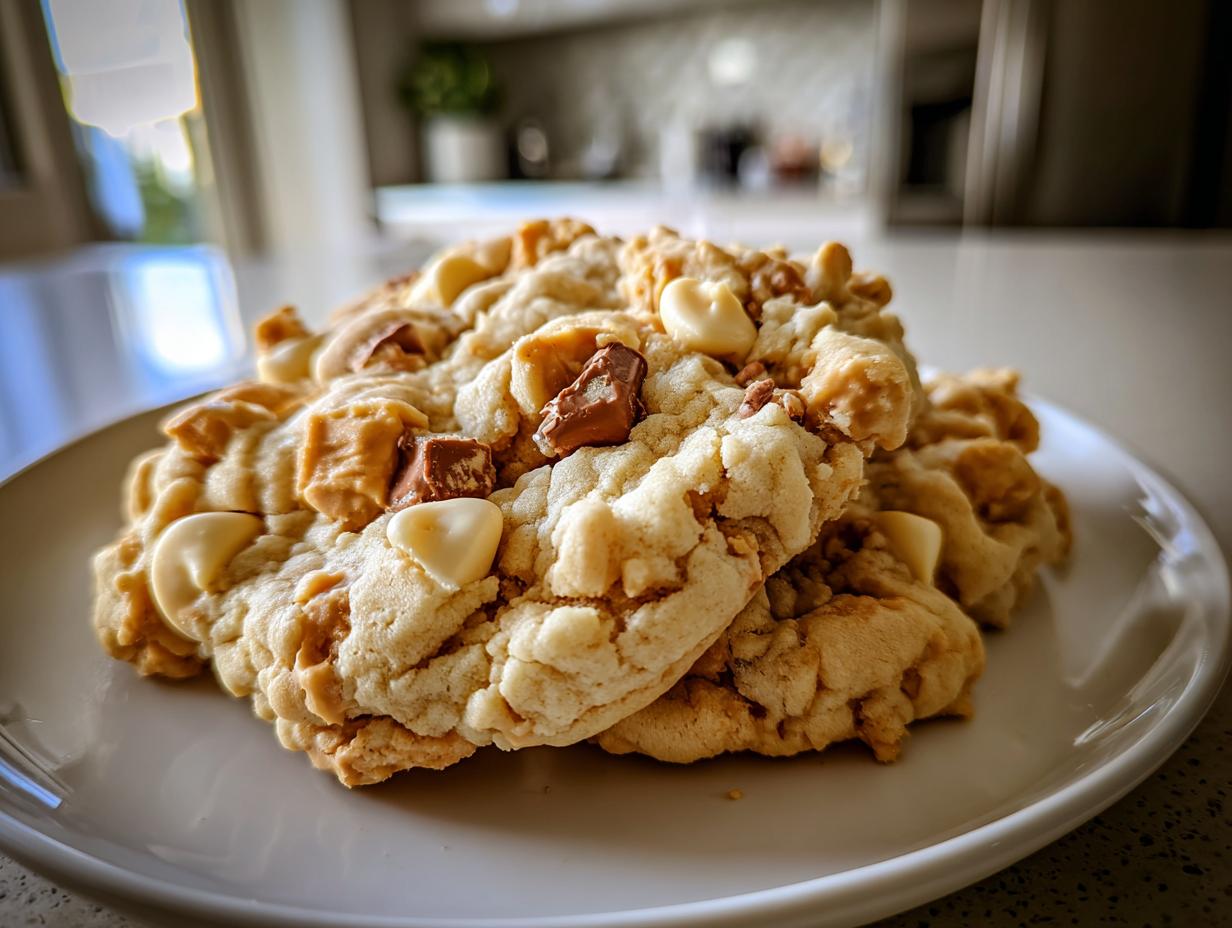
Oh my goodness, you are going to absolutely flip over these Overloaded Peanut Butter Cookies With Chocolate Pieces. Forget those flat, dry little discs you get sometimes! I spent years trying to nail that perfect bakery-style cookie—the kind that’s thick, soft, and almost ridiculously chewy, but that doesn’t spread out into a puddle the second it hits the hot pan. This recipe is the one. I swear, it’s my new go-to for satisfying a serious chocolate and peanut butter craving.
I used to think making those thick, professional-looking cookies was some kind of secret wizardry only achieved in commercial kitchens. I almost gave up baking cookies altogether because every batch I made seemed determined to flatten themselves! But once I figured out the right ratio of peanut butter to butter and learned *not* to overmix, suddenly, I was pulling out gorgeous, bakery-style stunners. This recipe is proof that you don’t need to be a pro to get incredible results!

Why This Overloaded Peanut Butter Cookies With Chocolate Pieces Recipe Works for Beginners
This recipe is honestly foolproof, which is why I’m so excited to share it with you first. A lot of complicated cookie recipes require chilling the dough for hours, but not this one! We’re using room-temperature eggs and butter, which blend together so easily, cutting your prep time way down. You just mix, fold in all those glorious chocolate pieces, scoop, and bake.
The key that makes it so simple is we aren’t messing around with complicated techniques. We’re using standard pantry staples—flour, sugar, baking soda—and the instructions are just straightforward creaming and mixing. Trust me, if you can beat butter and sugar together, you can absolutely master these thick, soft Overloaded Peanut Butter Cookies With Chocolate Pieces. No fancy equipment needed, just a regular mixer or even a strong arm!
Gathering Your Overloaded Peanut Butter Cookies With Chocolate Pieces Ingredients
Okay, let’s get down to what you need to make these monsters! I’ve listed everything below, but honestly, the magic is in the details of how you measure and prep the ingredients. Don’t rush this part; a little attention here means you won’t end up with flat cookies later, and that’s the last thing we want.
We are using a full cup of peanut butter chips, plus two different kinds of chocolate chunks and pieces. Yes, that’s a lot of chocolate, but hey, we called these *overloaded* for a reason! Make sure you have all your measuring cups ready to go before you even turn the mixer on. Organization saves so much headache later in the process.
Specific Ingredient Clarity for Overloaded Peanut Butter Cookies With Chocolate Pieces
This is where we talk science, or at least, baking science! First, your butter needs to be softened. Not melted, not hard, just soft enough that you can easily press your finger into it. If it’s too warm, the cookies spread too much!
When you measure your brown sugar, you absolutely must pack it down into the measuring cup. Grandma always said, “If you don’t pack it, you’re cheating the flavor!” For the flour, spoon it into the cup and level it off—don’t just scoop it straight from the bag, or you’ll add way too much.
Also, make sure those two large eggs are at room temperature. Cold eggs drop the temperature of your creamed butter mixture, and then you lose all that lovely air we just beat in! As for the chocolate, get a mix! I love the peanut butter chips for flavor and then milk chocolate chunks for those big melty pockets. Don’t substitute the baking soda for baking powder; they do totally different things here.
Essential Equipment for Bakery Style Overloaded Peanut Butter Cookies With Chocolate Pieces
You don’t need a giant stand mixer for this, though it certainly helps! I usually grab my big glass mixing bowl since we are making a decent batch—about two dozen cookies. Having two sheets ready to go is smart because we scoop big dough balls and need space for them to breathe.
The most crucial tool, besides your mixer, is the cookie scoop. I use a medium-sized scoop, about 2\u00bd tablespoons, every single time. Consistency in size is how you get that bakery look where every cookie is thick and uniform. And please, use parchment paper! It’s the only way to ensure these rich cookies release perfectly after baking.
Step-by-Step Guide to Perfect Overloaded Peanut Butter Cookies With Chocolate Pieces
Alright, let’s get mixing! This is where we build the structure for those thick, amazing cookies. Don’t try to rush the creaming stage—it sounds simple, but it’s non-negotiable for that soft center we are aiming for. Remember to have your oven preheated to 350\u00b0F while you work, and those two baking sheets lined with parchment paper should be waiting patiently.
Mixing the Wet and Dry Components for Overloaded Peanut Butter Cookies With Chocolate Pieces
First up, the wet stuff! In your big bowl, beat that softened butter and the creamy peanut butter until they are completely smooth. There should be no lumps of butter hanging around. Once that’s happy, stream in your brown sugar and the white granulated sugar. You have to beat this mixture for a good two or three minutes. You’re looking for it to get visibly lighter in color and fluffy—it’s trapping air, which is what keeps the cookie from spreading thin!
Next, add your room-temperature eggs, one at a time. Beat well after each addition so it fully incorporates before you add the next egg. Stop, scrape down the sides of the bowl, and make sure everything is mixed evenly. If you skip scraping, you’ll end up with streaks of unmixed sugar at the bottom.
Now, switch gears. In a separate bowl, whisk your flour, baking soda, and kosher salt together. Whisking is important because it acts like a mini-sifter, distributing the leavening agent evenly. Gently add this dry mixture into your wet ingredients. And here’s a huge tip: mix only until you see the last streaks of flour disappear. Seriously, stop right there! Overmixing flour develops gluten, and gluten equals tough cookies, which is the opposite of what we want.
Finally, the fun part! Take your peanut butter chips, milk chocolate chunks, and those extra candy pieces, and gently fold them into the dough with a spatula. Don’t use the mixer for this part, or you’ll break up all those beautiful chunks.

Baking and Cooling Your Overloaded Peanut Butter Cookies With Chocolate Pieces
Time to scoop! Don’t be shy; use about 2\u00bd tablespoons of dough for each cookie. Place them on your prepared sheets, making sure they have plenty of space—about 2\u00bd inches between each one. They will puff up a bit, but we want them thick, not running into each other.
Slide them into the preheated oven for 11 to 13 minutes. This timing is key! You must pull them out when the edges look set and firm, but the very center still looks a little soft, maybe even slightly wet. If you wait until the center looks totally baked through, you’ll end up with a dry cookie once it cools down. Remember the note: do not overbake!
The cooling process is almost as important as the baking! Leave those cookies right there on the hot baking sheet for a full 10 minutes. They are still cooking slightly from the residual heat, and this rest period helps them set into that perfect thick shape. After 10 minutes, gently move them to a wire rack to cool completely. If you try to move them sooner, they might just crumble apart on you!
Tips for Achieving the Best Overloaded Peanut Butter Cookies With Chocolate Pieces Texture
I know I mentioned it before, but I need to stress this again because it ruined so many of my early batches: the secret to those thick, bakery-style cookies is fighting the urge to overbake them. Seriously, trust me on this one! You want to pull them when they look just slightly underdone in the middle. They finish setting up on that hot pan during the rest period, which locks in all the chewiness.
Another thing that drives me crazy is when cookies spread out into thin pancakes. This usually happens for two reasons. First, your butter was too warm when you started mixing. Second, you overmixed the flour. Once you add the dry ingredients, you are just trying to barely incorporate them. Stop mixing as soon as you can’t see any more white streaks of flour. That keeps the gluten relaxed, which means a tender, thick cookie instead of a flat, tough one.
Finally, don’t skip the scoop size! Using a consistent 2\u00bd tablespoon scoop ensures all your cookies bake evenly. If you have one giant one and three tiny ones, the tiny ones will be hard as rocks by the time the giant one is done. Big scoops equal thick cookies. It’s just physics, or maybe just good baking sense!
Storing and Keeping Your Overloaded Peanut Butter Cookies With Chocolate Pieces Fresh
These cookies are so good, you might actually have leftovers—though I doubt it! Because they are so jam-packed with butter, peanut butter, and real chocolate, they stay fresh longer than a standard cookie, provided you store them correctly. The biggest enemy here is air, which dries them out and makes them lose that glorious soft center.
You absolutely must let them cool completely before attempting to store them. If you seal them up warm, you’ll just end up with sweaty, sad cookies that stick together. Once they are totally cool, transfer them to a good, airtight container. I love using those glass containers with the clamp lids for this, but any quality container works fine, as long as the seal is tight.
I find that these Overloaded Peanut Butter Cookies With Chocolate Pieces are actually best on day two. The flavors seem to meld overnight, and that softness really settles in. They are fantastic at room temperature for several days, but if you’re making a huge batch for later, the fridge is your friend.
Storage and Reheating Table for Overloaded Peanut Butter Cookies With Chocolate Pieces
Here’s a quick cheat sheet so you know exactly how long you can keep these beauties around. Remember, these are just estimates—if they smell good, they probably are good!
- Room Temperature Storage: 4 to 5 days in an airtight container.
- Refrigerator Storage: Up to 10 days, tightly wrapped or in an airtight container.
- Freezing: Up to 3 months in a freezer-safe bag with as much air pressed out as possible.
If you do store them in the fridge, they might firm up a little bit. Don’t panic! Just pop one (or two, I won’t judge!) in the microwave for about 8 to 10 seconds. That little bit of warmth melts the chocolate just enough to bring back that fresh-from-the-oven gooey texture. Seriously, reheating makes them taste brand new again!
Frequently Asked Questions About Overloaded Peanut Butter Cookies With Chocolate Pieces
I get so many questions about these cookies because everyone wants that perfect bakery result at home! It’s great that you’re asking these things beforehand because a small change can really alter how these Overloaded Peanut Butter Cookies With Chocolate Pieces turn out. Here are the top things people ask me about before they start mixing.
I always encourage people to stick close to the recipe the first time they try it, especially since we’re aiming for that specific thick, chewy texture. But once you nail the basic bake, you can start experimenting! Let’s tackle the peanut butter and the cookie shape questions right now.
Can I Substitute the Type of Peanut Butter in This Overloaded Peanut Butter Cookies With Chocolate Pieces Recipe
This is a big one! For the best, most reliable results, you really need to stick with creamy peanut butter, not the natural kind. The natural peanut butters separate—you know, the oil pools on top—and that extra oil messes up the fat ratio we carefully balanced with the butter. It often leads to flatter cookies.
If you absolutely prefer a little texture, crunchy peanut butter is okay to use instead of creamy, but you might lose a tiny bit of that super-smooth melt in the dough. Just make sure whatever you use is the standard, processed kind (like Jif or Skippy) that doesn’t require stirring. That consistency is what makes these bakery-style cookies work so well.
How Can I Make These Overloaded Peanut Butter Cookies With Chocolate Pieces Thinner or Flatter
Well, if you’re determined to make them flatter, I won’t stop you, but you’ll lose that signature thick, soft center! To get a flatter cookie, you have two options. The first is to make sure your butter is slightly warmer than room temperature—maybe let it sit out for an extra 15 minutes before creaming. Warmer fat spreads faster.
The second trick is to chill the dough balls for about 30 minutes before baking. Cold dough spreads slower in the oven, which gives the edges time to set before the center collapses too much. You might also reduce the baking time by about one minute, but honestly, why mess with perfection? These are supposed to be thick!
Understanding the Estimated Nutrition of Overloaded Peanut Butter Cookies With Chocolate Pieces
Now, I want to be super clear about this next part. I bake for love and taste, not necessarily for nutritional labels! These cookies are decadent—we have butter, sugar, and tons of chocolate—so they aren’t exactly diet food. The numbers I’m sharing here are just an estimate based on the ingredients we used for one standard cookie, yielding about 24 total.
Please take these figures with a big grain of salt, or maybe a big pinch of flour! Every brand of chocolate chip or peanut butter chip can change the final count slightly. Think of this more as a fun guideline than a strict dietary fact sheet. But wow, even knowing the calories, they are worth every single bite!
Nutritional Information Table for Overloaded Peanut Butter Cookies With Chocolate Pieces
Here is a quick look at the estimated breakdown per cookie. Remember, this is just a rough guide based on the recipe amounts!
| Nutrient | Estimated Amount Per Cookie |
|---|---|
| Calories | 290 |
| Fat | 17 g |
| Carbohydrates | 30 g |
| Protein | 6 g |
Share Your Thoughts on This Overloaded Peanut Butter Cookies With Chocolate Pieces Recipe
I really, truly hope you loved making these thick, chocolate-loaded cookies as much as I love eating them! Now it’s your turn to tell me all about it. Did you manage to pull them out at the perfect slightly-underbaked stage? Did you use extra dark chocolate chunks? If you want to see more of my baking adventures, check out my Facebook page!
Please leave me a rating below and tell me in the comments how your Overloaded Peanut Butter Cookies With Chocolate Pieces turned out. I always read every single comment, and I love seeing pictures of your successful bakes! You can also find more inspiration on Pinterest, or read my latest thoughts on Medium.
Print
Amazing 290-Calorie Overloaded Peanut Butter Cookies
- Total Time: 32 minutes
- Yield: 24 cookies
- Diet: Vegetarian
Description
These peanut butter cookies are thick, soft, and overloaded with chocolate and peanut butter flavor. They are easy bakery style peanut butter cookies.
Ingredients
- ¾ cup unsalted butter softened
- ¾ cup creamy peanut butter
- ¾ cup light brown sugar packed
- ½ cup granulated sugar
- 2 large eggs room temperature
- 2½ cups all purpose flour
- 1 teaspoon baking soda
- ½ teaspoon kosher salt
- 1 cup peanut butter baking chips
- 1 cup milk chocolate chunks
- ½ cup chocolate candy pieces
Instructions
- Preheat the oven to 350°F and line two baking sheets with parchment paper.
- Beat the butter and peanut butter together until smooth and creamy in a large bowl.
- Add the brown sugar and granulated sugar and beat for 2 to 3 minutes until light and fluffy.
- Beat in the eggs one at a time until fully incorporated.
- Whisk together the flour, baking soda, and salt in a separate bowl.
- Add the dry ingredients to the wet ingredients and mix just until combined.
- Fold in the peanut butter chips, chocolate chunks, and candy pieces evenly.
- Scoop large dough balls about 2½ tablespoons each and place them 2½ inches apart on the baking sheets.
- Bake for 11 to 13 minutes until the edges are set and the centers look slightly underbaked.
- Cool on the baking sheet for 10 minutes, then transfer to a wire rack to cool completely.
Notes
- Do not overbake to keep the cookies soft and thick in the center.
- Prep Time: 20 minutes
- Cook Time: 12 minutes
- Category: Dessert
- Method: Baking
- Cuisine: American