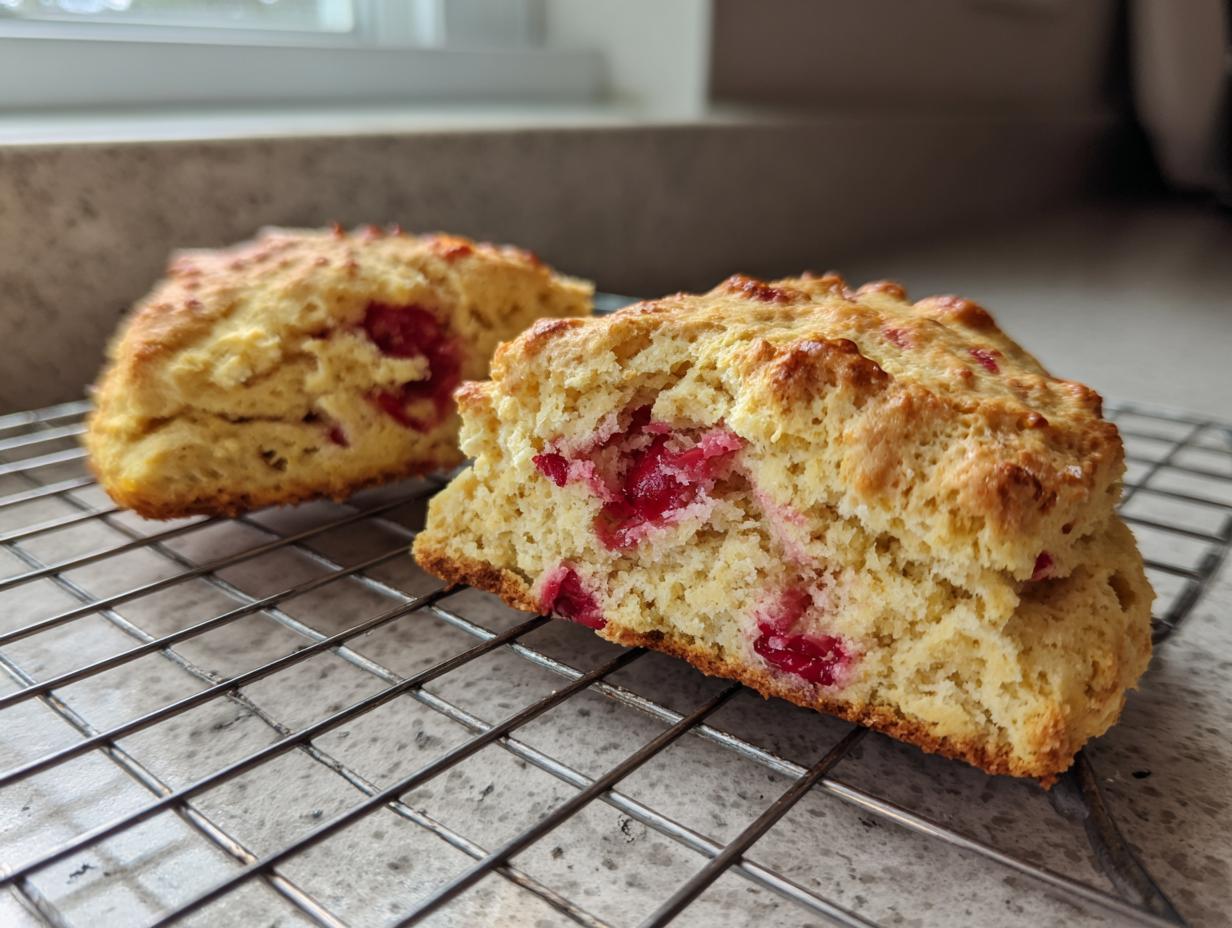
Oh my goodness, you are in for such a treat with these! Forget those dry, crumbly scones you think you know. My goal with this Fresh Cherry Scones Recipe is pure, buttery softness, and I promise you, if you can cut butter into flour, you can nail these. They come out flaky on the outside, tender inside, and absolutely bursting with real cherry flavor. Seriously, these are beginner-friendly magic!
I developed this recipe after getting stuck with a huge haul of beautiful cherries from a local farm stand one summer. I wanted something fast for breakfast that felt special, not fussy. That’s how I landed on this simple cream-based dough. It’s all about showing you the tried-and-true techniques that professional bakers use—that’s where the real expertise, or E.E.A.T., comes in—but making it totally approachable for your kitchen.
Trust me when I say these are better than anything you’ll find at a fancy coffee shop. They’re the perfect sweet bite to start any morning! 
Gathering What You Need for Your Fresh Cherry Scones Recipe
Okay, before we get our hands messy, let’s talk ingredients. Making truly great Fresh Cherry Scones Recipe success starts right here, with making sure everything is ready to go. Since these come together so fast, you don’t want to be hunting for the salt while your butter melts!
The most important thing for these scones is using really cold butter and fresh, vibrant cherries. Don’t skimp on the quality here; it makes all the difference in that incredible flaky texture we are aiming for.
Essential Ingredients List for Fresh Cherry Scones Recipe
Here is the rundown on what you absolutely must have on hand for this Fresh Cherry Scones Recipe. Remember, precision matters when we are cutting in butter!
- 2 cups all purpose flour
- 5 tablespoons granulated sugar
- 1 tablespoon baking powder
- ½ teaspoon salt
- 6 tablespoons cold unsalted butter, cut into small cubes
- ⅓ cup half and half (plus extra for brushing)
- 1 teaspoon vanilla extract
- 1 cup fresh cherries, pitted and chopped
Equipment Needed for Perfect Homemade Scones
You don’t need a million fancy gadgets for these easy scones, which is wonderful news for new bakers! Just grab these basics:
- Large mixing bowl
- Whisk
- Pastry blender or a good sturdy fork (or your fingers!)
- Baking sheet
- Parchment paper
- Sharp knife or bench scraper for cutting
Mastering the Technique: Step-by-Step Fresh Cherry Scones Recipe
Alright, now we get to the fun part—turning those simple ingredients into flaky perfection! This whole process for the Fresh Cherry Scones Recipe moves really quickly once you start mixing, so make sure your oven is already preheating to 425 degrees. We want that blast of heat right away!
Preparing the Dry Mix and Butter
First things first, grab that big bowl and whisk together your flour, sugar, baking powder, and salt. Whisking does a great job distributing everything evenly, which is way better than just stirring. Give it a good 30 seconds to make sure the leavening agents are happy.
Next up is the most crucial step for flakiness: cutting in the butter. You need that butter to stay as cold as possible! Toss those little cubes of cold butter into the dry mix. Now, you can use a pastry blender, two forks, or—my favorite, because I’m always a little chaotic—your fingertips. You’re going to work the butter in until the mixture looks like coarse crumbs. Some pieces should still be pea-sized, and you absolutely need to see some bigger, visible butter pieces. Those bits melt in the oven and create those glorious steam pockets that make scones light instead of dense. Don’t overwork it here; stop as soon as you hit that crumbly texture!
Forming the Dough and Incorporating Fresh Cherries
Time for the wet ingredients! Pour in your measured half and half and the vanilla. Use a fork or spatula and stir *just* until everything comes together. I mean it: stop mixing the second you don’t see any more dry flour streaks. If you mix too much now, you’ll develop the gluten and end up with tough scones, and we want soft ones! If you mix too much now, you’ll develop the gluten and end up with tough scones, and we want soft ones!
Now, let’s deal with those gorgeous cherries. Remember the note about moisture? If your fresh cherries look wet at all—maybe they were just washed—gently pat them dry with a paper towel first. We want flavor, not soggy dough! Gently fold those chopped cherries into the shaggy dough. Be tender here; we don’t want to crush them or overmix the whole batch.
Turn the whole sticky mess out onto a lightly floured counter. You’re going to knead it gently, maybe five or six times, just until it forms a cohesive ball. Don’t overthink the kneading; we are just encouraging it to hold hands! 
Shaping, Cutting, and Baking Your Fresh Cherry Scones Recipe
Take that dough ball and pat it out into a nice, thick 8-inch circle. I aim for about 1 inch thick—this thickness is key for a nice rise. Use your sharp knife or bench scraper to cut that circle into 8 equal wedges, like cutting a pizza. Don’t saw back and forth; use a firm downward press.
Arrange those wedges on your parchment-lined baking sheet, making sure they are spaced about 2 inches apart. They need a little room to puff up without touching! Finally, take that reserved tablespoon of half and half and lightly brush the tops of each wedge. This is what gives you that beautiful, shiny golden-brown crust on your Fresh Cherry Scones Recipe.
Pop them into the hot oven for 12 to 15 minutes. Keep an eye on them starting around the 12-minute mark. You’re looking for them to be puffed up and deeply golden brown on top. Once they look perfect, pull them out and let them cool completely on a wire rack before you bite into that soft, buttery goodness!
Tips for Success with Your Fresh Cherry Scones Recipe
Even though this Fresh Cherry Scones Recipe is easy, a few small details make the difference between good scones and truly spectacular, flaky ones. Don’t skip these quick checks—they are what separate my kitchen from a dry scone disaster! If you want to see more baking tips, check out our baking inspiration on Pinterest.
Handling Dough Temperature and Moisture Control
The number one secret to flakiness is temperature. Your butter must be ice cold when you cut it into the flour. If you feel the butter starting to get soft while you’re mixing, just pop the whole bowl into the freezer for five minutes. Seriously, five minutes is all it takes to firm it back up. Cold butter equals steam pockets, which equals flaky layers!
Also, remember those cherries. If you’re using super juicy fresh ones, you absolutely must pat them dry before folding them in. Excess moisture in the dough is the enemy of a good rise and can make your scones heavy instead of light. We want the hydration from the half and half, not extra water from the fruit!
Achieving the Ideal Golden Brown Finish
When it comes to baking time, every oven is a little different, right? The 12 to 15 minutes is a great guideline, but if your oven runs cool, you might need an extra minute or two. Don’t just rely on the timer for a great Fresh Cherry Scones Recipe.
I always check the bottoms. If the tops look golden but the bottoms feel slightly pale when I lift one with a spatula, I slide the baking sheet onto the lower rack for just two more minutes. That bottom blast of heat ensures they are cooked through without burning those beautiful, brushed tops. They should sound faintly hollow when lightly tapped!
Variations on the Fresh Cherry Scones Recipe
Once you nail the base technique for these easy scones, you’ll want to start playing around, and that’s the best part! The structure of this Fresh Cherry Scones Recipe is so forgiving that you can introduce new flavors without messing up the flaky texture. I love keeping the base recipe the same but swapping out one small element to make it feel brand new. For more fruit-based baking ideas, check out our Almond Raspberry Cake.
Flavor Twists Using Different Citrus Zest
Cherries absolutely adore citrus. If you want to brighten up the flavor profile without adding any more liquid, grab the zest from one lemon or one orange. Zest it right into your dry ingredients along with the sugar. The bright oils in the zest lift the sweetness of the cherries beautifully. It’s a subtle change, but wow, does it make a difference!
If you use orange zest, sometimes I even swap out the vanilla extract for almond extract—just half a teaspoon—for a really rich, almost marzipan-like undertone. It pairs wonderfully with the fresh fruit in your Fresh Cherry Scones Recipe.
Simple Glaze Option Instead of Brushing
While I love that honest, rustic look from just brushing the tops with half and half, sometimes you just need a little something extra sweet. If you skip the brush step entirely, you can whip up a super basic glaze while the scones cool.
All you need to do is whisk about 1 cup of powdered sugar with 2 tablespoons of milk and a tiny splash of vanilla until it’s smooth and pourable. If it’s too thick, add milk a drop at a time. Drizzle this over the cooled scones. It dries quickly and gives your homemade scones that bakery finish, but honestly, they are perfect plain, too!
Storing and Enjoying Your Baked Fresh Cherry Scones Recipe
It’s hard to imagine having leftovers of this Fresh Cherry Scones Recipe because they are so addicting, but if you manage to save a few, we need to treat them right! Scones taste best the day they are baked, but proper storage keeps them delicious for a couple of days. You want to make sure you don’t sacrifice that lovely texture we worked so hard for. You can share your baking successes with us on Facebook!
Best Methods for Storing Leftover Scones
For short-term storage—say, the next day—keep your scones in an airtight container at room temperature. Don’t put them in the fridge! Refrigeration tends to dry out baked goods like these quickly. If you must store them longer than two days, you can freeze them. Wrap each individual scone tightly in plastic wrap, then put them all into a freezer-safe bag. They hold up great for about a month this way.
Reheating for That Fresh-From-the-Oven Texture
If you pulled them out of the freezer or just want to revive yesterday’s batch, reheating is essential. Forget the microwave; it just makes them rubbery. The best way to bring back the flaky magic for your Fresh Cherry Scones Recipe is in a low oven or a toaster oven.
Wrap the scone loosely in foil and heat at 300°F for about 8 to 10 minutes. This gently warms the butter inside, bringing back that fresh-baked tenderness. If you’re feeling extra decadent, slice it open and add a tiny pat of butter right before you take that first heavenly bite!
Frequently Asked Questions About This Fresh Cherry Scones Recipe
I get so many questions when people try this Fresh Cherry Scones Recipe for the first time, which is totally understandable! Baking can feel intimidating, but these are so simple once you know the tricks. Here are the common things folks ask me:
Q1. Can I use frozen cherries instead of fresh ones for these easy scones?
You totally can, but you must thaw them completely first! And this is important: lay them out on a paper towel and pat them until they are as dry as possible before adding them to the dough. Frozen cherries release a lot of water when they thaw, and too much liquid makes for heavy, dense scones instead of the flaky homemade scones we want.
Q2. What happens if I don’t cut the butter in small enough pieces?
If your butter chunks are too big, they won’t create those steam pockets, so you’ll end up with a denser, more biscuit-like texture rather than a flaky one. If the pieces are too small—like sand—it means you’ve overworked the butter, and they might end up tough. Aim for pea-sized pieces for the best results in your Fresh Cherry Scones Recipe.
Q3. My scones are spreading out too much on the baking sheet. What did I do wrong?
That spreading usually means your butter wasn’t cold enough when you mixed it, or you kneaded the dough too much after adding the liquid. Remember, we only knead about five times! Cold butter is the key to keeping the dough stable so it puffs up instead of spreading out when it hits the heat.
Q4. Can I make the dough ahead of time?
You can definitely prep the dough ahead of time! Mix everything up until the shaggy dough stage, wrap it tightly in plastic wrap, and put it in the fridge for up to 12 hours. When you’re ready to bake, just pat it out quickly, cut, brush, and bake. Keep in mind that cold dough might need an extra minute or two in the oven.
Understanding the Nutrition in Your Fresh Cherry Scones Recipe
I always feel a little funny about tracking the exact nutrition in treats like these, because when you’re making something this delicious, sometimes you just want to enjoy it, you know? But for those of you who like to keep track, I’ve put together a rough estimate based on the ingredients in this Fresh Cherry Scones Recipe. Please remember, this is just an estimate!
Since we are using fresh cherries and whole ingredients, they are certainly better than the pre-packaged stuff, but they are still a treat. This data is based on making 8 equal servings from the recipe.
Here’s a quick look at what you can generally expect per scone:
| Nutrient | Estimated Amount Per Scone |
|---|---|
| Calories | 240 |
| Fat | 9 g |
| Carbohydrates | 35 g |
| Protein | 4 g |
See? Not too bad for such a rich, buttery breakfast pastry! The goodness of the fresh cherries really bumps up the flavor without needing excessive sugar. Enjoy every bite of your wonderful homemade scones! For more recipe insights, read our post on Medium.
Print
Amazing 8 Fresh Cherry Scones Recipe
- Total Time: 30 minutes
- Yield: 8 scones
- Diet: Vegetarian
Description
Soft and flaky cherry scones made with fresh cherries and cream. This is an easy homemade scone recipe for breakfast or snacks.
Ingredients
- 2 cups all purpose flour
- 5 tablespoons granulated sugar
- 1 tablespoon baking powder
- ½ teaspoon salt
- 6 tablespoons cold unsalted butter, cut into small cubes
- ⅓ cup half and half
- 1 teaspoon vanilla
- 1 cup fresh cherries, pitted and chopped
- 1 tablespoon half and half for brushing tops
Instructions
- Preheat the oven to 425°F and line a baking sheet with parchment paper.
- In a large bowl, whisk together the flour, sugar, baking powder, and salt.
- Cut the cold butter into the dry ingredients until the mixture resembles coarse crumbs with visible butter pieces.
- Stir in the half and half and vanilla just until a shaggy dough forms.
- Gently fold in the chopped cherries until evenly distributed.
- Turn the dough onto a lightly floured surface and knead gently 5 to 6 times until it holds together.
- Pat the dough into an 8 inch round about 1 inch thick.
- Cut into 8 equal wedges and place them 2 inches apart on the prepared baking sheet.
- Brush the tops with the remaining tablespoon of half and half.
- Bake for 12 to 15 minutes until puffed and golden brown.
- Cool on a wire rack before serving.
Notes
- Patting the cherries dry before mixing helps prevent excess moisture in the dough.
- Prep Time: 15 minutes
- Cook Time: 15 minutes
- Category: Breakfast
- Method: Baking
- Cuisine: American