Pumpkin Pie is one of those iconic desserts that just screams autumn, right? For the longest time, I thought making a truly amazing pumpkin pie was way out of my league. I’d see all these fancy bakers and think, “Never me!” But then I realized that the best recipes, the ones that truly make you feel something, are often the simplest. That’s exactly what this recipe is all about – sharing a foolproof, ridiculously delicious pumpkin pie that anyone, even if you’re just starting out like I was, can totally nail. My mission here at NoobRecipes is to prove that incredible homemade food is within everyone’s reach, and this pie is proof!
Why This Pumpkin Pie Recipe is a Must-Try
Okay, so why should you absolutely give this particular pumpkin pie recipe a whirl? Honestly, it’s because I’ve been right where you are – a little intimidated by baking, especially pies! This recipe stands out because it’s designed for YOU. It takes all the guesswork out of creating a stunning pumpkin pie that tastes like it came from a fancy bakery, but without any of the fuss.
Here’s what makes it a winner:
- Super Beginner-Friendly: Seriously, if you can open a can and whisk things together, you can make this pie. I’ve tested this a million times to make sure it works for everyone.
- Minimal Effort, Maximum Flavor: We’re using a store-bought crust to save you tons of time and hassle, and the filling? It’s just a few simple ingredients whisked together.
- Reliable Results Every Time: No more sad, cracked fillings or soggy bottoms! This recipe consistently delivers a smooth, creamy, perfectly spiced pumpkin pie. It’s the kind of recipe I trust enough to serve to guests because I know it’ll impress.
Trust me, making this pumpkin pie will give you that confidence boost you need in the kitchen. It’s delicious, straightforward, and absolutely perfect for fall celebrations or just a cozy night in.
Ingredients for Your Perfect Pumpkin Pie
Alright, let’s talk ingredients! The beauty of this pumpkin pie recipe is that it uses simple, everyday items you probably already have or can easily grab from the store. I always say that using good quality ingredients makes a huge difference, and it’s especially true here. You want that rich, pure pumpkin flavor to shine through, and using whole milk really gives the filling that extra creamy texture that’s just divine.
Here’s what you’ll need to gather:
| ¹ store-bought refrigerated pie crust | ¹ ¾ cups pumpkin puree (make sure it’s pure pumpkin, not pumpkin pie filling!) |
| ¾ cup brown sugar, firmly packed | 3 large eggs (letting them sit out for a bit to come to room temperature is a good idea!) |
| 2 teaspoons ground cinnamon | ½ teaspoon ground nutmeg |
| 1 teaspoon ground ginger | 1 teaspoon salt |
| 1 ¾ cups whole milk (you can use 2% in a pinch, but whole milk is best for richness) |
See? Nothing too fancy! These are the building blocks for a truly amazing, classic American pumpkin pie.
Step-by-Step Guide to Making Pumpkin Pie
Alright, let’s get this pumpkin pie party started! Making a fantastic pumpkin pie is totally doable, and honestly, it’s pretty straightforward once you know the steps. I’ve broken it down so you can follow along easily, and trust me, the aroma filling your kitchen will be amazing. We’re aiming for that perfect, smooth filling and a flaky crust, and it all starts with these simple steps.
Preparing the Pie Crust
First things first, let’s get that crust ready. Grab your store-bought refrigerated pie crust and gently press it right into your 9-inch pie dish. Make sure it fits nicely into all the nooks and crannies. Then, pop that dish onto a baking tray. This is a little trick I always do – it totally saves you from a messy oven if any filling decides to make a daring escape!
Mixing the Flavorful Pumpkin Filling
Now for the star of the show – the filling! In a big bowl, whisk together your pumpkin puree, brown sugar (pack it in there!), and those three large eggs. Next, toss in all those wonderful warming spices: the cinnamon, nutmeg, and ginger, plus that pinch of salt. Whisk it all until it’s nice and smooth. Finally, pour in the whole milk and give it another good whisk until everything is perfectly combined and looks wonderfully creamy. No lumps allowed!
Baking Your Delicious Pumpkin Pie to Perfection
Time to bake! Preheat your oven to 375°F (190°C). Carefully pour that gorgeous pumpkin mixture into your prepared pie crust. If you’re worried about the edges getting too dark – and it happens! – you can loosely wrap them with aluminum foil. Pop the whole thing into your preheated oven. We’re looking at about 70 minutes, but it’s good to peek around the 60-minute mark. You want the filling to be mostly set, but it should still have a tiny little jiggle right in the center. That’s the sweet spot!

The Importance of Chilling Your Pumpkin Pie
Okay, this next part is super crucial, so don’t skip it! Once your beautiful pumpkin pie is out of the oven, let it cool completely on a wire rack. Seriously, give it time. After it’s cooled down, wrap it up nice and tight and get it into the refrigerator for at least 5 hours. I know, it feels like forever, but this chilling time is what allows the filling to fully set and firm up, giving you that perfect slice every single time. It makes all the difference!
Tips for the Best Pumpkin Pie Ever
You know, when I first started baking pies, I was so worried about messing them up. But over time, I’ve learned a few little tricks that really make a difference, turning a good pumpkin pie into a *great* one. And the best part? They’re all super easy! First off, make sure your eggs and milk are at room temperature. It really helps everything combine smoothly for that silky-perfect filling. Trust me, it stops any weird lumps from forming. Also, don’t go crazy whisking the filling once you add the milk – just mix until it’s combined. Over-mixing can sometimes lead to cracks, and we want a beautiful, smooth surface on our pumpkin pie, right?
And about that crust! If you notice the edges browning too quickly while it’s baking, don’t be afraid to loosely tent some foil around them. It’s a simple fix that saves your beautiful crust from burning. My personal favorite tip, though? A little sprinkle of extra cinnamon or nutmeg on top right before serving. It just wakes up all those warm flavors. These little things really elevate your homemade pumpkin pie and show you’ve put in that extra bit of love and care!
Frequently Asked Questions About Pumpkin Pie
Got questions about making this classic American dessert? I’ve got answers! It’s totally normal to have a few queries when you’re diving into a new recipe, especially when it comes to something as beloved as pumpkin pie.
Can I use a different kind of milk? While whole milk is my top pick for richness, you can definitely use 2% milk if that’s what you have on hand. It’ll still be delicious! Just know that it might be slightly less creamy. I wouldn’t recommend skim milk though, as it really won’t give you that luxurious mouthfeel.
What if my crust starts browning too fast? Oh, that’s a common one! If you see those beautiful edges getting a bit too golden before the filling is set, just loosely tent some aluminum foil around them. It’s like a little shield for your crust and works like a charm!
My pie filling cracked, what happened? Don’t stress! A little crack sometimes happens, especially if the pie is overbaked. The best way to avoid it is to bake until the center is *just* set with a slight jiggle, and then let it cool completely and chill thoroughly. It’s all part of the learning process with pies and tarts! For more baking tips, check out King Arthur Baking’s ingredient properties guide.
Can I add anything else to the filling? Absolutely! Some people love adding a splash of vanilla extract or even a tablespoon or two of heavy cream for extra decadence. Feel free to experiment once you’ve mastered the basic recipe. This American dessert is pretty forgiving!
Nutritional Information for Your Pumpkin Pie
Just a friendly heads-up, the nutritional info you see below is an estimate. It can change a bit depending on the exact brands of ingredients you use and how big you slice your pie. Think of it as a good guideline rather than a strict rule!
| Serving Size | 1 slice |
| Calories | Approximately 300 kcal |
| Sugar | Approximately 35g |
| Sodium | Approximately 250mg |
| Fat | Approximately 10g |
| Saturated Fat | Approximately 4g |
| Unsaturated Fat | Approximately 6g |
| Trans Fat | 0g |
| Carbohydrates | Approximately 50g |
| Fiber | Approximately 3g |
| Protein | Approximately 6g |
| Cholesterol | Approximately 70mg |
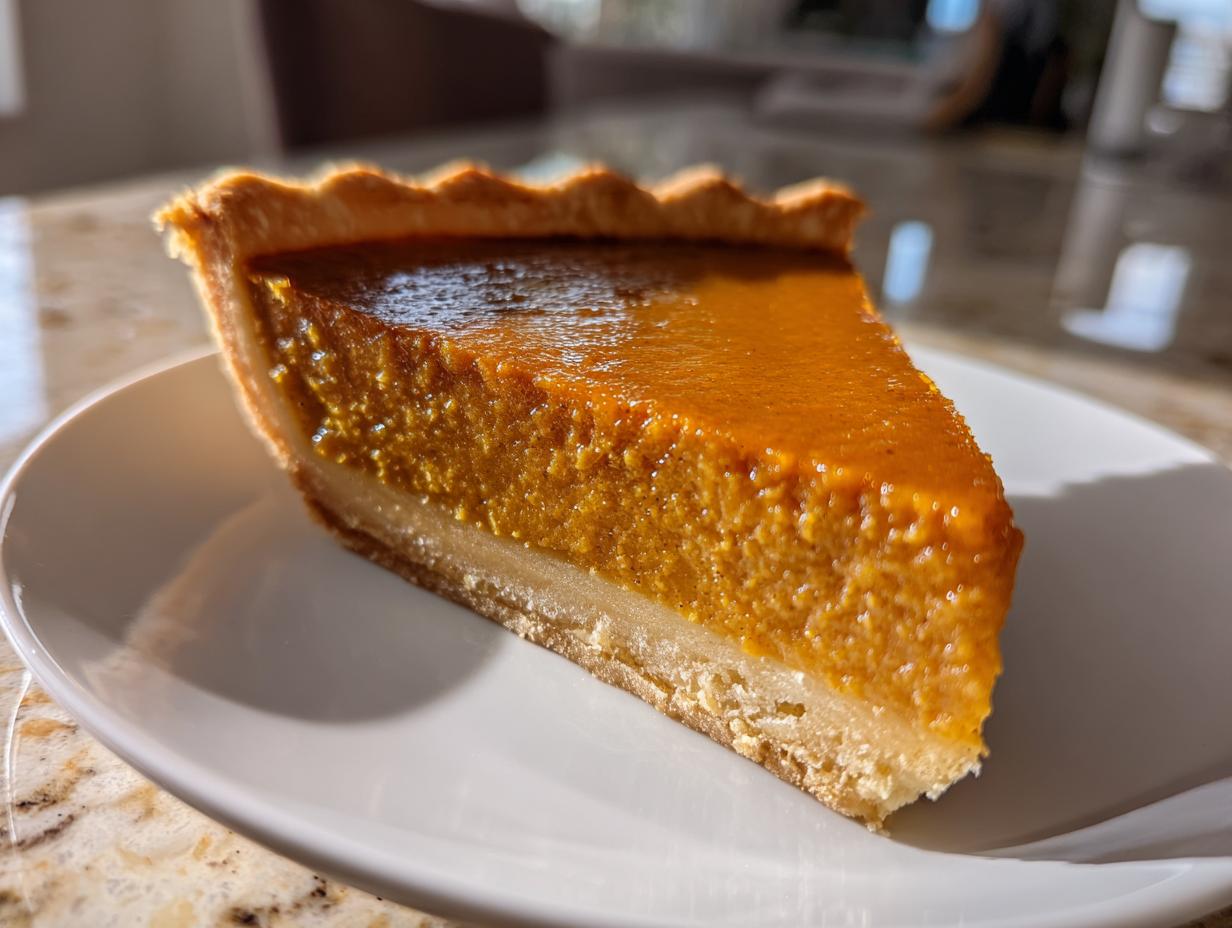
Enjoying Your Homemade Pumpkin Pie
And there you have it – your very own, absolutely gorgeous homemade pumpkin pie! Now comes the best part: serving it up. It’s absolutely divine on its own, but I love topping it with a generous dollop of whipped cream or a light dusting of cinnamon. If you’ve made this pie, I’d genuinely love to hear how it turned out for you! Sharing your baking wins (and even the little oops moments!) is what this is all about. For more fall-themed recipes, check out our Pumpkin Chocolate Chip Bars or our Heavenly Pumpkin Crisp.


Easy Pumpkin Pie: 1 Flawless Recipe
- Total Time: 6 hours 25 minutes
- Yield: 8 servings
- Diet: Vegetarian
Description
A classic American pumpkin pie recipe perfect for beginners, with a flaky crust and a smooth, spiced filling. This easy-to-follow guide will help you create a delicious homemade pie for any occasion.
Ingredients
- 1 store-bought refrigerated pie crust
- 1 ¾ cups pumpkin puree
- ¾ cup brown sugar, firmly packed
- 3 large eggs
- 2 teaspoons ground cinnamon
- ½ teaspoon ground nutmeg
- 1 teaspoon ground ginger
- 1 teaspoon salt
- 1 ¾ cups whole milk
Instructions
- Preheat your oven to 375°F (190°C).
- Press the pie crust into a 9-inch pie dish. Place the dish on a baking tray.
- In a large bowl, whisk together pumpkin puree, brown sugar, eggs, cinnamon, nutmeg, ginger, and salt.
- Add the whole milk and whisk until smooth.
- Pour the mixture into the pie crust. Loosely cover crust edges with foil to prevent over-browning (optional).
- Bake for about 70 minutes, checking after 60 minutes. The filling should be set with a slight jiggle.
- Let the pie cool completely on a wire rack.
- Wrap the cooled pie tightly and chill in the refrigerator for at least 5 hours.
- Serve with your favorite toppings.
Notes
- Using a baking tray under the pie dish helps catch any spills and makes cleanup easier.
- Covering the crust edges with foil is optional but helps prevent them from burning.
- The pie is done when the filling is mostly set but still has a slight jiggle in the center.
- Chilling the pie for at least 5 hours is crucial for the filling to firm up properly.
- Prep Time: 15 minutes
- Cook Time: 70 minutes
- Category: Desserts
- Method: Baking
- Cuisine: American