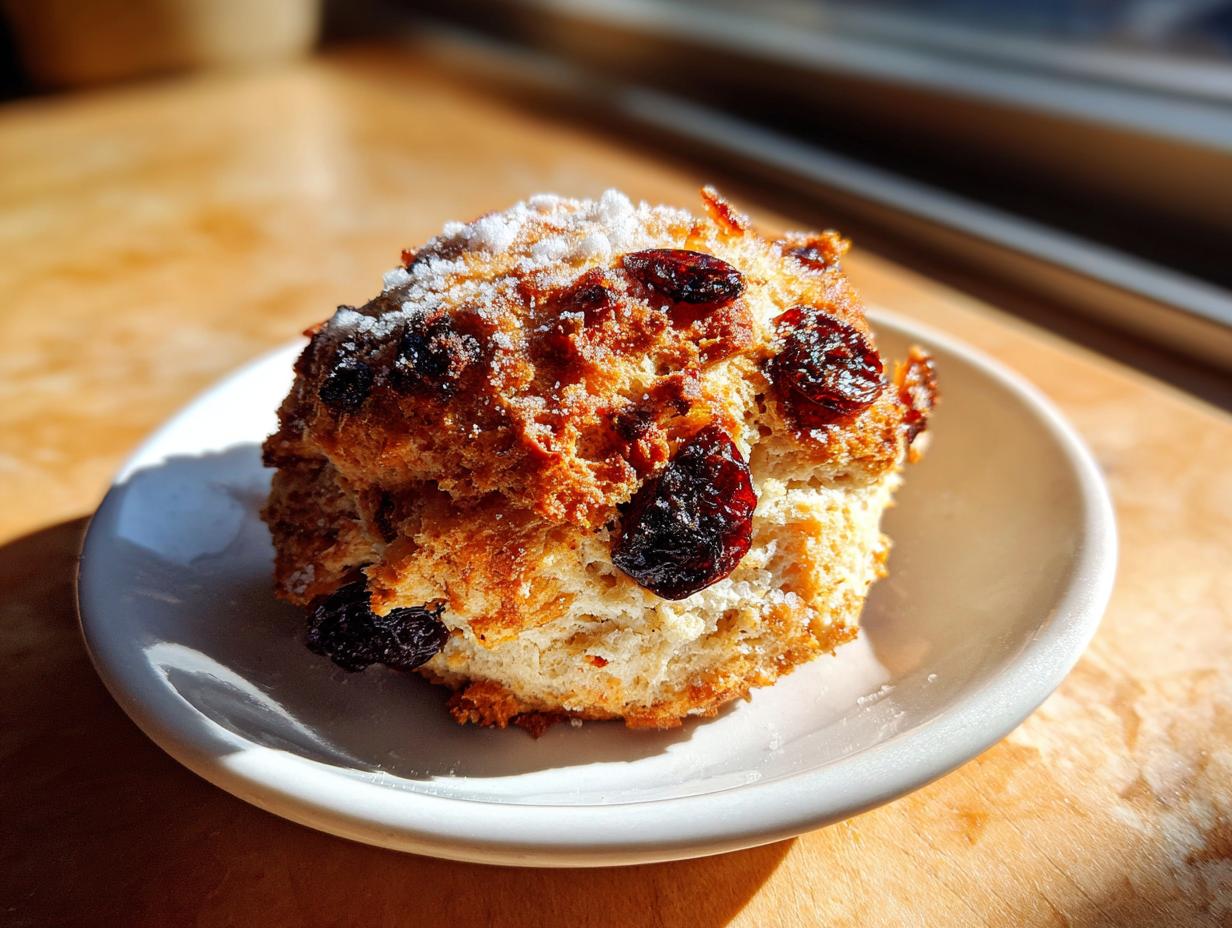
When I first started baking, scones felt like this mysterious, intimidating thing only fancy tea rooms could pull off. But let me tell you, my Easy Date Scones Recipe changed everything! These aren’t those dry, crumbly hockey pucks you sometimes end up with. Oh no. These are soft, flaky, and naturally sweet because we use those glorious little dates.
I perfected this Easy Date Scones Recipe one Sunday morning when I realized I was out of jam but had a bag of pitted dates staring at me. It was an emergency bake! Trust me, if you follow my simple steps, you’ll master the technique right away. This recipe is pure gold because it’s fast, forgiving, and tastes like you spent hours on it. I’ve baked this version hundreds of times, so I know exactly what works for true baking expertise. 
Essential Ingredients for Your Easy Date Scones Recipe
You don’t need a huge shopping list for these beauties, which is part of why I love them so much for a quick morning fix. We’re working with standard pantry staples, plus the star of the show: the dates! Getting the quantities right here is key to that flaky texture we’re aiming for.
Remember, every ingredient needs to be cold, cold, cold! Especially that butter. If your butter melts before it hits the oven, you’re asking for dense scones instead of light, airy ones. Keep everything chilled until the very last second.
Here’s exactly what you’ll need for a batch of eight perfect scones:
| Amount | Ingredient | Notes |
|---|---|---|
| 2 cups | All Purpose Flour | The base of everything! |
| 5 tablespoons | Granulated Sugar | Just enough sweetness. |
| 1 tablespoon | Baking Powder | Our main lift agent. |
| ½ teaspoon | Salt | To balance the sweetness. |
| 6 tablespoons | Cold Unsalted Butter | Cut into small cubes! Crucial. |
| ¾ cup | Half and Half | This holds the dough together. |
| 1 cup | Chopped Pitted Dates | The flavor bomb! |
| 1 tablespoon | Half and Half | For brushing the tops only. |
Ingredient Clarity and Preparation Details
I can’t stress this enough: the dates need to cooperate with the dough. If you toss in whole or giant chunks, they’ll either stick out or tear your dough when you cut the scones. My family rule is to chop those dates quite finely. It helps them distribute evenly throughout the batter, so you get a little burst of natural sweetness in every single bite without any massive sticky spots.
Also, notice we have two amounts of half and half. The larger amount goes into the dough to bring it together, and that tiny last tablespoon is just to brush the tops. That little brush of cream helps them turn that gorgeous golden brown color in the oven. Don’t skip it!
Equipment Needed for the Easy Date Scones Recipe
You don’t need a ton of fancy gadgets for this recipe, thank goodness! A good solid bowl is your best friend here, especially one big enough to whisk everything without flour flying everywhere—Oops! Make sure you have a baking sheet ready to go, lined with parchment paper.
You’ll also need something sharp to cut the rounds, like a bench scraper or even just a regular knife. And honestly, a silicone pastry brush is handy for that final milk wash, but you can always just use your clean fingers if you’re in a pinch. Keep it simple!
Step-by-Step Guide to Your Easy Date Scones Recipe
Okay, now for the fun part! This whole process, from measuring flour to pulling them golden brown from the oven, takes less than 30 minutes total. It’s honestly faster than running out to the bakery, and the smell that fills your kitchen is just unbeatable. We are moving fast here, so make sure your oven is hot and ready when you start mixing!
First things first: wake up that oven! Set it to 425 degrees Fahrenheit. I always use a standard baking sheet and line it with parchment paper. That parchment is your insurance policy against sticking, and it makes cleanup a breeze. Seriously, never skip the parchment paper.
Preparing the Dough for Perfect Easy Date Scones Recipe
Grab your biggest mixing bowl. We whisk the dry stuff first—flour, sugar, baking powder, and salt. Get them well combined so the baking powder is evenly spread out. If it isn’t, you’ll get one scone that rises to the ceiling and another that stays flat!
Next comes the cold butter cubes. This is where you need to channel your inner pastry chef. Use a pastry cutter or even two knives, or just your fingertips if you work quickly, to cut that butter into the flour mixture. You’re not trying to blend it in; you want it to look like coarse crumbs with some visible pea-sized chunks of butter still hanging around. Those butter chunks are what create those amazing flaky layers when they melt in the oven. Don’t overwork it until it looks like sand!
Now, pour in the main portion of the half and half. Stir it gently with a fork—just until it looks shaggy. I mean really shaggy, almost like it doesn’t want to come together. Stop stirring immediately! If you mix it too much now, you’ve already developed the gluten and you’ve lost the flakiness.
Finally, gently fold in those beautifully chopped dates. Use a rubber spatula for this, keeping your movements light. We are folding, not mixing. We want those dates tucked in, but we are not kneading the dough yet.
Shaping and Baking the Easy Date Scones Recipe
Turn that shaggy mess out onto a lightly floured surface. Now, this is the only real kneading you’ll do: gently press it together 5 or 6 times. That’s it! Just enough to make it stop falling apart. If you knead it 20 times, you’ll have biscuits, not scones. Shape it into a nice 8-inch round, about an inch thick. It should look rustic, not perfect. 
Use a sharp knife or bench scraper to cut that round into 8 equal wedges—like slicing a small pizza. Place those wedges on your lined baking sheet, making sure they are about 2 inches apart. They need room to expand sideways a little bit as they puff up.
Take that last tablespoon of half and half and brush it lightly over the tops of the wedges. If you’re feeling extra decadent, sprinkle a tiny bit of extra sugar on top for crunch. Pop them into that hot 425°F oven and set your timer for 12 minutes. Check them around 14 minutes; they should be puffed up nicely and lightly golden brown, especially on the bottoms. Let them cool on a wire rack for just a few minutes before you slather them with butter and dig in. They are best warm!
Why This Easy Date Scones Recipe Works for Everyone
I truly believe anyone can make these scones successfully, even if your baking history involves more burnt toast than beautiful pastries. This recipe is designed to be fast and foolproof, which is why it’s become my go-to when I need an impressive treat without the fuss.
Here are the big reasons why this Easy Date Scones Recipe is perfect for you:
- Speedy Baking: From start to finish, you’re looking at about 30 minutes total time. Perfect for unexpected brunch guests!
- Minimal Kneading: We only gently fold and press the dough a few times. This prevents gluten development, guaranteeing those lovely, tender layers.
- Natural Sweetness: The dates do most of the heavy lifting! You don’t need tons of sugar, which makes them taste richer and less cloying.
- Simple Technique: The method relies on just cutting cold butter into flour—a foundational skill that once mastered, opens up so many other baking doors for you.
If you can whisk dry ingredients and cube cold butter, you can absolutely nail this homemade scones recipe! You can find more baking tips over on our Pinterest page.
Tips for Making the Best Easy Date Scones Recipe
Even with an easy recipe like this, there are a couple of little secrets that professional bakers—and my own disastrous early attempts—have taught me. The biggest pitfall people fall into with any scone recipe is temperature. If your butter gets warm, it mixes right into the flour instead of creating those little pockets of steam that make the scone rise flaky. Keep that butter frozen or rock hard, cut it small, and work fast when you’re cutting it into the flour mixture.
Another huge one, and I mentioned it before but it bears repeating, is overmixing the dough once the liquid goes in. As soon as that shaggy dough just comes together, you have to stop. We want to handle it as little as possible. Think of it like shaking a soda bottle—you want to gently coax it together, not shake it violently!
Ingredient Notes and Substitutions for Easy Date Scones Recipe
When it comes to swaps, be careful, especially with the fat and the liquid. If you don’t have half and half, whole milk or heavy cream works fine, but you might need a splash less liquid overall because cream is richer. Don’t try to use low-fat milk; it just doesn’t provide the right texture for these homemade scones.
As for the dates, if you absolutely must substitute, dried cranberries or golden raisins are the closest flavor profile, but they won’t have the same natural caramel depth. If you use raisins, make sure you soak them in warm water for about ten minutes first, then drain them really well before folding them in. That stops them from robbing moisture from your scone dough, which is the last thing we want! For more baking inspiration, check out our Medium articles.
Answering Your Questions About the Easy Date Scones Recipe
I always get questions about scones because people worry they are fussy, but this Easy Date Scones Recipe is so straightforward! I’ve gathered the most common things folks ask me when they try this breakfast bake for the first time.
Q1. Can I make these ahead of time?
You absolutely can! You can cut the rounds, place them on the baking sheet, cover them tightly with plastic wrap, and chill them for up to 24 hours. When you’re ready to bake, just brush with the half and half and pop them into the hot oven. You might need to add 2 or 3 extra minutes to the baking time since they start cold.
Q2. My scones spread out instead of rising up. What went wrong?
That’s almost always a temperature issue! Either your butter wasn’t cold enough when you mixed it in, or maybe your oven wasn’t quite hot enough when they went in. Scones need that blast of high heat (425°F!) to force those butter pockets to expand quickly before the butter melts completely. Keep that butter freezing!
Q3. Can I use self-rising flour instead of all-purpose flour and baking powder?
Yes, you can, but you need to adjust the salt. Self-rising flour already has salt and leavening in it. If you swap, just leave out the 1 tablespoon of baking powder and the ½ teaspoon of salt from the dry ingredients. It works perfectly well for these date scones!
Q4. What’s the best thing to serve with these?
Honestly, they are amazing plain, but my favorite way is with a smear of good salted butter melting into the warm layers. A dollop of clotted cream or even some lemon curd makes them feel extra fancy for brunch. If you’re looking for other quick breakfast ideas, check out our French Toast Waffles.
Storing Your Delicious Easy Date Scones Recipe
The best part about these Easy Date Scones Recipe is that they are fantastic the day they are baked, but they hold up really well for a few days, too! Because they aren’t overloaded with eggs or cream like a richer cake, they stay soft longer. You want them to cool completely on the wire rack before you even think about putting them away, though. Trapping steam in with warm scones is how you get soggy bottoms, and we absolutely do not want that!
If you have leftovers, store them in an airtight container at room temperature. Don’t stick them in the fridge unless your kitchen is super humid, because the cold air can sometimes dry them out faster. If you do refrigerate them, make sure you warm them up properly before eating!
Here is my quick guide for keeping your homemade scones fresh:
| Storage Method | Timeframe | Reheating Tip |
|---|---|---|
| Airtight Container (Room Temp) | Up to 3 days | Microwave for 10-15 seconds until soft. |
| Freezer (Airtight Bag) | Up to 2 months | Wrap individually in foil, bake at 350°F for 10 minutes. |
If you’re freezing them, I highly recommend freezing them *un-brushed* with the half and half. Then, when you reheat them from frozen (wrapped in foil), they taste almost freshly baked!
Understanding the Nutrition of Your Easy Date Scones Recipe
Now, I’m not a nutritionist, so please take these numbers with a big grain of salt—literally, there’s salt in the recipe! This is just an estimate based on standard ingredient databases, so consider it helpful guidance rather than a strict diet plan for your delicious date scones.
| Nutrient | Amount Per Scone |
|---|---|
| Calories | 280 |
| Fat | 9 g |
| Carbohydrates | 46 g |
| Protein | 4 g |
Disclaimer: These figures are approximate based on the ingredients listed. Actual counts can vary depending on the exact brands and measurements you use! You can connect with us on Facebook for more updates.
Print
Easy Date Scones Recipe: 8 Flaky Bites
- Total Time: 30 minutes
- Yield: 8 scones
- Diet: Vegetarian
Description
Soft and flaky date scones made with naturally sweet chopped dates. This is an easy homemade scone recipe perfect for breakfast or brunch.
Ingredients
- 2 cups all purpose flour
- 5 tablespoons granulated sugar
- 1 tablespoon baking powder
- ½ teaspoon salt
- 6 tablespoons cold unsalted butter, cut into small cubes
- ⅜ cup half and half
- 1 cup chopped pitted dates
- 1 tablespoon half and half for brushing tops
Instructions
- Preheat the oven to 425°F and line a baking sheet with parchment paper.
- In a large bowl, whisk together the flour, sugar, baking powder, and salt.
- Cut the cold butter into the dry ingredients until the mixture resembles coarse crumbs with visible butter pieces.
- Stir in the half and half just until a shaggy dough forms.
- Gently fold in the chopped dates until evenly distributed.
- Turn the dough onto a lightly floured surface and knead gently 5 to 6 times until it holds together.
- Pat the dough into an 8 inch round about 1 inch thick.
- Cut into 8 equal wedges and place them 2 inches apart on the prepared baking sheet.
- Brush the tops with the remaining tablespoon of half and half and sprinkle lightly with sugar if desired.
- Bake for 12 to 15 minutes until puffed and lightly golden on the bottom.
- Cool on a wire rack before serving.
Notes
- Chopping the dates finely helps them distribute evenly and keeps the scones tender.
- Prep Time: 15 minutes
- Cook Time: 15 minutes
- Category: Breakfast
- Method: Baking
- Cuisine: American