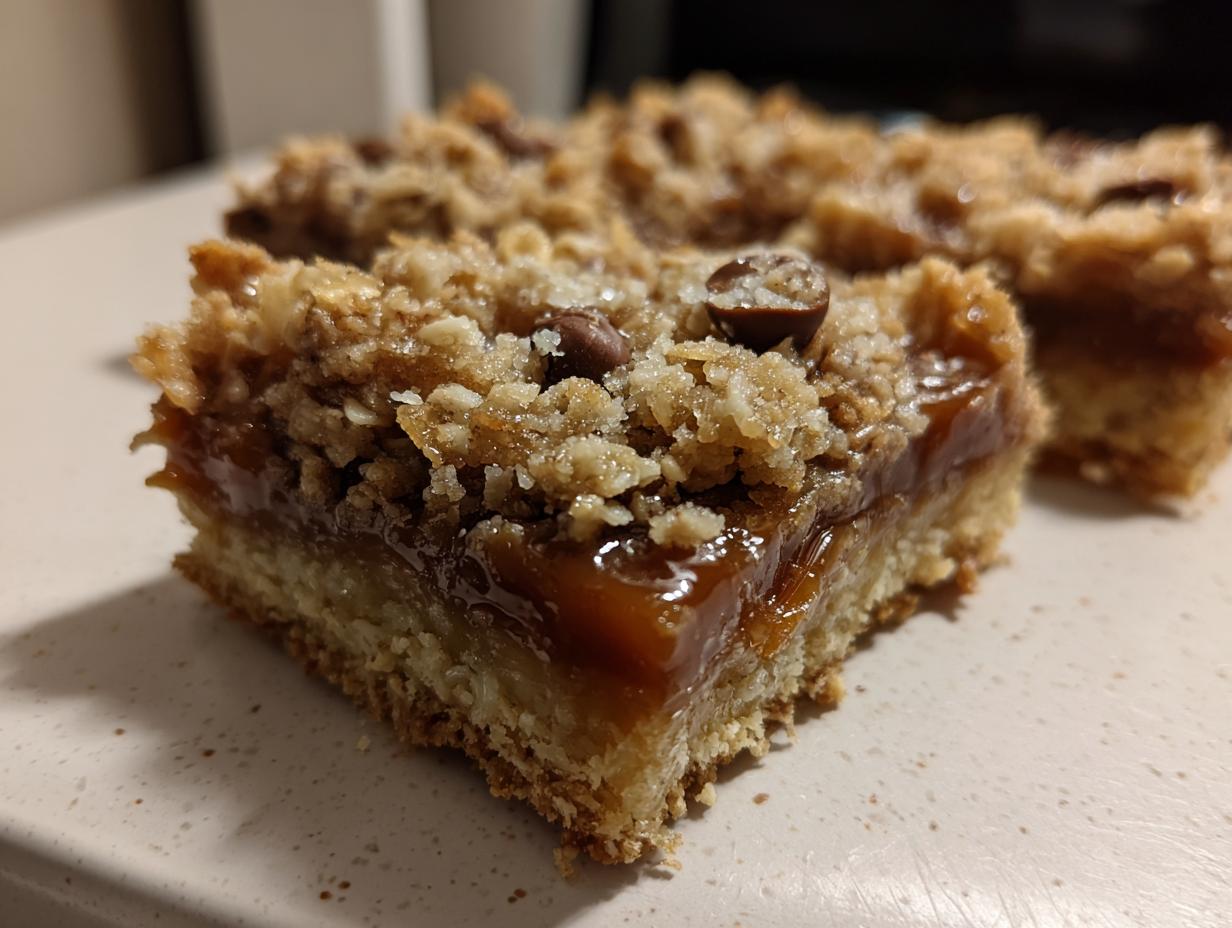
I have to tell you about my latest obsession—these Chewy Caramel Chocolate Oat Bars. They are everything you ever wanted in a dessert: buttery, loaded with melted chocolate, and that gooey caramel layer? Divine! I know, layering sounds complicated, but trust me when I say this recipe is practically foolproof, even if you’ve never baked anything more complex than toast.
I remember the first time I tried to make caramel from scratch for a batch of cookies years ago. Total disaster! It seized up, burned on the bottom, and I almost cried. That experience made me avoid anything with a caramel center for ages. But when I found this method using soft candies instead of dragging sugar to the right temperature? Game changer! It’s easy enough for a Tuesday night, but rich enough for a party. You are going to love how these turn out!

Gathering Your Supplies for Chewy Caramel Chocolate Oat Bars
Before we even think about melting butter, we need our battlefield set up! Baking is so much easier when everything is right there, waiting for you. Don’t let the multiple layers of these Chewy Caramel Chocolate Oat Bars intimidate you; the equipment list is pretty standard for a good bake. You’ll need a good 8-inch square pan—that size is key for getting the right thickness for the crust and topping.
You’ll also need a sturdy saucepan for making that luscious, gooey caramel center. Forget the fancy gadgets for now; we’re keeping this simple and effective. Having all your measuring cups and spoons ready will save you so much time when you’re mixing the dough in batches.
Essential Baking Equipment
- An 8-inch square baking pan. Make sure it’s sturdy!
- Parchment paper—this is non-negotiable for easy cleanup and removal.
- A reliable small saucepan for melting the caramel.
- A large mixing bowl for the dough.
- A rubber spatula for gently spreading the layers.
- A wire cooling rack so the bottom doesn’t steam.
The Perfect Ingredients for Chewy Caramel Chocolate Oat Bars
This recipe shines because it uses simple, good-quality components to create something that tastes incredibly luxurious. When we talk about Chewy Caramel Chocolate Oat Bars, the magic happens in the balance between the buttery base and the sweet, salty filling. Don’t skimp on the oats here; we want those old-fashioned rolled oats for the best chew factor.
The star of the show, besides the oats, is definitely the caramel. Using soft, unwrapped caramel candies makes the whole process so much smoother than trying to cook sugar syrup. It’s reliable, every single time. And remember, since this is a layered bar, the quality of your chocolate chips matters—use something you’d happily snack on!
Oat Crust and Topping Components
For the oat crust and the crumbly topping, we’re using the same dough, which is efficiency at its best! Make sure your light brown sugar is packed firmly into the measuring cup; that molasses content is what gives the crust that beautiful, slightly soft texture we’re aiming for.
Creating the Gooey Caramel Layer
This is where the texture gets truly amazing. We are taking soft caramel candies and melting them down with heavy cream. The cream isn’t just for thinning; it adds richness and helps keep that caramel layer soft and bendy even once it cools down. Don’t rush this part on the stovetop!
Ingredient Table
| Ingredient | Amount | Notes |
|---|---|---|
| Unsalted Butter | 1 cup | Melted |
| Light Brown Sugar | 1 cup | Packed tightly |
| Rolled Oats | 1 1/2 cups | Old-fashioned only, please! |
| All-Purpose Flour | 1 1/2 cups | |
| Baking Soda | 1 teaspoon | |
| Fine Sea Salt | 1/2 teaspoon | |
| Caramel Candies | 11 ounces | Soft, unwrapped |
| Heavy Cream | 1/2 cup | |
| Chocolate Chips | 1 cup | Semi-sweet recommended |
Step-by-Step Guide to Making Chewy Caramel Chocolate Oat Bars
Okay, now for the fun part—putting these amazing bars together! I break this down into a few simple stages so you don’t feel rushed while you’re assembling your Chewy Caramel Chocolate Oat Bars. Remember, patience in the assembly means perfection in the final slice!
Preparing the Pan and Oven
First things first: get that oven warmed up to 350 degrees Fahrenheit. This gives it plenty of time to come to temperature while you prepare the pan. Lining your 8-inch square pan with parchment paper is crucial here. I like to cut the paper large enough so that it hangs over two opposite sides—these are your handles for lifting the whole slab out later. Don’t skip this, or you’ll be scraping baked goodness out of the corners!
Mixing the Oat Dough Base
In a big bowl, we start with the wet stuff: the melted butter and the packed brown sugar. Whisk those together until they look happy and combined. Now, gently stir in your dry ingredients: the oats, the flour, the baking soda, and the salt. You’re not looking for a smooth cake batter; I want you to stop mixing when it just comes together into a crumbly, shaggy dough. If you overmix here, you’ll end up with hard bars instead of chewy ones!
Building and Baking the First Layer
Take about half of that crumbly oat mixture and press it firmly into the bottom of your prepared pan. Use the bottom of a measuring cup or just your clean fingers to really pack it down evenly. This is your foundation! Pop that crust into the preheated oven and let it bake all by itself for just 10 minutes. This pre-bake sets the crust so it doesn’t crumble apart when we add the gooey layers on top.
Layering the Caramel and Chocolate
While that crust is baking, get your caramel sauce ready. Combine the unwrapped candies and the heavy cream in your saucepan over medium-low heat. Stir, stir, stir! You need to keep it moving until it is totally silky smooth—no chunks allowed. As soon as you pull that hot crust out of the oven, immediately sprinkle the cup of chocolate chips evenly over the surface. Pour that warm, smooth caramel right over the chocolate. Use a spatula to nudge it gently to the edges.
Finishing the Bake and Cooling
Now, take the remaining oat dough and just crumble it loosely over the top of the warm caramel layer. Don’t press this top layer down! We want it crumbly. Bake for another 15 to 20 minutes. You’ll know they are ready when the edges look golden brown and the caramel layer is bubbling invitingly. This is the hardest part: You must let these cool completely—I mean at least four hours, or even overnight! If you try slicing them warm, the caramel will ooze everywhere, and you won’t get those beautiful bars.

Tips for Perfect Chewy Caramel Chocolate Oat Bars
Even with a simple recipe like this, a few little tricks can turn a good batch of Chewy Caramel Chocolate Oat Bars into an absolute masterpiece. I learned these lessons the hard way, usually involving a sticky spatula and a pan I couldn’t clean! Paying attention to the temperature and texture at different stages is what separates homemade from store-bought. If you want to see more baking tips, check out our latest articles.
Achieving Maximum Chewiness
The key to that perfect chewiness is definitely in the mixing of the dough. When you combine the flour, oats, and melted butter/sugar, stop mixing as soon as you no longer see dry flour streaks. If you beat it vigorously like a traditional cake, you develop too much gluten, and the bars end up hard and crisp instead of delightfully chewy. Also, don’t try to substitute the brown sugar for white sugar; that molasses is essential for keeping the texture soft!
Slicing Without Mess
If you take away only one piece of advice, let it be this: You absolutely must let these bars cool completely. I know, I know, the warm, bubbling caramel is calling your name, but slicing too early means your beautiful Chewy Caramel Chocolate Oat Bars will turn into a caramel puddle on your cutting board. Seriously, four hours minimum, or better yet, chill them in the fridge for an hour after they’ve cooled on the counter. When they are fully set, they lift out cleanly using the parchment handles, and you get perfect squares! For more dessert inspiration, follow us on Pinterest.
Storage and Reheating Instructions
The best part about these bars is that they actually taste even better the next day once the caramel has fully settled in! Since they are so rich, you don’t need to worry about them going stale quickly, but proper storage is key to maintaining that perfect, soft texture we worked so hard for.
Storing Your Baked Goods
Once you’ve successfully sliced them—remember, they must be totally cool—store your bars in an airtight container. I usually layer them with a small piece of wax paper between the layers so the caramel doesn’t stick to the bar above it, though if they are fully set, this isn’t always necessary. They stay perfectly fine sitting right on the counter at room temperature for about three to four days. No need to refrigerate unless your kitchen is incredibly hot! If you want to share your baking adventures, feel free to tag us on Facebook.
Reheating Guide
If you really want that “fresh out of the oven” molten chocolate moment, you can gently reheat them. Pop one bar on a microwave-safe plate for about 10 to 15 seconds. It warms up the chocolate beautifully, but be careful not to overdo it, or the caramel will get too runny again!
Frequently Asked Questions About Chewy Caramel Chocolate Oat Bars
I know you might have a few last-minute questions before you dive into baking, because every baker does! People often ask me about substitutions, or how to handle the messiest part of the process. Don’t worry, I’ve tested all these scenarios so you don’t have to!
Can I substitute the rolled oats?
This is a tough one, honestly. The recipe calls specifically for old-fashioned rolled oats because they hold their shape during baking, giving us that signature chew. If you use quick-cooking oats, they tend to dissolve more into the dough, making the crust denser and less textured. If you absolutely must substitute, try using an equal amount of roughly chopped nuts instead of oats, but you’ll lose that classic oatmeal bar flavor profile. If you are looking for other oat-based recipes, check out our maple pecan overnight oats.
How do I prevent the caramel from leaking when I cut the Chewy Caramel Chocolate Oat Bars?
This is the number one question I get! The secret to clean cuts isn’t in the heating; it’s in the cooling. You absolutely must let the bars cool completely on the counter for at least four hours. If you think they are cool, wait another hour! If you’re in a rush, pop the whole pan into the refrigerator for an hour after they’ve cooled down a bit. Once they are fully chilled and set, the caramel won’t run when you slice them into perfect Chewy Caramel Chocolate Oat Bars.
Sharing Your Baking Results
Well, that’s it! You’ve made something truly special. I just know these bars are going to disappear fast in your house. Once you’ve cooled them and sliced them up, please come back and let me know how they turned out! Leave me a rating and a quick review below—it helps other bakers know they can trust this recipe, too!
Print
Foolproof 3-Layer Chewy Caramel Chocolate Oat Bars
- Total Time: 4 hours 45 minutes
- Yield: 16 bars
- Diet: Vegetarian
Description
Rich, multi-layered bars featuring a buttery oat crust, gooey caramel center, and plenty of chocolate. These combine an oatmeal cookie with a candy bar indulgence.
Ingredients
- 1 cup unsalted butter, melted
- 1 cup light brown sugar, packed
- 1 1/2 cups old-fashioned rolled oats
- 1 1/2 cups all-purpose flour
- 1 teaspoon baking soda
- 1/2 teaspoon fine sea salt
- 11 ounces soft caramel candies, unwrapped
- 1/2 cup heavy cream
- 1 cup semi-sweet chocolate chips
Instructions
- Preheat your oven to 350°F and line an 8-inch square baking pan with parchment paper, letting excess hang over the sides.
- Combine the unwrapped caramel candies and heavy cream in a small saucepan over medium-low heat.
- Stir the caramel mixture constantly until it is completely smooth and melted, then remove it from the heat.
- Mix the melted butter and brown sugar in a large bowl until well combined.
- Stir in the oats, flour, baking soda, and salt until a crumbly dough forms.
- Press half of the oat mixture firmly into the bottom of the prepared baking pan to form an even crust.
- Bake the crust for 10 minutes, then remove it from the oven.
- Sprinkle the chocolate chips evenly over the hot crust.
- Pour the warm caramel sauce over the chocolate chips and spread it gently to the edges.
- Crumble the remaining oat dough over the caramel layer.
- Bake for 15 to 20 minutes until the edges are golden brown and the center is bubbling.
- Cool the bars completely in the pan on a wire rack for at least 4 hours to allow the caramel to set before slicing.
Notes
- The bars hold their shape well for make-ahead treats.
- Allow bars to cool fully for proper caramel setting before slicing.
- Prep Time: 15 minutes
- Cook Time: 30 minutes
- Category: Dessert
- Method: Baking
- Cuisine: American