Okay, listen up! If you think making a restaurant-quality cheese dip at home is some kind of dark art, I’m here to tell you you’re wrong! This recipe changed everything for me. When I first started cooking for big crowds—think Super Bowl parties where everyone expects the best—I was terrified of making a queso that would break, curdle, or just turn into oily sadness. I stuck to the store-bought jars for years!
But then I found this method. This isn’t some delicate, fancy cheese sauce; this is hearty, satisfying, and totally foolproof. We’re talking ground beef, beans, and cheese that actually melts right. I call it my Cowboy Queso because it’s robust enough for a ranch hand but easy enough for me on a Tuesday night!
The secret to making it beginner-friendly—and why I trust it completely—is that we cook the meat first and use cream cheese as our stabilizing backbone. That means you get that rich, thick texture without needing a food science degree. Trust me, once you make this, you’ll never buy the jarred stuff again. It’s my top-tier party dip for a reason!

Essential Ingredients for Authentic Cowboy Queso
You only need a handful of things for this dip, but the quality really matters, especially when it comes to the cheese. I’ve tried cutting corners, and believe me, the results were not worth the savings! This list makes enough for about eight hungry people, but honestly, if you have chips around, it disappears much faster than that.
We’re building this dip in layers of flavor, starting with the meat and ending with fresh pops of color. Don’t worry about fancy equipment; a good skillet and a whisk are all you need to get this done in under 30 minutes total.
Ground Beef and Spice Base
We start with half a pound of ground beef. I usually grab 85 to 90% lean. If you go too lean, you don’t get enough flavor rendering out, but we don’t want a greasy mess either! The spice is simple but key: salt, pepper, and those little crushed red pepper flakes. Those flakes aren’t just for heat; they give the whole dip a nice background warmth. Don’t skip them!
Creamy Cheese Foundation for Cowboy Queso
This is where the magic happens for our Cowboy Queso. You absolutely need the cream cheese—cubed up helps it melt faster—because it keeps everything stable. Then we mix sharp cheddar and Monterey Jack. The cheddar gives you that classic, tangy flavor, and the Jack melts like a dream and keeps things smooth. Always shred your own cheese if you can; the pre-shredded stuff has anti-caking agents that make the dip grainy!
Hearty Fillings and Fresh Additions
Once the cheese is melted, we toss in the good stuff that makes this a real meal! The can of diced tomatoes with green chilies adds moisture and just a little bit of necessary acid. Make sure you use one full can, undrained. Then, the black beans need to be thoroughly drained and rinsed—nobody wants that canned liquid messing up the texture. Finally, we stir in the diced red onion and cilantro right at the end for freshness. They cook just enough to soften slightly, but they still give you a nice bite.
Equipment Needed for Making Cowboy Queso
You don’t need a ton of fancy gadgets for this dip, which is part of why I love it so much for quick weeknight snacks or last-minute game days. Keep your setup simple!
- A large skillet or Dutch oven for browning the meat and melting the cheese.
- A wooden spoon or silicone spatula for stirring—you’ll be stirring constantly, so make sure it’s comfortable in your hand.
- A box grater if you’re shredding your own cheese (which you should be!).
- A measuring cup and spoons, of course.
That’s really it! We do everything right in one pot, which means cleanup is super fast. Total win!
Step-by-Step Instructions for Cowboy Queso
Alright, here is the game plan. This whole thing moves pretty fast—we’re talking 15 minutes of actual cooking time, so have your chips ready! Make sure you have your cheese shredded and everything else measured out before you even turn on the stove. Trust me on this one; once that cheese goes in, you have to keep moving!
Browning the Beef Mixture
First things first: grab that large skillet and get your tablespoon of olive oil heating over medium-high heat. Once it shimmers a little, toss in your ground beef. Now, you need to season it right away! Add your salt, pepper, and those red pepper flakes. You are going to cook this for about five to six minutes. Your goal here is to break up the meat really well—I like to use a wooden spoon to smash it into tiny little crumbles. We want the fat to render out nicely and the meat to get deeply browned. Once it’s cooked through and looks good, turn the heat down to medium. Don’t drain the fat yet; we need some of that richness!
Achieving the Perfect Creamy Texture in Cowboy Queso
This next part is crucial for avoiding lumps in your Cowboy Queso. Reduce that heat to medium—keep it gentle! Now, pour in your cup of milk. Immediately drop in those cubes of cream cheese. This is where you start stirring constantly. Don’t stop! You need to agitate it until that cream cheese melts completely into the milk and the beef mixture. It should look smooth, not oily or separated. Once it’s a uniform, creamy base, it’s time for the shredded cheeses.
Add your cheddar and Monterey Jack a handful at a time. Seriously, don’t dump it all in at once! Stir gently but persistently after each addition until that handful is fully incorporated and smooth before adding the next one. This slow, patient stirring is what guarantees you get that velvety, restaurant-style dip. If you rush this step, you’ll see lumps forming, and that’s a disaster.

Finishing and Warming the Dip
Once all the cheese is melted and you have a beautifully smooth, thick base, you can add your hearty fillings. Gently mix in the can of diced tomatoes with chilies (yes, use all the juice!), the drained and rinsed black beans, the finely diced red onion, and the chopped cilantro. You only need to cook this mixture for about three to four minutes, just enough time to heat everything through evenly. Don’t boil it hard now, or you risk upsetting that perfect cheese emulsion we just worked so hard to create!
Taste it! Does it need a little thinning? If it seems too thick for your liking—maybe your cheese was extra dense—just stir in a tiny splash of milk until it reaches that perfect, dippable consistency. You can transfer the whole thing right into a small slow cooker set to low to keep it perfectly warm for guests, or just serve it straight from the skillet!
Tips for Success When Making Cowboy Queso
I’ve had a few batches of this dip go wrong over the years, usually when I get impatient! But mastering this Cowboy Queso is all about avoiding separation and lumps. Here are my non-negotiable rules for a perfect, silky dip every single time.
First, never, ever add all your shredded cheese at once. I know it’s tempting to dump it in, but adding it gradually allows the heat to incorporate the cheese slowly. If the temperature is too high when the cheese hits, it seizes up and gets stringy or grainy. Keep that heat at medium-low during the melting phase!
Second, the cream cheese is your insurance policy. Make sure it’s actually softened a bit before you cube it and add it with the milk. Cold, hard cubes take forever to melt and can make the surrounding sauce sputter. We want gentle, even melting.
My third major tip is about the beans and tomatoes. Make sure those beans are super dry after rinsing. Excess water is the enemy of thick queso! If you notice the dip seems too thin even after the cheese melts, use less milk next time, or let it simmer gently for an extra minute or two uncovered to thicken up naturally.
Finally, if you are reheating leftovers, always add a splash of milk first. Cold cheese shrinks, and you need that liquid to help it relax back into a creamy texture without scorching the bottom.
Storage and Reheating Instructions for Cowboy Queso
Even though this dip is almost always gone in one sitting, sometimes you get lucky and have leftovers of this amazing Cowboy Queso. The good news is that it reheats surprisingly well if you treat the cheese right! You don’t want to just blast it in the microwave, or you’ll end up with a greasy disaster.
Storing Leftover Cowboy Queso Safely
When you’re putting the leftovers away, make sure you transfer the dip into a proper airtight container. Don’t leave it sitting out at room temperature for more than two hours, especially with all that meat and dairy in there. If you seal it up tight, it should keep perfectly fine in the fridge for about three to four days. I always try to transfer it to a container that isn’t too deep so it cools quickly in the fridge.
Reheating to Restore Creaminess
For reheating, low and slow is the name of the game. Never use high heat! The best way I’ve found is to put the queso in a small saucepan over very low heat, or use the slow cooker setting on low. You absolutely must stir it frequently. If it looks stiff or slightly separated when you first start stirring, add just a tiny splash of milk—maybe a teaspoon at a time—until it loosens up and gets that creamy texture back. It works like a charm!
Frequently Asked Questions About Cowboy Queso
I get so many great questions when people try my recipe for the first time! It’s always exciting to hear how much everyone loves this hearty dip. Here are a few things folks ask most often about making the best batch of Cowboy Queso.
Can I make this Cowboy Queso vegetarian?
Oh, absolutely! If you need to skip the beef for any reason, you can easily make this a vegetarian queso dip. Instead of browning the ground beef in Step 1, simply sauté your diced red onion first in the olive oil until it’s soft. Then, you can add diced mushrooms, crumbled plant-based ground meat substitute, or even some roasted corn kernels right where the beef would go. You still want to cook whatever substitute you use for about five minutes to develop some flavor before adding the milk and cream cheese. It still turns out amazing!
What is the best way to keep this party dip warm?
For parties or game days, you definitely want to keep this dip warm so it stays dippable. The very best tool for this job is a small slow cooker, which is why I mentioned it in the instructions! Transfer the finished queso right into the slow cooker. Set it to the ‘Low’ setting. This keeps it perfectly melted and creamy for hours without overheating it, which prevents separation. Just give it a gentle stir every 30 minutes or so! If you need other great party ideas, check out what we’re sharing over on Pinterest.
Do I really need to use both cheddar and Monterey Jack?
You sure do, if you want the best texture! The sharp cheddar gives you that classic, recognizable queso flavor that everyone expects. But Monterey Jack is a milder cheese that melts incredibly smoothly and has a higher fat content, which helps stabilize the whole dip and keeps it from getting grainy. If you absolutely had to choose just one, use the cheddar, but mixing them provides that perfect balance of flavor and meltiness for spectacular party dip results. You can also find more great tips on our Medium page.
Sharing Your Delicious Cowboy Queso
I truly hope this recipe becomes your go-to game day food! Making this hearty dip is one thing, but hearing about how much your friends and family loved it is the best part. When you try this cheesy, meaty masterpiece, please come back and leave a rating! You can always connect with us on Facebook too.
If you made any fun tweaks or substitutions, drop a comment below so we can all learn from you. Happy dipping!
Print
1 Foolproof Cowboy Queso Recipe Joy
- Total Time: 25 minutes
- Yield: 8 servings
- Diet: Omnivore
Description
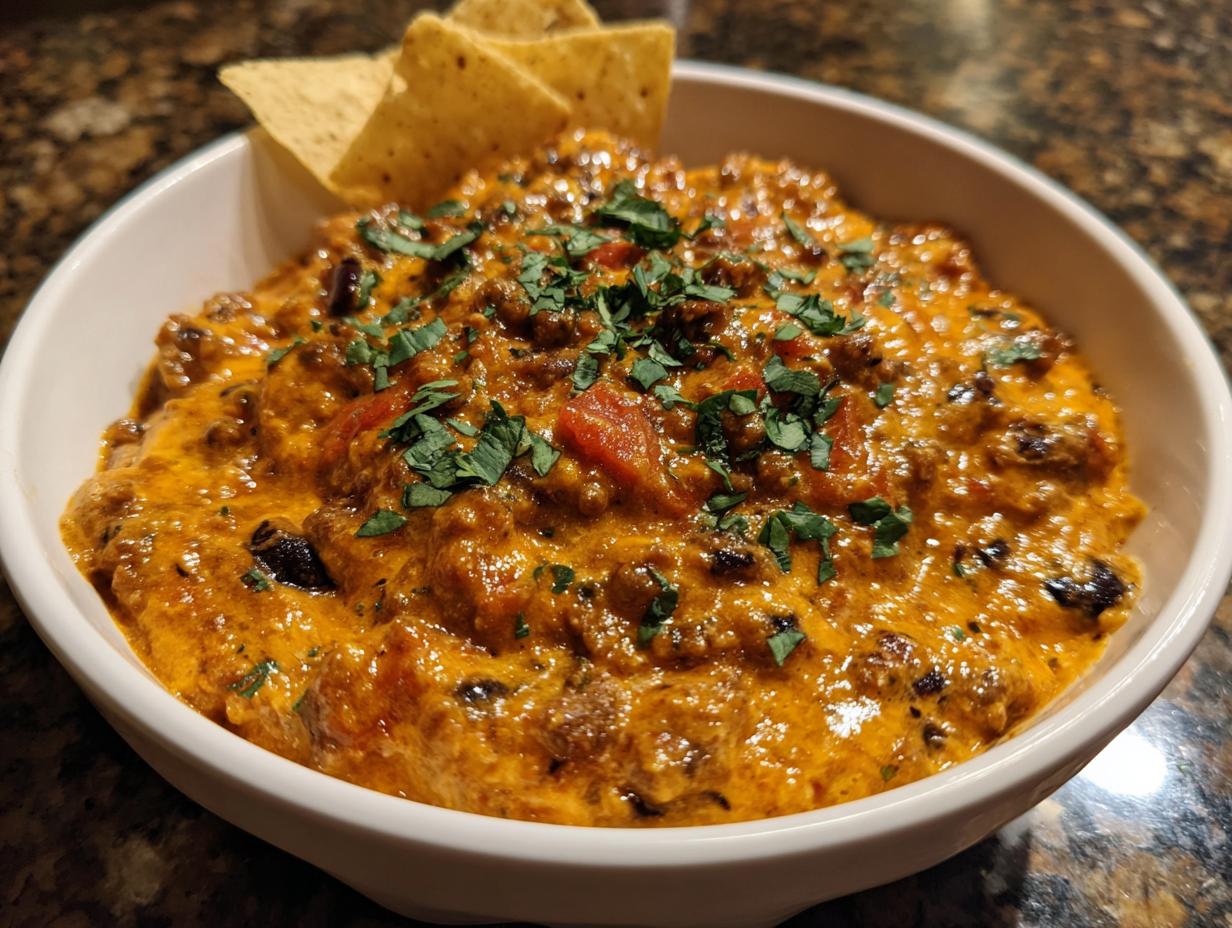
This creamy cowboy queso dip features ground beef, cheddar, beans, and tomatoes, creating a hearty appetizer perfect for gatherings.
Ingredients
- 1 tablespoon olive oil
- ½ pound ground beef (85–90% lean)
- ¼ teaspoon crushed red pepper flakes
- ½ teaspoon salt
- ¼ teaspoon black pepper
- 1 cup milk
- 8 ounces cream cheese, cubed
- 1½ cups shredded sharp cheddar cheese
- 1 cup shredded Monterey Jack cheese
- 1 can (10 ounces) diced tomatoes with green chilies, undrained
- 1 cup black beans, drained and rinsed
- ¼ cup finely diced red onion
- 2 tablespoons chopped cilantro
- Tortilla chips, pita chips, or toasted baguette slices (To Serve)
Instructions
- Heat olive oil in a large skillet over medium-high heat. Add ground beef, red pepper flakes, salt, and pepper. Cook 5 to 6 minutes, breaking up the meat until browned.
- Reduce heat to medium. Add milk and cream cheese cubes, stirring constantly until melted and smooth.
- Stir in cheddar and Monterey Jack cheeses a handful at a time until creamy.
- Mix in tomatoes, black beans, red onion, and cilantro. Stir gently and cook 3 to 4 minutes until heated through.
- Adjust consistency with a splash of milk if needed.
- Transfer to a serving bowl or keep warm in a slow cooker on low.
- Serve hot with tortilla chips or toasted bread.
Notes
- You can use leaner ground beef if preferred.
- Keep the queso warm in a slow cooker on low for parties.
- Prep Time: 10 minutes
- Cook Time: 15 minutes
- Category: Appetizer
- Method: Stovetop
- Cuisine: American