Forget plain old fries, seriously! I’m about to let you in on the best snack invention to ever come out of my kitchen: the ultimate crispy potato rings. I know, I know, potatoes are simple, but trust me when I say these are game-changers. They take that satisfying crunch you love from deep-fried food and put it into the most fun, dippable shape imaginable. When I first tried making these, I was worried they’d turn out mushy—you know how mashed potato things can be—but wow, they were golden and held their shape perfectly!
This recipe is my secret weapon for last-minute movie nights or when unexpected guests pop over. They are way easier than rolling out actual dough, and the double breading ensures that incredible, shatteringly crisp exterior. Seriously, these crispy potato rings are so good, my husband ate half the batch before I even finished the second round of frying. You won’t look at a regular potato the same way again!

Why You Will Master These Crispy Potato Rings
I’m telling you, these aren’t one of those recipes that looks easy but takes three hours of complicated steps. Nope! These potato rings are designed for real life. They come together fast, and the payoff in texture is huge. You’re going to feel like a kitchen wizard when you pull these golden beauties out of the fryer or the oven.
You’ll nail these on your first try because the structure is so forgiving, and the payoff is immediate. It’s the perfect snack for any night of the week, not just special occasions.
Quick Preparation for Perfect Crispy Potato Rings
- You only need about 20 minutes of hands-on time before they hit the heat. That’s faster than waiting for takeout!
- They are incredibly versatile. Serve them as an appetizer, a side dish, or the main event for a casual dinner.
- Whether you fry them for speed or bake them for a lighter touch, the crunch factor stays high.
Equipment Needed for Crispy Potato Rings
To get these perfect, you don’t need a fancy setup, which is great news! Having the right tools just makes the process smoother and faster. Trust me, using a good potato masher makes all the difference in the initial steps. Here’s what you’ll want handy before you start mixing up your dough.
- Large pot for boiling
- Potato masher or ricer
- Rolling pin
- Round cookie cutters (a smaller one for the center hole)
- Shallow dishes for the three-step breading station
- Heavy-bottomed pot or deep fryer (if frying)
- Baking sheet lined with parchment (if baking)
Gathering Ingredients for Crispy Potato Rings
Okay, let’s talk about what you need to make these amazing crispy potato rings. The ingredient list looks a little long because we are making the breading station three layers deep—that’s how we guarantee the crunch! But honestly, these are just pantry staples mixed with potatoes. Don’t let the flour, egg, and breadcrumbs scare you; it’s just a classic dredging setup that works every single time. You want everything measured out before you start mashing, so you can move quickly when the potatoes are ready.
Here is what you’ll need for about four servings of pure snack joy:
| Component | Ingredient | Quantity |
|---|---|---|
| Base | Russet Potatoes (peeled, cubed) | 3 large |
| Binder/Seasoning | Cornstarch, Salt, Pepper, Garlic Powder | Specific amounts vary |
| Coating Layer 1 | All-purpose flour | 1/2 cup |
| Coating Layer 2 | Eggs (beaten) | 2 large |
| Coating Layer 3 | Panko Breadcrumbs | 1 cup |
Ingredient Clarity and Preparation Notes
The potato choice here is non-negotiable if you want that fluffy inside/crispy outside combination. You absolutely must use Russet potatoes. They are starchy, which means they mash up beautifully and dry out slightly as they cook, creating that perfect dough consistency we need. If you use waxy potatoes, they stay too wet, and your rings will slump.
Also, make sure your Parmesan cheese is finely grated if you decide to use it—it just melts into the dough better that way. And when you mix the seasonings into the mash, take a tiny taste test before you form the rings. Remember, the flavor really sets in once they are cooked!
Step-by-Step Instructions for Crispy Potato Rings
This is where the magic happens! Don’t rush the first steps, especially letting the potatoes cool down a bit. If you try to mix the cornstarch in while they are piping hot, you’ll end up with a sticky mess that’s impossible to handle. We are moving from soft mash to perfectly crunchy crispy potato rings, and structure is everything!
Preparing the Potato Dough Base
First things first, boil those cubed Russets in salted water until they are completely fork-tender. We aren’t looking for al dente here; we want them soft enough to turn to mush easily. Drain them super well—I mean, let them sit in the colander for a minute or two. Any extra water is the enemy of crispy!
Mash them until they are as smooth as you can get them. Then, let them cool for about five minutes. This is important! Once they’ve cooled slightly, toss in the cornstarch, salt, pepper, garlic powder, and that optional Parmesan cheese. Mix it all together until it forms a soft dough. If it still feels way too sticky to handle, just mix in one more tablespoon of cornstarch. You want it workable, not loose.
Shaping and Coating Your Crispy Potato Rings
Now for the fun part! Dust your counter or a big cutting board lightly with flour. Roll out that potato dough until it’s about a half-inch thick. If you roll it too thin, they’ll break when you fry them; too thick, and the middle stays doughy. Half an inch is the sweet spot.
Use your round cutter to punch out the circles. Then, grab a smaller cutter—maybe the bottom of a piping tip or a small bottle cap—and punch out the center of each circle to make your ring. Gather up the scraps, quickly mash them back together, and roll them out for another batch. Don’t waste any potato!
Set up your dredging station: one dish with flour, one with the beaten eggs, and one with the panko breadcrumbs. Dip each ring first in the flour, shaking off the excess. Then, dunk it completely in the egg. Finally, press it firmly into the panko breadcrumbs. For the *ultimate* crunch, dip it back into the egg and then back into the breadcrumbs again for that double crust! That’s the secret insurance policy against sogginess.

Cooking Methods for Ultimate Crispy Potato Rings
You have two great paths to golden perfection here. For the fastest results and the crunchiest texture, you’ll want to fry. Heat your oil up to 350°F—you need that heat to be steady! Work in small batches so you don’t drop the oil temperature. Fry them for just 2 to 3 minutes per side until they are deeply golden brown. Scoop them out carefully and let them drain on paper towels immediately.
If you prefer baking, preheat your oven to 400°F. Line a baking sheet with parchment paper—this is essential. Lay your coated rings out in a single layer. You must brush or spray them lightly with oil; otherwise, the coating will just dry out instead of crisping. Bake them for 20 to 25 minutes total, flipping them halfway through to make sure both sides get that beautiful color.
Tips for Achieving Maximum Crispy Potato Rings Texture
Getting that perfect, shatteringly crisp exterior on your crispy potato rings really boils down to a few key details that you can control easily. First, absolutely stick to Russet potatoes. Their high starch content is what creates that firm, non-soggy interior structure we are aiming for. If you skip the cooling step after mashing, the dough gets too soft, and your breading won’t stick properly.
My biggest piece of advice centers on the oil temperature if you are frying. If the oil isn’t hot enough—aim for that steady 350°F—the rings will soak up oil instead of instantly crisping, and you’ll end up with oily, soft rings. If you bake, don’t be shy about brushing or spraying them with oil before they go into the 400°F oven. That little bit of fat is what turns the panko golden!
Storage and Reheating Your Crispy Potato Rings
Don’t let leftovers go to waste! These are best eaten fresh, but they reheat surprisingly well if you follow one simple rule: avoid the microwave. The microwave is the enemy of crispiness, I promise you that. Storing them in the fridge in a single layer inside an airtight container works best to keep them from getting squished together.
To bring back that amazing crunch, you need dry heat. A quick trip back into a hot oven or an air fryer will restore the texture beautifully. Here’s a quick guide:
| Method | Temperature | Time |
|---|---|---|
| Oven | 400°F | 8–10 minutes |
| Air Fryer | 375°F | 4–6 minutes |
Common Questions About Crispy Potato Rings
I get so many messages about these rings once people start making them, and that’s fantastic! It just shows how much everyone loves a good potato snack. Most questions revolve around keeping them crunchy or getting that dough just right. Don’t worry if you run into a small hiccup; we can fix almost anything! These crispy potato rings are pretty straightforward, but a few tips can make the difference between good and amazing.
Can I make the potato dough ahead of time for these crispy potato rings?
You absolutely can prep the dough ahead of time, which is a lifesaver on busy days! After you mix the mashed potatoes with the cornstarch and seasonings, wrap the dough tightly in plastic wrap and pop it in the fridge for up to 24 hours. When you’re ready to cook, let it sit on the counter for about 15 minutes to warm up just enough so you can roll it out without it cracking. If it feels too soft after sitting out, just dust your surface with a little extra flour.
What is the best type of potato for this snack?
Hands down, you need a high-starch potato. Russets are my go-to because they have less moisture and break down perfectly when mashed, giving you that fluffy interior that contrasts so well with the crust. If you use waxy potatoes, like red potatoes, they tend to hold their shape too much when boiled and release too much water, which makes the final dough gummy and hard to work with.
How to ensure my coating stays on during frying?
The coating staying on is all about the dredge sequence and making sure the potato surface is ready to grip. You must follow the flour-egg-breadcrumb sequence perfectly. The flour goes first to give the egg something to stick to, and then the egg acts as the glue for the panko. Also, make sure you press that panko breadcrumb layer on firmly—don’t just lightly sprinkle it! The double coating we do in the recipe really locks everything in place.
Enjoying Your Homemade Crispy Potato Rings
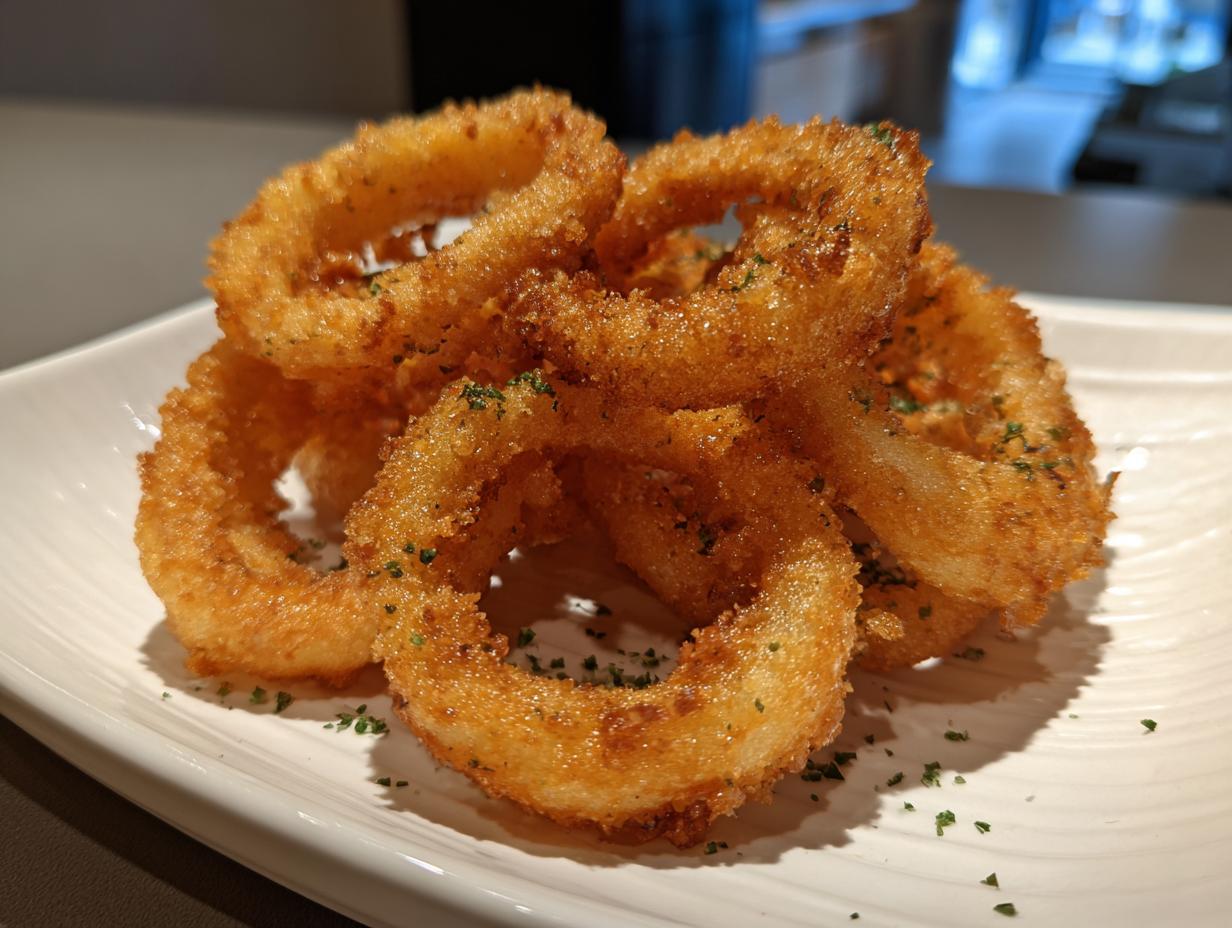
Now that you’ve got these gorgeous, crunchy potato rings, it’s time for the best part: dipping! These are fantastic served piping hot right out of the oil or oven. Don’t forget the garnish we talked about—a sprinkle of fresh parsley or some chopped chives adds such a bright, lovely color contrast to the golden crispy potato rings. My family loves them dipped in spicy mayo, but a classic ketchup or even a sharp cheddar cheese dip works wonders. Go get dipping! If you are looking for a great dip recipe, check out our guide on whipped ricotta hot honey dip.
We love seeing your creations! If you make these, tag us on social media. You can find more of our favorite recipes on our Pinterest page.
Print
Amazing 3-Step Crispy Potato Rings Bliss
- Total Time: 30 minutes
- Yield: 4 servings
- Diet: Vegetarian
Description
These crispy potato rings are golden, crunchy, and easy to make. A fun twist on fries—perfect for snacking, parties, or movie nights.
Ingredients
- 3 large Russet potatoes, peeled and cubed
- 3 tablespoons cornstarch
- 1/2 teaspoon salt
- 1/2 teaspoon black pepper
- 1/2 teaspoon garlic powder
- 1/4 cup finely grated Parmesan cheese (optional)
- 1/2 cup all-purpose flour
- 2 large eggs, beaten
- 1 cup panko breadcrumbs
- Vegetable or canola oil for frying
- Chopped parsley or chives for garnish
Instructions
- Boil potatoes in salted water until fork-tender, about 10–12 minutes. Drain well and mash until smooth. Let cool for 5 minutes.
- Add cornstarch, salt, pepper, garlic powder, and Parmesan to the mashed potatoes. Mix until a soft dough forms. Add 1 tablespoon more cornstarch if too sticky.
- Roll dough to about ½-inch thickness. Use a round cutter to make circles, then cut smaller circles from the center to create rings. Re-roll scraps as needed.
- Dip each ring in flour, then egg, then breadcrumbs, coating evenly. Repeat the egg and breadcrumb coating for an extra crispy crust.
- To fry: Heat oil to 350°F. Fry rings in batches for 2–3 minutes per side until golden brown. Drain on paper towels.
- To bake: Preheat oven to 400°F. Arrange rings on a parchment-lined baking sheet, spray or brush lightly with oil, and bake for 20–25 minutes, flipping halfway through.
- Sprinkle with salt and parsley. Serve warm with ketchup, spicy mayo, or cheese dip.
Notes
- Use starchy potatoes like Russets for the best texture.
- Let the mashed potatoes cool slightly before mixing to avoid a sticky dough.
- Prep Time: 20 minutes
- Cook Time: 10 minutes
- Category: Snack
- Method: Frying or Baking
- Cuisine: American