Okay, listen up, because I’m about to let you in on my absolute favorite weeknight secret: the Crispy Baked Parmesan Chicken Tenders! Forget the deep fryer mess, seriously. I used to think you needed gallons of oil to get that perfect crunch, but I was so wrong. This recipe is my go-to when I need something fast, kid-approved, and, most importantly, genuinely healthy.
If you’ve ever been intimidated by breading chicken, don’t worry one bit. This three-step dredging system is foolproof. I’ve made these for friends who claim they can’t cook anything beyond toast, and they nailed it! The secret is using panko that we toast first—trust me on this one—it makes all the difference between ‘meh baked chicken’ and ‘wow, is this fried?’ You’re going to feel like a kitchen rockstar after pulling these beauties out of the oven.

Why You Will Master Crispy Baked Parmesan Chicken Tenders
I know what you’re thinking: breaded chicken is always a chore, right? Wrong! This recipe is designed for real life. You’ll be shocked at how easy it is to pull off these amazing Crispy Baked Parmesan Chicken Tenders, even on a Tuesday!
Here’s why this recipe is going straight into your favorites rotation:
- It’s genuinely fast—we’re talking minimal time standing over the stove.
- The flavor is huge! That toasted panko and Parmesan combo is addictive.
- You get the crunch you crave without any of the guilt from frying.
Quick Prep Time for Busy Weeknights
Seriously, the prep time is only 15 minutes! That’s faster than ordering takeout, I promise. You just slice the chicken, set up your three little bowls, and you’re ready to roll. It’s the perfect solution when dinner needs to be on the table ASAP.
A Healthier Alternative to Frying
This is my main selling point! We skip the messy, heavy deep-frying process entirely. By toasting the panko lightly in olive oil and then giving the finished tenders a quick spray before baking, we get that gorgeous golden crust using way less fat. It’s the classic taste you love, reinvented for modern kitchens.
Simple Ingredients for Perfect Crispy Baked Parmesan Chicken Tenders
The magic in these Crispy Baked Parmesan Chicken Tenders doesn’t come from complicated steps; it comes from making sure the ingredients you use are doing their job right. Texture is everything here, and the quality of your breading components really shines through when we bake them.
You don’t need a pantry full of specialty items, which is why I love this recipe so much. We are keeping things simple, relying on good technique to make basic pantry staples taste incredible. Let’s look at what you need to gather before we start the assembly line!
Chicken and Breading Components
For the chicken, grab about a pound and a half of boneless, skinless breasts and slice them into nice, dippable strips. For the dry coating, this is where the crunch lives! You need a small amount of all-purpose flour, then the star: a cup and a quarter of panko breadcrumbs. Don’t skip toasting those crumbs first; it’s non-negotiable for crispiness!
Mix those toasted crumbs with half a cup of finely grated Parmesan cheese—use the real stuff if you can! Then we add in our flavor builders: one teaspoon of dried oregano, half a teaspoon of garlic powder, and just a quarter teaspoon each of salt and pepper.
Wet Mixture and Sauce Ingredients
The wet side of our dredging station is simple but important for making sure everything sticks. You’ll whisk together two large eggs, two tablespoons of water, and, here’s a little trick, one tablespoon of Dijon mustard. That little bit of mustard helps the coating adhere beautifully and adds a tiny bit of tang.
Now, don’t forget the dipping sauce! We make that separately, but it uses more Dijon. Whisk together half a cup of plain Greek yogurt, the remaining two tablespoons of Dijon mustard, and one tablespoon of honey. It’s tangy, sweet, and the absolute perfect partner for your tenders. If you enjoy tangy dips, you might also like this recipe for Greek Yogurt Ranch Dip.
Essential Equipment for Your Crispy Baked Parmesan Chicken Tenders
You don’t need any fancy gadgets for these Crispy Baked Parmesan Chicken Tenders, which is another big win for busy nights! What you really need is a good setup for dredging. Make sure you have your oven ready to go up to 400 degrees Fahrenheit.
You’ll want a sturdy baking sheet—line it with parchment paper first, please! Also, gather three separate shallow bowls for your assembly line: one for the flour, one for the egg wash, and the biggest one for your glorious Parmesan-panko mixture. That’s it! Three bowls and one pan is all it takes.
Step-by-Step Guide to Making Crispy Baked Parmesan Chicken Tenders
Alright, time to roll up our sleeves! This process is so straightforward, but the order of operations is key to getting those unbelievably Crispy Baked Parmesan Chicken Tenders. Think of this as an assembly line where every piece has an important job to do before it hits the oven.
Preparing the Coating and Chicken Strips
First things first: crank that oven up to 400 degrees Fahrenheit! You want it hot and ready to go. While it’s heating, line your baking sheet with parchment paper; this prevents sticking and makes cleanup a breeze. Now for the crunch secret: take your panko breadcrumbs and toast them in a skillet with just two tablespoons of olive oil over medium heat. Stir them constantly for about six or seven minutes until they are beautifully golden brown. Don’t walk away, or they’ll burn fast!
Once they’re toasted, immediately dump those golden crumbs into your largest shallow bowl. Mix in that grated Parmesan, oregano, garlic powder, salt, and pepper. That’s Coating Station Number Three!
Next, set up your other two stations. In the second bowl, whisk up your two eggs with the tablespoon of Dijon mustard and two tablespoons of water. That’s your glue! Finally, put your flour in the third, shallowest bowl. Make sure your chicken strips are ready to go—about a pound and a half, sliced nicely.
Breading and Arranging for Baking
This sequence is crucial, so pay attention! Take one chicken strip and dredge it completely in the flour first. You want a thin, even coat. Shake off any excess flour—we don’t want clumps! Next, dip that floured strip right into the egg mixture, letting the extra drip off.
Now, into the Parmesan-panko mix! This is where you press gently but firmly to make sure those crunchy crumbs really adhere to the chicken. I like to use my fingers to pat them on. Once it’s fully coated, lay that strip onto your prepared baking sheet. Repeat this for all your strips. Before they go into the oven, give every single tender a light, even spray of olive oil spray. This mimics the oil bath of frying and guarantees maximum crispiness!

Baking and Finishing Touches
Into the 400-degree oven they go! Bake these beauties for about 15 to 18 minutes. But here’s the kicker: you have to flip them halfway through. This ensures both sides get that gorgeous golden color. You’re looking for the chicken to reach an internal temperature of 165 degrees Fahrenheit—always use a thermometer to be sure! If you are looking for other crispy chicken ideas, check out our Crispy Baked Chicken Wings.
While those are baking and getting perfect, you have time to whip up that dipping sauce. Just whisk together the Greek yogurt, the other tablespoon of Dijon, and the honey until it’s smooth as silk. Once the tenders are out of the oven and golden, sprinkle them with a little fresh parsley for color, and serve them right away with that tangy sauce. Seriously, you’ve just made the best Crispy Baked Parmesan Chicken Tenders ever!
Tips for Achieving Maximum Crispiness
We all want that deep-fried crunch without the deep-fryer, right? Getting truly crispy Crispy Baked Parmesan Chicken Tenders is totally achievable, but it relies on a couple of non-negotiable steps. Don’t rush these parts, and you’ll be rewarded with texture that snaps!
The Importance of Toasted Panko
This is the single most important thing you can do. If you just dump the panko straight from the bag into the cheese, it will bake up pale and slightly chewy. By toasting the panko in a tiny bit of olive oil first, we are jump-starting the browning process. It gives the crumbs a head start and ensures they absorb the Parmesan flavor better, resulting in a richer, crunchier crust when they bake.
Using the Broiler for Extra Texture
If your tenders are cooked through but look a little pale on top after the main bake time, don’t panic! You can use the broiler for a lightning-fast crisp-up. Just move your baking sheet to the top rack, turn the broiler on low, and watch them like a hawk. Seriously, 60 seconds can turn golden into burnt, so you need to be right there supervising!
Storing and Reheating Your Tenders
These Crispy Baked Parmesan Chicken Tenders are so good I always make extra, but you have to store them correctly if you want them to stay crisp! If you try to just toss them in a plastic container, they will steam themselves soft, and nobody wants sad, soggy tenders the next day.
The key is air circulation! You want to cool them down completely first, and then get them into an airtight container separated by parchment paper. This prevents them from sticking together and keeps the moisture out. Here’s my quick guide for leftovers:
| Storage Duration | Best Reheating Method |
|---|---|
| Up to 3 days in the fridge | Toaster Oven or Air Fryer (Best crunch!) |
| Up to 1 month frozen | Bake from frozen at 400°F for 20-25 minutes |
Never use the microwave if you care about crispiness; it turns the panko crust rubbery immediately. A quick blast in a toaster oven is the best way to revive those glorious crumbs!
Frequently Asked Questions About Crispy Baked Parmesan Chicken Tenders
I get so many questions about these Crispy Baked Parmesan Chicken Tenders because everyone wants that perfect result! It’s normal to have little hiccups when you’re switching from frying to baking, so let’s clear up the most common things people ask me about.
You’ll find that most issues come down to temperature or mixing, but these quick fixes usually solve everything right away.
Q1. Can I use regular breadcrumbs instead of panko?
You certainly can, but you need to know that panko is what gives us that signature, airy crunch. If you use regular fine breadcrumbs, they will absorb more oil and create a denser coating. If you must substitute, toast them extra long to try and dry them out a bit more!
Q2. What kind of Parmesan cheese works best?
Use the finely grated kind that comes in the shaker can, or grate a block of real Parmigiano-Reggiano yourself! The pre-grated stuff has anti-caking agents, which actually helps keep the coating light when baking, so don’t feel guilty about using the shaker kind here. Just make sure it’s finely grated so it mixes evenly.
Q3. My tenders cooked in 12 minutes. Is that okay?
If your strips were very thin, 12 minutes might be enough! Always trust your thermometer over the clock. As long as the internal temperature hit 165 degrees Fahrenheit, they are safe and done. If they look pale, that’s when you use the broiler trick we talked about!
Q4. Can I swap the Greek yogurt in the sauce?
Sure! If you don’t have Greek yogurt, full-fat mayonnaise works really well for the base of the sauce, or even sour cream if you want something tangier. Just keep that ratio of Dijon and honey the same for the flavor balance!
Sharing Your Delicious Results
I really hope you loved making these as much as I love eating them! Once you’ve tried these amazing Crispy Baked Parmesan Chicken Tenders, please come back and tell me what you thought. Did you use the broiler? How was the honey mustard sauce?
Leave a rating right here on the page so other busy cooks know this recipe is a winner. And if you snap a picture of your perfectly crunchy dinner, tag me on social media! I love seeing your kitchen creations! You can find us on Facebook or check out our inspiration on Pinterest.
Print
Amazing 15 Crispy Baked Parmesan Chicken Tenders
- Total Time: 35 minutes
- Yield: 4 servings
- Diet: Vegetarian
Description
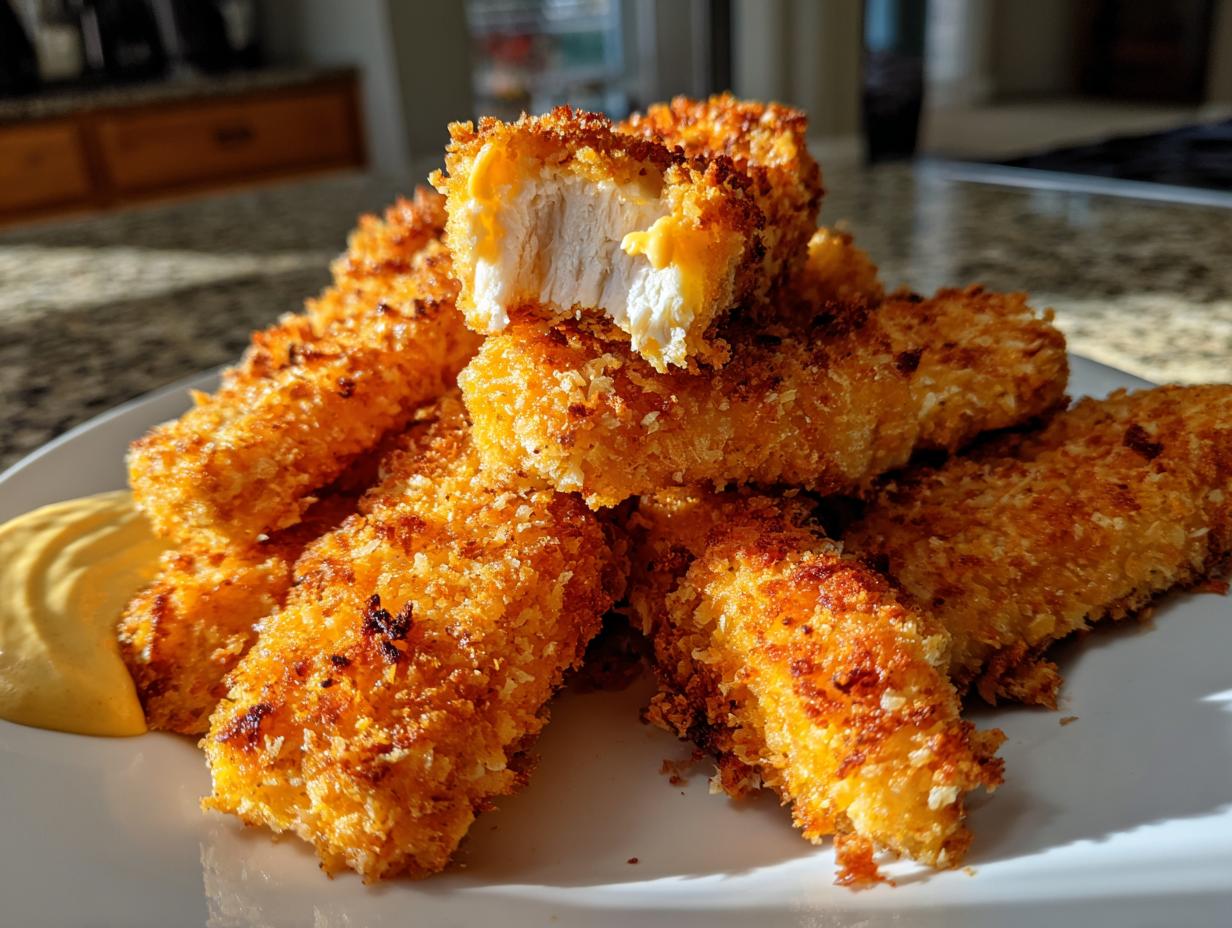
Golden, crispy baked parmesan chicken tenders with a crunchy panko coating. This is an oven-baked, healthier version of the classic favorite, perfect for quick dinners or dipping.
Ingredients
- 1 ½ pounds boneless, skinless chicken breasts, sliced into strips
- ⅓ cup all-purpose flour
- 2 large eggs
- 1 tablespoon Dijon mustard
- 2 tablespoons water
- 1 ¼ cups panko breadcrumbs
- ½ cup finely grated parmesan cheese
- 1 teaspoon dried oregano
- ½ teaspoon garlic powder
- ¼ teaspoon salt
- ¼ teaspoon black pepper
- 2 tablespoons olive oil
- Olive oil spray
- 1 tablespoon chopped fresh parsley (for garnish)
- ½ cup plain Greek yogurt (for sauce)
- 2 tablespoons Dijon mustard (for sauce)
- 1 tablespoon honey (for sauce)
Instructions
- Preheat your oven to 400°F. Line a baking sheet with parchment paper.
- Heat olive oil in a skillet over medium heat. Add panko and cook for 6–7 minutes, stirring, until golden brown.
- Transfer toasted crumbs to a shallow bowl. Mix the crumbs with parmesan, oregano, garlic powder, salt, and pepper.
- In one bowl, whisk the eggs, Dijon mustard, and water.
- Place flour in a separate bowl.
- Dredge each chicken strip in flour. Dip it in the egg mixture. Coat it with the panko mixture, pressing gently so the crumbs stick.
- Arrange the breaded chicken strips on the baking sheet. Lightly spray them with olive oil spray.
- Bake for 15–18 minutes, flipping halfway through, until the chicken is golden and reaches 165°F internal temperature.
- While the chicken bakes, whisk Greek yogurt, mustard, and honey in a small bowl until smooth for the sauce.
- Sprinkle the baked chicken with parsley and serve hot with the honey mustard sauce.
Notes
- For extra crunch, you can broil the chicken for 1–2 minutes at the end. Watch it closely to stop burning.
- Prep Time: 15 minutes
- Cook Time: 20 minutes
- Category: Main Course
- Method: Baking
- Cuisine: American