Bruschetta Dip is the appetizer that saved me during my first-ever housewarming party. Seriously! I was twenty-two, trying to impress my new neighbors, and I realized I had totally forgotten to make a proper snack. Panic set in, but then I remembered this super simple assembly trick my aunt showed me. It uses zero cooking, which is exactly what the NoobRecipes philosophy is all about: maximum flavor for minimum effort.
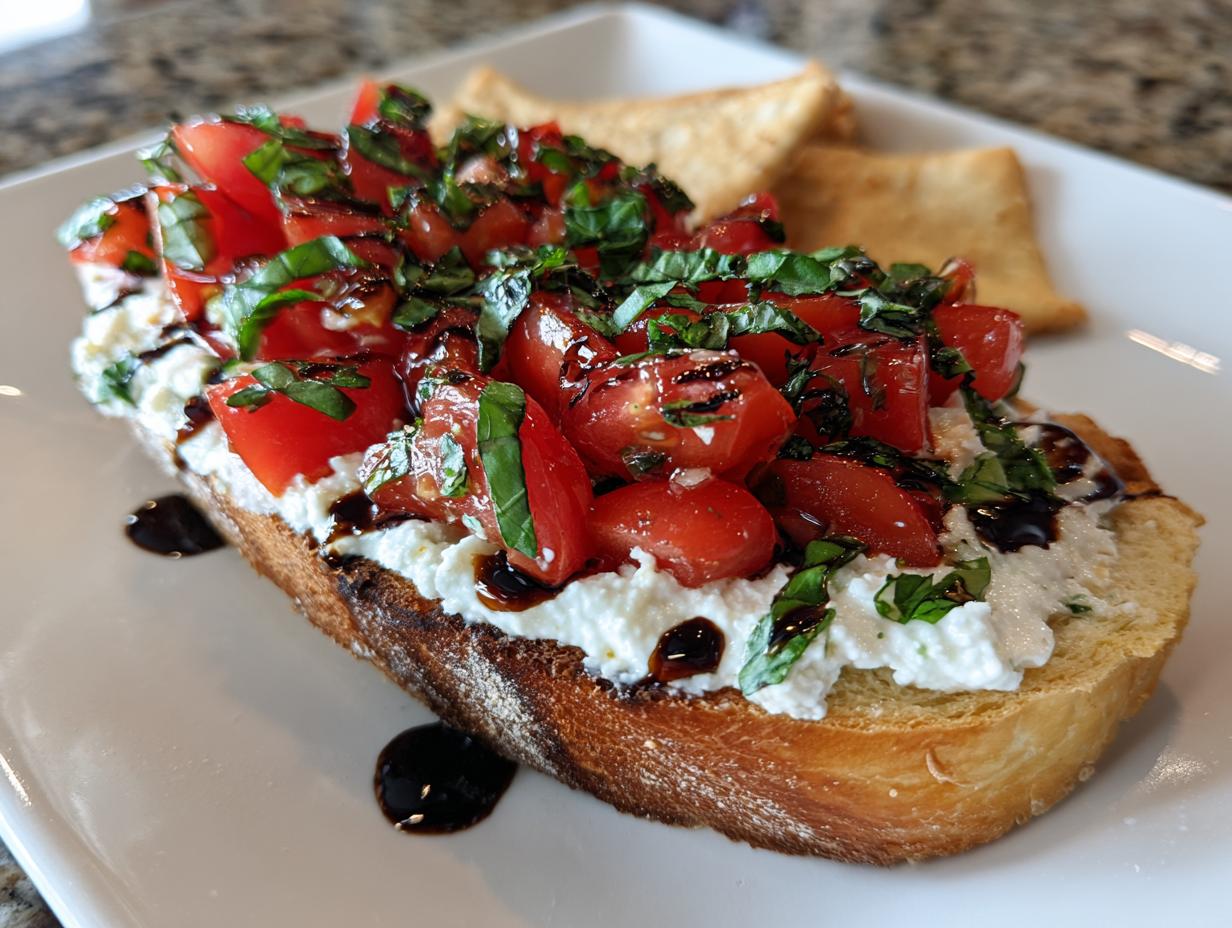
This isn’t some complicated, slow-roasted Italian dish. This is the real deal for busy folks who want something fresh, vibrant, and beautiful on the table in under ten minutes. Trust me, when you see that creamy base topped with bright tomatoes and that dark, glossy balsamic drizzle, people will think you slaved away for hours. It’s my go-to for proving that home cooks, even absolute beginners, can nail impressive party food.

Assembling Your Quick Bruschetta Dip
If you can spread soft cheese onto a plate, you can master this recipe. That’s the beauty of the Bruschetta Dip—it’s pure assembly, zero heat required! For those of you who are just starting out in the kitchen, this recipe is your confidence builder. We aren’t dealing with tricky temperatures or tricky doughs here; we are just layering amazing flavors.
The key to making this look professional is using a nice, wide, clean platter. You want that creamy cheese layer to be the base, spread almost to the edge but leaving a tiny border—that border is where the balsamic glaze will look its best when you drizzle it over everything. We are aiming for visual impact with almost zero physical work. Seriously, the hardest part of making this Bruschetta Dip is stopping yourself from dipping the first chip before the basil is even sprinkled on top!
Required Equipment for Perfect Bruschetta Dip
You guys know I love keeping things simple over here at NoobRecipes, and this Bruschetta Dip requires almost nothing in terms of specialized gear. Forget the stand mixer! You truly only need the basics to make this look fantastic.
Here is what you absolutely need on your counter before you start spreading:
- A large, flat serving plate or platter (This is crucial for presentation!)
- A sharp knife for chopping the fresh tomatoes and basil
- A cutting board
- A small spoon or offset spatula for spreading the cheese
That’s it! See? No oven time, no complicated whisks needed for this beautiful spread.
Ingredient Clarity for Your Bruschetta Dip
When making a no-cook spread like this Bruschetta Dip, ingredient quality really shines through because there’s nowhere for bland flavors to hide. Since we aren’t cooking anything, those fresh elements need to be spot-on. Don’t try to cheat on the basil; fresh herbs make all the difference here!
The base is one 6.5-ounce container of soft cheese. I always grab the Alouette brand that has the herbs already mixed in—it saves a step and guarantees a good flavor profile for beginners. Make sure the cheese is softened slightly at room temperature so it spreads like butter, not like a brick.
For the tomatoes, you need about a half cup, finely chopped. I dice mine small so they sit nicely on top of the cheese without sliding off later. And the basil? Chop it roughly, but aim for about a quarter cup packed.
Here’s a quick rundown of exactly what you need for this fantastic appetizer:
| Component | Amount | Prep Note |
|---|---|---|
| Soft Herb Cheese (like Alouette) | 1 (6.5 oz) container | Let it sit out for 10 minutes before spreading |
| Fresh Tomatoes | ½ cup | Finely chopped |
| Fresh Basil | ¼ cup | Freshly chopped |
| Balsamic Glaze | 2 Tablespoons | Reduction only, see note below! |
| Serving Vehicle | As needed | Pita chips or thin baguette slices |
Understanding the Balsamic Glaze
This is the one ingredient where beginners often get confused, so listen up! You absolutely must use a balsamic glaze or reduction, not regular balsamic vinegar. The vinegar is too watery and will soak into your cheese base immediately, making a mess. The thick glaze drizzles beautifully and holds its shape, giving you that professional, glossy finish on top of your dip.
Step-by-Step Instructions: Creating the Bruschetta Dip
Okay, get ready because this is where the magic happens, and I promise you, it takes less time than making toast. We are going to build this Bruschetta Dip layer by layer. Remember, presentation matters when you aren’t cooking, so keep those layers neat!
First things first, grab that large platter we talked about. Take your softened herb cheese—it should be spreadable now. Place the entire container’s contents right in the center of your plate. Now, take your offset spatula or the back of a spoon and gently spread the cheese outward. You want a nice, even layer, but stop about a quarter inch from the edge. This little border is your secret weapon; it frames the dip beautifully. Don’t press too hard, or you’ll scrape the plate!
Next up are the tomatoes! Take those finely chopped tomatoes and sprinkle them evenly over the cheese layer. Again, try to keep them centralized. If you pile them too high on one side, the whole thing will look lopsided when you go to serve it. This layer adds that beautiful pop of fresh flavor and color that screams summer.
After the tomatoes come the greens. Gently scatter your chopped fresh basil over the tomatoes. A little goes a long way here because the flavor is so intense. You’re looking for nice flecks of green scattered across the red and white base. If you’re using great quality basil, you’ll already start smelling that amazing Italian aroma filling your kitchen!
Now, for the grand finale of this Bruschetta Dip assembly: the balsamic glaze. Take your bottle of glaze—remember, thick, not runny!—and drizzle it back and forth across the entire platter. Don’t just glob it in one spot. Use a zigzag motion that covers the cheese, the tomatoes, and the basil. This is pure theater, folks! Once that dark, sweet glaze hits the fresh ingredients, you’re done. Seriously, that’s the entire recipe. Serve it immediately with your favorite chips or bread because this appetizer is best enjoyed right when it’s put together.

Tips for Making Your Bruschetta Dip Shine
Even though this Bruschetta Dip is assembly-only, a few small tricks I learned the hard way can take it from good to “Wow, who made this?” First, chilling your serving platter beforehand is a game-changer, especially if you’re serving this on a hot day. Pop your plate in the fridge for about 15 minutes before you start spreading the cheese. It helps keep everything firm while you’re layering, preventing the cheese from getting too soft and sloppy.
My other big tip for this simple recipe involves the tomatoes. Always pat them dry with a paper towel after chopping! If you skip this, that extra moisture seeps out and waters down your beautiful cheese base, turning your perfect Bruschetta Dip into a slightly soupy puddle. A little blotting goes a long way toward keeping those layers distinct and fresh-tasting.
Also, don’t be afraid to experiment with the herb cheese base. If you can’t find the pre-herbed kind, just use plain cream cheese or Boursin, and stir in a tiny pinch of dried oregano and garlic powder. It’s still super beginner-friendly but lets you tweak the flavor profile just a bit! If you want more appetizer ideas, check out our snacks section.
Serving Suggestions for Bruschetta Dip
Because this dip is so savory and fresh, it pairs wonderfully with a variety of textures. While the recipe calls for pita chips—and I love the crunch of the Town House brand—you can certainly get creative. Thinly sliced, toasted baguette rounds are always elegant. For something a little different, try serving it with sturdy, lightly salted vegetable chips or even some sturdy pretzel crisps. Everything should be crisp enough to scoop up that creamy base without breaking!
Frequently Asked Questions About Bruschetta Dip
I know you beginners might have a few questions about making this assembly-required snack. Don’t sweat it; I’ve got the answers right here!
Q1. Can I prepare this Bruschetta Dip ahead of time?
Since this is a no-cook recipe, it’s best assembled right before serving. If you need to prep components ahead, chop your tomatoes and basil, but keep them separate and dry in the fridge. Assemble the entire Bruschetta Dip no more than 30 minutes before your guests arrive.
Q2. What if I can’t find balsamic glaze? Can I just use regular balsamic vinegar?
Absolutely not! This is crucial for your Bruschetta Dip success. Regular vinegar is too thin and will turn your lovely cheese layer into a soggy mess in minutes. You must use a thick reduction. If you only have regular vinegar, simmer about a half cup in a small pan until it reduces by half and coats the back of a spoon—that’s your homemade glaze!
Q3. Can I add garlic to this dip?
You totally can, but since we aren’t cooking, you need to be careful. Instead of adding raw minced garlic directly to the cheese (which can taste harsh), try stirring a tiny pinch of garlic powder into the soft cheese base before spreading it on the plate. That gives you the flavor without the raw bite.
Q4. How long will leftovers of the Bruschetta Dip last?
Honestly, leftovers are rarely a thing because everyone devours it! But if you have any left, scrape off the tomato/basil topping and store the base cheese spread separately. The fresh toppings don’t keep well once they’ve sat out.
Storing and Keeping Your Bruschetta Dip Fresh
Since this recipe involves fresh, uncooked ingredients, storage isn’t ideal, but if you must save leftovers from your amazing Bruschetta Dip, here is the best way to go about it. Remember, the fresh basil and tomatoes lose their crispness fast once assembled.
You cannot reheat this, obviously, since nothing was cooked to begin with! For best results, you need to separate the components.
| Component | Storage Method |
|---|---|
| Soft Cheese Base | Airtight container in the fridge for up to 3 days |
| Toppings (Tomatoes/Basil) | Store separately, loosely covered, for up to 1 day |
| Glaze (If any is left) | Store in original container in the fridge |
When you want to enjoy it again, start fresh with new chips and spread the leftover cheese base, then add freshly chopped tomatoes and basil if you have them! If you enjoyed this recipe, be sure to follow us on Pinterest for more easy wins!
Print
Bruschetta Dip: 1 Amazing Beginner Win
- Total Time: 10 minutes
- Yield: 6 servings
- Diet: Vegetarian
Description
Bruschetta Dip is a simple, no-cook appetizer featuring creamy herb cheese topped with fresh tomatoes, basil, and a sweet balsamic glaze, perfect for serving with chips or bread.
Ingredients
- 1 6.5 oz Alouette Cheese with herbs or other soft cheese spread
- ½ cup tomatoes, chopped
- ¼ cup fresh basil, chopped
- 2 Tablespoons Balsamic vinaigrette glaze or reduction
- Pita chips, crackers or thinly sliced baguette for serving
Instructions
- Spread the soft cheese evenly over the center of a large, clean plate or small platter, leaving about a 1/4 inch border.
- Evenly sprinkle the chopped tomatoes over the cheese layer.
- Sprinkle the fresh chopped basil over the tomatoes.
- Drizzle the balsamic glaze back and forth over the entire plate.
- Serve immediately with pita chips, crackers, or thin slices of baguette.
Notes
- Use a clean and dry plate or platter for serving.
- Balsamic glaze is a reduction and is thicker than regular balsamic vinegar; do not substitute with straight vinegar.
- Town House brand pita chips are a good serving suggestion.
- Prep Time: 10 minutes
- Cook Time: 0 minutes
- Category: Appetizer
- Method: No-Bake Assembly
- Cuisine: Italian-American