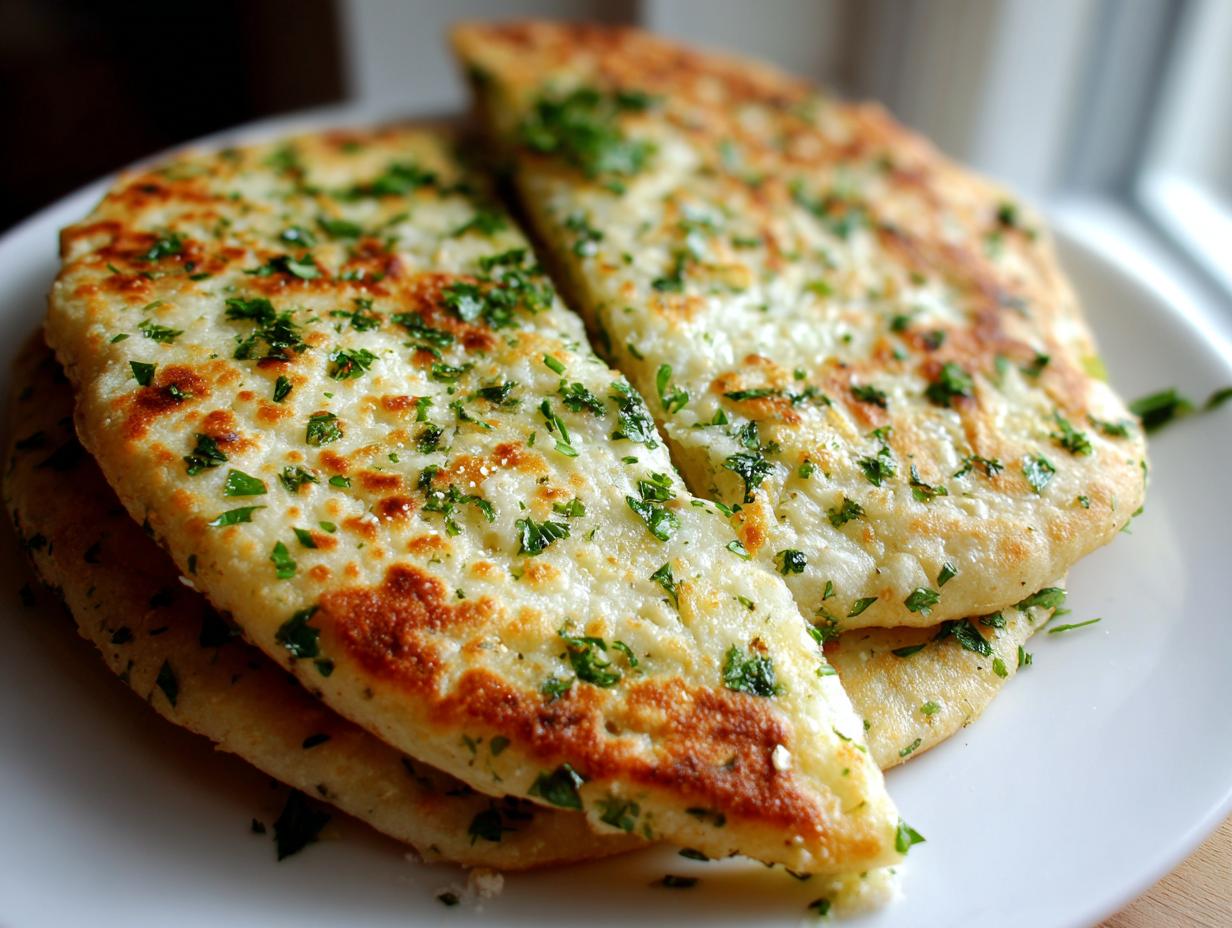
Listen, some nights you just need cheesy, garlicky goodness, and you need it *now*. Forget waiting 20 minutes for the oven to warm up! That’s why I developed this obsession with making the air fryer tortilla garlic bread. Seriously, this is the fastest way to satisfy that craving. It’s crispy, gooey, and done before you can even find a clean mixing bowl.
I learned the hard way that when you have soccer practice and homework looming, you need a 10-minute recipe that doesn’t taste like a compromise. This quick garlic bread hits every single spot. The air fryer is magic here—it toasts the tortilla perfectly without drying it out. Trust me, once you try this air fryer tortilla garlic bread, you’ll never go back to waiting on the broiler!

Essential Ingredients for Perfect Air Fryer Tortilla Garlic Bread
When you’re aiming for speed, you might think you can just grab anything, but for this air fryer tortilla garlic bread, the quality of the few ingredients really shines through. Since the cooking time is so short—we’re talking minutes—you need everything ready to go and perfectly prepped. We aren’t baking a heavy loaf here; we are crisping thin layers, so every component matters for that perfect snap.
My goal is always maximum flavor payoff in minimum time, and that starts with using the right components. Don’t skip the fresh garlic; the jarred stuff just doesn’t have the same punch when you’re only cooking for five minutes!
Gathering Your Air Fryer Tortilla Garlic Bread Components
Here is exactly what you need to gather before you even think about turning on the machine. I keep these things stocked because you never know when a cheesy bread emergency might strike! If you are looking for more quick snack ideas, check out our snacks category.
- 2 medium flour tortillas (Standard taco size works great here)
- 2 tablespoons unsalted butter, softened (This is crucial—not melted, just soft!)
- 1 clove garlic, minced (Fresh is best, don’t even try the powder for this one)
- \u00bc teaspoon salt
- \u00bd cup shredded mozzarella cheese (Low-moisture, whole milk melts the best)
- 1 tablespoon grated Parmesan cheese
- \u00bd teaspoon Italian seasoning
- \u00bc teaspoon red pepper flakes (Optional, but please try them!)
- 1 tablespoon chopped fresh parsley (For that beautiful green finish)
Ingredient Notes and Substitutions for Your Air Fryer Tortilla Garlic Bread
Let’s talk specifics because the texture of this air fryer tortilla garlic bread depends heavily on how you prep these items. First, the butter absolutely must be softened—think spreadable, but not oily. If it’s hard, it won’t spread evenly, leaving dry patches on your tortilla. If you forget to set it out, zap it in the microwave for just five seconds!
For the cheese, mozzarella gives you that wonderful pull, while Parmesan adds the sharp, salty kick. If you only have shredded Italian blend, that will work in a pinch, but the mozzarella/Parm combo is superior. As for the heat, those red pepper flakes are totally optional, but they cut through the richness of the butter and cheese so nicely. If you skip the flakes, consider adding a little extra Italian seasoning instead for flavor depth.
Preparing Your Air Fryer Tortilla Garlic Bread Layers
Okay, now that you have all your beautiful components ready, it’s time to get messy—which is my favorite part! This is where we build the foundation for that incredible crispiness that makes this air fryer tortilla garlic bread so addictive. Since everything moves so fast once it hits the fryer, you need this layering process down pat. It should take you barely three minutes total!
Making sure everything is evenly distributed is key. If you pile the cheese too high in the middle, you’ll get a soggy center, and we are aiming for edge-to-edge crunch! Have your cutting board ready and your ingredients within arm’s reach.
Mixing the Flavorful Garlic Butter Base
This little butter mix is the soul of the dish. Grab a tiny bowl—I mean, really small, so you don’t waste any of that precious garlic flavor sticking to the sides. Toss in your softened butter, your minced garlic clove, and that tiny pinch of salt. Now, grab a fork or a tiny whisk and just mash it all together until it becomes one uniform, fragrant paste. You want that garlic totally incorporated so every bite of your air fryer tortilla garlic bread tastes the same.
If your butter is too cold, the garlic bits will just sit on top, and when you spread it, the garlic will slide right off onto the counter. So, check that softness again!
Assembling the Tortilla Stack for Air Frying
Lay your first tortilla flat on your work surface. Take about half of that garlic butter mixture and spread it evenly right out to the very edges. Don’t leave a margin! Next, sprinkle half of your mozzarella, half of your Parmesan, and half of your seasonings (the Italian herbs and those optional red pepper flakes) right over that butter layer.
Now, lay the second tortilla right on top of the first one, creating your stack. Repeat the process: spread the remaining garlic butter on the top tortilla, and then finish it off with the rest of your cheeses and seasonings. It sounds like a lot of topping for a thin tortilla, but it cooks down perfectly into that cheesy crust we love. If you want to get fancy, you can use a fork to press the edges together slightly, but usually, the melted cheese seals it fine!

Step-by-Step Instructions for Air Fryer Tortilla Garlic Bread
We’ve done the hard work of prepping the ingredients and stacking them beautifully. Now comes the best part—watching the magic happen in the air fryer! Remember, because this is such a quick recipe for air fryer tortilla garlic bread, you can’t walk away for long. It goes from perfect to slightly too dark very quickly, especially if your air fryer runs hot.
My biggest piece of advice here is to trust your machine, but always peek. We are aiming for golden brown and crispy, not burnt and brittle. Since we are cooking two tortillas stacked together, we need that circulating air to hit every surface evenly. This whole cooking process is faster than making toast! If you need more inspiration for quick meals, follow us on Pinterest.
Preheating and Initial Air Frying Time
First things first: you absolutely must preheat! This ensures that the moment the tortilla stack hits the basket, it starts crisping immediately rather than slowly warming up. Set your air fryer right now to 375\u00b0F. While that’s heating up, gently place your layered tortilla stack into the basket. Make sure it’s sitting flat—no curling up the sides!
Start the timer for 4 minutes. This is your first check point. When that timer goes off, gently pull the basket out and take a look. If it’s already deeply golden and bubbling happily, you might be done! If it looks pale in spots, slide it back in for another minute or two. Most machines take about 5 or 6 minutes total for this air fryer tortilla garlic bread to reach peak crispiness.
Finishing and Slicing Your Crispy Air Fryer Tortilla Garlic Bread
Once you pull that golden stack out—wow, the smell is incredible!—you need to resist the urge to slice it right away. That melted cheese and butter are lava hot. Carefully transfer the whole stack onto a cutting board. Let it rest there for about 1 to 2 minutes. This short rest allows the cheese to set up just enough so it doesn’t ooze out everywhere when you cut it.
I always slice it just like a pizza—cutting it into 6 or 8 wedges. Then, for the grand finale, grab that fresh parsley and sprinkle it liberally over the top. The green against the melted gold cheese? Perfection! Serve the wedges immediately with your favorite dipping sauce. You deserve this quick garlic bread! For more savory recipes, check out our dinner and lunch ideas.
Tips for Achieving Maximum Crispiness in Your Air Fryer Tortilla Garlic Bread
If crispness is your main goal—and with this snack, it absolutely should be—then you need to treat your air fryer right! This isn’t just about throwing things in; it’s about airflow management, which is the secret sauce for any great air fryer tortilla garlic bread. Since we are only cooking for a few minutes, any slight error in placement or temperature gets magnified fast.
First, never, ever try to cook more than two tortillas stacked together. If you try to triple this recipe, the heat won’t penetrate the middle layers fast enough, and you’ll end up with warm, floppy bread instead of that perfect crunch. Keep it to a single, thin layer in the basket, even if that means cooking in batches.
Also, make sure your tortillas are room temperature when you start. A cold tortilla hitting a hot basket can sometimes seize up unevenly. A quick 30 seconds on a warm stovetop burner before buttering can help ensure even cooking right to the edges. Finally, trust the 4-minute check! That initial blast of heat is crucial for setting the structure. If you wait until 6 minutes to check, you’ve probably gone too far. This little trick guarantees the best air fryer tortilla garlic bread every single time.
Quick Serving Suggestions for Cheesy Bread
Since this cheesy bread is so incredibly fast to make, it’s perfect for last-minute additions to dinner or just when you need a satisfying snack. The richness of the garlic butter and mozzarella begs for something bright or acidic to cut through it. You absolutely must serve this warm—it loses a lot of its charm once it cools down!
My go-to pairing is always a classic jar of marinara sauce. The warm, tangy tomato flavor is the perfect foil for this rich cheesy bread. If you’re feeling less traditional, ranch dressing is fantastic; the cool, herby flavor is surprisingly good with the garlic and Parmesan notes.
For a real dinner upgrade, serve these wedges alongside a big, simple green salad tossed with a sharp vinaigrette. That acidity really balances out the fat from the butter and cheese. Honestly, though, sometimes I just eat the whole thing standing over the sink—no judgment here! You can find great salad inspiration on our Medium page.
Storing and Reheating Leftover Air Fryer Tortilla Garlic Bread
I’m going to be honest with you: there are rarely leftovers when I make this air fryer tortilla garlic bread. Seriously, it disappears! But if you manage to save a couple of wedges, you need to know the right way to bring back that original crispness. Microwaving this is a cardinal sin; you’ll end up with soft, floppy sadness, and nobody wants that.
The best method relies on recreating that dry, circulating heat of the air fryer. If you store it improperly, that glorious cheese layer will steam itself into rubbery oblivion. Always let the bread cool completely before you even think about storing it, otherwise, condensation builds up inside your container.
Here’s the breakdown for keeping your leftover tortilla snack tasting almost as good as fresh:
| Method | Instructions | Notes |
|---|---|---|
| Storage | Place cooled wedges in a single layer inside an airtight container. | Do not stack them tightly or they will steam together. Best eaten within 2 days. |
| Reheating (Air Fryer) | Preheat air fryer to 350\u00b0F. Place wedges in a single layer in the basket. | Cook for 2-3 minutes. Check at 2 minutes—it should be hot and crunchy again! |
| Reheating (Oven) | Preheat oven to 375\u00b0F. Place wedges directly on a baking sheet. | Bake for about 5-7 minutes until the cheese melts again and the edges crisp up. |
The air fryer is definitely the superior method for reheating this quick garlic bread. It only takes a couple of minutes to blast away any residual softness and restore that satisfying crunch. If you skip reheating and try to eat it cold, the butter tends to firm up, and it just doesn’t have the same delicious pull.
Frequently Asked Questions About This Quick Garlic Bread
I get so many questions about tweaking this recipe because everyone seems to love how fast it comes together! It’s meant to be flexible, but a few core rules keep it tasting like the best quick garlic bread you’ve ever had.
Can I use different types of cheese for this air fryer tortilla garlic bread?
Oh yes, you absolutely can experiment with cheese! Mozzarella is my favorite because it melts beautifully and gives you that classic cheese pull, but if you want more flavor, swap out half of the mozzarella for Provolone or Monterey Jack. Those melt really well too. If you use a harder cheese like sharp cheddar, just know it might not spread quite as smoothly across the tortilla, but the flavor will be sharper. Just stick to about a half cup total of shredded cheese for the best results on your air fryer tortilla garlic bread.
What if I do not have an air fryer?
Don’t worry if your air fryer is currently hiding in the back of the pantry! You can totally make this as a fantastic oven-baked tortilla snack. Simply follow the buttering and layering steps, but instead of the air fryer, preheat your regular oven to 400\u00b0F. Place the stacked tortillas directly onto a baking sheet. Bake them for about 8 to 10 minutes. You need to watch them closely, though, because the top layer can brown faster than it crisps up underneath, so check around the 7-minute mark!
Understanding the Nutrition in Each Serving of Air Fryer Tortilla Garlic Bread
I always include the nutrition breakdown because, let’s be real, while this is a quick treat, it’s still cheesy bread! Since we are using flour tortillas and a good amount of butter and cheese, it definitely packs some satisfying flavor—and calories. This information is based on dividing the recipe into two equal servings, as outlined. Keep in mind this is just an estimate; your exact numbers will change based on the brand of tortilla or how heavily you sprinkle that Parmesan!
For those tracking fats, this air fryer tortilla garlic bread is definitely higher in fat because of the melted butter and cheese, but that’s what makes it taste so unbelievably good, right? It’s a fantastic source of protein too, thanks to all that mozzarella and Parmesan. It really shines as a satisfying side dish that feels indulgent but comes together in 10 minutes flat.
| Nutrient | Amount Per Serving (Estimated) |
|---|---|
| Calories | 320 |
| Fat | 18 g |
| Carbohydrates | 28 g |
| Protein | 12 g |
| Sodium | N/A |
Because this is such a fast recipe, I usually don’t worry too much about the detailed sodium count unless I’m adding extra salt or using heavily salted cheese. But overall, for a cheesy, garlicky snack that comes together faster than takeout, this nutritional profile is pretty reasonable. Enjoy every bite of your air fryer tortilla garlic bread! Feel free to connect with us on Facebook for more updates.
Print
Fast 5-Min Air Fryer Tortilla Garlic Bread Joy
- Total Time: 10 minutes
- Yield: 2 servings
- Diet: Vegetarian
Description
Make crispy air fryer tortilla garlic bread in minutes with butter, garlic, and cheese. This recipe offers a lighter, quick alternative to classic garlic bread, ideal for snacks or side dishes.
Ingredients
- 2 medium flour tortillas
- 2 tablespoons unsalted butter, softened
- 1 clove garlic, minced
- ¼ teaspoon salt
- ½ cup shredded mozzarella cheese
- 1 tablespoon grated Parmesan cheese
- ½ teaspoon Italian seasoning
- ¼ teaspoon red pepper flakes (optional)
- 1 tablespoon chopped fresh parsley
Instructions
- Preheat air fryer to 375°F.
- Mix softened butter, minced garlic, and salt in a small bowl until smooth.
- Spread the garlic butter evenly over each tortilla, covering the surface to the edges.
- Sprinkle mozzarella, Parmesan, Italian seasoning, and red pepper flakes evenly over the buttered surface.
- Stack one tortilla directly over the other to form a layered round.
- Place the tortilla stack in the air fryer basket in a single layer.
- Air fry for 4–6 minutes, checking after 4 minutes, until the bread is golden and crisp.
- Remove carefully and let cool for 1–2 minutes.
- Slice the stack into wedges and sprinkle with parsley.
- Serve warm with dipping sauce.
Notes
- Serve warm with marinara or ranch dipping sauce.
- Prep Time: 5 minutes
- Cook Time: 5 minutes
- Category: Snack/Side Dish
- Method: Air Frying
- Cuisine: American