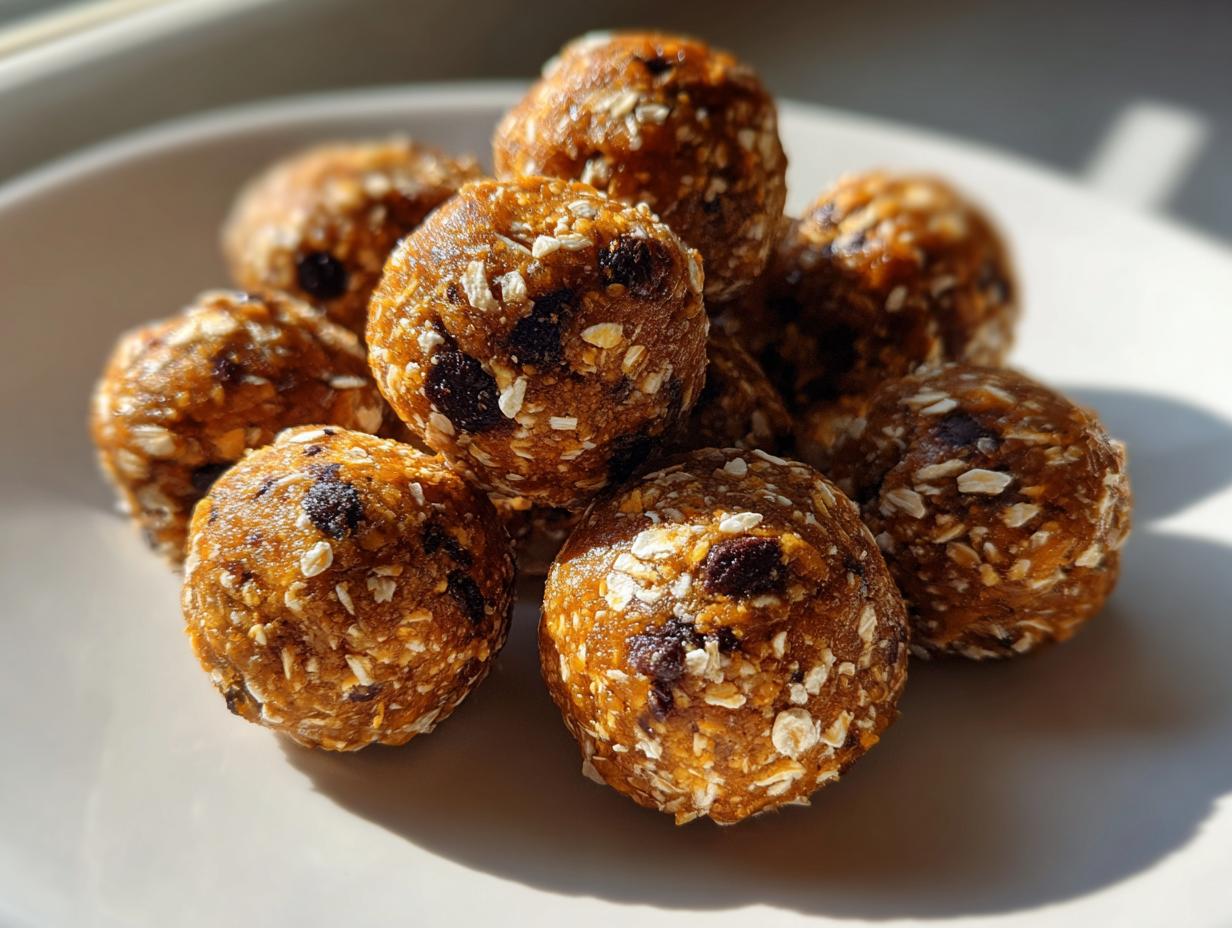
Okay, listen up, because I’m about to let you in on my biggest secret weapon for those days when you think you have zero time to eat anything remotely healthy. Forget complicated baking; we’re talking about the absolute easiest, most satisfying snack you’ll ever make: these incredible no-bake energy bites! Seriously, they come together faster than it takes to boil water.
If you’ve ever looked at a recipe and thought, “Too many steps, too much heat,” this one is for you. This recipe is so straightforward, even if you’ve never successfully made toast, you can nail these. We’re using simple pantry staples like oats and peanut butter to create a powerhouse snack that’s perfect for meal prep or just surviving the 3 PM slump. Trust me, you’ll be reaching for these healthy snacks all week long!
Gathering What You Need for Your No-Bake Energy Bites
The best part about these little guys is that you don’t need to turn on the oven, and you probably have most of this stuff in your pantry right now! We are keeping this super minimal because nobody has time for a grocery scavenger hunt when they need a quick snack. These no-bake energy bites rely on just a handful of very standard components to create that perfect sticky, chewy texture. We are using oats as the base, which gives them body and fiber, and peanut butter to hold everything together beautifully.
If you can measure ingredients into a bowl, you can make this recipe. That’s my promise to you! Let’s look at exactly what you need before we dive into the mixing.
Essential Ingredients for Perfect No-Bake Energy Bites
When it comes to these bites, the measurements are pretty forgiving, but for the very first batch, I really want you to stick to what I use. This ensures you get that perfect consistency right away. Don’t substitute the flaxseed; it’s crucial for binding these no-bake energy bites!
- 2 cups old-fashioned rolled oats (Don’t use instant, they get mushy!)
- 1 cup creamy peanut butter (Your favorite brand is fine, but make sure it’s the smooth kind.)
- 1 third cup honey (This is the sticky magic!)
- 1 half cup mini chocolate chips (Because snacks need chocolate, obviously.)
- 1 third cup ground flaxseed
- 1 teaspoon vanilla powder (Or extract if you don’t have powder.)
- 1 quarter teaspoon fine sea salt

Equipment Check for Making No-Bake Energy Bites
We are aiming for maximum flavor with minimum cleanup, which is why this recipe is perfect for beginners. You won’t need any fancy mixers or spatulas for these no-bake energy bites. Just grab the basics!
- A big, sturdy mixing bowl. You need room to really work that dough in there!
- A strong spoon or spatula. Trust me, a whisk won’t cut it when the dough gets thick.
- A standard baking sheet or tray.
- Parchment paper or wax paper to line that tray. This stops sticking, and we love easy cleanup!
Step-by-Step Guide to Making No-Bake Energy Bites
Alright, time to get our hands dirty! This is where the magic happens, and it moves fast. We are going from loose ingredients to a perfect, rollable dough in just a few minutes. Just follow these steps closely, and you’ll have a tray full of delicious no-bake energy bites ready to go.
Combining Dry Ingredients for Your No-Bake Energy Bites
First things first, we need to make sure everything that doesn’t melt is mixed up perfectly. Grab that large bowl we talked about. Toss in your 2 cups of rolled oats, the ground flaxseed, those mini chocolate chips, the vanilla powder, and that little pinch of sea salt. Don’t just give it a quick swirl!
You really need to stir this mixture well. I mean, really stir it until you can’t see any clumps of just one ingredient hiding at the bottom. This thorough mixing ensures that when we add the wet stuff, everything gets coated evenly. We want those chocolate chips and flaxseed distributed throughout every single one of our future no-bake energy bites, not just stuck in one corner of the bowl.
Mixing Wet Ingredients into the No-Bake Energy Bites Dough
Now for the heavy lifting! Add the peanut butter and the honey right on top of those dry ingredients. This is where you need that sturdy spoon, or even better, your hands if you don’t mind getting a little sticky—which, let’s be honest, you will anyway!
Start mixing slowly. At first, it’s going to look like a disaster, like the peanut butter is just sitting on top of the oats and refusing to blend. Keep stirring! I remember my very first batch of these bites; I thought I hadn’t added enough peanut butter because I stopped mixing too soon. It was so crumbly I couldn’t even roll a ball! You have to keep working it until a thick, cohesive dough forms. It should stick together when you squeeze a handful. Don’t give up until it looks like dense cookie dough.
Shaping and Chilling Your No-Bake Energy Bites
Once you have that perfect, thick dough, you’re ready to roll! Scoop out about one tablespoon of the mixture at a time. Use your palms to quickly roll it between your hands until you have a nice, smooth one-inch ball. They don’t have to be perfectly round, but try to keep them uniform in size so they chill evenly.
Place those freshly rolled no-bake energy bites onto the tray you lined with parchment paper. Make sure they aren’t touching too much, just in case they try to spread a little while setting up. Now, this next part is non-negotiable: they need to chill. Pop that tray into the refrigerator for a solid 30 minutes. This chilling time is crucial because it firms up the peanut butter and honey, making them hold their shape perfectly. After 30 minutes, they’ll be firm enough to transfer to your airtight container!

Troubleshooting Common Issues with No-Bake Energy Bites
Even with the simplest recipes, sometimes things just don’t go exactly as planned, and that’s totally normal! When making no-bake treats, the environment—how dry your oats are, the exact temperature of your peanut butter—can change the outcome slightly. Don’t panic if your first attempt at these no-bake energy bites isn’t perfect; we can fix almost anything!
When you’re mixing, you might run into two main problems: the mixture is too dry and crumbly, or it’s too oily and sticky. Both are easy fixes, and knowing how to adjust shows you’re really getting the hang of this recipe!
Adjusting Consistency in Your No-Bake Energy Bites
If your mixture feels too dry after you’ve stirred it for a good five minutes, it means the oats haven’t fully absorbed the sticky stuff, or you might have slightly drier peanut butter. This is the time to add liquid, but go slow! Add peanut butter one tablespoon at a time, mixing well between each addition, until it starts holding together when you press it.
On the flip side, if your dough is way too wet—maybe you accidentally measured a little too much honey, or your peanut butter was really runny—it won’t roll into a ball; it will just smear. For wet no-bake energy bites, you need to bulk them up. Add more oats, a tablespoon at a time, or add a little extra ground flaxseed. Flaxseed is great because it soaks up that extra moisture without changing the flavor profile too much. Remember, my notes say you can adjust the ratios, so play with it until it feels like a firm dough you can easily shape!
Why This Recipe is My Go-To for Quick Snacks
I keep this recipe taped inside my pantry door because it solves so many problems in my busy week! It’s not just about being delicious, although they absolutely are. It’s about how they fit into real life. When I need a healthy option fast, these bites are always my first thought. They require zero oven time, which is a huge win during the summer months when the last thing I want is to heat up the kitchen.
These little orbs are packed with good stuff, making them satisfying enough to stop me from raiding the cookie jar later. They are my secret weapon against afternoon hunger pangs when I’m running out the door to pick up the kids or rushing to a meeting.
Quick Prep and Minimal Effort for No-Bake Energy Bites
Let’s talk speed. The total active time for this recipe is only about 15 minutes, maybe less if you have strong arms! You literally just combine things, stir, and roll. That’s it. There is absolutely zero baking involved, which means no preheating, no worrying about burning, and best of all, a minimal cleanup job.
Think about that: 15 minutes of work for a week’s worth of healthy snacks. We’re talking about 20 perfectly portioned, ready-to-grab treats that live right in the fridge. This incredible speed and the fact that they are completely no-bake are why this recipe earns permanent residency in my weekly rotation. If you want to see more quick snack ideas, check out my page on protein pancakes!
Storing and Serving Your Perfect No-Bake Energy Bites
You’ve made them, you’ve tasted one (or three!), and now you need to know how to keep these amazing no-bake energy bites tasting fresh for the week ahead. The good news is, they are super resilient because of the peanut butter and honey base. They don’t dry out easily like baked cookies do, which is one of the best features of a no-bake snack!
The key to longevity here is cold storage. You absolutely must keep them chilled if you want them to maintain that perfect, firm shape we worked so hard to achieve during the 30-minute rest. Don’t leave them sitting out on the counter all day, or they might get a little soft and melty, especially if your kitchen runs warm!
Storage Guidelines for Leftover No-Bake Energy Bites
Storing these is incredibly simple. You just need a good container. Make sure the tray you used for chilling is completely empty, and transfer your finished no-bake energy bites into an airtight container. I love using glass containers because I can see how many I have left, but any container that seals tightly works just fine.
They store beautifully in the refrigerator for up to one full week. Seriously, I often make a double batch just so I don’t have to worry about snacks for nearly two weeks! Pull them out of the fridge about five minutes before you plan to eat them if you prefer them slightly softer, but honestly, I eat them straight from the cold. They are ready to grab and go anytime! For more ideas on making snacks ahead of time, take a look at my overnight oats.
| Storage Location | Maximum Shelf Life | Notes |
|---|---|---|
| Refrigerator (Airtight Container) | Up to 1 Week | Keeps them firm and fresh. Best method. |
| Room Temperature | A few hours only | Not recommended; they may soften quickly. |
Frequently Asked Questions About No-Bake Energy Bites
I get so many messages about these little guys! People always have questions when they try a new staple recipe. Since these no-bake energy bites are so simple, most issues come down to slight variations in ingredients, but I’ve got the answers right here to keep your snacks perfect.
If you’re worried about substitutions or making sure they last, check out these common queries. I want everyone to have success with this healthy snack!
Q1. Can I use quick oats instead of old-fashioned rolled oats?
You absolutely can, but be warned: quick oats will result in a slightly softer texture because they break down faster. For the best chewiness and structure in your no-bake energy bites, stick to rolled oats. Quick oats might make them a bit too mushy after a couple of days in the fridge.
Q2. What if someone has a peanut allergy? Can I substitute the peanut butter?
Yes! This is a super adaptable recipe. If you need to avoid peanuts, swap the peanut butter for almond butter, sunflower seed butter, or even tahini. Just make sure whatever you use is creamy, not crunchy, so it binds well. The core structure of these no-bake energy bites will hold up!
Q3. Do I have to use ground flaxseed, or can I skip it?
I really, really advise against skipping the ground flaxseed in this particular recipe. It acts as a crucial binder, especially when you aren’t baking. If you don’t have flaxseed, you could try an equal amount of chia seeds, but flax is better for the texture of these specific no-bake energy bites.
Q4. How long do these healthy snacks really last?
As long as you keep them properly chilled in an airtight container, they stay fantastic for about a week. If you make a huge batch, you can freeze them too! Just pull them out about 15 minutes before you want to eat them, and they taste almost freshly made.
Share Your Experience Making These No-Bake Energy Bites
Whew! That’s it! You’ve officially mastered the fastest, healthiest snack on the planet. I’m so excited for you to start enjoying these little powerhouses all week long. Honestly, watching people realize how easy it is to make something this tasty from scratch is my favorite part of sharing these recipes. If you want to see more of my kitchen adventures, follow me on Facebook!
Now that you’ve got your tray full of delicious energy bites chilling away, I’d absolutely love to hear how they turned out for you! Did you stick to the chocolate chips, or did you throw in some shredded coconut or dried cranberries? We are all about sharing tips and tricks in this kitchen! You can also find more visual inspiration on Pinterest.
If you made a batch, please leave a comment below and tell me how long it took you from start to finish. Did you use your hands to mix, or did you manage to keep your spoon clean? Let me know your thoughts, and if you loved them enough to make them again this week, give the recipe a big rating! Happy snacking, everyone! For more recipe ideas, check out my latest posts on Medium.
Print
Amazing 20 No-bake energy bites within minutes
- Total Time: 15 minutes
- Yield: 20 bites
- Diet: Vegetarian
Description
Easy no-bake energy bites made with oats and peanut butter. A healthy snack ready in minutes perfect for meal prep and busy days.
Ingredients
- 2 cups old-fashioned rolled oats
- 1 cup creamy peanut butter
- 1 third cup honey
- 1 half cup mini chocolate chips
- 1 third cup ground flaxseed
- 1 teaspoon vanilla powder
- 1 quarter teaspoon fine sea salt
Instructions
- Add the oats, ground flaxseed, chocolate chips, vanilla powder, and salt to a large bowl.
- Stir until the dry ingredients are evenly combined.
- Add the peanut butter and honey to the bowl.
- Mix with a sturdy spoon until a thick dough forms.
- Scoop about 1 tablespoon of mixture and roll into a 1 inch ball.
- Place the balls on a parchment-lined tray.
- Refrigerate for 30 minutes until firm.
- Transfer to an airtight container and keep chilled.
Notes
- These bites store well in the refrigerator for up to one week.
- Adjust the ratio of peanut butter or honey if the mixture seems too dry or too wet.
- Prep Time: 15 minutes
- Cook Time: 0 minutes
- Category: Snack
- Method: No-Bake
- Cuisine: American