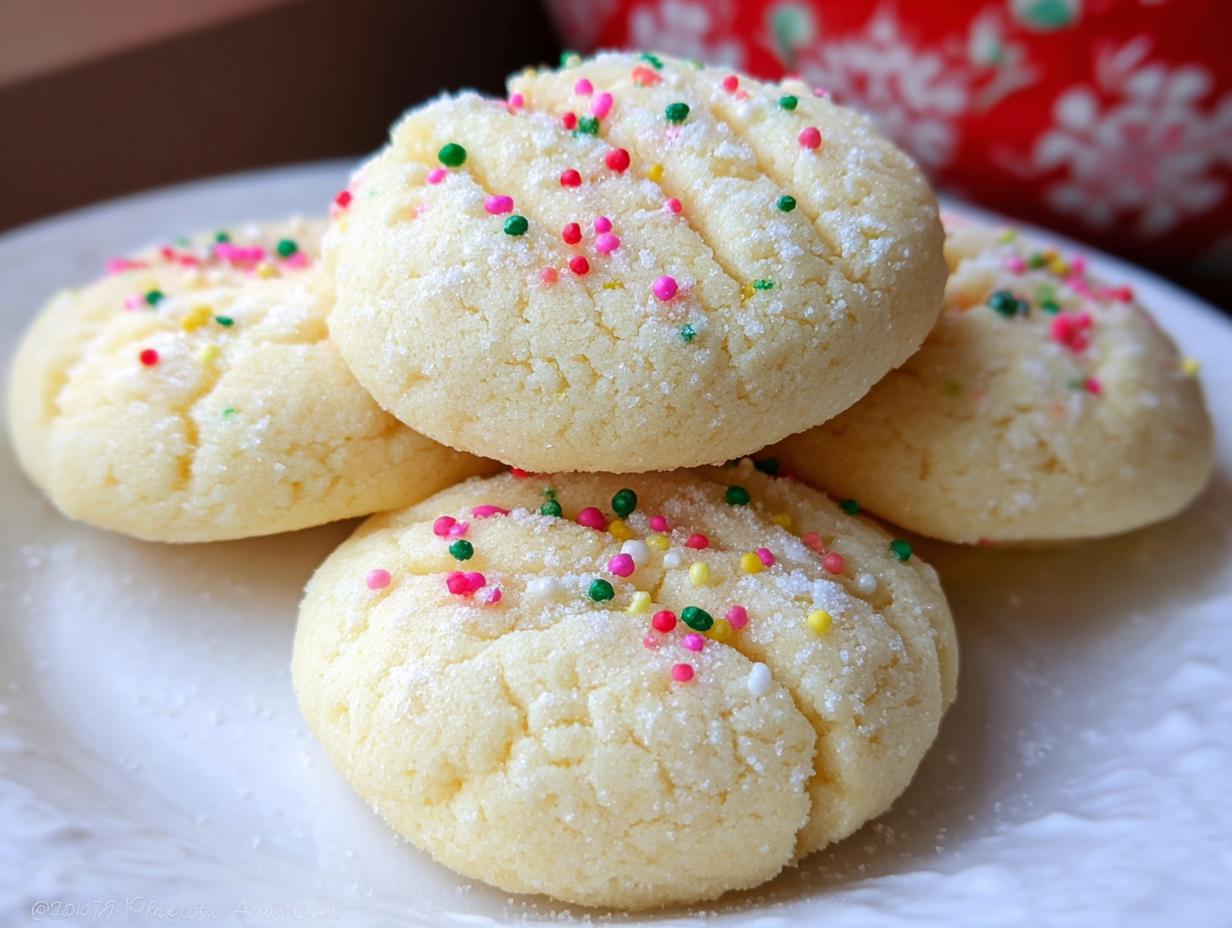
Whipped Shortbread Cookies are the reason I started NoobRecipes, honestly. I remember trying to make traditional shortbread for the first time and ending up with these hard, crumbly rocks that tasted more like butter bricks than dessert. It was so frustrating! But then I found this method—the whipping technique—and everything changed. Trust me, these cookies deliver that incredible, delicate, melt-in-your-mouth texture that makes people think you spent all day fussing in the kitchen.
The secret isn’t complicated ingredients; it’s just knowing how to treat the butter and sugar right at the start. That’s why this recipe is perfect for anyone just starting out. We’re skipping the fuss and going straight for pure, buttery magic. You get a cookie that’s light as air but still sturdy enough to handle a little sprinkle decoration. Forget those dense, heavy shortbreads you’re used to. We’re making cookies that actually dissolve when they hit your tongue!

Why You’ll Love These Whipped Shortbread Cookies
I know you’re looking for cookies that look impressive but don’t require you to have years of baking experience, and these deliver! They are surprisingly simple, especially because they come together so fast once you nail that initial whip. Seriously, they are my go-to when I need something amazing quickly.
- Unbeatable Texture: The name says it all—they are truly whipped! They are lighter and more delicate than any standard shortbread you’ve ever tried. They just vanish when you eat them.
- Beginner Proof: This recipe relies on simple mixing steps. If you can use a mixer, you can master these cookies. No fancy techniques needed, promise!
- Rich, Pure Butter Flavor: With so few ingredients, the flavor of the good butter really shines through, balanced perfectly by that touch of vanilla.
- Quick Prep Time: You can have these mixed and ready for the oven in under 30 minutes of active work, which is fantastic for a beginner baker!
Quick Facts About Your Whipped Shortbread Cookies
Here are the numbers so you can plan your baking session. Remember, the total time includes that crucial chilling phase, so plan ahead!
- Prep Time: 25 minutes
- Cook Time: 20 minutes
- Total Time: 2 hours 45 minutes (including chilling)
- Yield: 36 cookies
Gathering Your Ingredients for Whipped Shortbread Cookies
The beauty of these cookies is that they don’t require a trip to a specialty store. We are relying on just a handful of pantry staples to create something truly spectacular. However, because there are so few ingredients, the quality of what you use really matters here. Don’t skimp on the butter—it’s the star!
When you look at the list, you’ll notice we use confectioners’ sugar instead of granulated sugar. That’s intentional! It dissolves smoothly during the whipping process, which is key to that super fine texture we are aiming for. Also, pay close attention to the temperature of your butter; it’s non-negotiable for this recipe to work right.
Essential Ingredients List
You can find the exact measurements you need for 36 cookies listed out clearly below. Just make sure that butter is soft before you even think about turning on the mixer!
| Ingredient | Amount |
|---|---|
| Butter, salted (room temperature) | 1 and \u00bd cups |
| Confectioners\u2019 sugar | \u00be cup |
| All-purpose flour | 2 and \u00bc cups |
| Cornstarch | \u00be cup |
| Pure vanilla extract | 2 teaspoons |
| Sprinkles (non-pareils) | \u00bc cup |
Ingredient Notes and Substitutions
That 2 teaspoons of extract is where you can really personalize these beauties. I used vanilla because it’s classic, but lemon or even orange extract works wonderfully if you want a little bright citrus note. Feel free to swap those out!
Now, let’s talk about the cornstarch. This isn’t just filler, folks; it’s what separates a standard shortbread from these light, airy whipped cookies. The cornstarch cuts the gluten in the flour, which is what gives you that signature melt-in-your-mouth sensation. Don’t try to swap it for more flour, or you’ll end up back in the butter brick territory I mentioned earlier!
Step-by-Step Instructions for Perfect Whipped Shortbread Cookies
Okay, listen up, because this is where the magic happens. If you mess up the mixing or the chilling, you won’t get that dreamy texture we’re aiming for. But don’t panic! Just follow these steps exactly, and you’ll be amazed at what you pull out of your oven. It’s all about patience during the creaming stage.
Creaming the Butter and Sugar
First things first: make sure that butter is truly soft—not melted, just soft enough that your finger leaves a dent easily. Put that softened butter and the confectioners’ sugar into your mixing bowl. Now, turn the mixer up to medium-high speed. You need to beat this mixture for a solid 4 to 5 minutes. Seriously, don’t stop early! You are whipping air into the fat, and this air is what makes the cookies light later on. You’re looking for the mixture to turn pale yellow and look fluffy, almost like light frosting. Once you hit that texture, you can add your vanilla extract—or whatever flavor you chose—and mix it in just until it disappears.
Combining Dry and Wet Elements
This is where we have to be gentle! Turn your mixer down to the lowest speed you have. You want to gradually add your sifted flour and cornstarch mixture. I mean slowly, like a tablespoon at a time if you need to. The goal here is to combine everything just until you no longer see streaks of white flour. Stop the mixer immediately once it comes together! If you overmix once the flour is in, you develop gluten, and suddenly your light, melt-in-your-mouth cookie becomes tough. We absolutely do not want tough cookies here, so stop mixing as soon as it’s uniform.
Shaping and Chilling Your Whipped Shortbread Cookies
The dough might feel a little soft right now, which is normal because of all that butter we whipped in. If it’s sticking badly to your hands, just pop the whole bowl into the fridge for about 10 or 15 minutes to firm up a bit. Once you can handle it, scoop out balls that are about equal in size—I aim for about a tablespoon each. Place these dough balls onto a baking sheet lined with parchment paper. Now grab a fork. Dip the tines into a little dish of cornstarch or flour, and then gently press down on the top of each ball to flatten it slightly. This gives the cookie its classic look and helps it bake evenly. Finally, add your sprinkles right on top!

Here’s the step that separates the good cookies from the *amazing* cookies: chilling! You must chill these Whipped Shortbread Cookies for a minimum of two hours in the refrigerator until they are very firm. You can freeze them too, which speeds things up if you’re impatient! While they are chilling, go ahead and preheat your oven to 300°F. Don’t skip the chill!
Baking to a Delicate Finish
Once those little dough balls are rock solid from the fridge, slide them into your 300°F oven. They need about 19 to 20 minutes to bake. The key visual cue here is that the tops should look set, meaning they aren’t shiny or wet-looking anymore, but they should *not* be brown. These cookies are meant to stay pale and delicate. If they start turning golden on the edges, you’ve gone too far! Let them cool right there on the baking tray for about five minutes before carefully moving them to a wire rack to finish cooling completely. If you try to move them too soon, they might crumble!
Tips for Achieving Melt-in-Your-Mouth Whipped Shortbread Cookies
I’ve learned a few tricks over the years, mostly by making mistakes so you don’t have to! The biggest downfall for most people making these buttery cookies is rushing the chilling process. If the dough isn’t ice cold when it hits the oven, the butter melts too fast, and the cookies spread into flat, greasy puddles instead of holding their shape.
Another common error I see beginners make is over-beating the dough once the flour goes in. Remember what I said about gluten? As soon as you see the dry streaks disappear, stop immediately. That light, airy structure comes from the air you incorporated during the initial butter and sugar whipping, not from aggressively mixing the flour in.
Also, don’t be tempted to increase the oven heat to speed things up. 300°F is low and slow for a reason. It allows the cookie to bake through without browning the outside too quickly. If you see any browning, pull them out immediately. These cookies should look pale and delicate when they are done. Trust me on the chilling—it’s the most important step for that signature texture!
Serving Suggestions for Your Buttery Cookies
Once these buttery cookies have cooled completely, they are beautiful all on their own, especially with those festive sprinkles. But if you want to dress them up a tiny bit for a party platter, I have a few simple ideas that don’t involve complicated icing.
You can dip half of the cooled cookie into some good quality melted chocolate—white chocolate looks really elegant against the pale cookie. Another favorite is simply pressing a small, colorful candy into the center before they set. Or, if you’re feeling fruity, a tiny dab of your favorite high-quality jam right in the middle makes them look like little thumbprint cookies. They pair perfectly with a hot cup of coffee or a simple glass of milk!
Storing and Reheating Whipped Shortbread Cookies
Since these cookies are so rich in butter, knowing how to store them properly ensures they stay fresh and maintain that delicate texture for as long as possible. The good news is that they are quite durable! For short-term enjoyment, keep them in an airtight container right on your counter. They’ll be perfectly fresh for up to a week.
If you made a huge batch (and you probably did, because they disappear fast!), you can easily stash them in the refrigerator for an extra week of freshness. For long-term storage, these freeze beautifully, either baked or unbaked. I like to freeze the dough balls after I’ve shaped and sprinkled them—it makes emergency cookie baking so easy later on!
Check out the table below for the exact timelines so you don’t have to guess when they might go stale!
| Storage Location | Duration |
|---|---|
| Room Temperature (Airtight) | Up to 1 week |
| Refrigerator | Up to 2 weeks |
| Freezer (Baked or Unbaked) | Up to 2 months |
Frequently Asked Questions About Whipped Shortbread Cookies
I get so many questions about these cookies because everyone wants that perfect texture the first time! Here are the ones I hear most often from my readers over at NoobRecipes.
Can I skip chilling the Whipped Shortbread Cookies dough?
Oh, please don’t! I know it’s tempting when you want cookies right now, but you really, really shouldn’t skip that two-hour chill time. If you bake the dough when it’s soft, the high butter content melts instantly in the oven, and the cookies will spread out into thin, greasy discs instead of holding that beautiful, thick, melt-in-your-mouth shape we worked so hard for.
How do I make these cookies lighter?
You nail the texture by focusing on two main things. First, you must cream the butter and sugar for the full 4 to 5 minutes until it’s genuinely pale and fluffy—you are literally whipping in the air. Second, make sure you measure that cornstarch correctly! It’s the key ingredient that keeps the gluten down, resulting in the lightest cookie possible. If your Whipped Shortbread Cookies aren’t light enough, try whipping the butter a minute longer next time.
What is the best way to store leftover Whipped Shortbread Cookies?
They are best stored at room temperature in an airtight container for up to a week. They hold up really well! If you need them to last longer than that, just pop them into the fridge or freezer, as I detailed earlier. They freeze like a dream, which is great for holiday baking prep!
Nutritional Information Disclaimer
Just a quick note here, since we are all about real, homemade food! The nutritional data you see listed is based strictly on the ingredients I used in my kitchen that day, using standard brand measurements. Because everyone’s butter, flour, and even sprinkles can vary slightly, these numbers are just an estimate for guidance. If you are tracking macros or calories strictly, I always recommend plugging your specific brand ingredients into your favorite tracking app for the most precise results!
Share Your Baking Success
I truly hope you loved making these cookies as much as I love eating them! When you follow a recipe that relies so much on technique, like the whipping and chilling steps here, I always want to know how it turned out for you. Did that butter cream up nice and fluffy? Did they truly melt in your mouth?
Don’t be shy! Head down to the comments section below, give the recipe a quick star rating so other new bakers know what to expect, and tell me how your batch of Whipped Shortbread Cookies turned out. Did you stick with vanilla, or did you try the orange extract? I love hearing about your kitchen successes! You can also follow along for more baking inspiration on Pinterest or Facebook.
Print
Fluffy Whipped Shortbread Cookies: 36 Magic Bites
- Total Time: 2 hours 45 minutes (includes chilling)
- Yield: 36 cookies
- Diet: Omnivore
Description
Whipped Shortbread Cookies offer a light, melt-in-your-mouth texture superior to standard shortbread. This recipe is simple enough for new bakers to master, yielding delicate, buttery treats perfect for any occasion.
Ingredients
- 1 and ½ cups butter at room temperature, salted
- ¾ cup confectioners’ sugar
- 2 and ¼ cups all-purpose flour
- ¾ cup cornstarch
- 2 teaspoons pure vanilla extract (or lemon extract or orange extract)
- ¼ cup sprinkles (of choice) (non-pareils used)
Instructions
- Beat butter and confectioners’ sugar in a large mixing bowl for 4–5 minutes on medium-high speed until light textured.
- Add flavorings and mix well.
- Turn the mixer to low and gradually add sifted flour and cornstarch. Beat only until combined.
- Scoop and roll the dough into 36 equal-sized balls. If the dough is too soft, refrigerate for 10–15 minutes.
- Place dough balls on a lined baking tray or flour-coated plate.
- Press tops with a fork dipped in cornstarch or flour and top with sprinkles.
- Chill the dough balls for about 2 hours in the fridge until very firm, or freeze until firm.
- Preheat oven to 300°F while chilling.
- Bake cookies for 19–20 minutes or until tops look set.
- Allow cookies to cool on the baking tray.
Notes
- Shortbread stores in an airtight container at room temperature for up to a week.
- Refrigerate for an additional week or freeze baked or unbaked cookies for up to 2 months for longer storage.
- Top cookies with melted chocolate, a Hershey’s Kiss, candy cane Kisses, cherry halves, or a small dollop of jam before baking to enhance flavor.
- Prep Time: 25 minutes
- Cook Time: 20 minutes
- Category: Cookie
- Method: Baking
- Cuisine: American