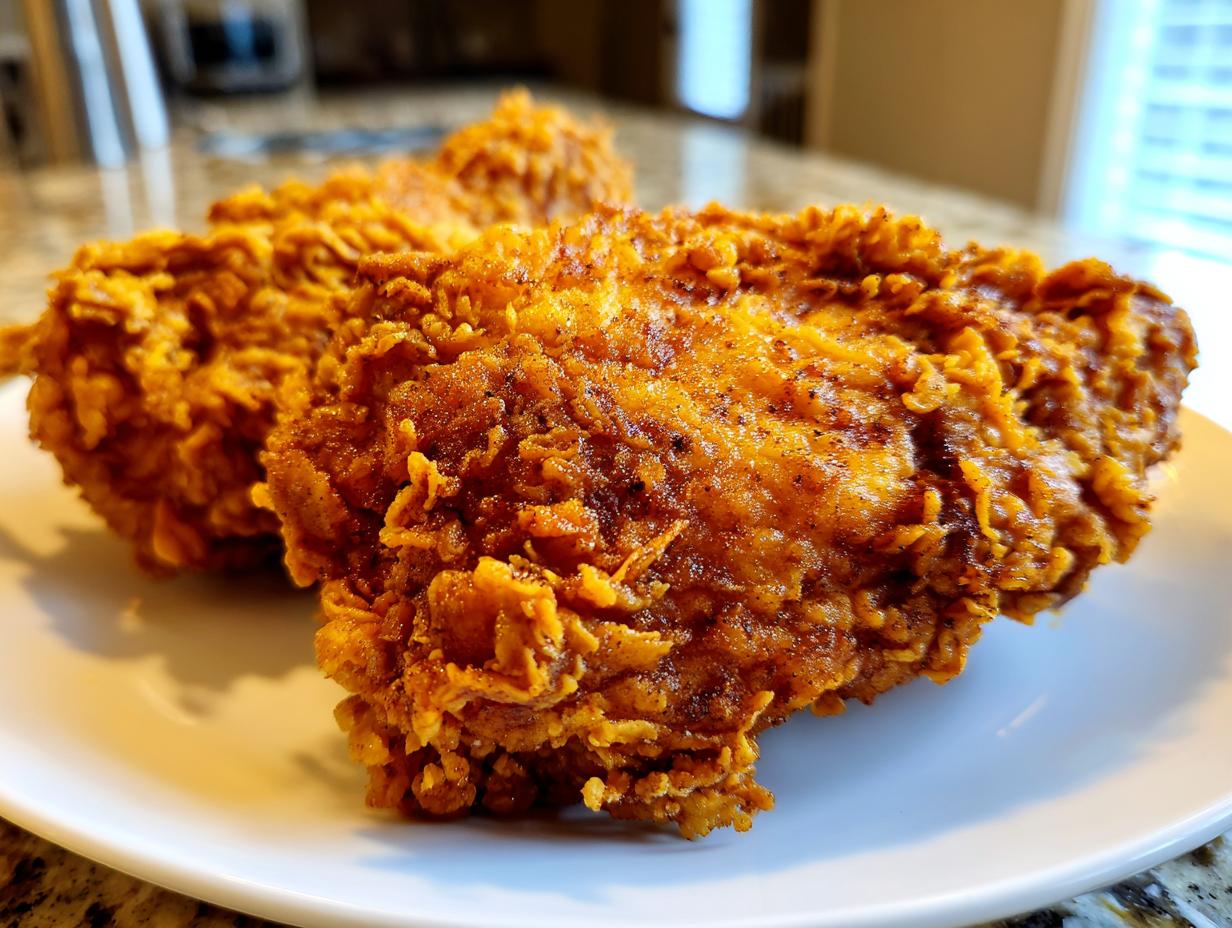
Ultimate Crispy Golden Fried Chicken (Just Like Mom’s). I remember the first time I tried making fried chicken for my family. It was a disaster. I ended up with pale, flabby skin and chicken that tasted like slightly seasoned sadness. Seriously, it was so bad I almost gave up on cooking entirely! That’s why, when I started NoobRecipes, I knew I had to conquer this classic dish. If a total beginner like me—who struggles to boil water sometimes—can nail this recipe, anyone can.
This isn’t just any fried chicken recipe; this is the one that finally clicked for me. It uses my mom’s secret weapon—a long buttermilk soak—combined with a little trick from a local diner that guarantees that shatteringly crisp, deep golden crust every single time. Forget complicated steps; this is about getting that perfect, juicy result without needing a culinary degree. We’re going to walk through the marinating, the dredging, and most importantly, how to keep that oil happy so you get that beautiful texture. Trust me, after this, you’ll never need takeout again!

Why You Will Love This Ultimate Crispy Golden Fried Chicken (Just Like Mom’s)
I know what you’re thinking: fried chicken is too hard or too messy. Nope! I built this recipe specifically so beginners like us can achieve restaurant-quality results without the stress. It’s all about technique, not complicated ingredients. You’ll be amazed at how easy it is to get that classic, satisfying crunch!
Key Benefits for the Home Cook
- Unbeatable Crispiness: We use a double-dredge and cornstarch in the flour mix. This combo locks in the juices and creates a crust that actually stays crunchy, even if it cools down a bit.
- Incredible Flavor Depth: That long soak in buttermilk isn’t just for tenderizing; it seasons the chicken all the way to the bone. Say goodbye to bland chicken!
- Beginner Proof: I laid out every single temperature and timing cue. If you follow these steps, you won’t end up with greasy, soggy chicken—I promise.
Essential Equipment for Ultimate Crispy Golden Fried Chicken (Just Like Mom’s)
Listen, you can have the best ingredients in the world, but if your tools aren’t ready, the chicken won’t cooperate. I learned this the hard way when I tried frying in a shallow skillet—it was an oily mess! For this recipe to work its magic, we need a few specific things set up before we even touch the buttermilk.
Frying Setup Essentials
The most important thing here is controlling that heat. You absolutely need a heavy-bottomed pot, like a sturdy Dutch oven. Shallow pans just don’t hold temperature well when you drop cold chicken in. And please, please, please use a reliable thermometer. Guessing the oil temperature is the fastest way to a greasy disaster. We are shooting for a steady 350°F.
Preparation and Draining Tools
You’ll need a few big bowls for soaking and dredging, obviously. But the real game-changer for keeping things crispy is the draining setup. Ditch the paper towels—they trap steam and make the bottom soggy! You must use a wire rack set over a baking sheet. This lets the air circulate underneath so that crust stays perfect.
Gathering Ingredients for Ultimate Crispy Golden Fried Chicken (Just Like Mom’s)
Okay, the tools are ready, now for the stars of the show! Don’t feel intimidated by the list; everything comes together easily. We’re using simple pantry staples, but the quality of that chicken soaking in the marinade really makes the difference. Below is the exact list I use every time I make this for my family. Double-check you have everything before you start mixing!
| Ingredient | Specific Requirement |
|---|---|
| Chicken | 1 whole chicken (about 3.5-4 lbs), cut into 8 pieces |
| Frying Oil | Vegetable or peanut oil, enough for 1.5 inches depth in your pot |
| Buttermilk Marinade | 2 cups buttermilk, 1 large egg (beaten), 1 tbsp salt, 1 tsp black pepper |
| Crispy Coating Flour | 2 ½ cups all-purpose flour, ½ cup cornstarch, 2 tbsp paprika, 2 tsp garlic powder, 2 tsp onion powder, 2 tsp salt, 1 tsp black pepper, 1 tsp dried thyme, ½ tsp cayenne pepper (optional) |
Notes on Ingredient Selection and Preparation
A few quick notes before you dive in. For the marinade, please don’t skimp on the buttermilk—it needs to be full-fat buttermilk for the best tenderizing and coating action. Also, make sure your chicken pieces are relatively uniform in size if possible. If you have one huge breast piece and one tiny drumstick, the small one will burn before the big one cooks through. We want them cooking evenly!
And that cornstarch in the flour? That’s not optional if you want that deep, golden crunch. It’s a non-negotiable secret weapon for keeping things shatteringly crisp!
Step-by-Step Instructions for Ultimate Crispy Golden Fried Chicken (Just Like Mom’s)
Alright, this is where the magic happens! Don’t rush this part, the patience you show now is what separates soggy chicken from the legendary stuff. We’re going to take this step by step, just like I learned when I was trying to stop burning dinner. Remember, we want golden, crispy perfection!
Step 1: The Buttermilk Marinade Technique
First things first: we need to tenderize and flavor that chicken deep down. Grab your biggest bowl—you need room for all those pieces to swim comfortably. Whisk together the 2 cups of buttermilk, that one beaten egg, the tablespoon of salt, and the teaspoon of pepper. Give it a good stir so it’s all incorporated.
Now, drop in your chicken pieces. Make sure every single bit is covered in that tangy bath. Cover the bowl tightly—I usually use plastic wrap and then put the whole thing in the fridge. Mom always said the longer the better, so while four hours is the minimum, I highly recommend letting it soak overnight if you can. That extended time really breaks down the proteins and makes the final product ridiculously juicy.
Step 2: Creating the Ultimate Crispy Coating Mix
While the chicken is chilling (or if you’re in a hurry), let’s mix the dry stuff. You need a large, shallow dish for this—a casserole dish works perfectly. Dump in the 2 ½ cups of flour, and this is crucial: add that half cup of cornstarch. That cornstarch is your secret weapon for that thin, craggy, super-crispy exterior; don’t skip it!
Then, toss in all your seasonings: the paprika for color, the garlic and onion powders for depth, the salt, pepper, and thyme. If you like a little kick, now’s the time for that cayenne. Whisk this dry mix together really well. You want those spices evenly distributed so you don’t get a bite that’s all salt and no paprika.
Step 3: Preparing the Frying Station
Time to get the oil heating up! Pour your vegetable or peanut oil into that heavy Dutch oven until you have about an inch and a half deep. Put it over medium-high heat. You absolutely must have a candy or deep-fry thermometer clipped to the side. We are aiming for a steady 350°F (175°C). If the oil is too cool, the chicken gets greasy. Too hot, and the outside burns before the inside cooks.
While the oil heats, set up your draining station. Place that wire rack over the baking sheet right next to your stovetop. Remember what I said: wire rack is essential for air circulation!
Step 4: Mastering the Double-Dredge Method
Pull the chicken from the fridge. Let the excess buttermilk drip off—shake it gently. Now, dredge it completely in the flour mix. Press that flour on there! You want a good, thick layer.
Here’s the double-dredge trick: dip that floured piece *quickly* back into the leftover buttermilk—just a quick dip to re-wet the crust—and immediately put it back into the flour mix for a final, firm coating. Pat it down again. This layering is what creates those amazing, shaggy flakes on the outside.
Step 5: Resting the Coated Chicken
This step sounds like a waste of time, but trust me, it’s not! Once coated, place the chicken pieces on a clean plate or rack, separated from each other. You have to let them rest for 10 to 15 minutes. Why? This resting time allows the moisture from the buttermilk to hydrate the flour coating, making the crust stick tight to the meat. If you fry it immediately, the coating often falls off in the oil!
Step 6: Frying Until Perfectly Golden
Once your oil hits 350°F, it’s time to fry. Carefully lower only 3 or 4 pieces into the hot oil at a time. Do not overcrowd the pot! Overcrowding drops the oil temperature instantly, and we’ll end up with soggy chicken.
Fry the chicken for about 6 to 8 minutes on the first side. Use tongs to gently flip the pieces. Cook the second side for another 6 to 8 minutes. You’re looking for that deep, rich golden-brown color. Use your thermometer to check the thickest part of the meat—it must hit 165°F (74°C) internally. Darker pieces, like thighs, might need an extra minute or two.
Step 7: Draining and Final Rest
When the chicken is perfectly cooked, carefully lift it out of the oil and place it immediately on your waiting wire rack. Do not put it on paper towels! The rack lets the hot air circulate underneath, keeping that crust crisp.
Let the chicken rest on the rack for a good 5 to 10 minutes before serving. This allows those juices that were pushed to the center during frying to redistribute back through the meat. If you cut into it right away, all that moisture runs out! Patience pays off!

Tips for Achieving Truly Expert Ultimate Crispy Golden Fried Chicken (Just Like Mom’s)
Even though this is a beginner-friendly recipe, there are a few little secrets I picked up watching Mom fry that elevate this from good to absolutely legendary. Don’t skip these final checks, especially if it’s your first time deep-frying. These small details are what keep the crust light and crunchy, not heavy and oily. You want that satisfying crackle when you bite in!
Temperature Control is Key
I can’t stress the thermometer enough. If you see the oil bubbling too furiously, pull the heat back immediately. If it stops bubbling when you add the chicken, turn the heat up a bit. Keeping that temperature locked in around 350°F means the crust cooks at the same rate as the inside, ensuring no raw spots and no greasy absorption.
Preventing a Soggy Bottom
My biggest rookie mistake was draining the chicken on a stack of paper towels. Bad idea! The steam gets trapped underneath, and boom—soggy bottom. Always, always use a wire rack set over a baking sheet. This lets the air flow all around the chicken, drying the outside and keeping that hard-earned crispiness intact until it hits your plate.
Storage and Reheating Instructions for Leftover Ultimate Crispy Golden Fried Chicken (Just Like Mom’s)
If you somehow manage to have leftovers—which is rare in my house!—you need to treat this crispy chicken right. The biggest mistake people make is trying to reheat it in the microwave. That just turns the beautiful crust into rubber! The goal is to re-crisp that coating without drying out the meat inside. Store it properly first, and you’ll have success later.
| Storage Item | Time Limit | Reheating Recommendation |
|---|---|---|
| Airtight Container | Refrigerate for up to 3 days | Oven or Air Fryer (Recommended) |
The best way to bring it back to life is in a 400°F oven for about 10-12 minutes, or in an air fryer at 375°F for about 5 minutes. This method dries out the crust again and heats the meat evenly. Enjoy those leftovers!
Frequently Asked Questions About Ultimate Crispy Golden Fried Chicken (Just Like Mom’s)
I get so many emails asking about tweaks and troubleshooting, which just proves that everyone wants to master this classic! Since this is one of my core recipes here at NoobRecipes, I wanted to tackle the most common questions right here so you feel totally confident tackling this easy fried chicken.
Can I Bake or Air Fry This Ultimate Crispy Golden Fried Chicken (Just Like Mom’s)?
You absolutely *can* bake or air fry this, especially if you’re looking for a lighter meal. However, I need to be honest: you won’t get the exact same result as deep frying. The deep-fried version gives you that signature, shatteringly crisp texture because the crust is insulated by the hot oil. Baking will give you a nice, browned coating, but it will be drier and less craggy. If you air fry, it’ll be closer, but you have to be careful not to crowd the basket!
What is the Best Oil to Use for This Easy Fried Chicken Recipe?
My mom always used plain old vegetable oil, and honestly, that works great because it has a high smoke point and a neutral flavor. Peanut oil is also fantastic if you have it; it handles the high heat really well and adds a subtle richness. Just make sure you use an oil that can safely reach 350°F without smoking excessively. Save the fancy olive oil for salad dressing!
How Long Does the Chicken Need to Marinate for the Best Flavor?
If you’re in a pinch, you need at least four hours for the buttermilk to really start tenderizing the meat. But if you want that truly deep, flavorful, “just like Mom’s” taste, leave it overnight! Seriously, 12 hours in the fridge does wonders. That long soak is key to making sure the chicken isn’t dry, even for beginners who might accidentally overcook a piece by a minute or two.
Share Your Ultimate Crispy Golden Fried Chicken (Just Like Mom’s) Success
Wow, if you made it this far and followed all the steps, I am seriously proud of you! You just conquered one of the most famous, yet often feared, recipes in home cooking. That smell filling your kitchen right now is the smell of victory, my friend!
Now that you have that basket of perfectly golden, shatteringly crisp chicken—the kind that makes people stop talking mid-sentence—I want to see it! Don’t keep this success all to yourself. Here at NoobRecipes, we are all about building confidence together.
Go ahead and snap a picture of your masterpiece. Share it on Instagram or Facebook and tag me! Let me know how it went—did the double-dredge work like magic for you? Did you let it marinate overnight? Drop your rating below the recipe card so other new cooks know they can totally nail this too. I read every comment, and I love seeing your kitchen wins. Happy eating!
If you want to share your culinary triumphs with our community, you can find us on Facebook or save this recipe for later on Pinterest!
Print
Ultimate Crispy Fried Chicken: 6 Steps to Glory
- Total Time: 4 hours 20 minutes
- Yield: 6-8 servings
- Diet: Omnivore
Description
Learn how to make incredibly crispy and golden fried chicken just like mom used to make. This recipe is perfect for beginners and guarantees delicious results.
Ingredients
- 1 whole chicken (about 3.5-4 lbs), cut into 8 pieces
- Vegetable or peanut oil, for frying (about 6-8 cups)
- For the Buttermilk Marinade:
- 2 cups buttermilk
- 1 large egg, beaten
- 1 tbsp salt
- 1 tsp black pepper
- For the Crispy Coating:
- 2 ½ cups all-purpose flour
- ½ cup cornstarch
- 2 tbsp paprika
- 2 tsp garlic powder
- 2 tsp onion powder
- 2 tsp salt
- 1 tsp black pepper
- 1 tsp dried thyme
- ½ tsp cayenne pepper (optional)
Instructions
- In a large bowl, whisk together the buttermilk, beaten egg, 1 tbsp salt, and 1 tsp black pepper for the marinade. Add the chicken pieces, ensuring they are fully submerged. Cover and refrigerate for at least 4 hours, or preferably overnight.
- In a large shallow dish or a zip-top bag, combine the flour, cornstarch, paprika, garlic powder, onion powder, salt, pepper, thyme, and cayenne pepper. Mix until well combined.
- When ready to fry, pour oil into a large, heavy-bottomed pot or Dutch oven to a depth of about 1.5 inches. Heat the oil over medium-high heat until it reaches 350°F (175°C). Set a wire rack over a baking sheet nearby for the finished chicken.
- Working with one piece at a time, remove the chicken from the buttermilk marinade, allowing the excess to drip off. Dredge the chicken thoroughly in the flour mixture, patting to make sure it’s fully coated.
- For an extra-crispy crust, dip the floured chicken back into the buttermilk marinade briefly, and then dredge it again in the flour mixture. This is called a double-dredge.
- Place the coated chicken on a separate plate or rack and let it rest for 10-15 minutes. This helps the coating adhere to the chicken.
- Carefully place 3-4 pieces of chicken into the hot oil, ensuring not to overcrowd the pan, as this can lower the oil temperature and result in greasy chicken.
- Fry the chicken for about 6-8 minutes on each side, until it is a deep golden brown and cooked through. The internal temperature should reach 165°F (74°C). Dark meat pieces may take slightly longer than white meat.
- Once cooked, remove the chicken from the oil and place it on the prepared wire rack to drain. This keeps the bottom of the chicken from getting soggy.
- Let the chicken rest for at least 5-10 minutes before serving.
Notes
- For an extra-crispy crust, double-dredge the chicken.
- Let the coated chicken rest before frying to help the coating adhere.
- Do not overcrowd the pan when frying.
- Drain the chicken on a wire rack to prevent sogginess.
- Prep Time: 20 minutes
- Cook Time: 20 minutes
- Category: Main Course
- Method: Deep Frying
- Cuisine: American