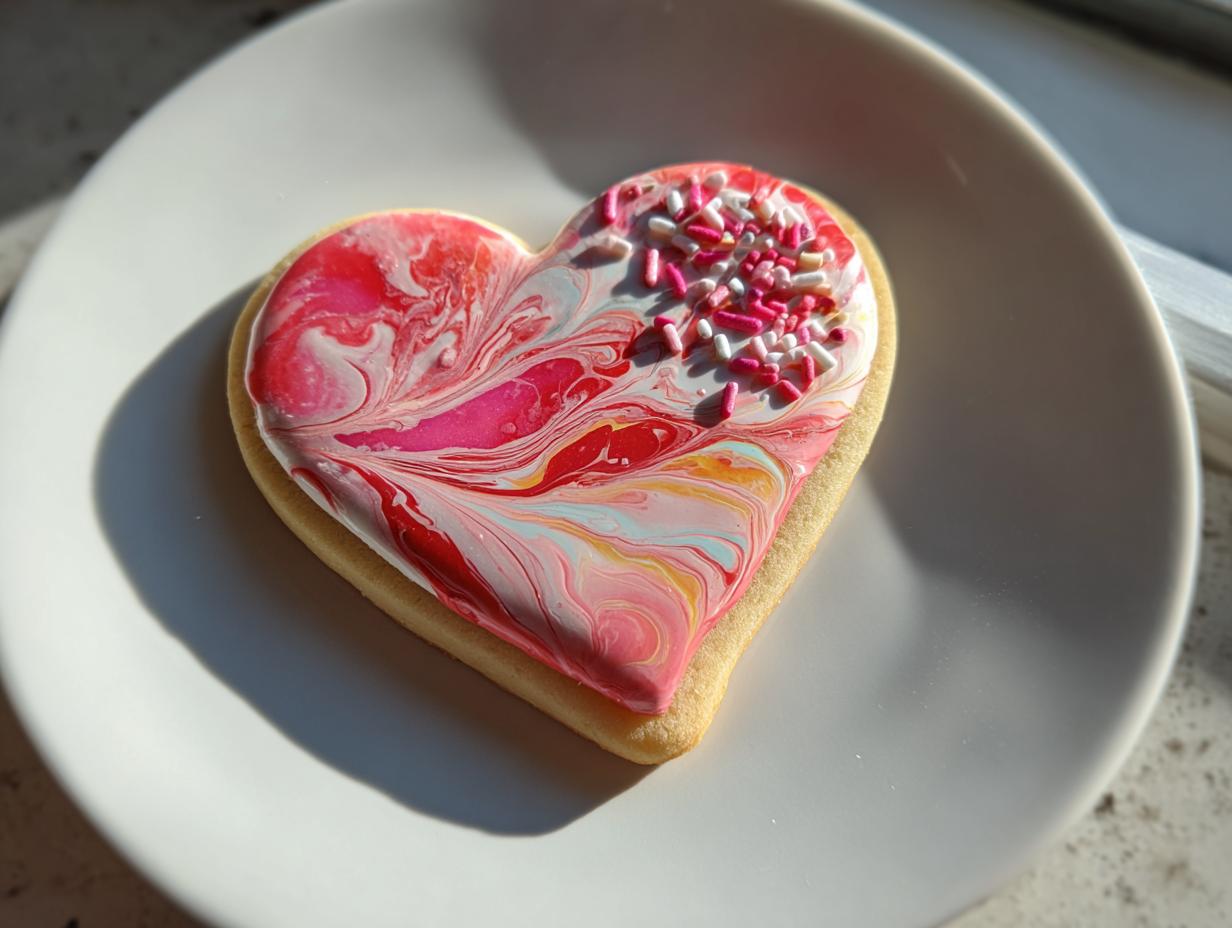
If you’ve ever felt intimidated by decorating cookies, stop right there! These Sweetheart Cookies are your new best friend. They are unbelievably soft, buttery, and shaped like perfect little hearts, but the real magic is the royal icing that practically decorates itself.
When I first started baking seriously, sugar cookies were my Everest—they always cracked or broke when I tried to move them. But this recipe changed everything for me. Because the dough chills perfectly and the icing uses a simple wet-on-wet technique, even absolute beginners will end up with professional-looking results. Trust me, these Sweetheart Cookies are foolproof, and they taste miles better than anything store-bought!

Gathering Your Supplies for Sweetheart Cookies
Before you get that butter softened, let’s get organized! Having all your tools ready makes baking these Sweetheart Cookies so much smoother. Seriously, setting everything out first prevents that frantic searching mid-recipe, which always leads to a kitchen disaster.
Essential Tools for Baking and Decorating
- A reliable stand mixer or a good hand mixer for creaming.
- A 3-inch heart-shaped cookie cutter—size matters for the icing!
- Two large baking sheets lined with parchment paper.
- A whisk and a sturdy mixing bowl for the icing.
Ingredient Breakdown for Soft Sweetheart Cookies
The secret to these wonderfully soft Sweetheart Cookies isn’t just the shape; it’s using quality ingredients that build flavor and structure. We want a tender crumb that melts in your mouth, not a hard, snappy cookie. That means taking a moment to make sure your butter is perfectly softened—not melted! This recipe relies on that creaming action to trap air, which keeps the cookies light.
Don’t skimp on the vanilla and almond extracts either; that little bit of almond really makes the buttery flavor pop. And for the icing? Meringue powder is non-negotiable because it stabilizes the icing so beautifully, giving you that smooth, shiny finish we’re aiming for.
Cookie Dough Components
- 3 cups all-purpose flour (Whisked with leavening agents!)
- 1 cup unsalted butter, softened (This is key for creaming!)
- 1 cup granulated sugar
- 1 large egg
- 1 teaspoon vanilla extract
- 1/2 teaspoon almond extract
Simple Royal Icing Ingredients
- 4 cups powdered sugar (Sifted, if you have time, though I usually don’t!)
- 3 tablespoons meringue powder (For that perfect stiffness and shine)
- 9 tablespoons warm water
Coloring and Decoration Elements
- Red gel food coloring
- Pink gel food coloring
- Assorted heart-shaped sprinkles (For a final flourish!)
Step-by-Step Instructions for Sweetheart Cookies
Okay, now for the fun part! Getting these Sweetheart Cookies baked and decorated is easier than you think, provided you follow the rhythm of the recipe. Don’t rush the creaming or the chilling—those are the steps that separate a good cookie from a truly melt-in-your-mouth one.
Mixing the Perfect Cookie Dough
First things first, get your dry ingredients whisked together. That’s your flour, baking powder, and salt all happy in one bowl. Set that aside for a minute.
Now, grab your butter and sugar. This is where you need the mixer. You have to cream them together on medium-high speed until they look light and fluffy—I mean really pale, like whipped clouds. This trapping of air is crucial! Once you hit that perfect texture, toss in your egg, the vanilla, and that lovely almond extract. Let it mix until it’s totally uniform.
Next, kill the speed! Turn the mixer down low, and start adding that flour mix slowly, a little bit at a time. You want to mix just until the flour disappears into a soft dough. If you overmix here, you’ll start developing gluten, and suddenly your soft cookies will be tough. Stop as soon as it comes together into a nice ball.
Rolling, Cutting, and Baking Your Hearts
This dough is soft, so we need to introduce it to the fridge. Sandwich the dough between two sheets of parchment paper—this keeps it clean and stops it from sticking to your counter. Roll it out evenly to about a quarter-inch thickness. Then, chill it for 30 minutes. Trust me, those 30 minutes stop the hearts from spreading into blobs in the oven!
When the timer goes off, preheat your oven to 350°F and get those baking sheets ready with fresh parchment. Use your heart cutter and cut out as many shapes as you can. Give them about 2 inches of space between them. Bake them for 10 to 12 minutes. You are looking for the edges to be *barely* starting to turn golden. If they look fully brown, they are overdone. Pull them out, let them cool on the sheet for five minutes, and then move them to a wire rack to cool completely. Do not rush this cooling step!
Creating the Smooth Royal Icing Base
While the cookies cool down—and I mean *completely* cool, or the icing melts—you make the icing. Put your powdered sugar, meringue powder, and warm water into a clean bowl. Whisk it on medium-high speed for a solid 5 minutes. You are aiming for what we call a 15-second consistency.
What does that mean? Take your whisk out, let the icing drip back into the bowl, and count slowly to 15. If the trail of icing that dripped back down smooths out and disappears completely by the time you hit 15, you’re perfect! If it disappears faster, it’s too thin. If you can still see the trail, it’s too thick. A little water or a little more sugar fixes it!
Decorating Sweetheart Cookies with Marbling
Divide your icing into three bowls: one white, one pink, and one red. Now we use the wet-on-wet magic! Start by piping a border outline around the edge of one completely cooled cookie. Let that outline set for just a minute, then flood the inside with white icing.
While the white flood is still wet, immediately add small dots of your pink and red icing randomly across the white surface. Grab a toothpick—this is the fun part! Drag the toothpick through the dots from the center outward, or just swirl them gently. This creates those gorgeous, easy marbled patterns. If you want a more defined look, you can outline first, let that dry for an hour, and then flood. But for speed and that soft texture, keep everything wet!

Tips for Achieving Beautiful Sweetheart Cookies Every Time
I’ve learned a few tricks over the years that stop these gorgeous Sweetheart Cookies from turning into a decorating disaster or a rock-hard snack. Baking is science, but decorating is pure intuition! If you nail these two areas—the icing flow and the bake time—you’ll be thrilled with the results.
Best Practices for Icing Consistency
That 15-second rule is your guide, but sometimes the humidity messes things up. If your icing is too thick and won’t flow easily when you drag the toothpick, add water one half-teaspoon at a time until it loosens up. If it’s too thin and runs right off the cookie, or if the colors bleed into each other too much, stir in a tablespoon or two of powdered sugar until it thickens back up. You want it fluid, but still holding its shape slightly when piped.
Maintaining Softness in Your Baked Goods
Remember how I stressed barely golden edges? That’s the secret handshake for soft sugar cookies! If you leave them in until the whole cookie is deeply golden brown, they will be crispy all the way through when they cool. We want that tender, buttery center. Pull them out as soon as the top looks dry and the edges are just starting to set. They firm up significantly on the cooling rack, so don’t try to bake the color in!
Storing and Serving Your Sweetheart Cookies
Once you’ve put all that love into decorating them, you want your Sweetheart Cookies to stay perfect! Luckily, the royal icing acts like a little seal, locking in that buttery softness. Storing them correctly is super simple, but you must be patient until the icing is totally dry before stacking them up.
Keeping Decorated Cookies Fresh
Let the cookies sit out on the counter for at least 6 to 8 hours after decorating until the icing is completely hard to the touch. Then, layer them between sheets of parchment paper inside an airtight container. Keep them at cool room temperature—never the fridge, as that can make the icing sweat! They stay fantastic like this for nearly a week.
| Storage Method | Duration | Notes |
|---|---|---|
| Airtight Container (Room Temp) | Up to 7 days | Layer with parchment paper to prevent sticking. |
| Freezing (Uniced Dough) | Up to 3 months | Wrap dough tightly before freezing. |
Frequently Asked Questions About Sweetheart Cookies
I get so many questions about these Sweetheart Cookies because everyone wants that perfect balance of soft cookie and shiny icing. Here are the things folks ask me about most often when they’re getting ready to bake!
Can I make these cookies ahead of time?
Absolutely! You can make the cookie dough up to three days ahead of time. Just wrap it up really well and keep it in the fridge. When you’re ready to bake, let it sit on the counter for about 15 minutes to soften slightly before rolling. For the icing, you can mix the base the day before, but I always tint it fresh the day I plan to decorate, as the colors can sometimes deepen overnight.
What if I don’t have almond extract?
Oh, that’s an easy fix! If you are out of almond extract, you can substitute it with another half-teaspoon of vanilla extract. It will still taste delicious and buttery, but you lose that little bit of complexity the almond adds. You could also try adding a tiny drop of lemon extract if you want a brighter flavor, but stick to vanilla if you want to keep it classic!
How long does the royal icing take to set?
This depends on humidity, but generally, once you finish decorating, you should let them sit out on the counter for 6 to 8 hours before you stack them or put them in a box. The flood icing needs time to dry hard so the marbled patterns don’t smear. If your kitchen is really damp, give it a full 12 hours just to be safe!
Estimated Nutritional Snapshot for Sweetheart Cookies
When you’re making something this delicious, you probably aren’t focused on the numbers, but it’s good to have a general idea of what you’re serving up! These Sweetheart Cookies are rich because of all that butter and sugar, which makes them a wonderful treat for any special occasion. I try not to stress too much about the exact breakdown, but here’s what we know about this recipe. If you want to see more of our baking adventures, check out our Pinterest page!
| Nutrient | Amount Per Cookie (Estimate) |
|---|---|
| Serving Size | 1 cookie |
| Calories | 210 |
| Fat | 8g |
| Carbohydrates | 34g |
| Protein | 2g |
If you enjoyed this recipe, you can find more sweet treats like our Red Velvet Crinkle Cookies or explore our savory side with recipes like Sheet Pan Chicken Parmesan. Don’t forget to follow us on Facebook for daily updates!
Print
Amazing 15-Minute Sweetheart Cookies Bliss
- Total Time: 57 minutes
- Yield: 24 servings
- Diet: Vegetarian
Description
Soft, buttery, heart-shaped sugar cookies topped with smooth, easy-to-make royal icing, perfect for decorating with marbled patterns.
Ingredients
- 3 cups all-purpose flour
- 1 teaspoon baking powder
- 1/4 teaspoon salt
- 1 cup unsalted butter, softened
- 1 cup granulated sugar
- 1 large egg
- 1 teaspoon vanilla extract
- 1/2 teaspoon almond extract
- 4 cups powdered sugar
- 3 tablespoons meringue powder
- 9 tablespoons warm water
- Red gel food coloring
- Pink gel food coloring
- Assorted heart-shaped sprinkles
Instructions
- Whisk the flour, baking powder, and salt together in a medium bowl. Set the mixture aside.
- Cream the softened butter and granulated sugar in a stand mixer on medium-high speed until the mixture becomes light and fluffy.
- Add the egg, vanilla extract, and almond extract. Beat until everything combines fully.
- Reduce the mixer speed to low. Gradually add the flour mixture until a soft dough forms.
- Place the dough between two sheets of parchment paper. Roll it to a 1/4-inch thickness. Chill the dough for 30 minutes.
- Preheat your oven to 350°F. Line two large baking sheets with parchment paper.
- Use a 3-inch heart cutter to cut out shapes. Place the cookies 2 inches apart on the prepared sheets.
- Bake the cookies for 10 to 12 minutes. Look for edges that are barely golden and centers that are set.
- Cool the cookies completely on a wire rack before you begin decorating.
- Whisk the powdered sugar, meringue powder, and water for 5 minutes. The icing should reach a 15-second consistency.
- Divide the icing into three bowls. Tint one bowl red, one pink, and leave the third bowl white.
- Pipe an outline on each cookie and fill it in. Add dots of contrasting colors onto the wet icing. Drag a toothpick through the dots to create heart patterns.
Notes
- The royal icing uses a wet-on-wet technique for easy marbled designs.
- Bake until edges are just barely golden for a soft cookie texture.
- Cool cookies fully before applying icing.
- Prep Time: 45 minutes
- Cook Time: 12 minutes
- Category: Dessert
- Method: Baking and Decorating
- Cuisine: American