Okay, stop what you are doing right now because I have found the dessert that will make everyone at your next gathering think you spent three days in an Italian kitchen. We are talking about Raspberry Tiramisu, and honestly, it’s probably the easiest showstopper I have ever made. Seriously! When I first started trying to bake anything beyond toast, layered desserts felt intimidating, but this one? It’s nearly foolproof.
Forget the heavy coffee flavor of the classic version. This recipe is a bright, creamy, fruity twist that just screams spring and sunshine. It’s elegant, tastes incredibly fresh because we make our own jam, and the best part is that it has to be made ahead. That means zero stress on party day!
I remember the first time I served this, my sister asked if I bought it from that fancy bakery downtown. I just winked! It relies on good ingredients and simple layering, which is exactly what I love to teach people. If you can stir a pot and whip some cream, you can nail this Raspberry Tiramisu every single time. Trust me on this one; it’s going to be your new go-to! 
Why This Raspberry Tiramisu Recipe Works for Everyone
This version of Raspberry Tiramisu truly shines because it cuts out all the complicated steps but keeps all the rich, creamy flavor. You get that luxurious mascarpone texture without any egg tempering—huge win! The prep time is surprisingly fast, maybe forty-five minutes tops before it goes into the fridge.
Because it demands an overnight chill, you are practically guaranteed success. It sets up perfectly, making slicing clean and easy. It’s the ultimate make-ahead dessert, delivering a fresh, vibrant flavor profile that is so much lighter than the traditional version. Everyone loves it!
Essential Equipment for Your Raspberry Tiramisu
You don’t need a dozen fancy gadgets, but having these basics ready makes the process smooth. I always pull these out first so I’m not scrambling halfway through:
- A sturdy 8×10-inch or 9×9-inch baking dish for layering.
- At least one small saucepan for making the jam and the syrup.
- An electric mixer—handheld or stand—for whipping that gorgeous cream filling.
- A fine-mesh sieve to strain the clear raspberry syrup; this is key!
- Spatula and mixing bowls, of course.
Gathering Ingredients for Your Raspberry Tiramisu
The secret to making this Raspberry Tiramisu taste so bright and fresh is using real fruit and good dairy. Don’t skimp on the mascarpone; it’s the backbone of that incredible creaminess. Since this dessert relies on layers of flavor, we need to organize our fruit components first. It’s a little bit of prep work upfront, but it pays off huge in the final taste! If you love raspberry flavor, you might also enjoy this spritzer!
Jam Components and Syrup Base
We are making two separate raspberry mixtures, so keep them mentally separated! For the jam, you’ll need about two and a half cups of frozen raspberries, half a cup of granulated sugar, and a splash of lemon juice. This cooks down thick, so make sure you have that saucepan ready. For the soaking syrup, we use less sugar—half a cup—with water and another quarter cup of frozen raspberries. Remember, the syrup needs to be completely cool before you dip your cookies, so plan for that chilling time!
Cream Filling Ingredients and Ladyfinger Selection
For the filling, everything dairy needs to be ice cold, especially that heavy cream. You need a full 16 ounces of mascarpone cheese, one cup of powdered sugar for that smooth sweetness, a teaspoon of vanilla paste (which I prefer for its strong flavor), and two tablespoons of lemon juice to cut through the richness. Also, grab your ladyfingers—Savoiardi are the best here—you’ll need about 25 of them for two layers. They soak up that syrup beautifully!
Step-by-Step Guide to Preparing Raspberry Tiramisu
Alright, let’s get cooking! This is where the magic happens, but don’t rush it. We tackle this in stages: jam, syrup, cream, and then assembly. Keep your jam and syrup separate until we tell you to combine things, okay?
Creating the Homemade Raspberry Jam
First, grab a saucepan and toss in your main batch of raspberries, sugar, and that tablespoon of lemon juice. We cook this over medium heat until it starts bubbling happily. Now, this needs some patience; you’ll simmer it low and slow for about 20 to 25 minutes. You’ll know it’s ready when it looks noticeably thicker and the berries have broken down completely. Don’t just eyeball it—it needs to coat the back of a spoon a little. Once it’s done, transfer it to a shallow bowl. This MUST be covered and chilled until it’s totally cool, which usually takes at least an hour. If you try to use warm jam, you’ll melt your beautiful cream later, and nobody wants that sad, runny mess!
Crafting the Bright Raspberry Syrup
Next up is the soaking liquid for our ladyfingers. In a *separate* small saucepan, heat the water, the syrup sugar, and the smaller quarter cup of raspberries. Stir it until the sugar dissolves, then bring it to a quick boil. Let it simmer for just three minutes, gently breaking up the berries with your spatula. The crucial step here is straining! Push this mixture through a fine sieve to get a clear, bright pink syrup. Discard the solids. This syrup needs to cool completely to room temperature before we start dipping cookies later.
Whipping the Mascarpone Cream Filling
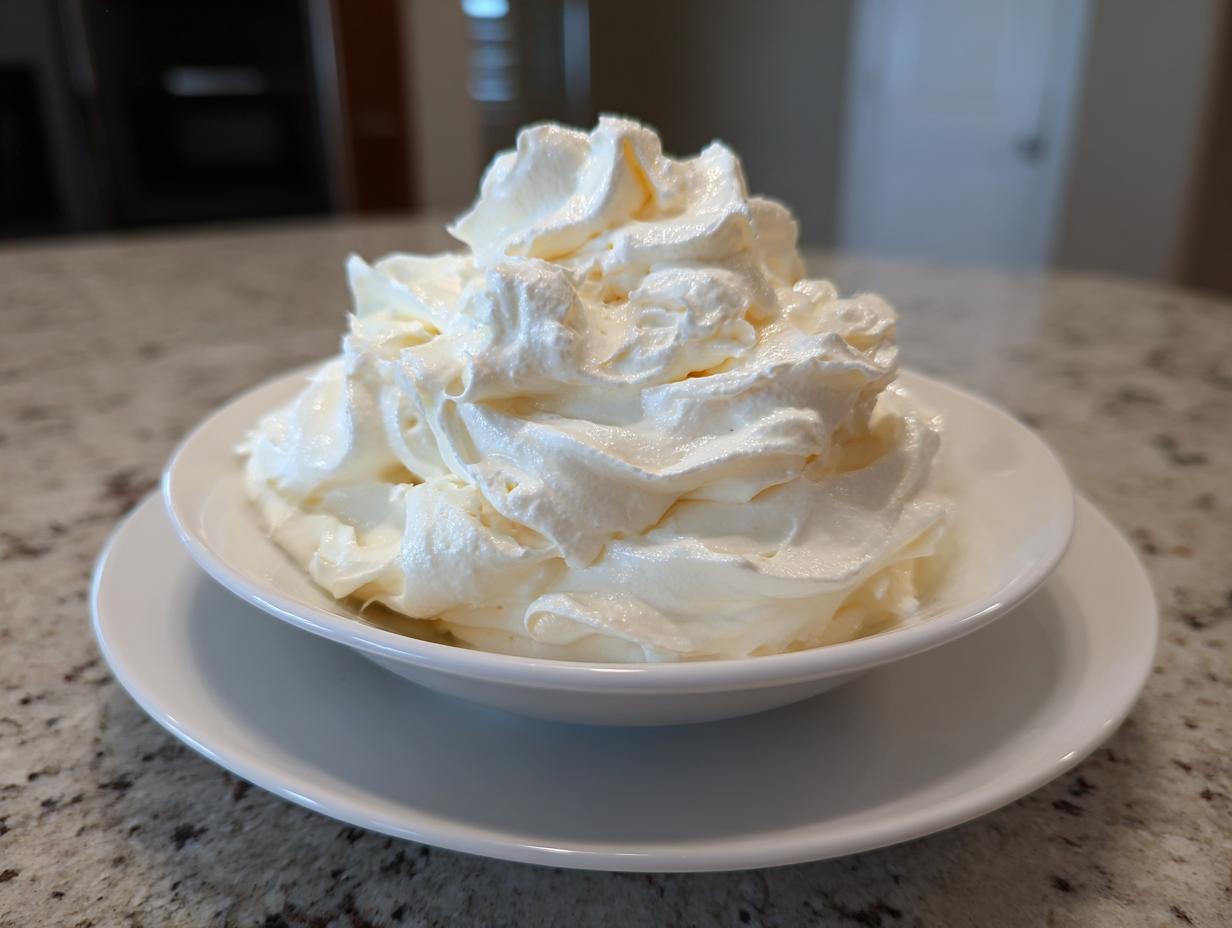
Time for the filling! Make sure your mascarpone and heavy cream are cold—I mean *really* cold. In your mixer bowl, beat the mascarpone cheese with the powdered sugar, the two tablespoons of lemon juice, and the vanilla until it’s completely smooth. It should look like thick, creamy frosting. Now, slowly add the cold heavy cream and whip it up until you see medium-stiff peaks. Be careful; mascarpone can turn grainy if you overbeat it! Stop as soon as those peaks hold their shape but still look soft and luscious.
Assembling the Layered Raspberry Tiramisu
This is the fun part where we build our delicious Raspberry Tiramisu! Start by spreading a thin layer of that gorgeous mascarpone cream right on the bottom of your dish. This stops the cookies from sticking. Now, take your ladyfingers and dip them quickly—and I mean *quickly*—into the cooled raspberry syrup. Don’t let them soak; they should only touch the liquid for a second on each side, or they’ll turn mushy! Lay them in a single layer over the cream base. Then, spread half of your remaining mascarpone mixture over the cookies. Take half of your chilled jam and drop little dollops all over the cream layer, then gently smooth it out. Repeat the whole process: syrup-dipped cookies, the rest of the cream, and the rest of the jam dollops.
The Crucial Chilling Time
I know you want to dig in right now, but you absolutely cannot! Cover your assembled Raspberry Tiramisu tightly with plastic wrap. It needs to go into the refrigerator for a minimum of eight hours. Honestly, overnight is so much better. This chilling time allows the ladyfingers to soften perfectly and the flavors to all melt together. If you skip this, the layers will slide apart when you try to slice it! You can find more great dessert ideas in our dessert section.
Tips for Perfecting Your Raspberry Tiramisu Assembly
Getting that beautiful texture in your Raspberry Tiramisu is all about technique, especially when it comes to dipping those cookies. I can’t stress this enough: quick dips only! If the ladyfingers get too saturated, the entire dessert collapses into a pink puddle. You want them moist enough to eat, but still holding their shape.
When you smooth the cream layers, be gentle. You want the jam dollops to stay somewhat distinct, not fully mixed into the mascarpone. That contrast between the smooth cream and the tart jam is what makes this dessert sing! If you want to see how we handle other fruit flavors, check out our Cherry Tiramisu recipe.
Flavor Adjustments and Texture Control
If your homemade jam ended up a little too thick—maybe your simmer went a bit long—don’t panic! You can thin it slightly by stirring in a tiny teaspoon of your reserved raspberry syrup before you layer it. If you want an extra pop of brightness, grab a microplane and grate some fresh lemon zest right over the top layer of mascarpone before you add the final jam layer.
Also, if you are worried about the final look of your Raspberry Tiramisu, try leaving the top layer of jam off until the very last minute. Then, just before serving, spread that final layer on. It looks incredibly glossy and fresh that way! We love sharing our kitchen secrets on Medium.
Serving and Storing Your Make-Ahead Raspberry Tiramisu
The moment of truth! After that essential overnight chill, your Raspberry Tiramisu is ready for its grand reveal. The best way to serve this is to take it out of the fridge about 15 minutes before you plan to cut it. This lets the mascarpone cream soften up just slightly, making it easier to slice cleanly.
For the garnish, I always go simple because the pink layers are so gorgeous on their own. Spread that final layer of reserved raspberry jam right on top. Then, pile on a generous handful of fresh, bright red raspberries. If you want a little extra visual flair, throw on some thin lemon zest curls—they look so elegant against the pink!
When slicing, use a long, sharp knife and wipe the blade clean between each cut. This keeps those layers looking sharp and distinct. It’s a stunning presentation, and everyone will be asking for the recipe for this amazing Raspberry Tiramisu! Follow us on Facebook for more updates.
Storage and Reheating Guidelines
Since this dessert is all about fresh dairy and fruit, storage is straightforward. You want to keep it covered tightly in the refrigerator. It holds up beautifully, which is why I love it for entertaining!
| Storage Location | Recommended Duration | Serving Notes |
|---|---|---|
| Refrigerator (Covered) | Up to 4 days | Serve chilled; let sit 15 minutes before slicing. |
| Freezer | Up to 1 month | Thaw overnight in the refrigerator before serving. |
Frequently Asked Questions About Raspberry Tiramisu
I get so many questions about this recipe because people are always nervous about making layered desserts. Don’t worry; I’ve tried to cover all the little things that popped up when I was first perfecting my Raspberry Tiramisu!
Q1. Can I use store-bought jam instead of making it?
You absolutely can, and I won’t tell! If you’re really pressed for time, use a high-quality raspberry jam. However, I highly recommend at least thinning the store-bought jam slightly with a tablespoon of your raspberry syrup. Store-bought jams can be thicker and might drag the mascarpone layer when you spread it.
Q2. My cream filling seems too loose. Did I mess up the mascarpone?
This usually happens for two reasons: either your heavy cream wasn’t cold enough, or you stopped whipping too soon. If it’s slightly loose, just pop the bowl back into the fridge for 30 minutes before you try to layer. If it’s *really* runny, you might have overmixed the mascarpone while adding the cream. For the next batch of Raspberry Tiramisu, just ensure the cream is whipped to stiff peaks before folding it in!
Q3. How important is the overnight chilling time? Can I serve it after 4 hours?
That chilling time is non-negotiable for a clean slice! If you try to cut it after just four hours, the structure won’t have set, and you’ll end up with a messy bowl of cream and soaked cookies. The Raspberry Tiramisu needs that full 8 hours, preferably overnight, so the ladyfingers fully absorb the syrup and the cream firms up nicely.
Q4. Can I substitute the ladyfingers with regular vanilla wafers or cake?
You can use vanilla wafers in a pinch, but they won’t soak up the syrup the same way—they might end up a bit too dense. If you use cake, make sure it’s a very plain, slightly dry pound cake or sponge cake, and you’ll need to dip it even more quickly than the traditional ladyfingers.
Q5. What if I don’t like lemon? Can I skip the lemon juice in the filling?
The lemon juice is actually really important because it brightens up the heavy mascarpone and balances the sweetness of the jam. If you really dislike lemon, you can cut the amount in half, but I wouldn’t skip it entirely. Alternatively, you can use a tiny splash of good quality almond extract instead of the lemon juice for a different warm flavor note in your Raspberry Tiramisu. For more sweet inspiration, check out our Pinterest page!

Stunning Raspberry Tiramisu: 1 Foolproof Dessert
- Total Time: 9 hours 10 minutes
- Yield: 12 servings
- Diet: Vegetarian
Description
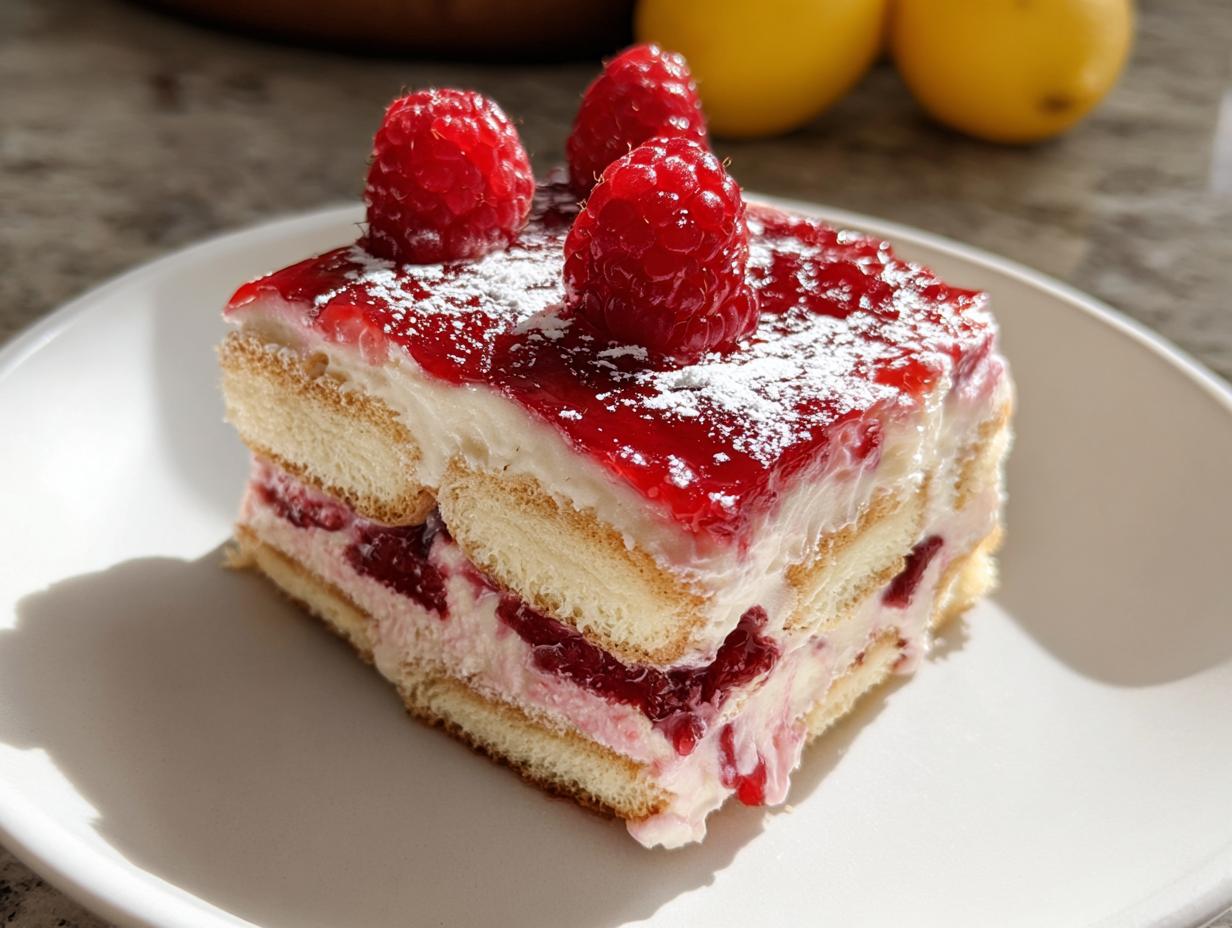
This elegant raspberry tiramisu layers mascarpone cream, raspberry jam, and syrup-soaked ladyfingers for a fruity, make-ahead dessert perfect for spring. It is a bright twist on the classic Italian dessert, offering a fresh, creamy, and indulgent treat.
Ingredients
- 2 1/2 cups frozen raspberries (for jam)
- 1/2 cup granulated sugar (for jam)
- 1 tablespoon lemon juice (for jam)
- 1/2 cup granulated sugar (for syrup)
- 1/2 cup water (for syrup)
- 1/4 cup frozen raspberries (for syrup)
- 16 ounces mascarpone cheese, cold
- 1 cup powdered sugar
- 2 tablespoons lemon juice (for filling)
- 1 teaspoon vanilla extract or vanilla paste
- 2 cups heavy cream, cold
- 25 ladyfinger cookies (Savoiardi)
- Fresh raspberries, for garnish
- Lemon slices or zest curls, optional
Instructions
- Make the raspberry jam: Combine raspberries, sugar, and lemon juice in a saucepan. Cook over medium heat until berries break down and the mixture bubbles. Reduce heat and simmer for 20–25 minutes, stirring occasionally, until thickened. Transfer to a shallow bowl, cover, and chill until cool (about 1 hour).
- Prepare the raspberry syrup: In a small saucepan, heat sugar, water, and raspberries until sugar dissolves and the mixture boils. Reduce heat and simmer for 3 minutes, breaking down the berries with a spatula. Strain through a fine sieve and let cool to room temperature.
- Make the mascarpone filling: Beat mascarpone, powdered sugar, lemon juice, and vanilla in a large bowl until smooth. Add heavy cream and whip until the mixture forms medium-stiff peaks. Do not overbeat.
- Assemble the tiramisu: Spread a small amount of mascarpone cream in the bottom of an 8×10-inch (or 9×9-inch) dish. Quickly dip each ladyfinger in raspberry syrup on both sides and arrange in a single layer over the cream. Spread half the mascarpone mixture evenly over the top, then spoon half the raspberry jam in dollops and smooth gently. Repeat with another layer of dipped ladyfingers and remaining mascarpone cream.
- Chill overnight: Cover with plastic wrap and refrigerate for at least 8 hours or overnight.
- Finish and serve: Just before serving, spread the remaining raspberry jam on top. Garnish with fresh raspberries and thin lemon slices. Slice and serve chilled.
Notes
- Store covered in the refrigerator for up to 4 days.
- For a lighter version, substitute half of the mascarpone with Greek yogurt while maintaining creaminess.
- Prep Time: 45 minutes
- Cook Time: 25 minutes
- Category: Dessert
- Method: No-Bake/Layered
- Cuisine: Italian